Qlik Sense is a data visualization and discovery product that allows you to create flexible, interactive visualizations that lead to meaningful decisions. Qlik provides cloud-based connectors that allow users to connect to and integrate with data stored in cloud platforms like AWS, Azure, Google Cloud, or other cloud-based services.
OvalEdge uses Rest API to connect to the data source, which allows you to crawl the data objects (Reports, Report Columns, etc.) and build Lineage.
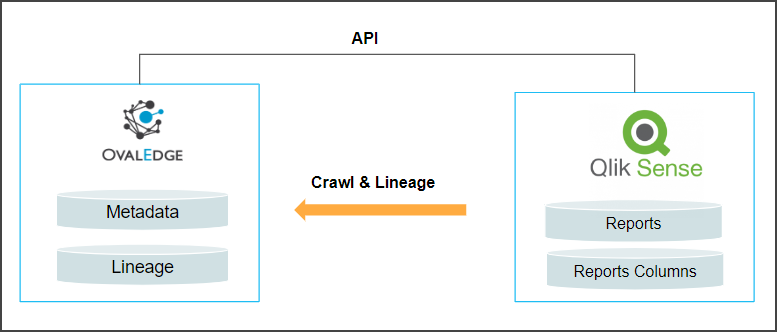
Connector Capabilities
The Qlik Sense connector supports the following data objects:
|
Functionality |
Description |
|
Crawler |
Reports (Presentation Reports) Report Columns Sheets Cells |
|
Lineage |
Report Lineage, ReportColumn lineage, and Lineage source. Supported File Types: Tables. XLSX. TXT. CSV Files. |
Prerequisites
Generating an API key
This section provides instructions on generating an API key that facilitates the connection to the OvalEdge application.
To generate an API key,
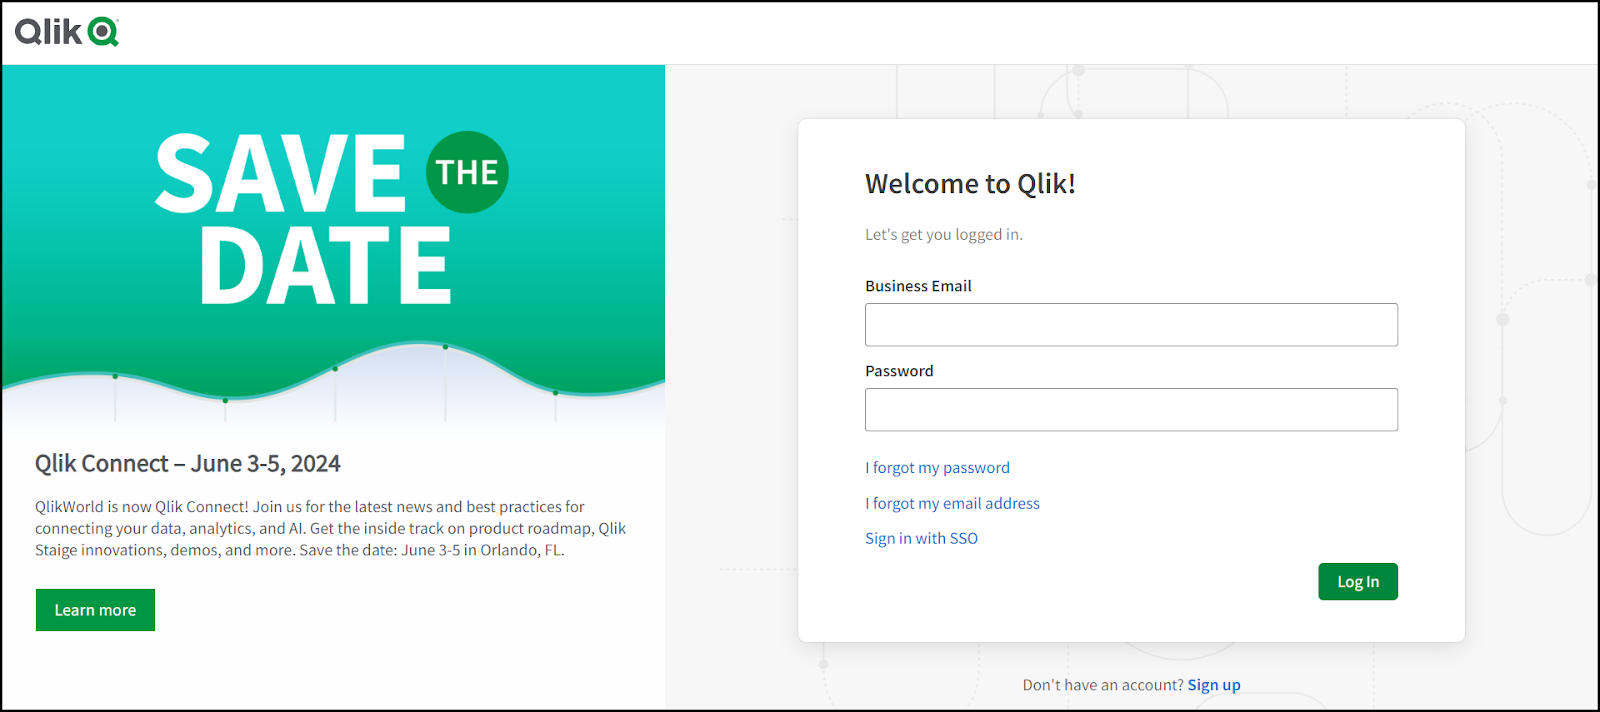
- Go to login.qlik.com.
- Enter your Business Email and Password, then click Login.
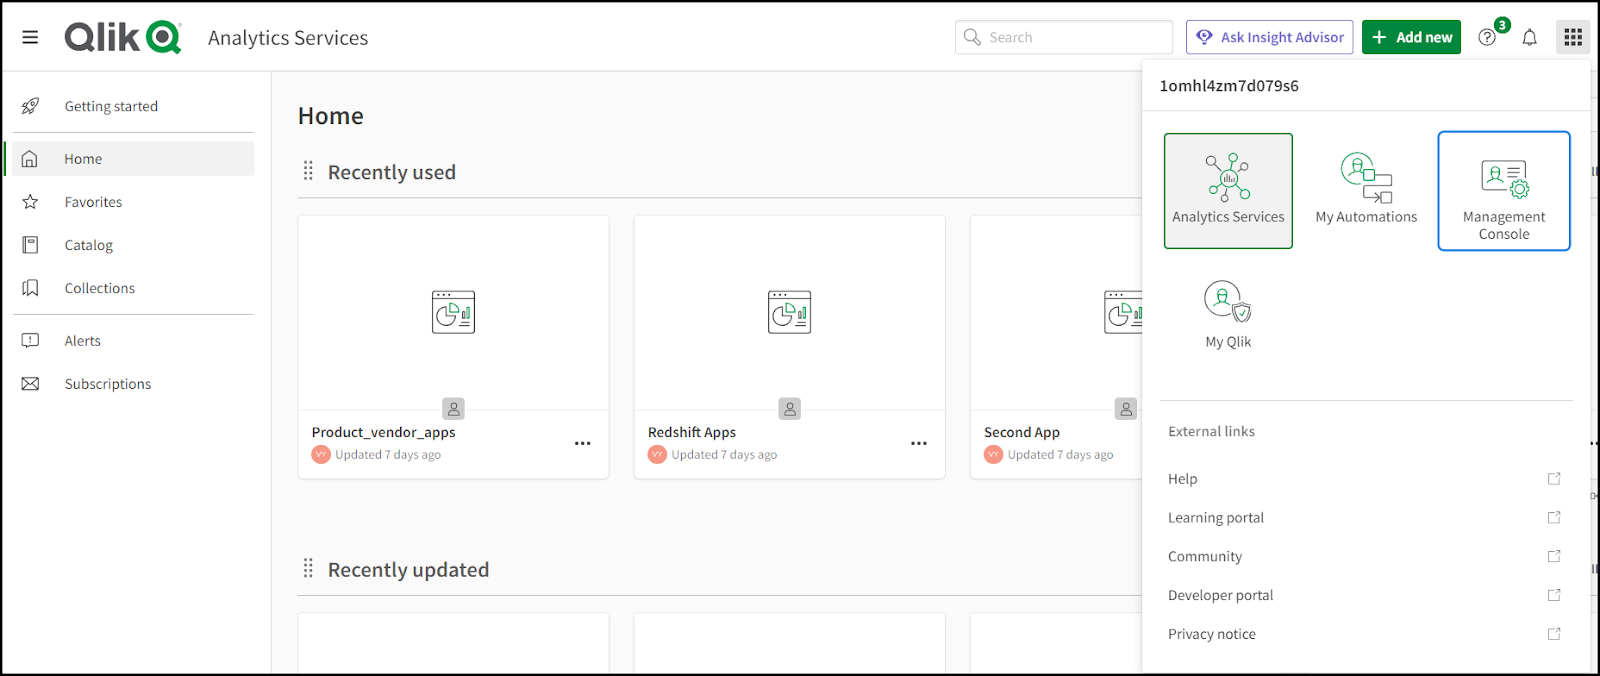
- The Qlik Analytics Service window is displayed. Click on the 9 dots option from the right side, then select Management Console.
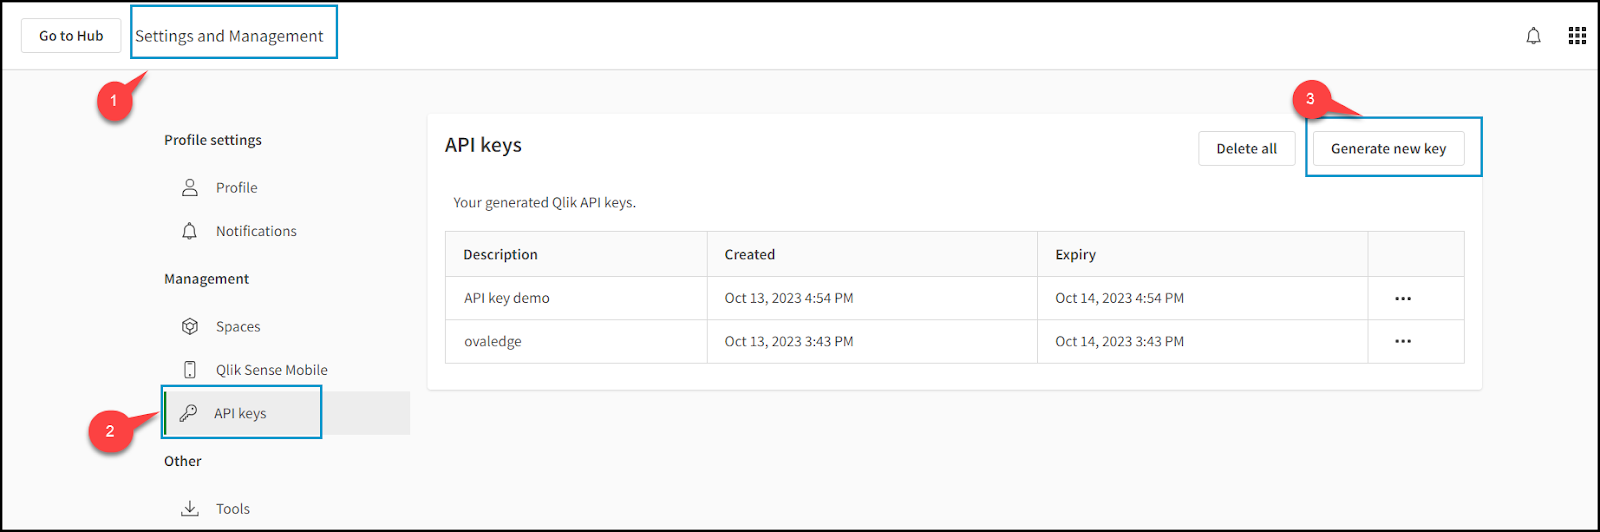
- On the Management Console page, on the left side, navigate to Settings > Generate API Keys. Click Generate New.
Note: Make sure that the Enable API keys option is enabled.
- In the Settings and Management page, under the Management section, navigate to API keys > Generate new key.
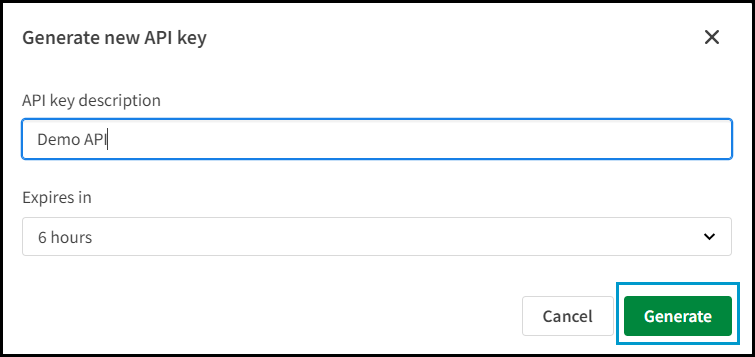
- Generate new API key pop-up window is displayed.
- Enter the API key description.
- Choose a duration from the Expires in the drop-down list. The API key will expire based on the selected duration.
- Click Generate.
- A new API key is generated. Click Copy and Close. Now, the API key is generated.

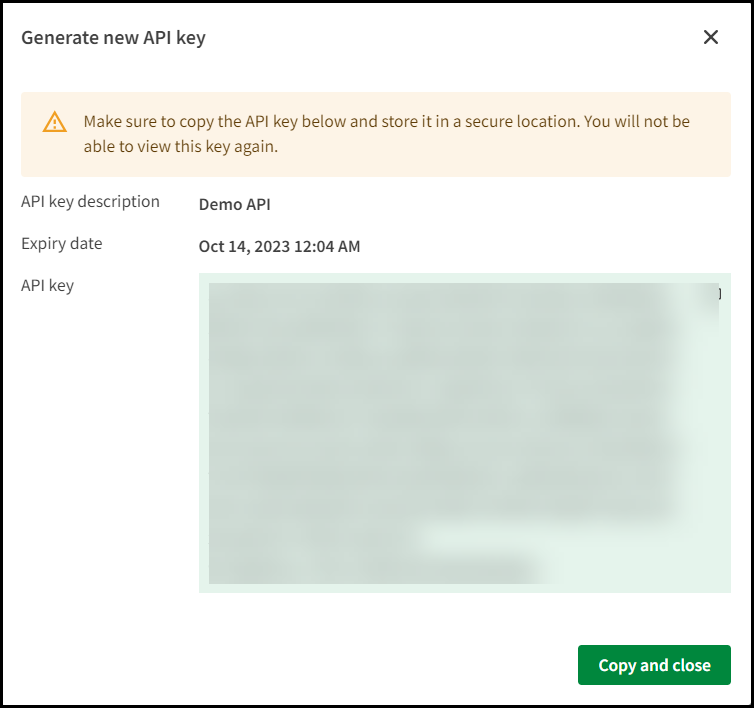
Example of API key: eyJh****************************************uCw0dHYb
API Permissions
The user with which the token is generated to integrate with Qlik Cloud should at least
have access( can view and edit) to all the spaces that are planned to be
cataloged.
Steps to give Access to the spaces to the user with which the token is generated:
- Click on the nine dots icon in the top right corner.
- Select the Management Console.
- Choose "Spaces" from the left-side menu.
- Click the three dots next to one of the listed spaces in your environment.

- Click on "Manage Members".

- Add the service_account user by clicking on "Add Members".

- Search for your user in the textbox. Click on "Can view" and enable the
checkboxes for both "Can view" and "Can edit" permissions.
- Repeat steps 4,5, 6, and 7 for each listed space available in your environment.
Establish a connection
To connect to the Qlik Sense using the OvalEdge application, complete the following steps:
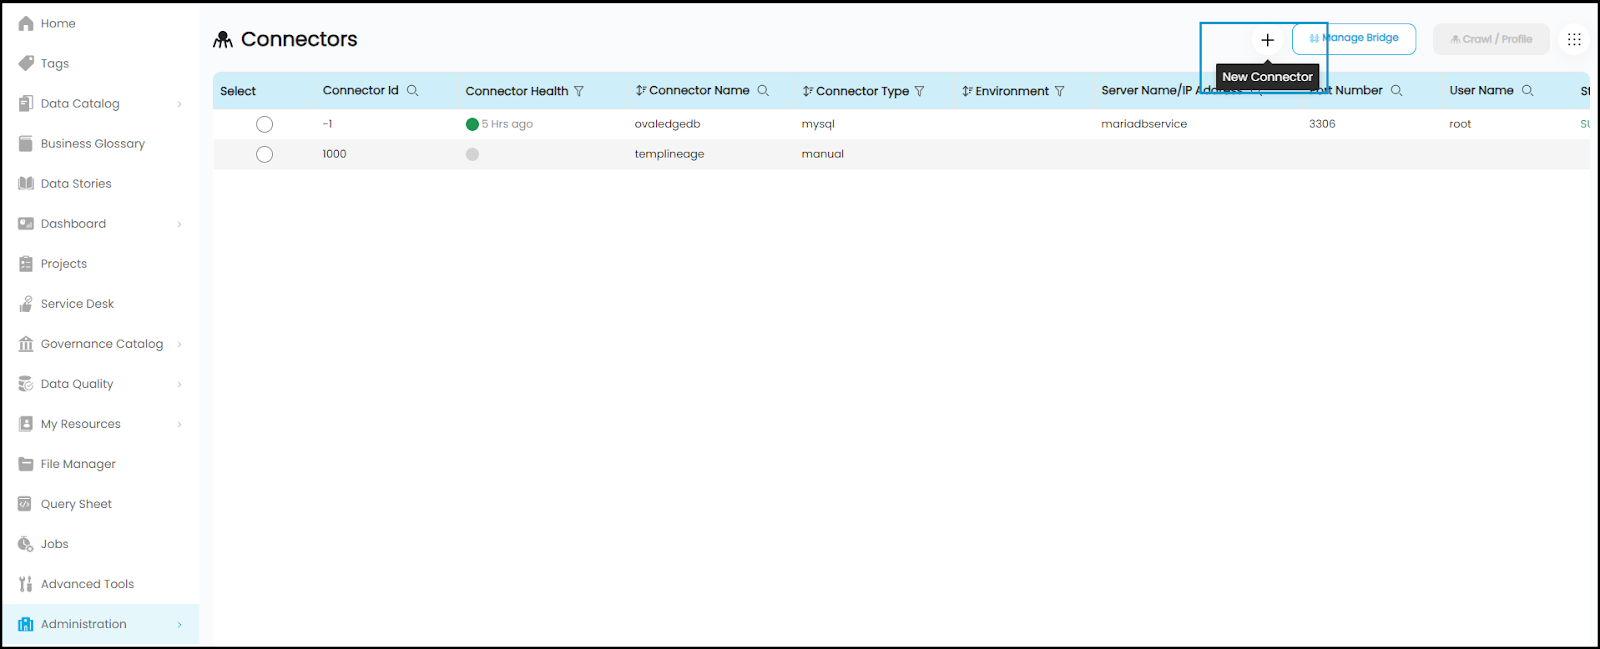
- Log in to the OvalEdge application.
- Navigate to Administration > Connectors module.
- Click on the + (New Connector) icon.
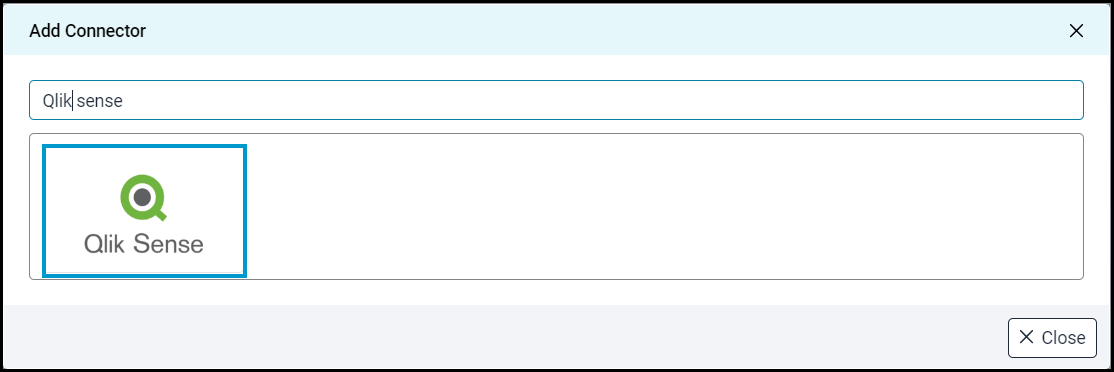
- Add Connector pop-up window is displayed where you can search for the Qlik Sense connector.
- The Add Connector with connector type-specific details pop-up window is displayed. Enter the relevant information to configure the Qlik Sense connection.
After entering all the connection details, select the appropriate button based on your preferences.
Note: The asterisk (*) denotes mandatory fields required for establishing a connection.Fields
Details
Connector Type
The selected connection type, Qlik Sense, is displayed by default. If required, the drop-down menu allows you to change the connector type, and based on the selection of the connection type, the fields associated with the selected connection type are displayed.
Type of Server*
Select the server type as QliksenseCloud from the drop-down list.
Credential Manager*
Select the option from the drop-down list to indicate where you want to save your credentials:
OE Credential Manager: When OvalEdge establishes a connection to the Qlik Sense database, the Qlik Sense connection is configured with the service account's basic username and password in real-time. Users need to add the credentials manually if the OE Credential Manager option is selected.
HashiCorp: The credentials are stored in the HashiCorp database server and fetched from HashiCorp to OvalEdge.
AWS Secrets Manager: The credentials are stored in the AWS Secrets Manager database server; OvalEdge fetches the credentials from the AWS Secrets Manager.
Azure Key Vault:
For more information, click Azure Key Vault.
For more information on Credential Manager, refer to Credential Manager.
License Add Ons
All the connectors will have a Base Connector License by default that allows you to crawl and profile to obtain the metadata and statistical information from a data source.
OvalEdge supports various License Add-Ons based on the connector’s functionality requirements.
- Select the Auto Lineage Add-On license that enables the automatic construction of the Lineage of data objects for a connector with the Lineage feature.
Connector Environment
The environment drop-down list allows you to select the environment configured for the connector from the drop-down list. For example, PROD, or STG (based on the configured items in the OvalEdge configuration for the connector.environment).
The purpose of the environment field is to help you identify which connector is connecting what type of system environment (Production, STG, or QA).
Note: The steps to set up environment variables are explained in the prerequisite section.
Connection Name*
Enter a connection name for the Qlik Sense connector.
You can specify a name to easily identify it on the OvalEdge Connector page. Example: Qlik Sense_test
Connection url*
Enter the Hostname or IP address of the Qlik Sense.
Qliksense Cloud API Key*
Enter the Qlik Sense Cloud API key. This helps you to connect to the Qlik Sense cloud.
XML files generation path
Enter the path created in the OvalEdge server to generate metadata files by the node server.
Default Governance Roles*
You can select a specific user or team from the governance roles (Steward, Custodian, Owner) assigned for managing the data object.
Note: The drop-down list displays all the configurable roles (for a single user or a team) according to the configurations made in the OvalEdge Security > Governance Roles section.
Admin Roles*
Select the required admin roles for this connector.
- To add Integration Admin Roles, search for or select one or more roles from the Integration Admin options, and then click on the Apply button.
The responsibility of the Integration Admin includes configuring crawling and profiling settings for the connector, as well as deleting connectors, schemas, or data objects. - To add Security and Governance Admin roles, search for or select one or more roles from the list, and then click on the Apply button.
The security and Governance Admin is responsible for:- Configure role permissions for the connector and its associated data objects.
- Add admins to set permissions for roles on the connector and its associated data objects.
- Update governance roles.
- Create custom fields.
- Develop Service Request templates for the connector.
- Create Approval workflows for the templates.
Select Bridge*
To enable OvalEdge to function as a SaaS application behind a customer's firewall, the OvalEdge Bridge is necessary. The Bridge functions as a firewall at the network layer.
- When a bridge has been set up, it will be displayed in a drop-down menu. Users can select the required Bridge ID.
- The user can select "NO BRIDGE" when it is not configured.
For more information, refer to Bridge Overview
- Validate:
- Click on the Validate button to verify the connection details. This ensures that the provided information is accurate and enables successful connection establishment.
- Save: Click on the Save button to store the connection details. Once saved, the connection will be added to the Connectors home page for easy access.
- Save & Configure: For certain Connectors that require additional configuration settings, click the Save & Configure button. This will open the Connection Settings pop-up window, allowing you to configure the necessary settings before saving the connection.
- Once the connection is validated and saved, it will be displayed on the Connectors home page.
Note: You can either save the connection details first or validate the connection first and then save it.
Connection Validation Errors
|
Sl.No |
Error Messages(s) |
Descriptions |
|
1 |
error_validate_connection |
An alert message is displayed when API keys are incorrect or expired. |
➤ If you have any issues creating a connection, please contact your assigned OvalEdge Customer Success Management (CSM) team.
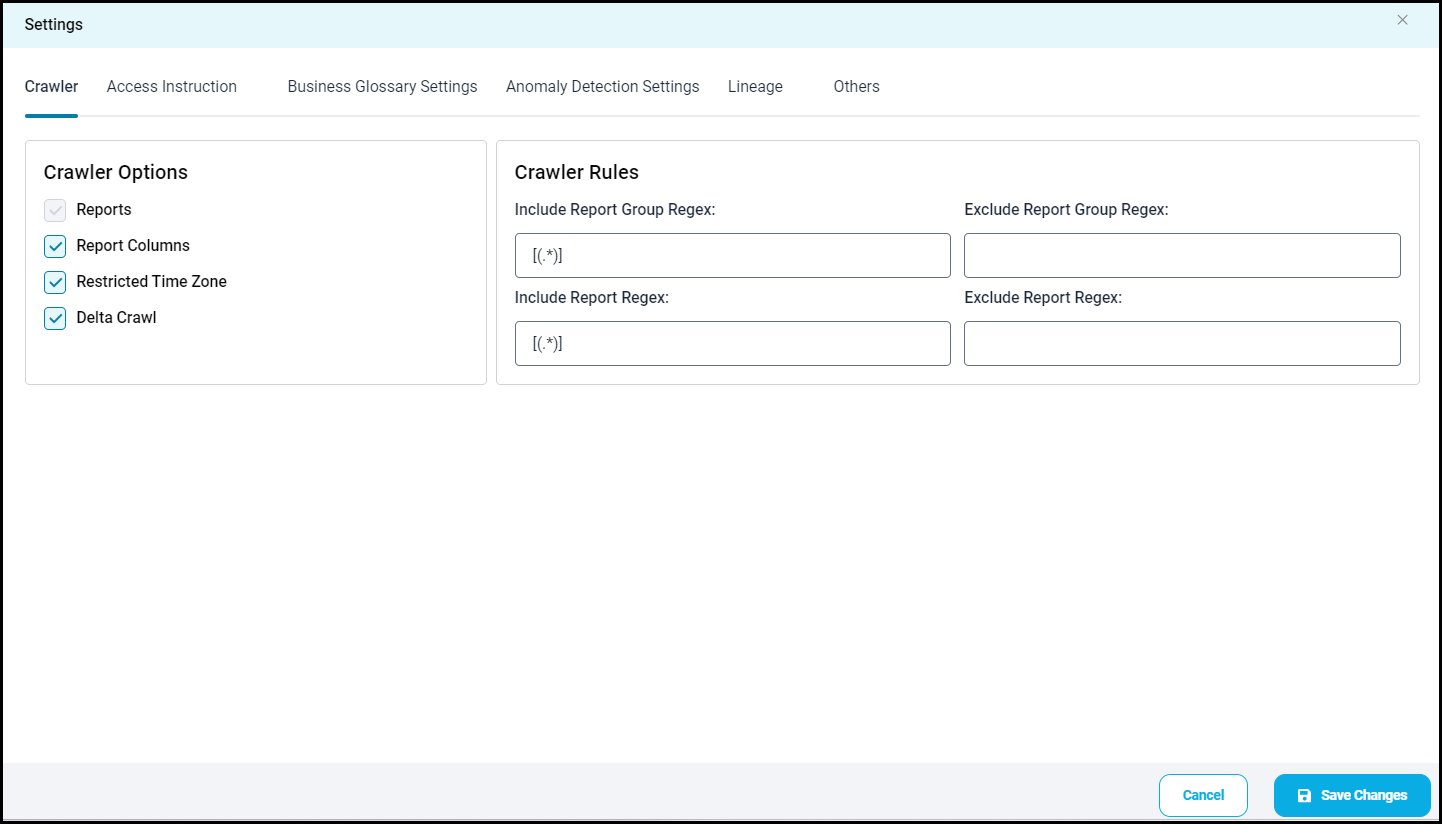
Connector Settings
Once the connection is established successfully, various settings are provided to retrieve and display the information from the data source.
|
Connection Settings |
Description |
|---|---|
|
Crawler |
Crawler settings are configured to connect to a data source and collect and catalog all the data elements in the form of metadata. |
|
Access Instruction |
It allows the data owner to instruct others on using the objects in the application. |
|
Business Glossary Settings |
It allows users to manage the data association of terms related to a particular connector associated with it. The business glossary setting works based on the order of options defined for each business glossary’s managed data association. |
|
Anomaly Detection Settings |
These settings allow users to set up anomaly detection preferences at the connector level. By default, the configuration is based on global settings established in System Settings and remains unmodifiable. In the custom settings, users can activate or deactivate anomaly detection for the specific connector. They also have the flexibility to switch the default algorithm between Deviation or IQR and modify the associated parameters. |
|
Lineage |
The lineage settings allow you to configure multiple dialects (by Selecting Source Server Type for lineage) and connection priority lists to pick the tables to build lineage. |
|
Others |
The Send Metadata Changes Notifications option is used to set the change notification about the metadata changes of the data objects.
Context URL By utilizing the Context URL feature in the OvalEdge Browser Extension, you can map OvalEdge to specific URL addresses through the crawler settings. This allows the extension to recognize the site and provide metadata results from the OvalEdge catalog, even when the plugin is used outside of the OvalEdge application. The Context URL feature is only applicable to the Report connection type. |
Crawling of Report Group Names
A Crawl/Profile button allows you to select one or more Report Group Names for crawling.
- Navigate to the Connectors page, and click Crawl/Profile. It allows you to select the Report Groups that need to be crawled.
- The crawl option is selected by default.
- Click on the Run button that gathers all metadata from the connected source into the OvalEdge Data Catalog. After a successful crawl, all the information is displayed in the Data Catalog > Report / Report Column Tab.
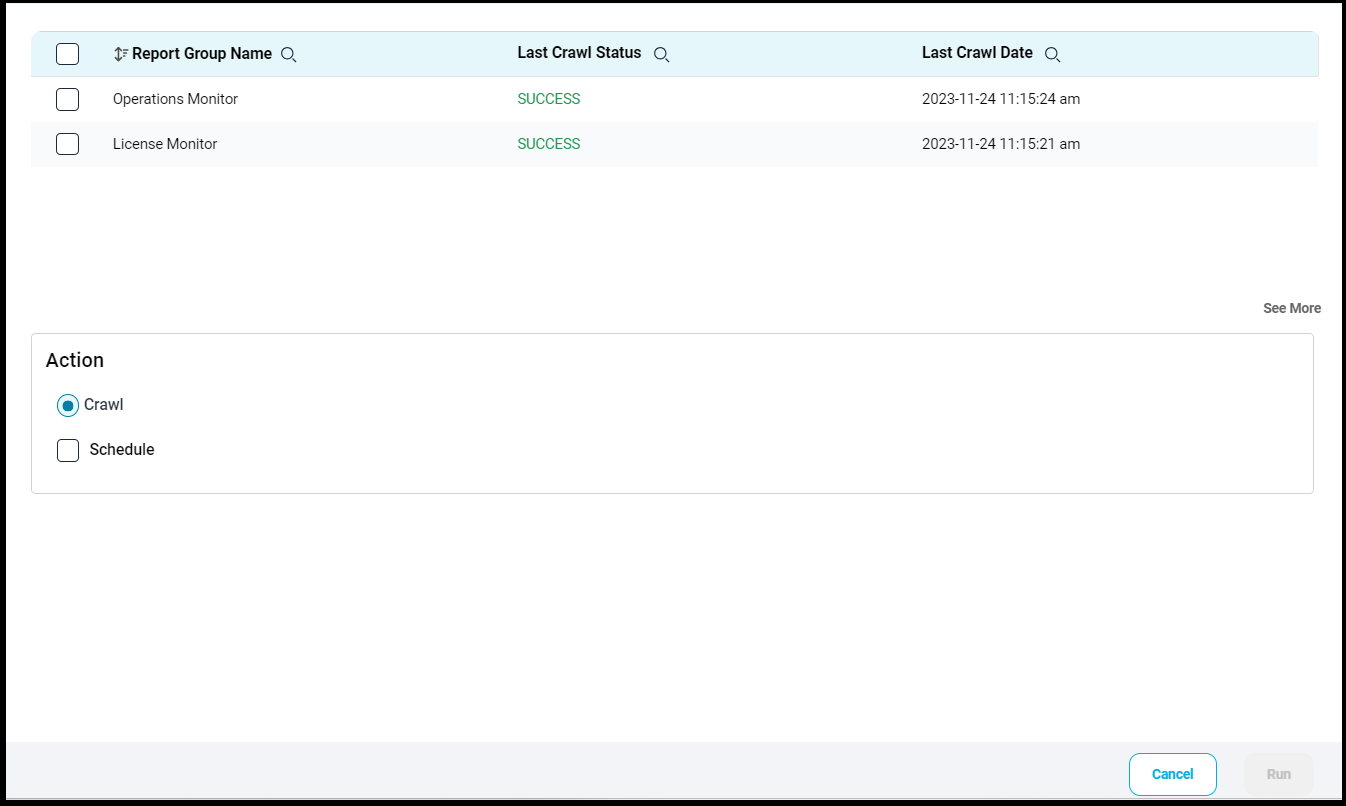
Note: For more information on Scheduling, refer to Scheduling Connector.
Copyright © 2024, OvalEdge LLC, Peachtree Corners, GA, USA.