This article outlines how to retrieve connector details from Azure Key Vault, including instructions on App Registration, creating Key Vault Secrets, assigning roles, and validating the Azure Key Vault connector.
What is Azure Key Vault ?
Azure Key Vault allows for secure storage and strict access mechanisms of sensitive information such as tokens, passwords, certificates, API keys, and other confidential data.
For more information, refer to the Azure Key Vault
Please follow the below steps for integrating the OvalEdge application with Azure Key Vault.
- App Registration: It authenticates the OvalEdge application to the Azure Key Vault.
- Create Key Vault Secrets: It stores the MySQL Database details and ES credentials.
- Role Assignment: It grants access to Azure resources and involves creating a role assignment.
- Azure Key Vault Connector: It establishes the Azure Key Vault Connector in the OvalEdge application.
App Registration
When you register an application in Azure, you get a unique identifier called a Client ID or Application ID that represents the application.
- Log in to the Azure Portal (https://portal.azure.com) with your Azure account credentials.
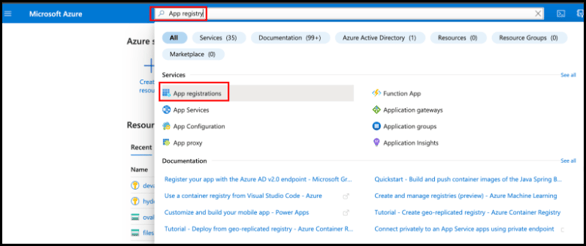
- From the All Services menu, select App Registrations.
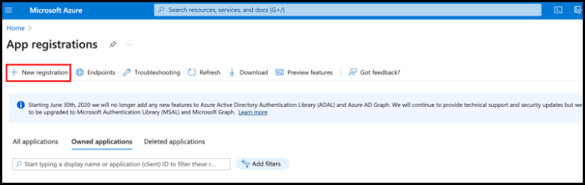
- Click on the + New registration tab.
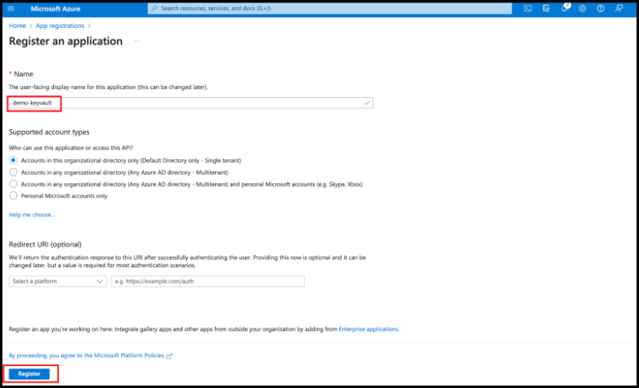
- Enter a name for your app and click on the Register button.
- Once the app is registered, navigate to the Certificate and secrets option and click on the Client secrets tab.
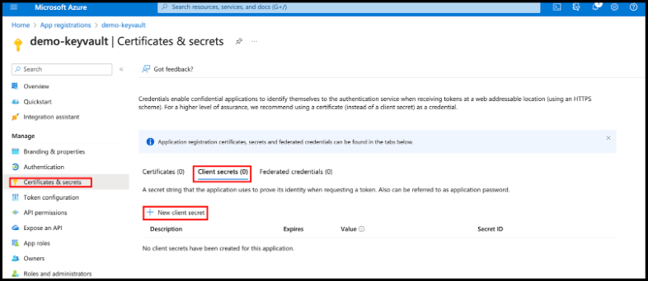
- Click on the + New Client Secret, then Add a client secret pop-up window is displayed.
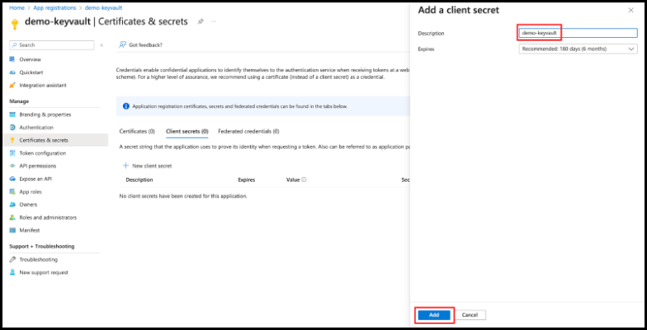
- Enter the description for client secret and select the secret expiry from the drop-down list.
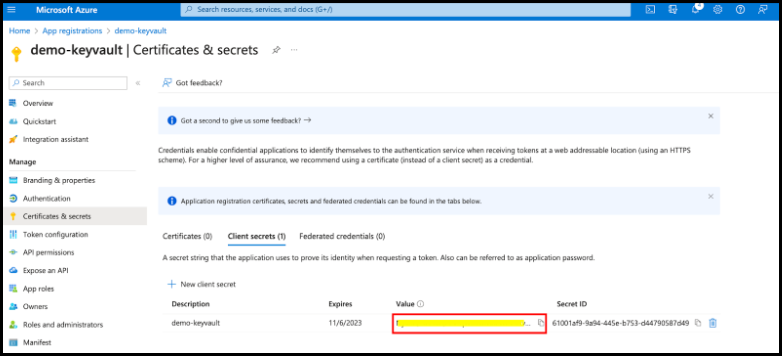
- Click on the Add button that will generate a new client secret.
- Copy the value and store it in the notepad that is required in the Section : Azure Key Vault Connector.
- Navigate to the Overview tab and copy the Client ID and Tenant ID for your app.
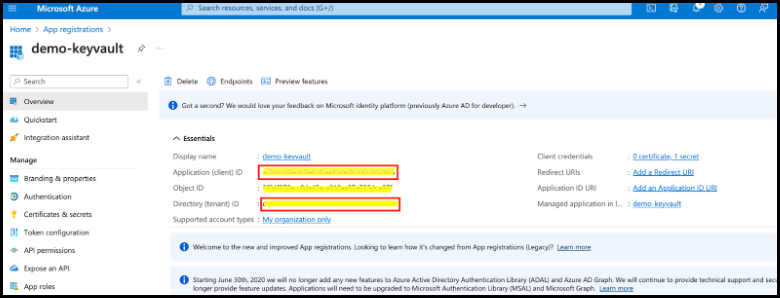
Note: Copy the client secret value and other app details, and store it in the notepad, that is required for while validating the Azure Key Vault connector.
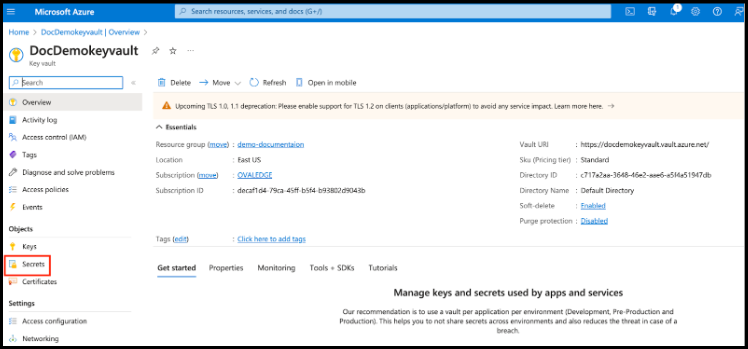
Creating Azure Key Vault Secrets
To create Key Vault Secrets in Azure, follow below steps:
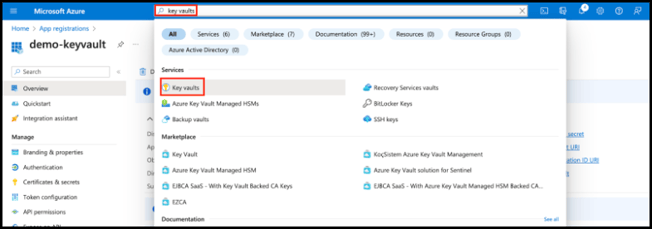
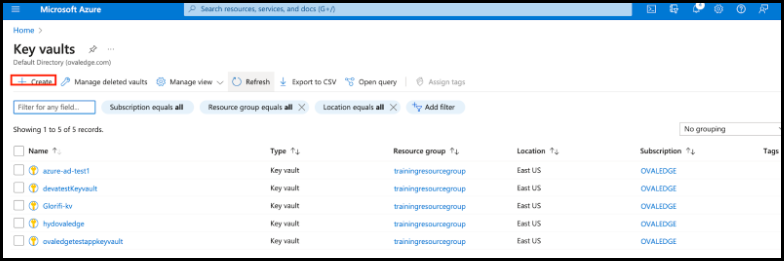
- Navigate to Key Vaults.
- Click on the + Create tab.
- Create a Key Vault form is displayed.
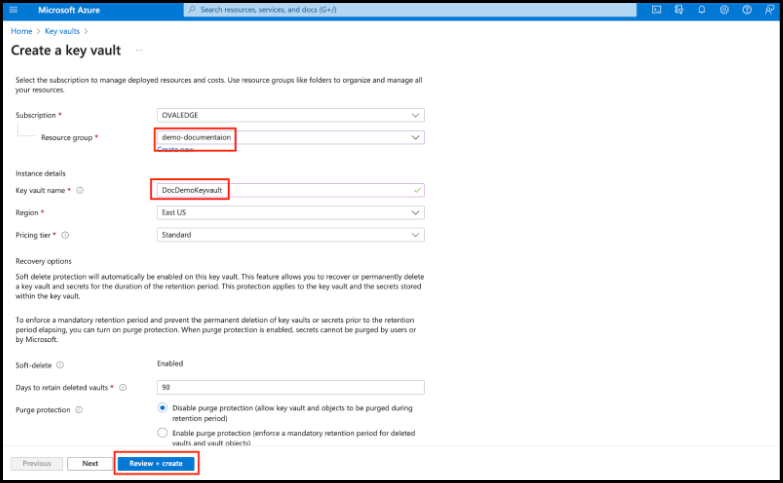
- Select the Resource group from the drop-down list and provide the Key Vault name.
- Click on the Review + Create button.
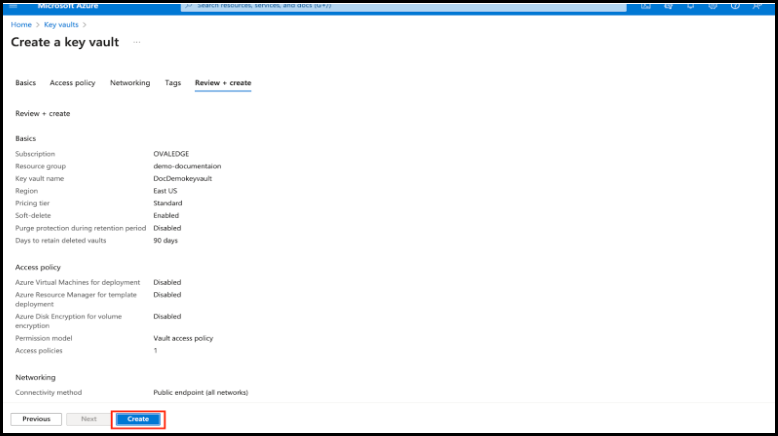
- Click on the Create button.
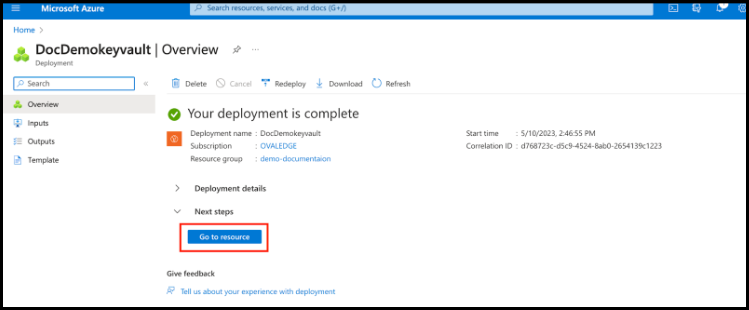
- Once the deployment is complete, click on the Go to resource button.
- Click on the Secrets option.
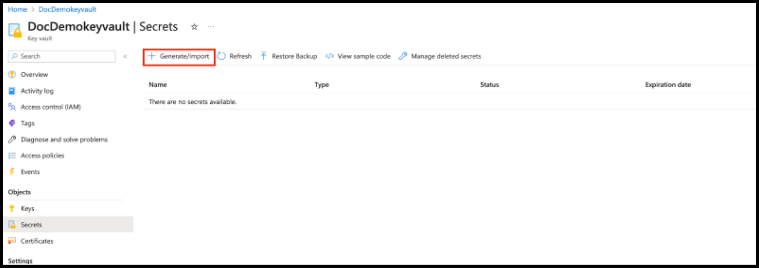
- Click on the + Generate/Import tab. A Create a Secret page is displayed.
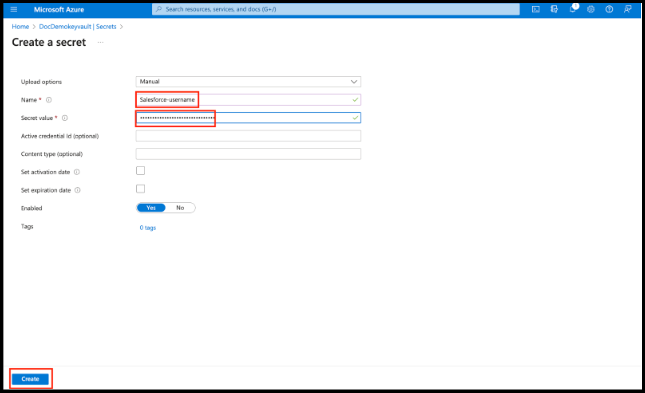
- To create the secret, select Upload options as Manual.
- Enter the Name as Salesforce-username (Suppose you need it for Salesforce connector).
- Enter the Value as “Actual username of connector(example: Salesforce)”.
- Click on the Create button.
Note: One secret key will be consumed for each parameter. As an example, Salesforce-username can be considered a secret key.
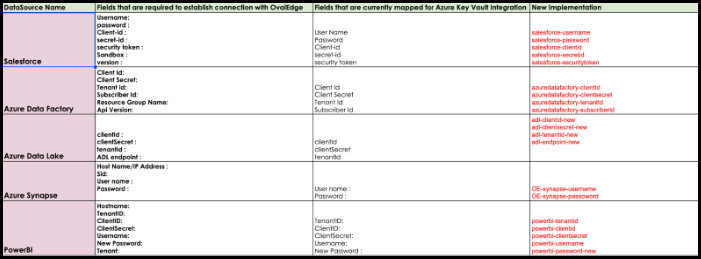
Examples:
Below are few examples of connectors that can utilize Azure Key Vault to retrieve Azure secrets securely.
Role Assignment
- Go to Azure portal and navigate to Access control (IAM) and select Add Role assignments.
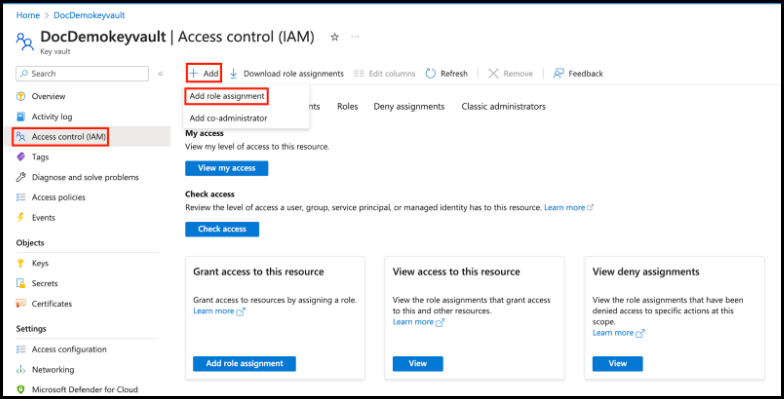
- Click + Add tab, Add role assignment page is displayed.
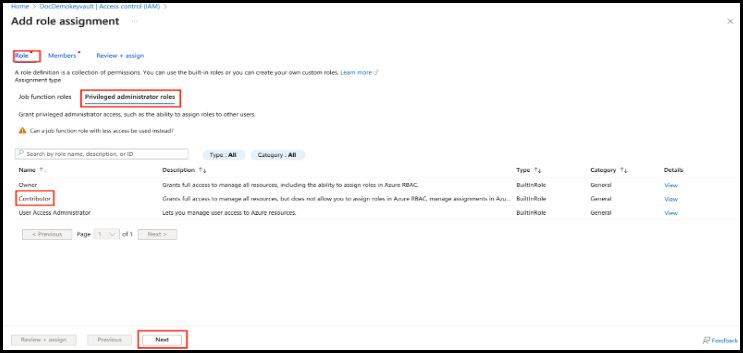
- Select Privileged administrator roles and click on the Contributor.
- Click on the Next button that will navigate to the Members tab.
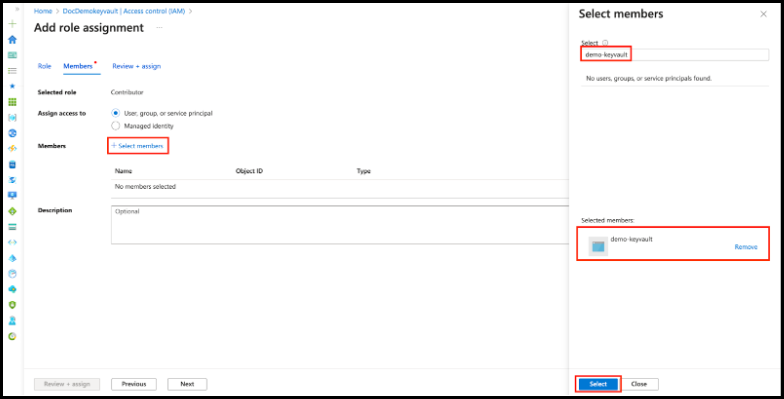
- Click on the + Select members and search for the app registry you created and select the app registry then click on the Select button.
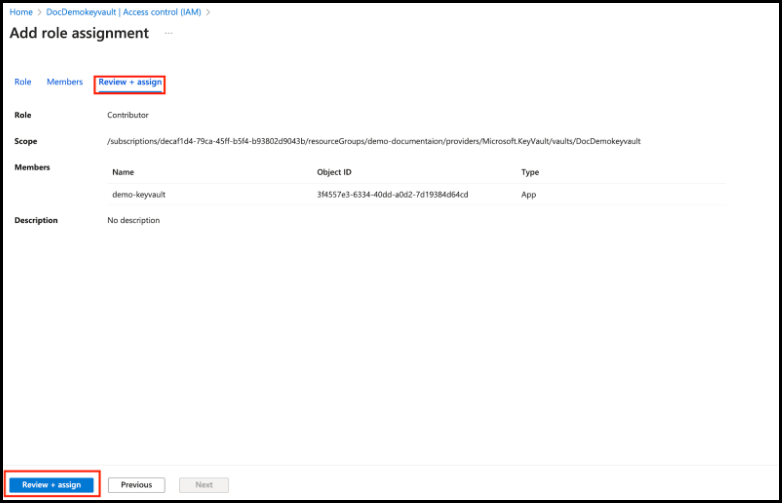
- Click on the Review + Assign button to display details of the role assignment.
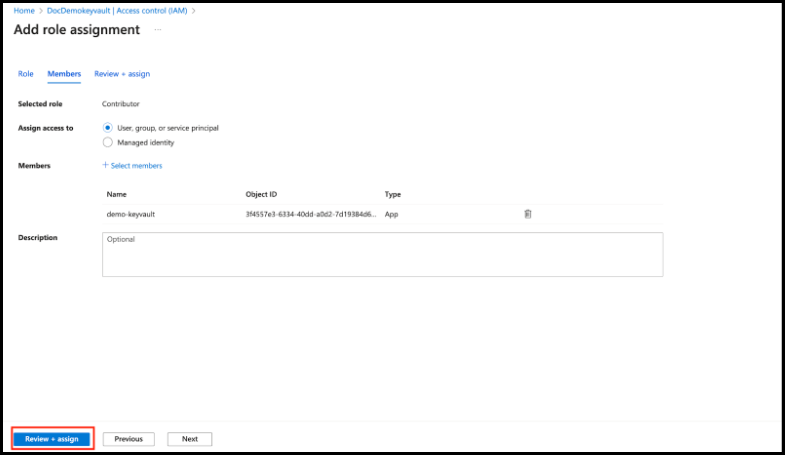
- Select Review + assign tab then click on the Review + assign button.
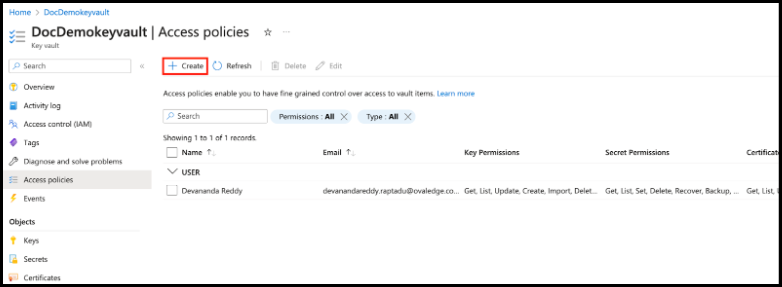
- Navigate to the Access policies option and click on the +Create tab.
- Set the Permission as
- 'Key permissions' as Get,
- 'Secret Permissions' as Get,
- 'Certificate permissions' as Get.
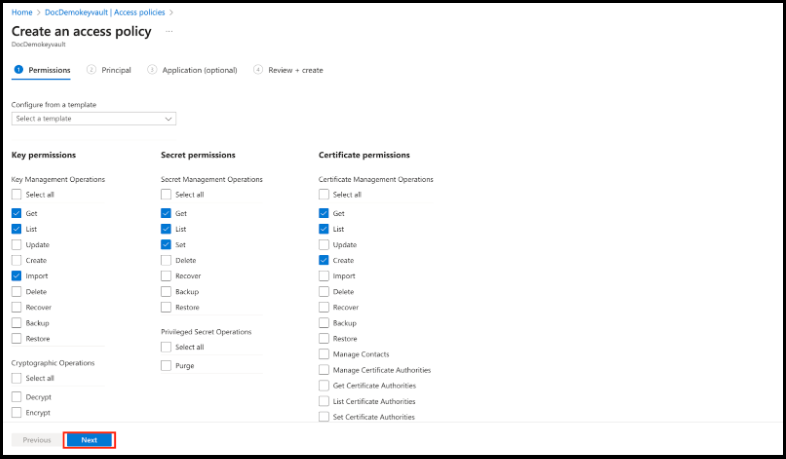
- Click on the Next button.
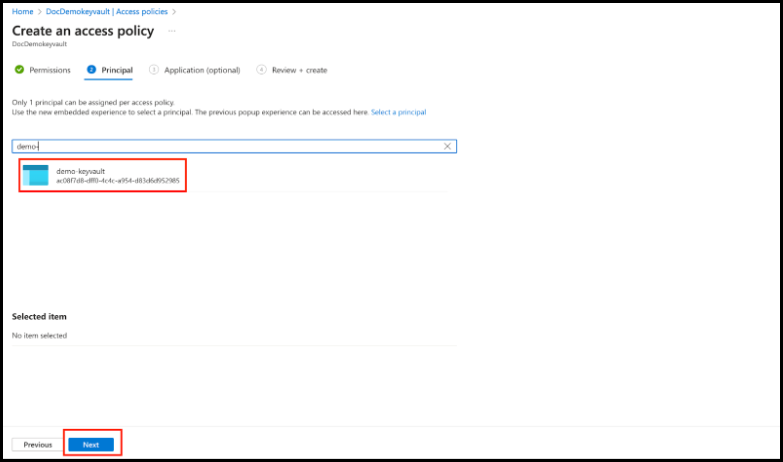
- Select the app you created and click on the Next button.
- Click on the Review + create tab.
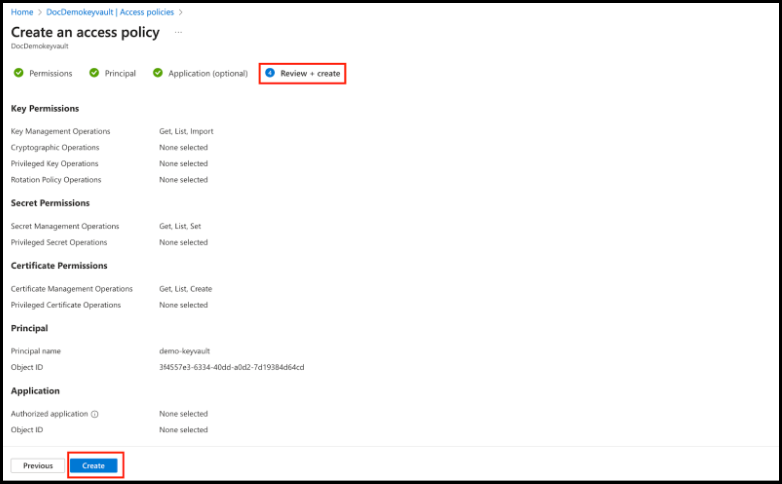
- Click on the Create button that completes the role assignment process.
Azure Key Vault Connector
To setup the Azure Key Vault connector,
- Log in to the OvalEdge application.
- In the left menu, navigate to the Administration module, and click on Connectors.
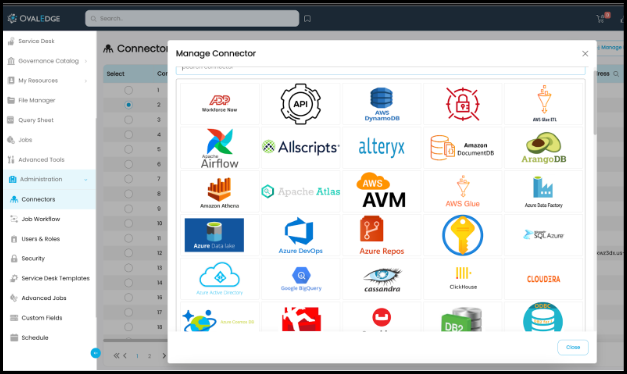
- Click on the + icon (New Connector), the Add Connector pop-up is displayed.
- Select the Azure Key Vault connector.
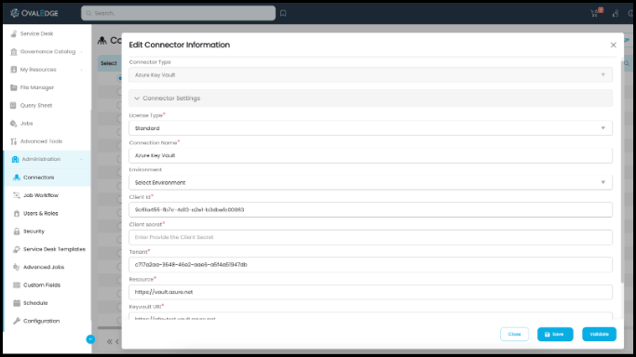
- Enter the mandatory fields of Azure Key Vault such as Connection Name, Client Id, Client Secret, Tenant and Resource, Keyvault URL.
- Once the Azure Key Vault is successfully validated and saved, it will be available in the Credential Manager dropdown field of the other implemented connector such as Salesforce (as an example).
Note: The Key Vault Connector can be validated using Bridge. To do so, you need to select the Bridge from the dropdown, which displays all the added bridges. After selecting the Bridge, enter the required connection details. Once the connection details are entered, click on the Validate button to verify the details. If the details are validated successfully, and then connection is saved. - You can navigate to the Administrator | Connector module to select the Salesforce connector and click on the Credential Manager dropdown to select the AzureKeyVault option.
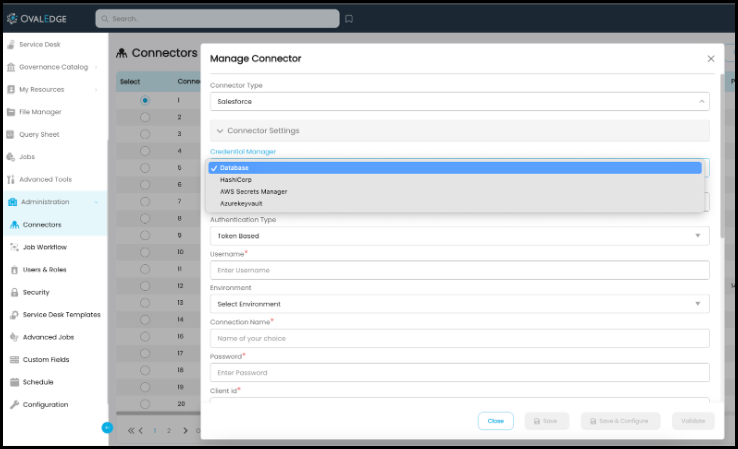
- Once Azure Key Vault is selected, you need to enter a username. For instance, Username is the key vault secret name (Salesforce-username) generated in step 11 of section Creating Azure Key Vault Secrets.
- Provide all the mandatory fields and key vault key in the connection details and validate the connection and save the connection.