Prerequisites
A. Components Required
Review the hardware prerequisite to ensure that your environment meets the minimum standards before you perform the installation.
B. Installation Prerequisites
Review the hardware prerequisite to ensure that your environment meets the minimum standards before you perform the installation.
Hardware OvalEdge has two components, web application, and algorithms.
C. Software prerequisitesDeploy Web Application Install MySQL For installation of MySQL follow the below link https://dev.mysql.com/downloads/windows/installer/5.7.html and select MySQL version.
Note: Download and install Server version: 5.7.34-log MySQL Community y Server (GPL)
- Install MySQL
- Install OvalEdge Database
- Install Java
- Environment Variable
- Install or Copy Tomcat
|
Component |
Minimum |
Recommended |
|
Processor |
2 core processors |
4 core processors |
|
Memory |
8GB RAM |
16GB RAM |
|
Disk |
50GB of physical disk space for the installation |
100GB of physical disk space for the installation |
Production Cluster Specification for about 100-400 users
Installation of OvalEdge Web Application Review the software prerequisites and ensure that your environment meets the minimum standards before you start the installation.
|
Component |
Specification |
Remarks |
|
Database Server |
8 core processors 32 GB RAM 500 GB SSD |
MySQL 5.7 (Nightly backup on a shared drive) |
|
Application Server (2) |
2 X 8 Core Processor and 16 GB RAM 200 GB SSD |
2 Tomcat 8.5 on each server fronted by the load balancer |
|
Load Balancer |
Client’s existing load balancer infrastructure |
Install OvalEdge
MySQL Database
Once the MySQL database is installed, use the following commands to create the OvalEdge database and also need to set the ini configured.
In MySQL my . ini config file, the user needs to be set the below details:
File location : C:\ProgramData\MySQL\MySQL Server 5.7\my.ini
Note: Before adding stop the MySQL services and then add it and save and start the services.
# Set the SQL mode to
strict sql-mode="STRICT_TRANS_TABLES,NO_AUTO_CREATE_USER,NO_ENGINE_SUBSTITUTION,ONLY_FULL_GROUP_BY" 1.
Connect to MySQL
Run MYSQL command-line client and execute the below commands
CREATE DATABASE ovaledgedb;

CREATE USER 'ovaledge'@'localhost' IDENTIFIED BY '0valEdge!' ;

CREATE USER 'ovaledge'@'%' IDENTIFIED BY '0valEdge!' ;

GRANT ALL ON ovaledgedb.* TO 'ovaledge'@'localhost'; GRANT ALL ON ovaledgedb.* TO

'ovaledge'@'%'; USE ovaledgedb;

SOURCE {your path}/ovaledge_install.sql SOURCE {your path}/xxx.sql

mysql>source /home/linux_user/vx.x/1.database.sql mysql>show databases;
Now you can see the Ovaledge database is created successfully.
Running all the SQL
Run all the remaining .sql files.
mysql>source /home/linux_user/vX/2.tables.sql

mysql>source /home/linux_user/vX.X/3.views.sql

mysql>source /home/linux_user/vX.X/4.data.sql mysql>source/home/linux_user/vX.X/5.multilang.sql

mysql>ALTER TABLE helpcenter_topic CONVERT TO CHARACTER SET utf8mb4 COLLATE utf8mb4_unicode_ci;

mysql>source /home/linux_user/vX.X/9.helpcenter.sql

mysql>source /home/linux_user/vX.X/6.validate.sql

mysql> select * from version;
Component 1
Install MySQL

When the download completes:
- Run the installer.
- Select I accept the license terms and click Next.
- Select setup server only.
- Follow the screen instructions and click on Next --> Execute.
Installation starts
- Select the first option Standalone MYSQL server / classic MySQL Replication and click Next.
- Enter the password for MYSQL root and repeat the password.
- Follow the screen instructions and click on Next --> Execute --> Finish.
Component 2
Install Java
Before installing Tomcat make sure that Java 1.8.0_291 is installed.
Note - Required Java Version - java version "1.8.0_291"
Java(TM) SE Runtime Environment (build 1.8.0_291-b11)
Java HotSpot(TM) 64-Bit Server VM (build 25.231-b11, mixed mode)
- Go to the command prompt and type java –version.
- To install Java go to - https://www.oracle.com/java/technologies/javase/javase-jdk8-downloads.html
- Go to Oracle JDK8 and download the web URL

- Login in with valid creds and click on download Linux x86 RPM Package.
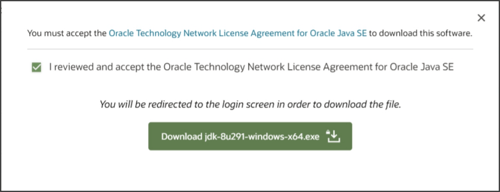
Immediately it will start downloading java. After the download completes, run the application. Follow the installation wizard to complete the installation of java.
Environment Variables
Once you have successfully installed Java on your machine, now it’s time to set environment variables so that your machine can access java. Follow the procedure carefully to set variables.
- Right click on This pc --> Properties --> Advanced system settings --> Advanced tab.
-May-17-2022-02-14-32-52-PM.png?width=400&name=image%20(1)-May-17-2022-02-14-32-52-PM.png)
- In the Advanced tab go to Environment Variables --> System variables --> New. It will pop up a window asking for variable name and variable path.
-May-17-2022-02-16-21-98-PM.png?width=500&name=image%20(2)-May-17-2022-02-16-21-98-PM.png)
- Enter The Variable name as JAVA_HOME and in the Variable value give the path of jdk installation and then click 'OK'.
For example: in demo its C:\Program Files\Java\jdk1.8.0_191. Refer to the below screenshot.
-May-17-2022-02-20-28-18-PM.png?width=500&name=image%20(3)-May-17-2022-02-20-28-18-PM.png)
- Select the path in system variables and click Edit.
-2.png?width=400&name=image%20(4)-2.png)
- Select New --> Enter %JAVA_HOME%\bin --> Click OK.
Now you can go to the command prompt and type java – version. You should be able to see the java version.
-2.png?width=516&name=image%20(5)-2.png)
Note: If you see java version messages as shown in the above screenshot, then Java installation is completed.
Verify Installation
Restart the tomcat server after the configuration.
Please use the following command (whenever Tomcat doesn't restart properly) after storing in a shell script.
- Open Apache Tomcat services.
- Click Esc and Ctrl+C.
- Tomcat services get killed. To restart the services, you need to run the startup.bat file.
Troubleshooting
Known Issue fixes:
mysql> set global
sql_mode='STRICT_TRANS_TABLES, NO_ZERO_IN_DATE, NO_ZERO_DATE, ERROR_FOR_DIVISION_BY_ZERO,
NO_AUTO_CREATE_USER, NO_ENGINE_SUBSTITUTION';
mysql> set session
sql_mode='STRICT_TRANS_TABLES, NO_ZERO_IN_DATE, NO_ZERO_DATE, ERROR_FOR_DIVISION_BY_ZERO,
NO_AUTO_CREATE_USER, NO_ENGINE_SUBSTITUTION';
Copyright © 2019, OvalEdge LLC, Peachtree Corners GA USA