The OvalEdge Query sheet provides users with the following capabilities:
- Use the Query window to access data from the tables stored in the OvalEdge repository list.
- Using the shortcuts, perform query operations like filtering, aggregating, sorting, joining, and grouping.
- Query Sheet allows users to execute and save queries in history for future use.
- Saved queries can be cataloged and shared.
The minimum permission the end-user will need to even access this module is a Metadata Read and Data Read on their user-role.
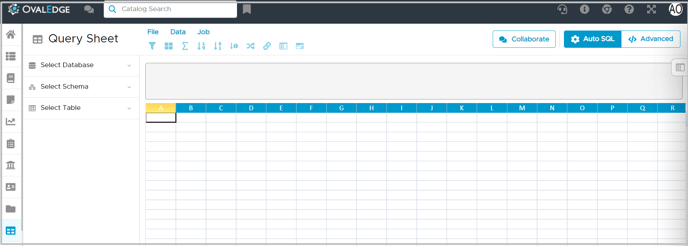
Navigating Query Sheet
The Query Window is divided into four sections:
- Object Explorer to select and view the contents of all the data objects like database, schemas, and tables.
- A user interactive Function Menu Bar to perform query operations on the data by a single click. Some items on the menu might be disabled, which means that they cannot be selected until you have performed other actions.
- Query editor window to manually write queries and perform similar and advanced query operations on the connected data sources.
Users can access this window by pressing a shortcut key CTRL+Q.
- Result window to view the results of the query.
The items that are described in this section are specific to the OvalEdge SQL Query Window.
Get to Your Data using Query Sheet
There are multiple ways to use this query sheet.
Author a Query
An advanced SQL user can write queries in the query editor window to get the results.
Auto SQL
In the Auto SQL, users can apply query operations in the shortcut ribbon. These queries are automatically generated.
- Navigate to Query sheet
- Select a database, schema, and table from the left side panel.
- For example, Click on the Filter function. From the dropdown list select a column name.

- Enter the name of the user who is supposed to receive the queries.
Note:
- These built-in queries are appended to Advanced queries.
- Auto SQL queries are not editable.
Advanced
Users can edit and execute the query in the query editor with the help of the Advanced tab.
- Navigate to Query sheet
- Select a database, schema and table from the left side panel.
- Select Advanced tab.
- User can edit a query in the query editor
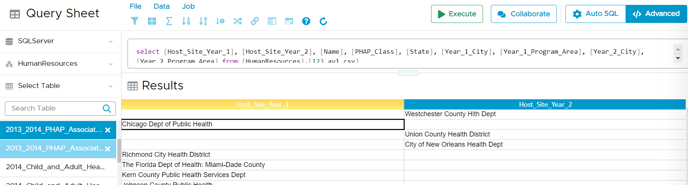
- Click on the Execute button, and the query will be processed accordingly.
Note:
- In the Advanced tab, all the query operations (Filter, Data and Jobs) are disabled.
- Execute button will record the history of queries executed in Queries - > Jobs -> Query History.
Collaborate
Users can collaborate queries and share with other users when required.
- Navigate to Query sheet
- Select a query
- Click on the Collaborate button
- Enter the name of the user who is supposed to receive the queries.
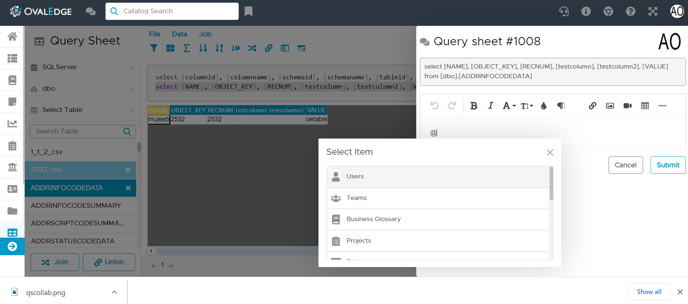
- Click on the submit button, it will notify the user mentioned in the inbox -> Collaboration
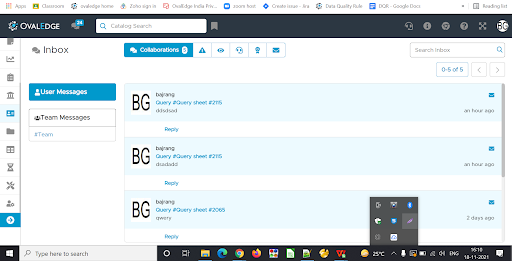
- The queries that are collaborated will auto catalog in catalog query. Users can once again open the cataloged queries to make any changes
- The queries that are collaborated will also be available in the inbox notification.
- The queries that are collaborated will also be available in the data catalog - > queries tab, and users build the query or take any action from there itself.
Build a Query
For users who have a basic level of knowledge of SQL, can use the functional toolbar, and based on the functions selected it will help build the query. The query builder allows users to build queries by filtering, aggregate functions, joins, and unions with a single click. And if users want to further enhance their queries they can edit and update the query.
The menu bar helps to manage the data and perform data operations. The OvalEdge Query sheet has File, Data, and Job items on the menu bar. Each item has a list of query operations that can be executed. All the query operations are also available as easy to use visual shortcuts below the ribbon.
See this article Query Sheet cheat sheet to understand more about various operations used in OvalEdge.
Drag and drop the Table
OvalEdge has now introduced a new feature in the Query sheet. We can now just drag and drop the table into the query box.
In detail, when we open the Query Sheet, we need to select the Database and Schema then the list of tables will be listed down. Drag your table from the list and drop it in the query box, it will display the script of that particular table.