Upgrading your Java Runtime Environment (JRE) and Java Development Kit (JDK) on Windows is essential to ensure your system is equipped with the latest features and security patches.
This step-by-step guide will walk you through the process, covering upgrading to JRE 8u391 and JDK 8u391, setting environment variables, and verifying installations.
Upgrading to Java 8u391
1. Download JDK 8u391:
-
-
Visit the Oracle JDK Downloads page.
-
Download the Java SE Development Kit (JDK) version 8u391 installer for Windows.

-
(or)
Use the provided link for downloading:
https://ovaledge.s3.us-west-1.amazonaws.com/OvalEdge+Clients/Caat_Pension_Fund/jdk-8u391-windows-x64.exe
2. Stop Tomcat Server:
-
-
Stop the currently running Tomcat server from services.

-
3. Run the JDK Installer:
-
-
Run the downloaded JDK installer.
-
Follow the installation wizard's instructions.
-
Uninstall the previous JDK version if prompted or choose a new installation directory.
-
4. Uninstall the Previous JDK Version (Optional):
-
-
Navigate to "Control Panel" > "Programs" > "Programs and Features."
-
Find the existing JDK version in the list.
-
Right-click and select "Uninstall."
-
-
-
Follow the prompts in the installer to complete the installation.
-
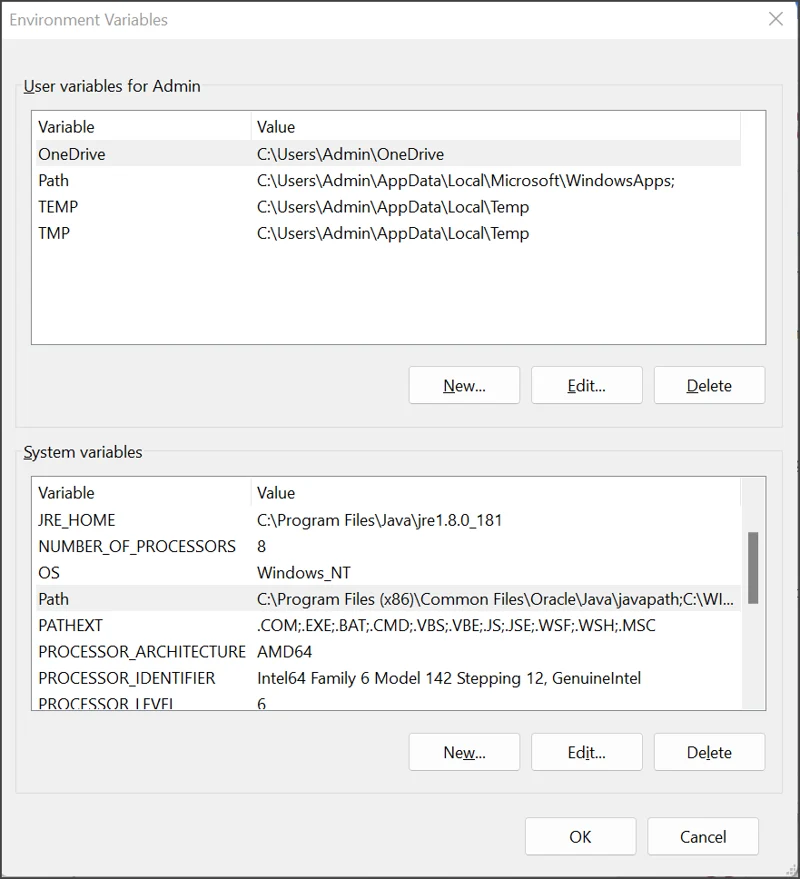
Set the Environment Variables
1. JRE:
Update the system's PATH environment variable:
-
-
Right-click on "This PC" or "Computer."
-
Select "Properties."
-
Click on "Advanced system settings."
-
Click the "Environment Variables" button.

-
-
-
Under "System variables," find the "Path" variable and click "Edit."
-
Add the path to the bin directory of your new JRE installation.
-
Example: C:\Program Files\Java\jre1.8.0_391\bin.
-
-
Click "OK" to close each window.
-
-
-
Update the PATH environment variable as mentioned in the previous response.
-
Verify Installations
1. Open a command prompt and type the following command:
-
-
java -version
-

-
-
Ensure that the output indicates the new version (JDK 8u391).
-
Perform the following steps for Tomcat Service
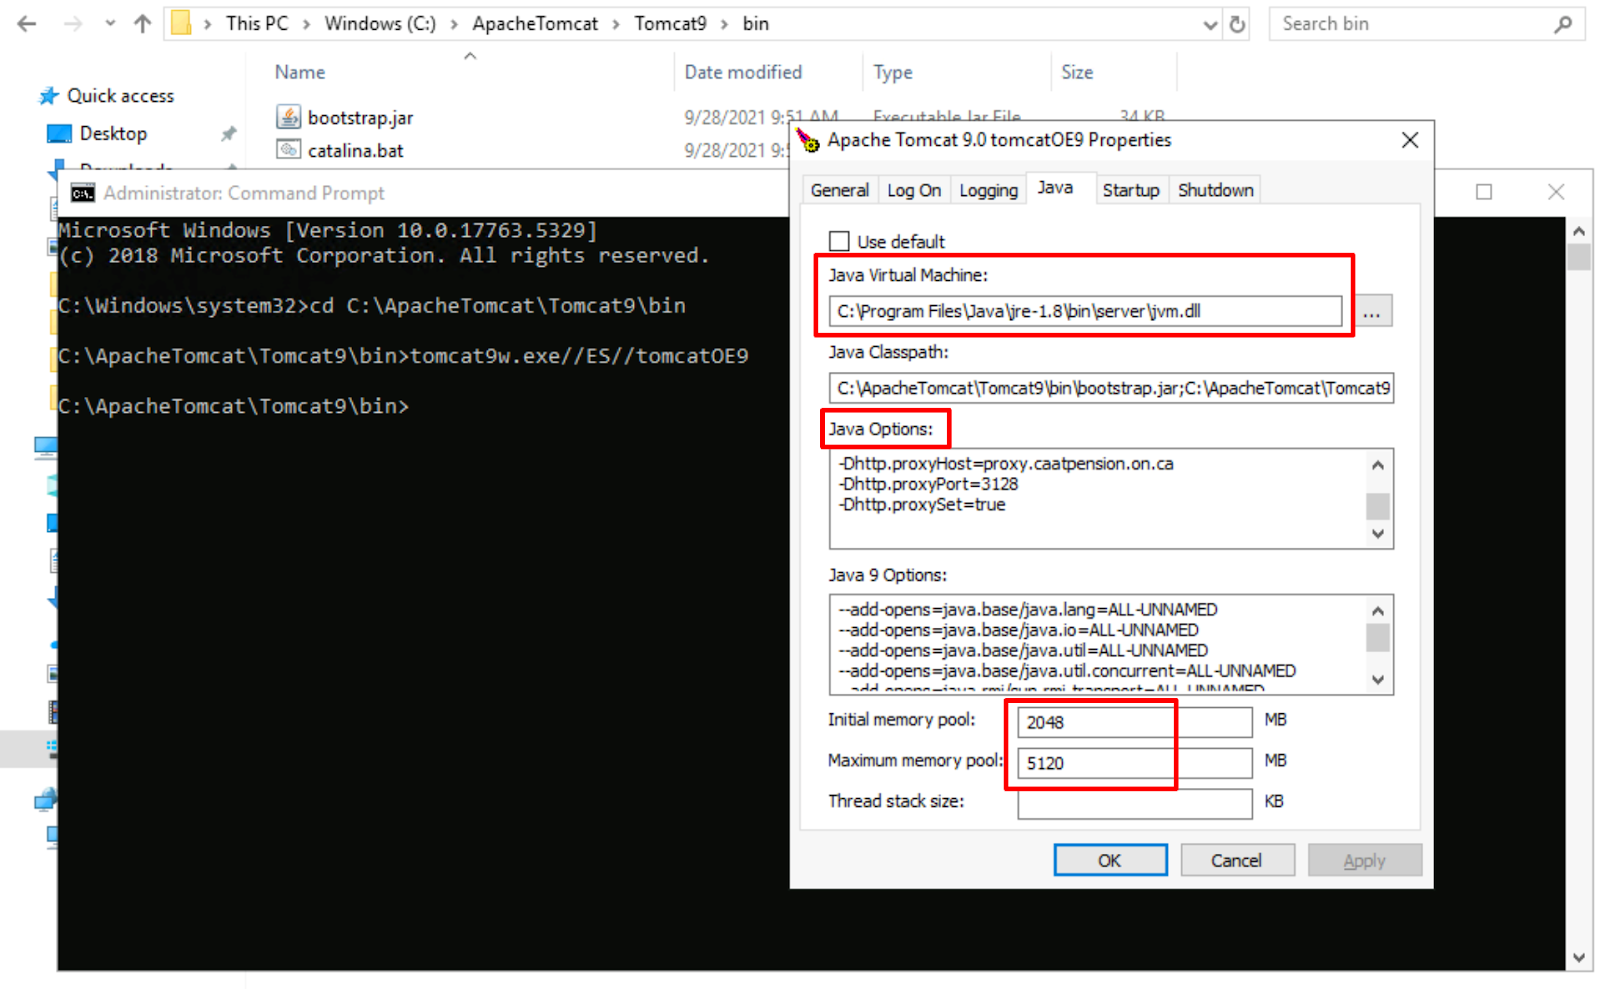
1. Uninstall Tomcat Service:
-
-
Before uninstallation, backup Java options and Heap Size for updating in the new Tomcat Service.
-
Command : tomcat9w.exe//ES//<tomcatservice_name>
-
-
Once the Java Upgrade is confirmed Need to uninstall the existing Tomcat Service.
Command: service.bat uninstall <tomcatservice_name>
-

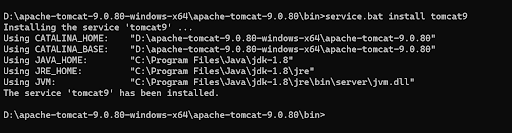
2. Install Tomcat Service:
Following the installation, configure the new Tomcat service by specifying the Java options (including additional values) and setting the heap size to match that of the previous Tomcat service.
Command: service.bat Install <tomcatservice_name>
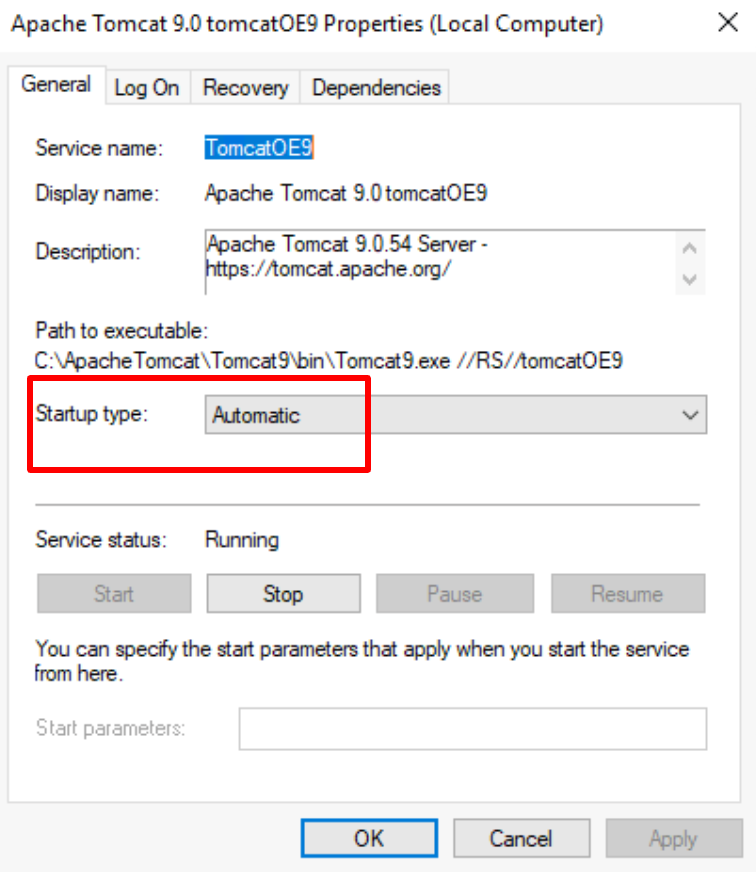
3. After successfully Setup of java and Heap size of the Tomcat service, proceed to configure the Tomcat service is automatic.
-
-
After the successful upgrade, start the Tomcat server from Services.

-
Copyright © 2024, OvalEdge LLC, Peachtree Corners, GA USA