WebFocus Connector is a Business Intelligence software that offers a wide range of data analytics capabilities. Using the WebFocus Connector, the existing Dashboards can be pulled and used as Report Groups in the OvalEdge application.

Crawling Support Data Objects
|
Feature |
Supported Objects |
Remarks |
|
Crawling |
Report Groups, Reports, and Report Columns |
It fetches all the Folders, which can be used as Report Groups. |
Prerequisites
User Permissions
The following are the minimum permissions required for OvalEdge to validate the WebFocus connection.
|
Permission: USAGE Roles: Crawler Admin Super User: OE ADMIN |
Connection Details
To connect to the WebFocus instance using the OvalEdge application, complete the following steps.
- Log in to the OvalEdge application
- Navigate to Administration > Connectors module.
- Click on the + icon, and the Manage Connection with Search Connector pop-up window is displayed.
- Select the connection type as WebFocus. The Manage Connection with WebFocus specific details pop-up window is displayed.
- The following are the field attributes required for the WebFocus connection.
|
Field Name |
Description |
|---|---|
|
Connection Type* |
By default, the selected connection type is displayed as WebFocus. |
|
License Type* |
The license type is Standard by default. |
|
Connection Name* |
Enter the name of the connection, the connection name specified in the Connection Name textbox will be a reference to the WebFocus connection in the OvalEdge application. Example: WebFocus Connection1 |
|
Host Name* |
Enter the Host or IP Address of the WebFocus instance. |
|
Port* |
Enter the port number of the WebFocus instance. |
|
User Name* |
Ener the Name to connect to the WebFocus. |
|
Password* |
Enter the Password to connect to the WebFocus. |
|
Default Governance Roles* |
From the dropdown list, select Stewards, Custodian, Owner, and other Governance Roles. |
|
No. of archive objects* |
By default, the number of archive objects is set in the disable mode. To enable the archive option, click on the Archive toggle button and enter the number of objects to be archived. |
Note: * (asterisk) indicates the mandatory field required to establish a connection.
6. Once after entering the connection details in the required fields.
7. Click on the Save button or Save & Configure to establish the connection and configure the connection settings. Clicking upon the Save & Configure button, the Connection Settings pop-up window is displayed, where you can configure the connection settings for the selected Connector.
Note: The Save & Configure button is displayed only for the Connectors for which the settings configuration is required.
8. Click on the Validate button once the entered connection details are validated.
Note: It is up to the user's discretion whether to save the connection details first or validate the connection and then save it.
Error Validation Details
The following are the possible error messages encountered during the validation.
|
Error Messages |
Description |
|
Error_validate_connection |
An alert message is displayed when provided details are incorrect. |
Connection Settings
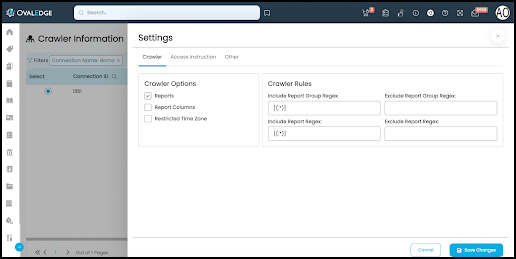
Crawler
Crawler Setting has various setting tabs, and the options are displayed based on the selected connections. The crawler options available for the WebFocus Connector are Reports, Report Columns, and Restricted Time Zones, and choosing one of the crawler options is mandatory.
|
Crawler options |
Reports: This crawling option is used to fetch all the Report Groups from the Reporting tool and display them in the OvalEdge instance. Report columns: This crawling option is used to fetch all the report columns existing in the reports and display them in the OvalEdge instance. Restricted Time Zone: In the Crawler Settings page, you can select the Restricted Time Zone checkbox for crawling the selected report database at the Restricted time zone. Once the Restricted Time Zone checkbox is selected, you cannot succeed in crawling the selected report database connection in the given UTC time zone. The failed crawling details are displayed in the Job Logs. In the Configuration page - Others tab, you can set the UTC time zone and can enter the start time and end time, now, during this time setting you cannot crawl the report database connection. |
|
Crawler Rule |
When setting up the regex rules, you will be able to write rules that will either include and/or exclude schema, tables, views, columns, procedures, and functions that start with, end with, or have middle characters as defined in the rule. |
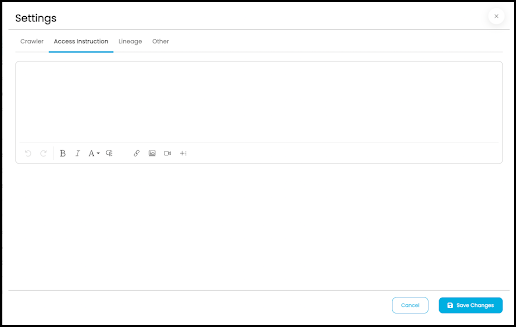
Access Instructions
It allows the Crawler admin to enter and save specific instructions on the data source/connector.
Lineage

This feature allows you to select multiple servers simultaneously to build the Lineage from the required tables. You can configure multiple servers simultaneously in the Selecting Source Server Type for lineage and also set the connection priority lists to pick the tables in the Connections Priority to pick the source table for lineage building.
Others
The Others tab helps to update the Send Metadata Changes Notifications and Context URL sections.
Send Metadata Changes Notifications:
- Select whether the notifications for the Data Owner and Data Steward under the specific Roles need to be sent or not.
- Select the desired role from the Roles dropdown menu and click on the Save Changes button. The notifications will be successfully sent to select Data Owner and Data Steward.
Context URL:
Enter the browser URL for the selected data source.
Note: To add multiple URLs, click on the + Add New URL option. The new textbox to provide the URL details is displayed in the Context URL section.