Crawling is a process of collecting information about data from various data sources like on-premise and cloud databases, Hadoop, visualization software, and file systems. When an OvalEdge crawler connects to a data source, it collects and catalogs all the data elements (i.e. metadata) and stores it in the OvalEdge data repository. The crawler creates an index for every stored data element, which can later be used in data exploration within the OvalEdge Data catalog which is a smart search. OvalEdge crawlers can be scheduled to scan the databases regularly, so they always have an up-to-date index of the data element.
Data Sources
OvalEdge crawler integrates with various data sources to help the users to extract metadata and build a data catalog. In this document, you can see how to make a connection to your SQL server instance and crawl the databases and schemas.
Connect to the Data
Before you can crawl and build a data catalog, you must first connect to your data. OvalEdge requires users to configure a separate connection for each type of data source. The users must enter the source credentials and database information for each type of connectivity. Once a data connection is made, a simple click of the Crawl button starts the crawling process.
You can use either SQL Server Authentication/Windows Authentication to connect to your SQL server instance.
Configure a new database connection
- Select the Administration tab and click on it to expand the functions.
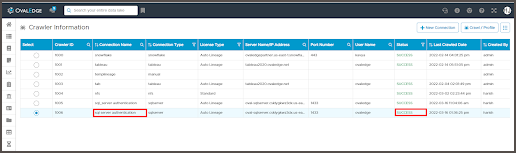
- Select the Crawler.
- Click the New Connection from the Crawler window. The dialog box for configuring a database connection is displayed.
Example: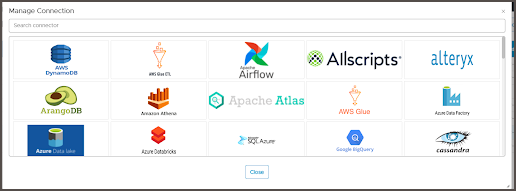
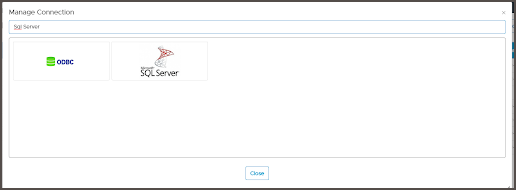
- Search for SQL Server in the Search connector.
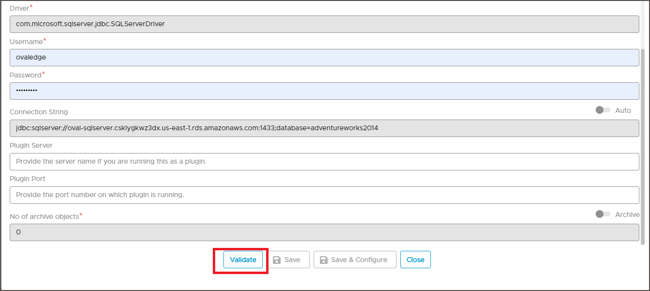
- Enter the connection details.
-
Enter the Driver name and Connection string manually.
Alternatively, set the Connection string toggle button to automatic, to get the details automatically from the credentials provided. -
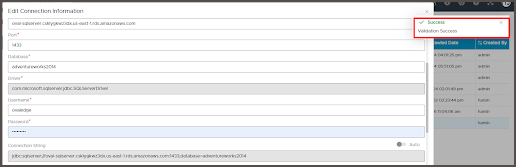
Click Validate to test the database connection.
-
When validation completes, click Save to finish the configuration of the database connection.
A dialog box that the database added successfully is displayed.
Connection details
|
Configuration |
Default/Sample value* |
Description |
|
Database Type |
SQL Server |
Select the database type from the list |
|
Authentication |
SQL Server Authentication |
This is the default authentication (Only for SQL server connection) |
|
Connection Name |
Requires input |
Reference name for database identification in OvalEdge |
|
Hostname / IP Address |
Requires input |
Database instance URL(on-premises/cloud-based) ** |
|
Port Number |
Requires input Default 1433 |
Port number of the database instance |
|
Sid/Database |
Requires input |
A unique name that identifies the selected database (Only for SQL Server connection) |
|
Driver Name |
com.microsoft.sqlserver.jdbc.SQLServerDriver |
JDBC driver name for SQL server |
|
Connection String |
jdbc:sqlserver://{servername}:{portnumber};database={sid};integratedSecurity=true; |
SQL server |
*- Requires Client-specific input
Crawl a database connection
In OvalEdge, each data source can be crawled at a Schema level. In other words, when there are multiple schemas within a database, you have an option to select a specific schema and crawl.
To crawl a specific Schema or multiple schemas,
- Select the Administration tab and click on it to expand the functions.
- Select the Crawler.
- Select a database from the list.
- Click the Crawl/Profile button on the crawler page.
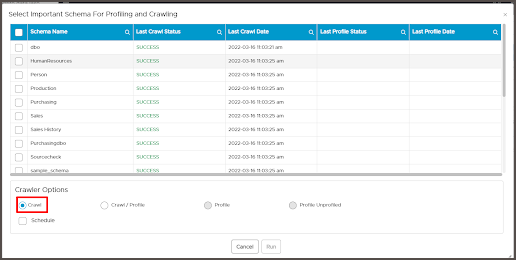
The dialog box to select Important schema for crawling and Profiling is displayed.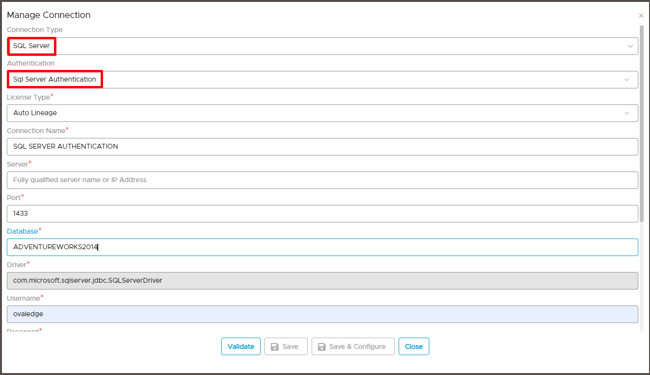
- Click the Checkbox next to the schema name and select a single schema or multiple schemas to crawl and profile.
- To crawl all schemas, click Select All.
- Click OK to initiate Crawling the database connection immediately.
Alternatively, select Advance options to schedule a Crawl and Profile action
later.
- A dialog box displays that a crawl job is Initiated.

- Select the Jobs tab in the object explorer(left side of the window) to know the status of the job submitted.
- Check the Job step status and click the Refresh button.
INIT - Advanced Job is initiated
RUNNING - Job is being processed
WAITING - Submitted Job is on Queue to be processed
SUCCESS - Job is completed successfully
ERROR - Job has failed. Check error message in the Logs
KILLED - The initiated job has been killed.
PARTIAL SUCCESS - The initiated job has completed partially. - Go to the Crawl window to check the Last Crawl Status of the selected Schemas.