This article provides a comprehensive introduction to SMTP and its components. It further describes how to set up SMTP to transmit email notifications and details the various parameters within the OvalEdge application that can be used for configuration purposes.
Introduction
Email has been around for decades and is still one of the most widely used communication methods worldwide. Whether for personal or business purposes, we rely on email to send and receive important information quickly and efficiently. The process in the back end when the Send button is clicked during email transmission is when SMTP comes into play.
SMTP (Simple Mail Transfer Protocol) is an application used by email clients (Yahoo, Gmail, Apple Mail, Outlook) to send and receive emails over the internet. It works with the mail transfer agent to move email across networks to the right computer and email inbox.
SMTP Server and SMTP Port
An SMTP Server, like any other server, is an application that provides a service to other applications within a network, allowing them to send, receive, and relay email messages. It is like a post office that processes and sends letters from City A to City B or their intended destination. Without a server, email communication between different domains, e.g., Gmail to Yahoo, would not be possible.
To route communications appropriately, any server requires two essential pieces of information:
- First, a Domain Name or internet address (IP) is used to identify the specific machine or server. It is similar to a street address that identifies a physical location, but in this case, it is a unique identifier that identifies the machine or server on the internet.
- Second, a Port number is needed to identify a particular application or service running on the machine. It is similar to an extension number on a phone system that directs calls to an organization's specific department or individual. SMTP 25 and 2525 are the two commonly used port numbers.
Setting up SMTP Parameters
Configuring the SMTP settings in the OvalEdge application is essential to ensure emails are delivered promptly to their intended recipients.
Note 1: Users with Admin-level privileges can only configure the SMTP settings.
Note 2: Valid email addresses must be provided during the user creation so that users can receive email notifications.
Note 3: Users can set their email notifications preferences to be received from the list of options (Collaborations, System Alerts, Watchlist Alerts, etc.) by navigating to the ‘My Profile’ section.
To set up SMTP,
- Log in to the OvalEdge application
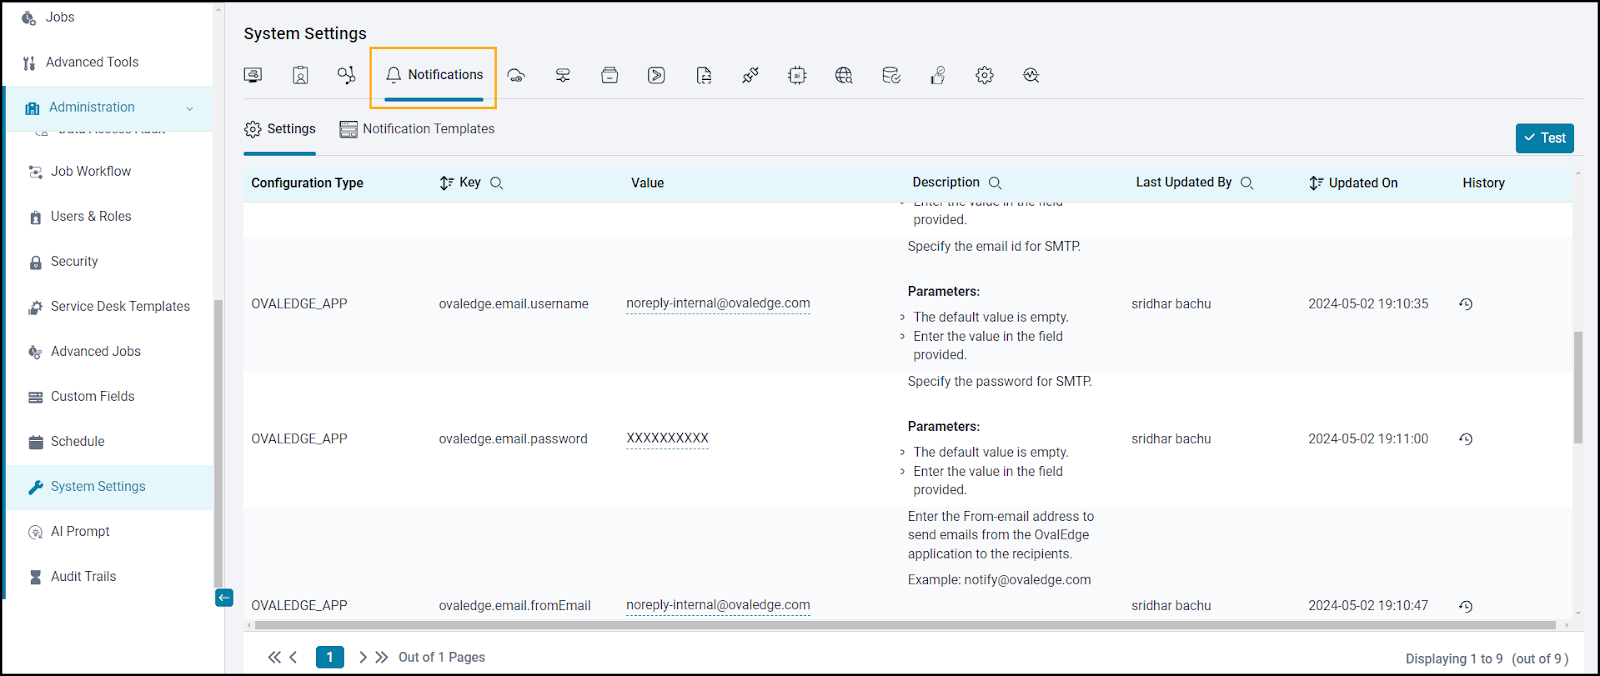
- From the left menu, select Administration > System Settings.
- Select the Notifications Tab from the top menu.
- Enter the following parameters in the configurations.
|
Key |
Description |
|
ovaledge.smtp.server |
Enter the SMTP server's IP address or hostname to send emails from OvalEdge to the receiver email. Example: google.smtp2go.com Parameters: The default value is empty. Enter the URL in the field provided. |
|
ovaledge.smtp.port |
Enter the SMTP Port number to connect to an SMTP server. Common values include 25, 2525. Parameters: The default value is empty. Enter the port number in the field provided. |
|
ovaledge.smtp.mode |
SMTP operates in different modes: Unencrypted mode (without encryption) and Encrypted mode (with encryption). SMTP can be used with encryption protocols such as SSL or TLS to secure email transmission from unauthorized access. It is an optional field. Parameters: The default value is empty. Enter the value in the field provided. |
|
ovaledge.email.username |
Enter the username or account that is configured on the SMTP server. Parameters: The default value is empty. Enter the username/account in the field provided. |
|
ovaledge.email.password |
Enter the password of the SMTP username/ account configured on the SMTP server. Parameters: The default value is empty. Enter the password in the field provided. |
|
ovaledge.email.fromEmail |
Enter the email address that should appear in the ‘From’ field of the email message when it is sent. Example: bob.admin@ovaledge.com Parameters: The default value is empty. Enter the ‘From email’ address in the field provided. |
|
smtp.oauth2.tenantid |
Enter Tenant ID for OAuth Token Validation and SMTP Server Authentication. Parameters:
|
|
smtp.oauth2.clientid |
Enter Client ID for OAuth Token Validation and SMTP Server Authentication. Parameters:
|
|
smtp.oauth2.clientsecret |
Enter Client Secret for OAuth Token Validation and SMTP Server Authentication. Parameters:
|
|
smtp.oauth2.cloud.name |
Enter Cloud Name for OAuth Token Validation and SMTP Server Authentication. Parameters:
|
To Configure OAuth for SMTP Authentication in Azure for OvalEdge
Create an App Registration in Azure
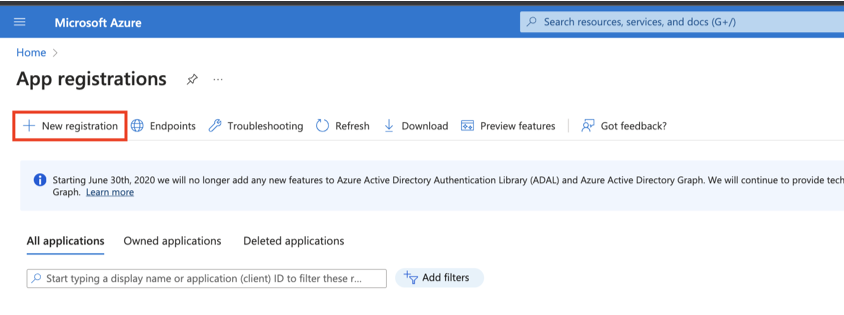
- Navigate to the Azure Portal and access the "App Registration" page.
- Click on "+ New Registration" to create a new app registration.
- Provide a name for the app registration and complete the registration process.
Generate a Client Secret
- After creating the app registration, access the "Certificates & Secrets" section.
- Create a new secret and make sure to save its value for later use.

Retrieve Client-Id and Tenant-Id
- Go to the "Overview" page of your app registration to find the Client-Id and Tenant-Id.

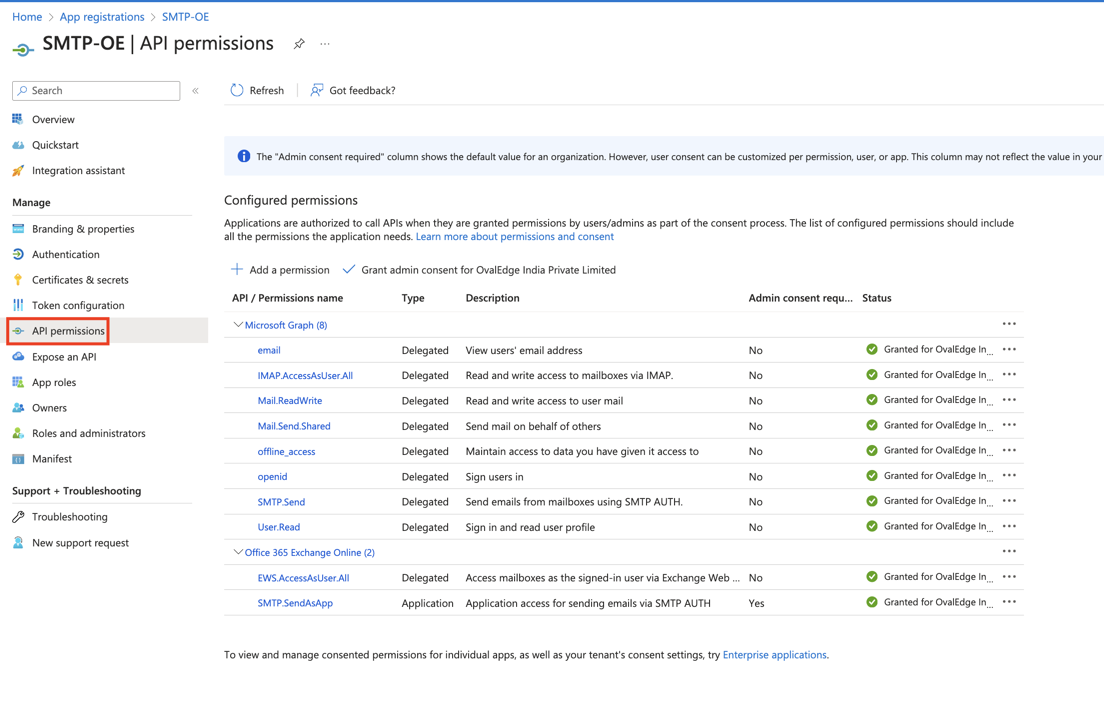
Configure API Permissions
- In the "API Permission" blade, enable the necessary APIs and grant admin consent as required.
- To enable the Office 365 Exchange Online APIs, please follow the below steps.
- Under delegated permissions, add EWS.AccessAsUser.All as shown below
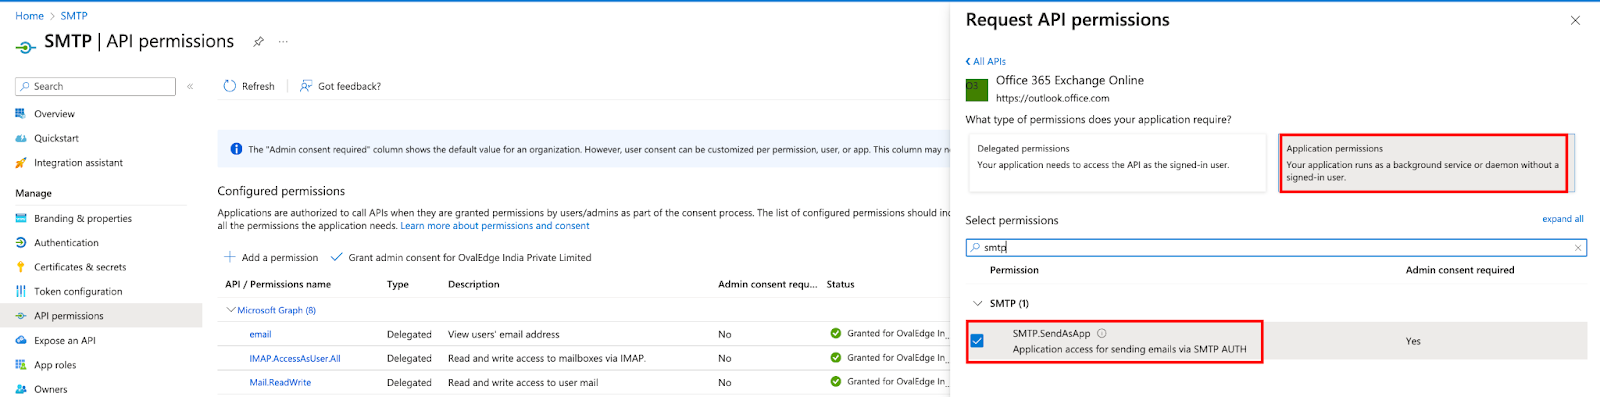
- Under Application Permissions, add SMTP.SendAsApp is shown below.


Adding Service Principal to OfficeExchange
Once the tenant admin consents to the Azure AD application, you must register your AAD application's service principal in Exchange via Exchange Online PowerShell.
To do so please run the following commands
- # Install-Module -Name ExchangeOnlineManagement -allowprerelease
- # Import-module ExchangeOnlineManagement
- # Connect-ExchangeOnline -Organization <Tenant-ID>
- Once login is successful, you will see the message below.
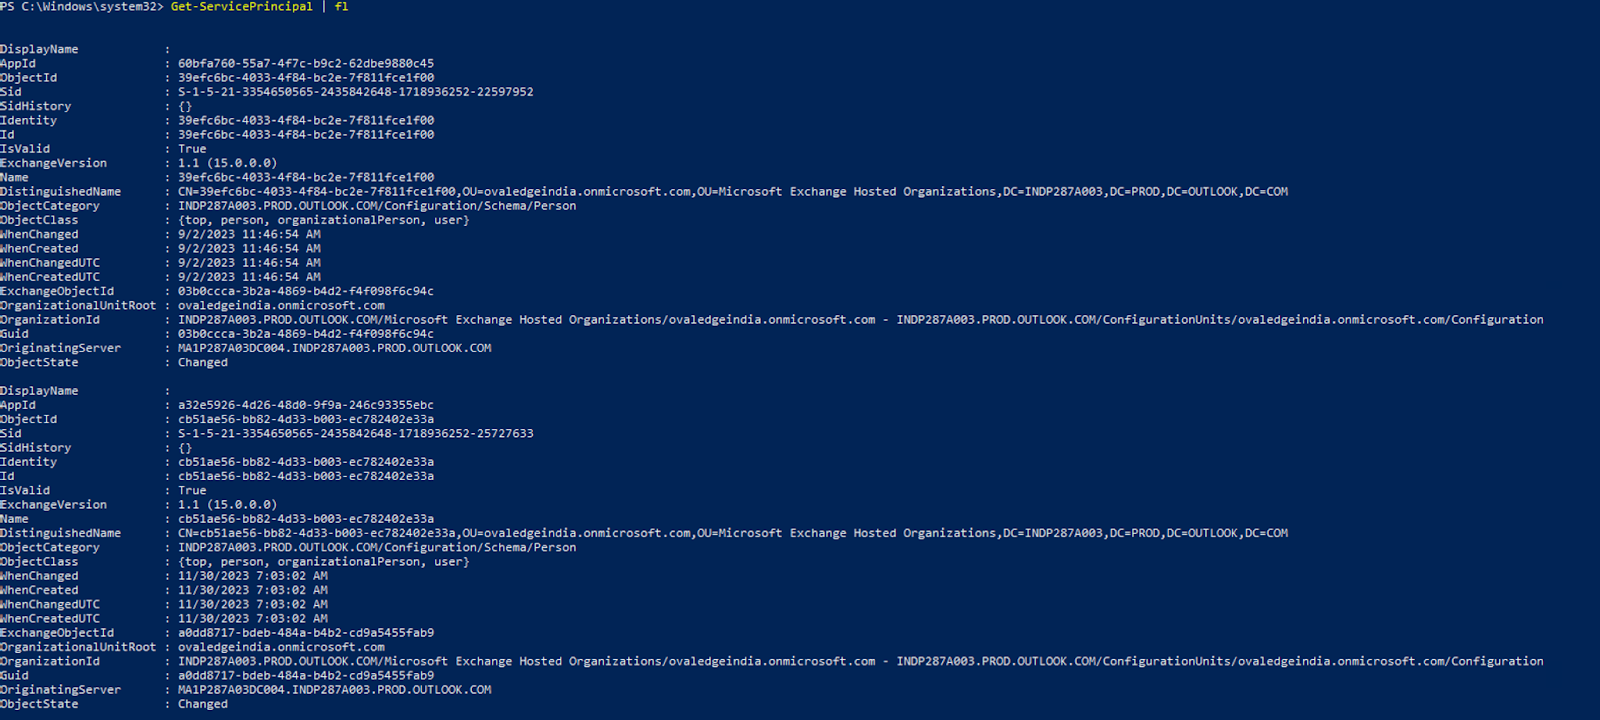
- Once the Service principle is added, you can check the added service principles using the below command


# New-ServicePrincipal -AppId <APPLICATION_ID> -ObjectId <OBJECT_ID> [-Organization <TENANT_ID>]
Note: The OBJECT_ID is the Object ID from the Overview page of the Enterprise Application node (Azure Portal) for the application registration. It is not the Object ID from the Overview page of the App Registrations node. Using the incorrect Object ID will cause an authentication failure.
- # Get-ServicePrincipal | fl
- Give your application's service principal access to one mailbox shown below
# Add-MailboxPermission -Identity "xyz.abc@example.com" -User <SERVICE_PRINCIPAL_ID> -AccessRights FullAccess
- With the above, the entire configuration part to utilize OAuth for SMTP is done.
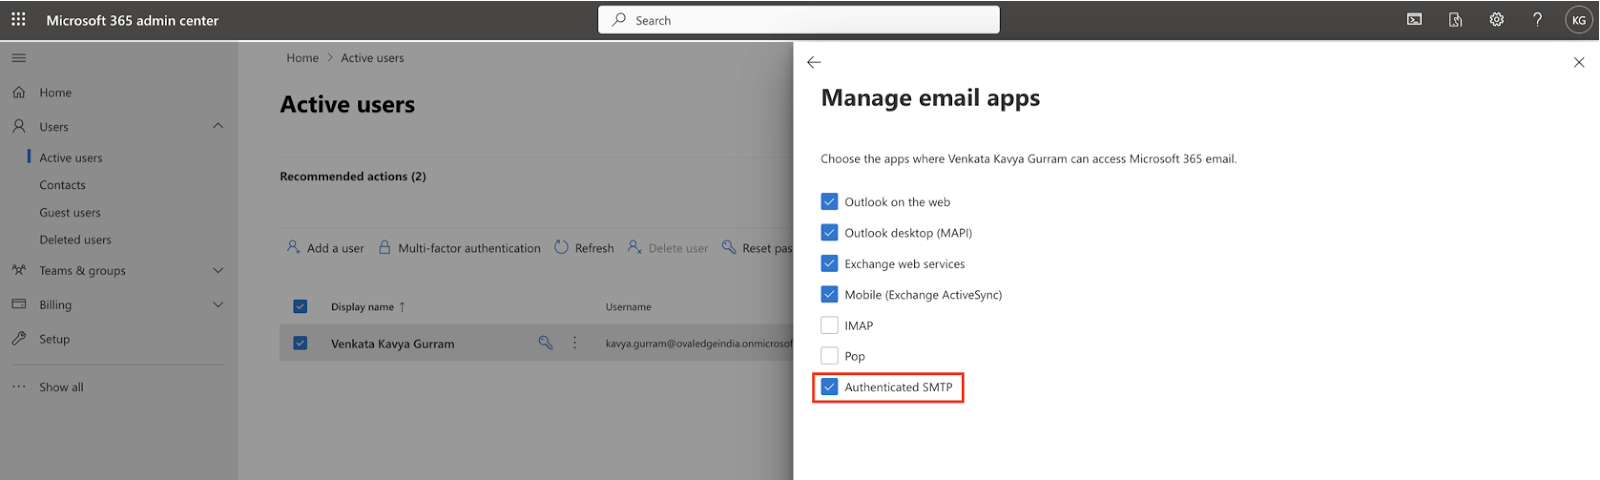
Enable SMTP Authentication in Office 365
- Log in to the Office 365 Admin portal.
- Enable SMTP Authentication for the service user created for OvalEdge's SMTP purposes.
- Access "Manage email apps" and enable Authenticated SMTP as needed.
- Upon completing the above steps, you will have obtained the Client-Id, Client-Secret, Tenant-Id, and the email address of the service user for whom Authenticated SMTP is enabled.

Update OvalEdge SMTP Configuration
- Log in to the OvalEdge application with admin credentials.
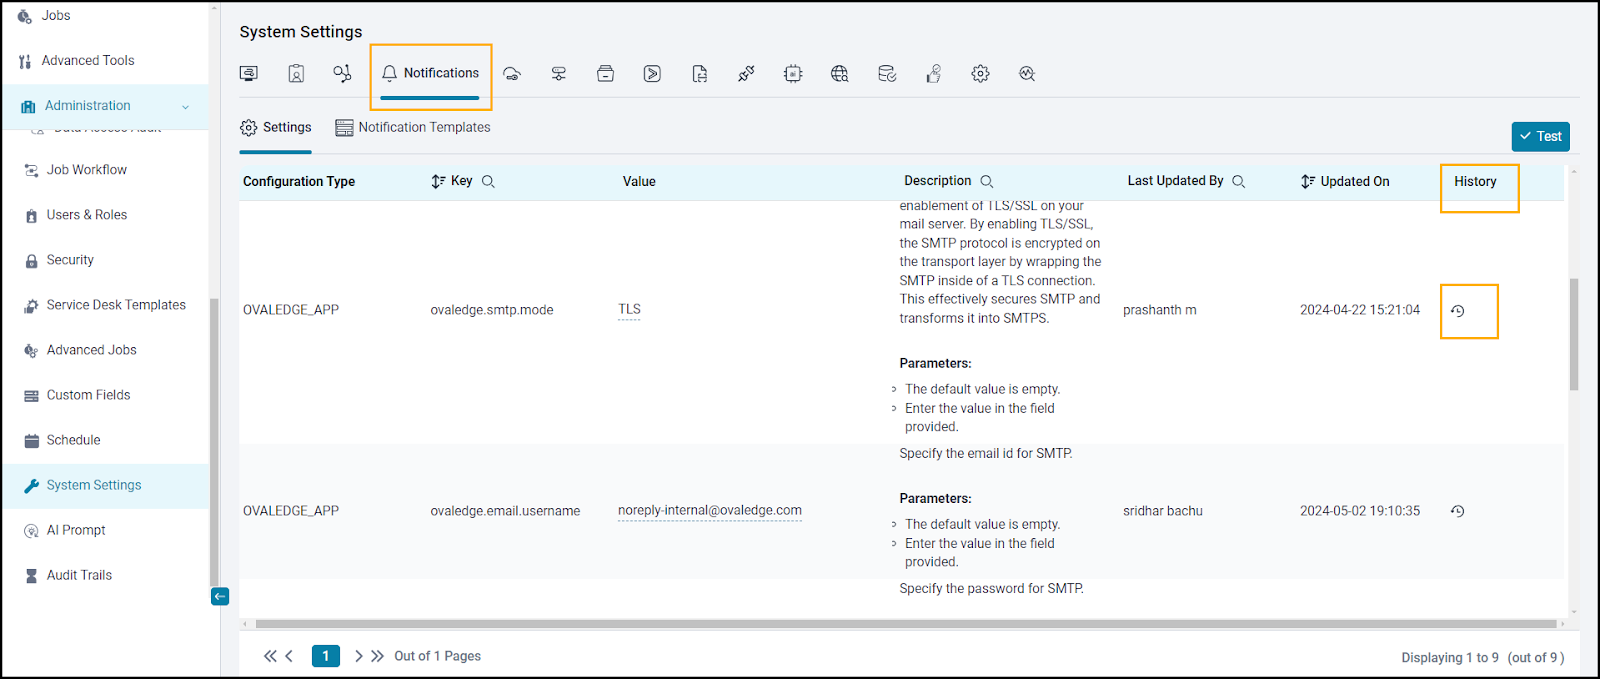
- Navigate to the Administration > System Settings > Notifications tab.
- Click on the Settings tab, the Notifications Settings page is displayed.
- In the Settings page, edit the values for the following keys to update the SMTP configurations:
ovaledge.smtp.server: smtp.office365.com

ovaledge.smtp.port: 587 (adjust if necessary)

ovaledge.email.username: service.user@example.com

ovaledge.email.password: Leave it empty (update and save it with an empty value as it is not required for this SMTP configuration)

ovaledge.email.fromEmail: service.user@example.com (provide the service user's email address)

smtp.oauth2.tenantid: Your Tenant-Id

smtp.oauth2.clientid: Your Client-Id

smtp.oauth2.clientsecret: The secret value created in step 2

smtp.oauth2.cloud.name: Azure

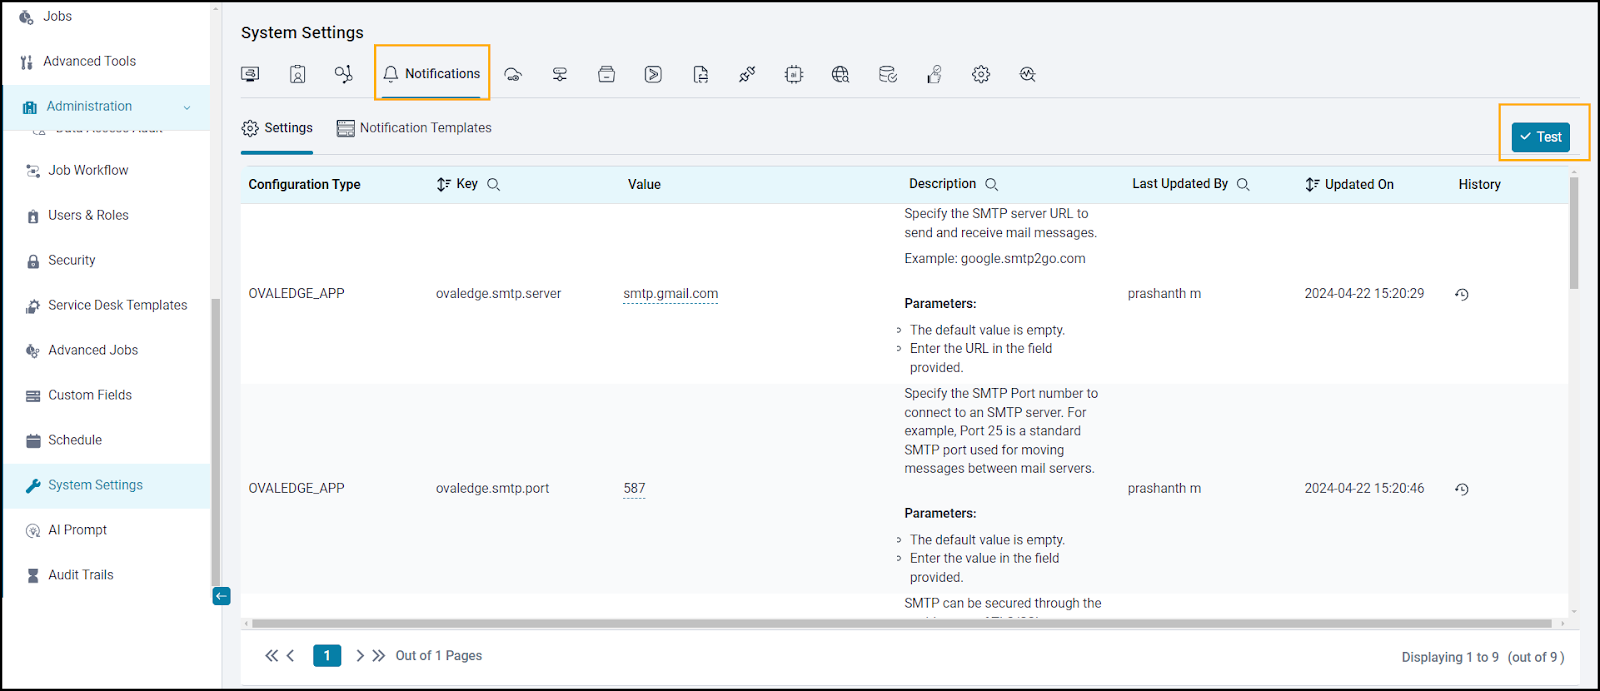
Testing the SMTP Configuration
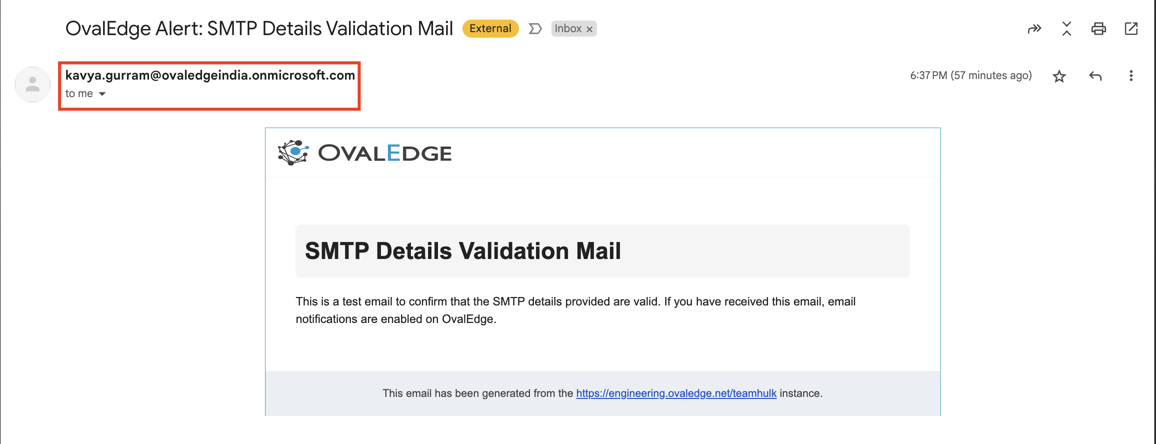
Testing the SMTP configuration is an important step to ensure that the SMTP server is configured correctly and to verify that email messages can be sent successfully. A 'Test' button is provided in the top-right corner.
- In System Settings > Notifications, click the Test button in the top-right corner.
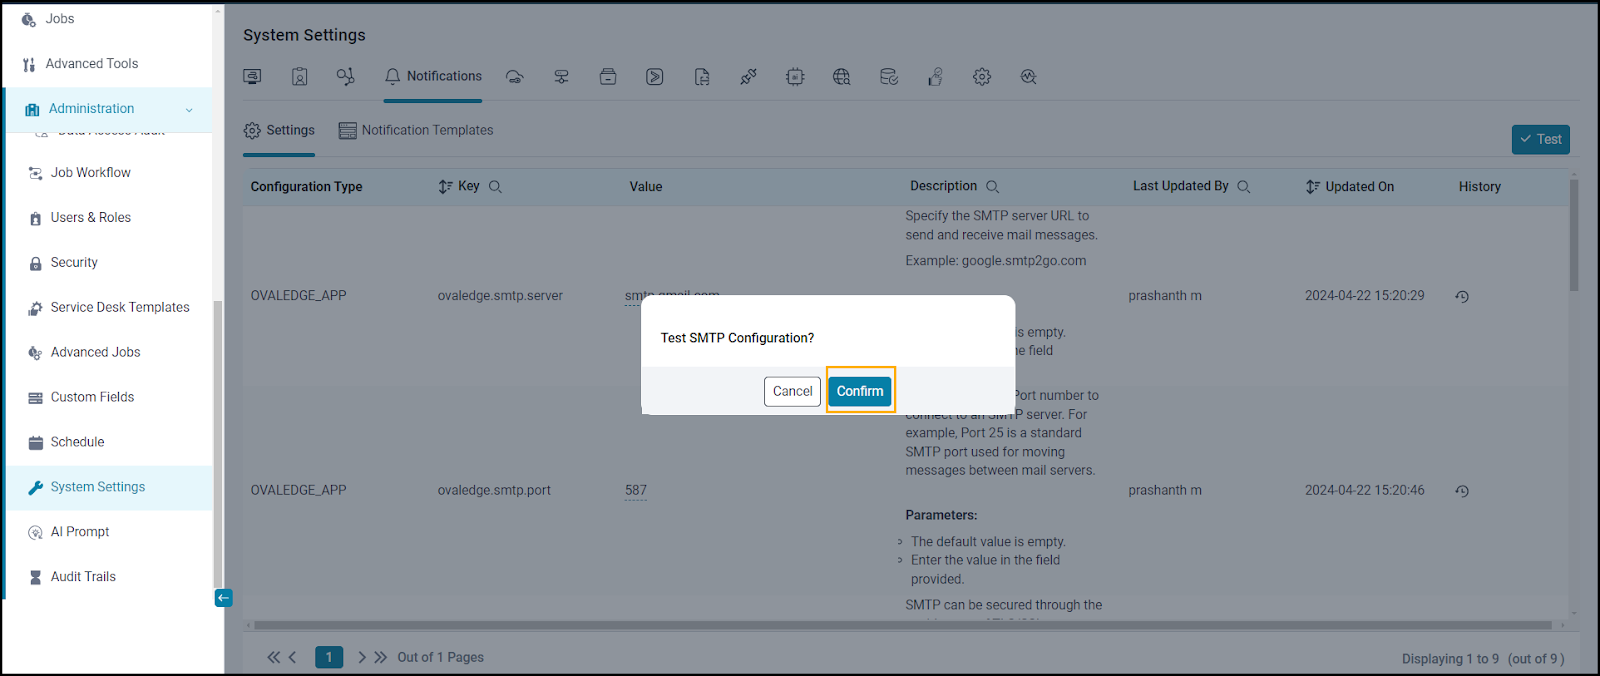
- Click on the Test SMTP option to view a confirmation pop-up window, and click the Confirm button. An email is sent to the admin user (who is configuring the settings).
- If any required field is missing, a prompt will indicate the missing information.
- Admin user receives test mail from service user in the format below.
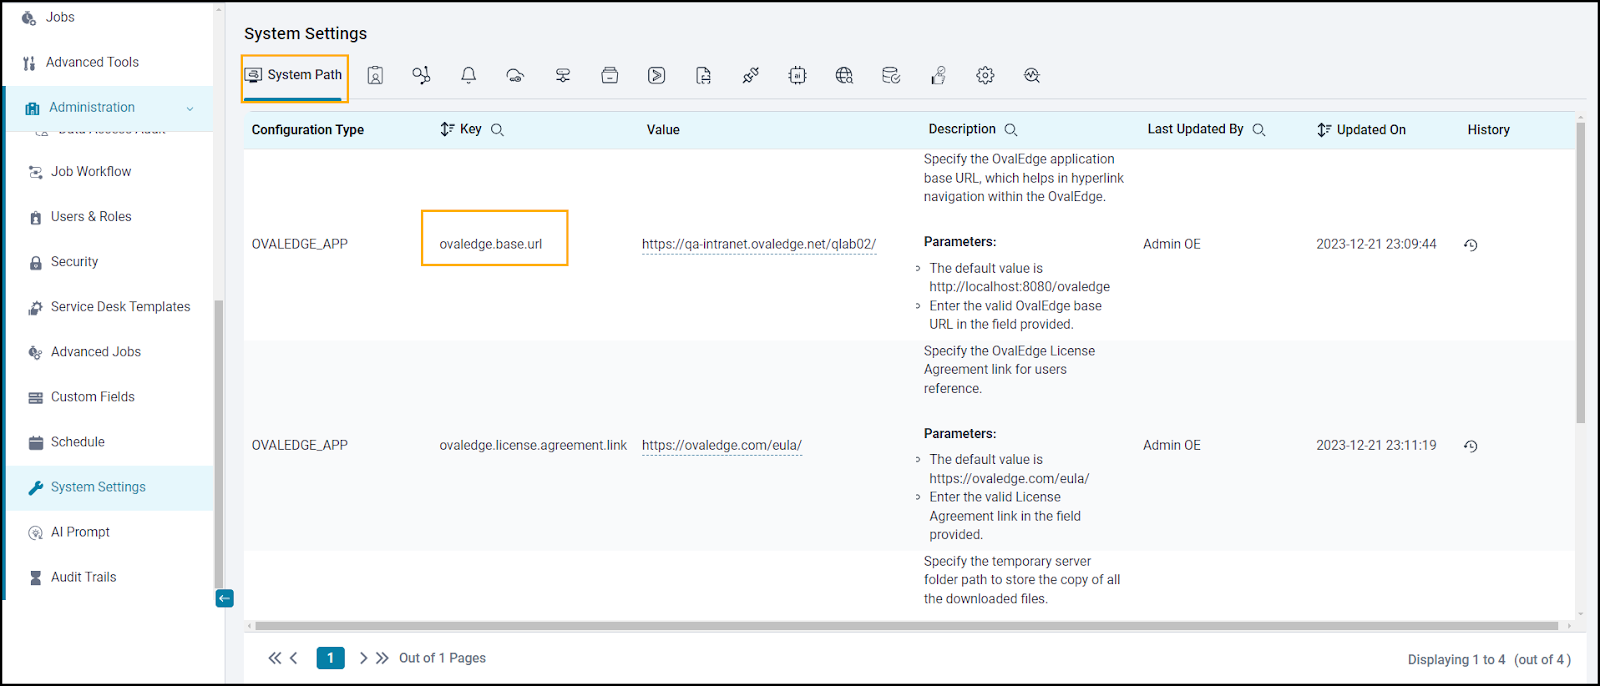
Note: Please ensure that the ovaledge.base.url of Administration > System Settings > System Path is updated with the OvalEdge instance URL.
Configuration History
A History icon is provided to view the list of changes made to the configuration. Click on the History icon, and a pop-up window or dialog box will appear that displays a list of changes made to the configuration. Each change ‘From’ and ‘To’ will be listed, showing the previous and current values of the configuration parameters, along with the date and time it was made and the user who made the change.
It allows users to track changes made to a configuration over time easily.
Important Note
Users must select the relevant checkboxes to receive Emails. To do so, click on My Resources (User icon) at the top right corner of the header banner, navigate to the My Profile > Notifications Settings section, and select the appropriate checkboxes, as shown in the image below.
The available alerts are related to the Data Catalog, Business Glossary, Projects, Service Desk, Governance Catalog, Data Quality, System Alert, Data Access Management, and Question Wall.
Copyright © 2024, OvalEdge LLC, Peachtree Corners, GA USA