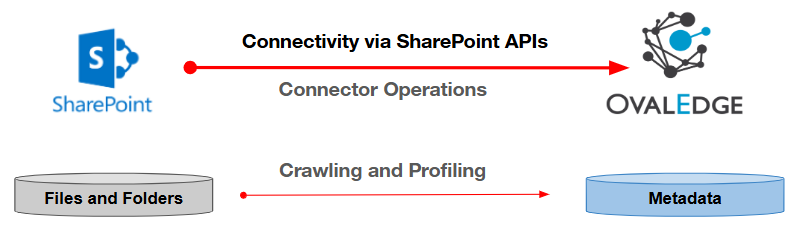
SharePoint is a file connector that retrieves files and folders from the SharePoint site. OvalEdge provides an interface to connect with SharePoint and perform all standard operations, such as crawling and profiling.
Overview
Connector Details
|
Connector Category |
File System |
|
OvalEdge Release Current Connector Version |
6.3.0.5 |
|
Connectivity [How OvalEdge connects to SharePoint] |
SharePoint APIs |
|
OvalEdge Releases Supported (Available from) |
Release6 Onwards |
Connector Features
| Cataloging of Metadata Objects | ✅ |
| Delta Crawl | ❌ |
| Profiling | ✅ |
| Query Sheet | N/A |
| Data Preview | ✅ |
| Auto Lineage | ❌ |
| Manual Lineage | ✅ |
| Authentication via Credential Manager | ✅ |
| Data Quality | ✅ |
| DAM (Data Access Management) | ❌ |
| Bridge | ✅ |
Getting Ready to Establish a Connection
Prerequisites
The following are the prerequisites required for establishing a connection:
Service Account User Permissions
Important: We recommend having a separate service account to establish a connection from OvalEdge to the data source with minimal permissions.
|
Operations |
Minimum Permissions |
|
Connection Validation |
Read Permission |
|
Crawler |
Read Permissions on the Folders or Files that need to be cataloged. |
Setup a Connection
Important: You must have the Connector Creator role to set up a connection in OvalEdge.
- Log into OvalEdge, go to Administration > Connectors, click + (New Connector), search for SharePoint, and complete the specific parameters.
Note: Fields marked with an asterisk (*) are mandatory for establishing a connection.Field Name
Description
Connector Type
By default, “SharePoint" is displayed as the selected connector type.
Connector Settings
Authentication*
OvalEdge supports the following three types of authentication for SharePoint:
- Online
- On-Premise-Basic
- On-Premise-Kerberos
Version*
Select the version from the dropdown list:
Options:
- SharePoint
- Graph
Note: This field is available when the Authentication mechanism is selected as "Online."
Credential Manager*
Select the desired credentials manager from the dropdown list. Relevant parameters will be displayed based on your selection.
Supported Credential Managers:
- OE Credential Manager
- HashiCorp Vault
- AWS Secrets Manager
- Azure Key Vault
License Add Ons
OvalEdge connectors have a default license add-on for data crawling and profiling.
- Select the checkbox for Data Quality Add-On to identify data quality issues using data quality rules and anomaly detection.
Connector Environment
Select the environment (Example: PROD, STG) configured for the connector.
Connector Name*
Enter a unique name for the SharePoint connection.
(Example: "SharePoint_Prod").
Share point Uri*
The SharePoint Uniform Resource Identifier (URI) is a unique address that identifies a specific resource within a SharePoint site or environment.
Example: if http://ovalege.sharepoint.com/sites/ovaledgesite/home.aspx is the URL that you are accessing, then http://ovalege.sharepoint.com is URI.
Site*
Enter the site name.
http://ovalege.sharepoint.com/sites/ovaledgesite/home.aspx
Username*
A unique identifier or name is used to identify a user within a system or application.
Note: This field is available when the Authentication mechanism is selected as "On-Premise-Basic” and On-Premise-Kerberos.”
Password*
A secret combination of characters that confirms a user's identity and provides access to a system or application.
Note: This field is available when the Authentication mechanism is selected as "On-Premise-Basic” and On-Premise-Kerberos.”
Domain
Enter the domain.
Note: This field is available when the Authentication mechanism is selected as “On-Premise-Kerberos.”
Client Id*
A unique identifier is assigned to a client application for authentication purposes.
For instructions on generating a Client Id, click here.
Note: This field is available when the Authentication mechanism is selected as Online.
Client Secret*
A confidential key is used to authenticate the client application.
For instructions on generating a Client Id, click here.
Note: This field is available when the Authentication mechanism is selected as Online.
Title
The title is associated with the client application.
Note: This field is available when the Authentication mechanism is selected as Online and Version as SharePoint.
App Domain
The domain or URL where the client application is hosted.
Note: This field is available when the Authentication mechanism is selected as Online and Version as SharePoint.
Redirect URI
The destination URL where the user is redirected after authentication.
Note: This field is available when the Authentication mechanism is selected as Online and Version as SharePoint.
Tenant Id*
Enter Tenant Id.
For instructions on generating a Client Id, click here.
Note: This field is available when the Authentication mechanism is selected as Online and Version as "Graph."
Default Governance Roles
Default Governance Roles*
Select the appropriate users or teams for each governance role from the dropdown list. All users and teams configured in OvalEdge Security are displayed for selection.
Admin Roles
Admin Roles*
Select one or more users from the dropdown list for Integration Admin and Security and Governance Admin. All users configured in OvalEdge Security are available for selection.
No Of Archive Objects*
It indicates the number of recent metadata changes to a dataset at the source. By default, it is off. You can enable it by toggling the Archive button and specifying the number of objects to archive.
Example: Setting it to 4 retrieves the last four changes, shown in the 'version' column of the 'Metadata Changes' module.
Bridge
Select Bridge*
If applicable, select the bridge from the dropdown list.
The drop-down list displays all active bridges configured in OvalEdge. These bridges enable communication between data sources and OvalEdge without altering firewall rules.
- After entering all connection details, you can perform the following actions:
- Click Validate to verify the connection.
- Click Save to store the connection for future use.
- Click Save & Configure to apply additional settings before saving.
- The saved connection will appear on the Connectors home page.
Connectivity Troubleshooting
If incorrect parameters are provided, you may encounter error messages. To resolve these issues, ensure all input is correct. If problems persist, contact your assigned OvalEdge support team.
|
S.No. |
Error Description |
Resolution |
|
1 |
Permission Denied |
You get this error message if the access token details are invalid. |
|
2 |
Internal Server Error |
It will respond with a 500 Internal Server Error. |
Manage Connector Operations
Crawl/Profile
Important: You must have the Integration Admin role in OvalEdge for crawl/profile operations.
- Once the user configures the desired connector settings, click the Crawl/Profile button to initiate the cataloging process of the folder/file. A message will appear confirming the successful submission to the catalog folder/file job.
- After completing the job, all the folders/files will be cataloged and displayed in the File Manager. Select the specific folder(s) or file(s) from the list, and then select the "Catalog Files/Folders" option from the Nine Dots menu to add them to the Data Catalog.
Other Operations
The Connectors page in OvalEdge provides a centralized view of all configured connectors, including their health status.
Managing connectors includes:
- Connectors Health: Displays performance with a green (active) or red (inactive) icon, helping monitor data flow and address issues early.
- Viewing: Shows connector details (e.g., File Folders, Files, File Columns) via the View icon.
Nine Dots Menu Options:
You can view, edit, validate, and delete connectors using the Nine Dots menu.
- Edit Connector: Update and revalidate the data source.
- Validate Connector: Check the connection's integrity.
- Settings: Modify connector settings.
- Crawler: Configure metadata that needs to be extracted.
- Access Instructions: Specify how data can be accessed as a note.
- Business Glossary Settings: Manage term associations at the connector level.
- Delete Connector: Remove connectors with confirmation.
Appendix A
Generating Client Secret, Client ID, and Tenant ID
Important: You must have Azure Administrator access to generate Client Secret, Client ID, and Tenenat ID.
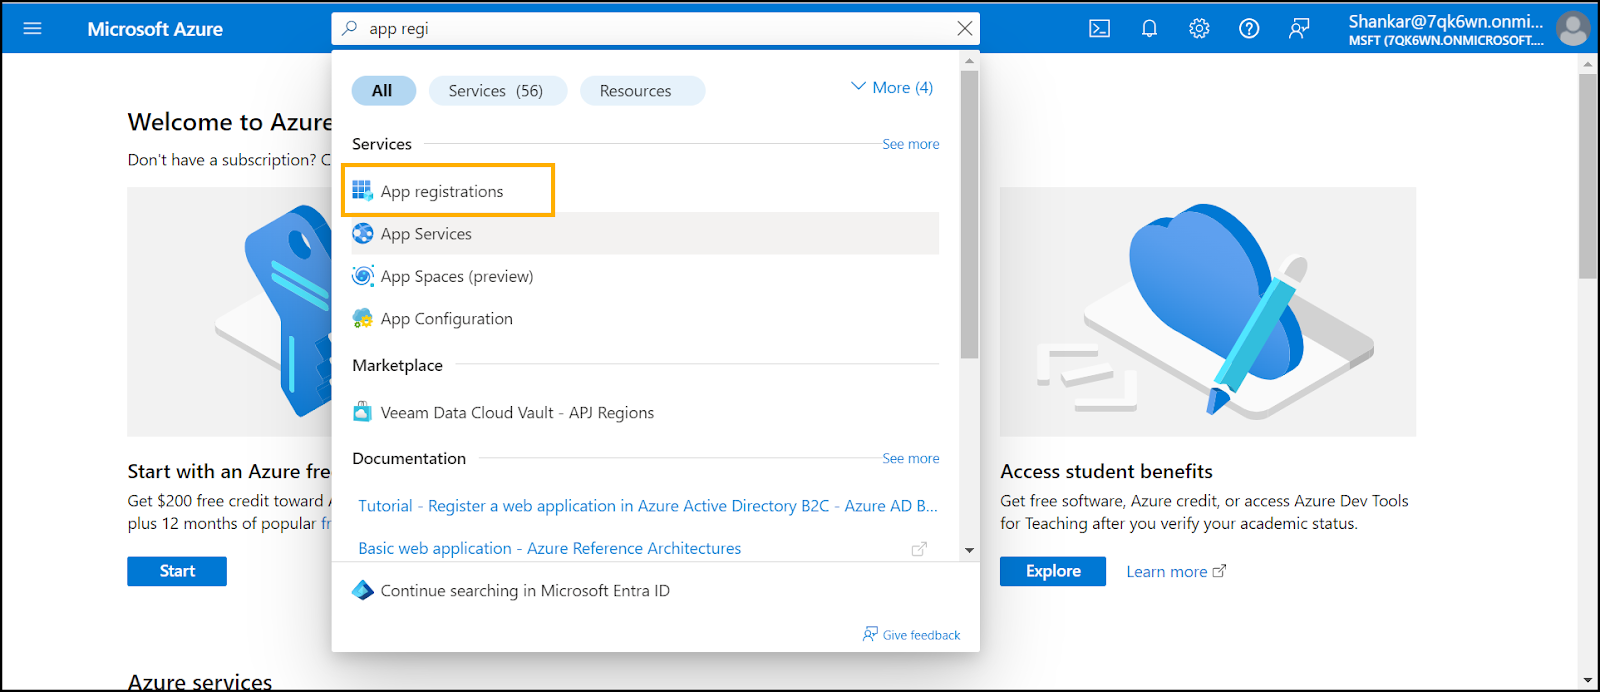
- Log in to the Azure portal: https://portal.azure.com/#home.
- In the search bar, Search for App registrations.
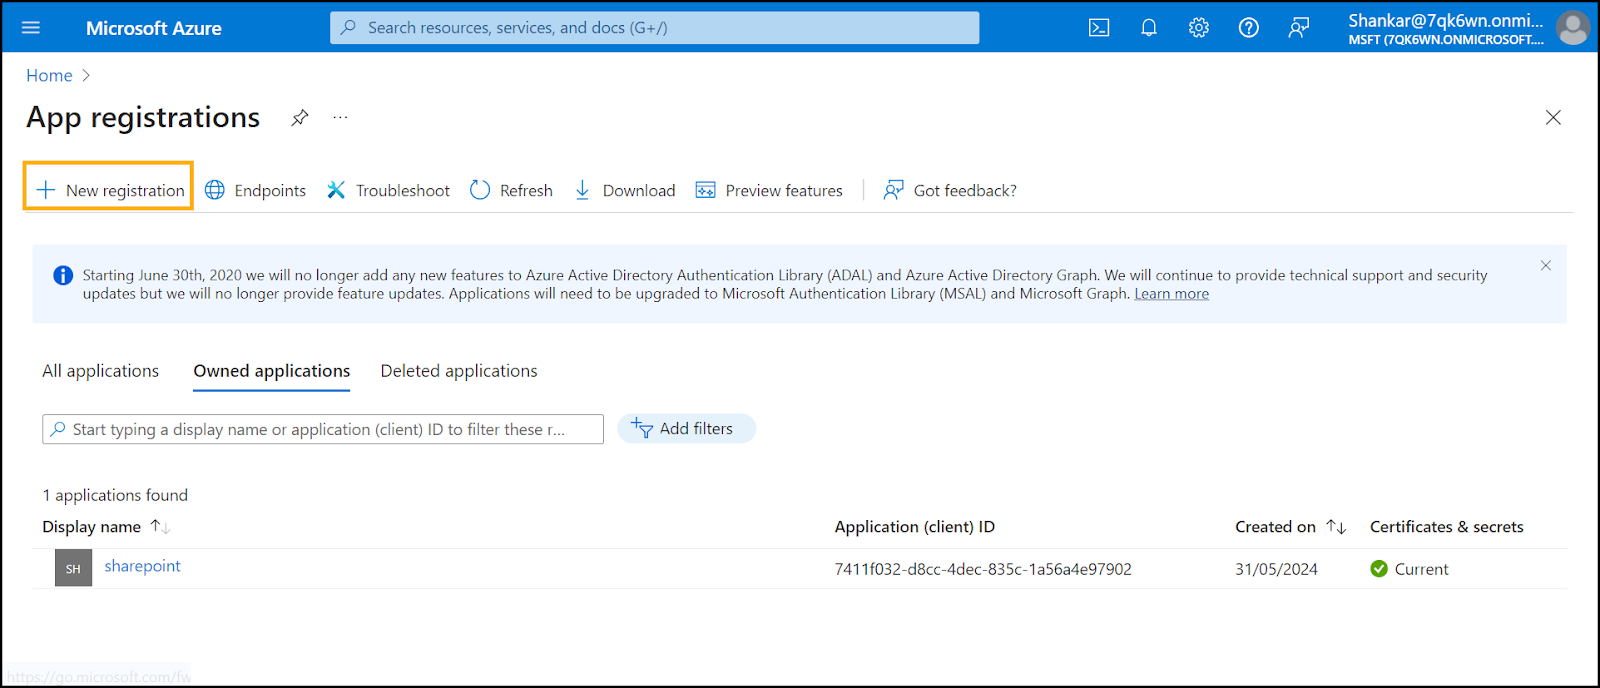
- Click New registration.
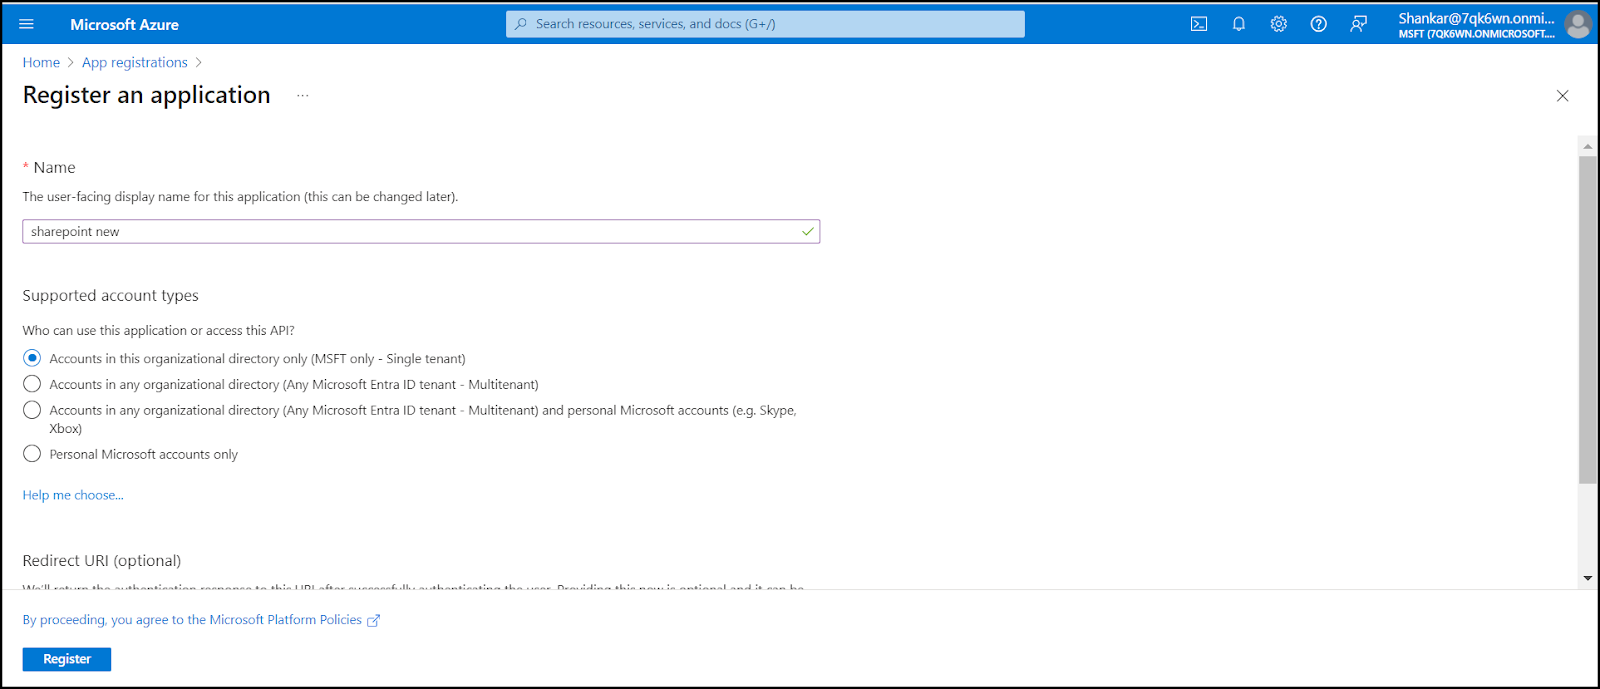
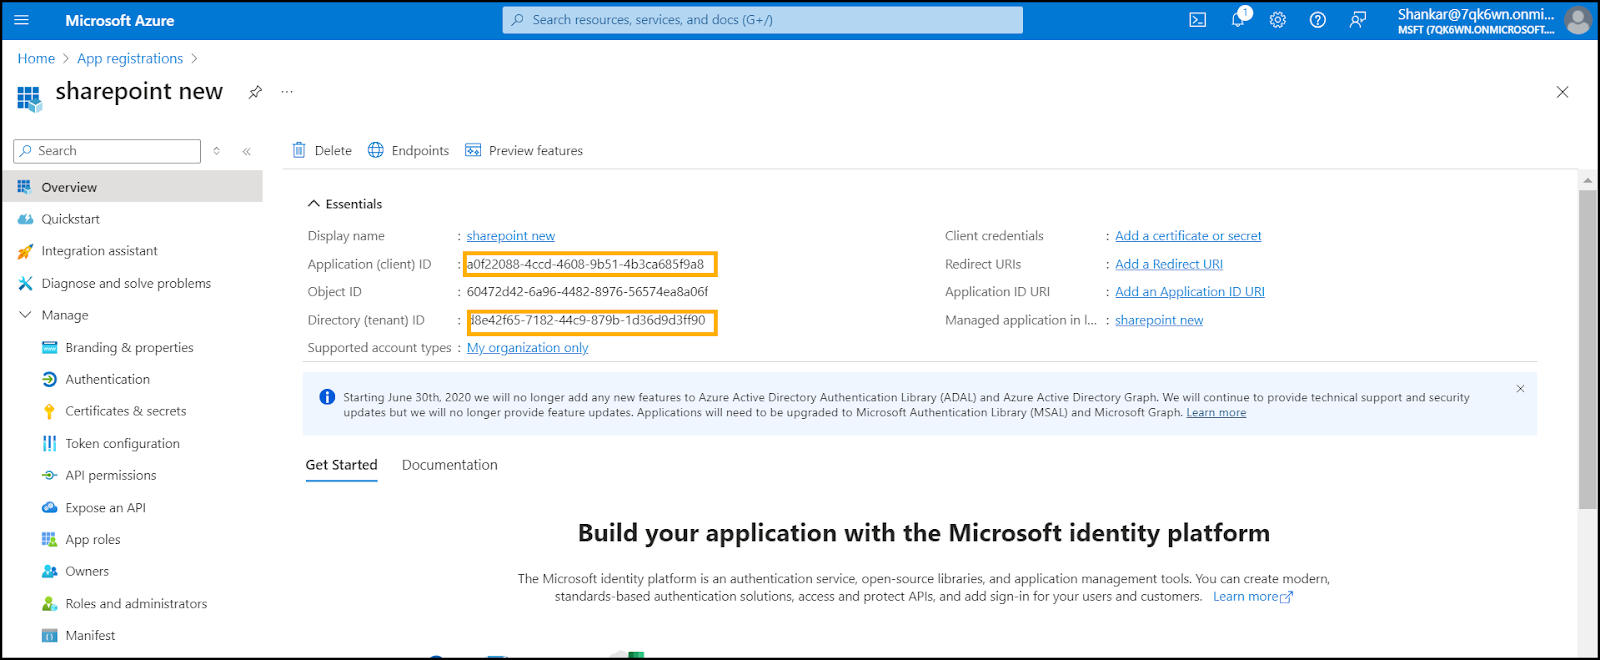
- Fill in the details as shown on the screen, then click Register.
- Upon registration, a client ID and tenant ID will be generated automatically.
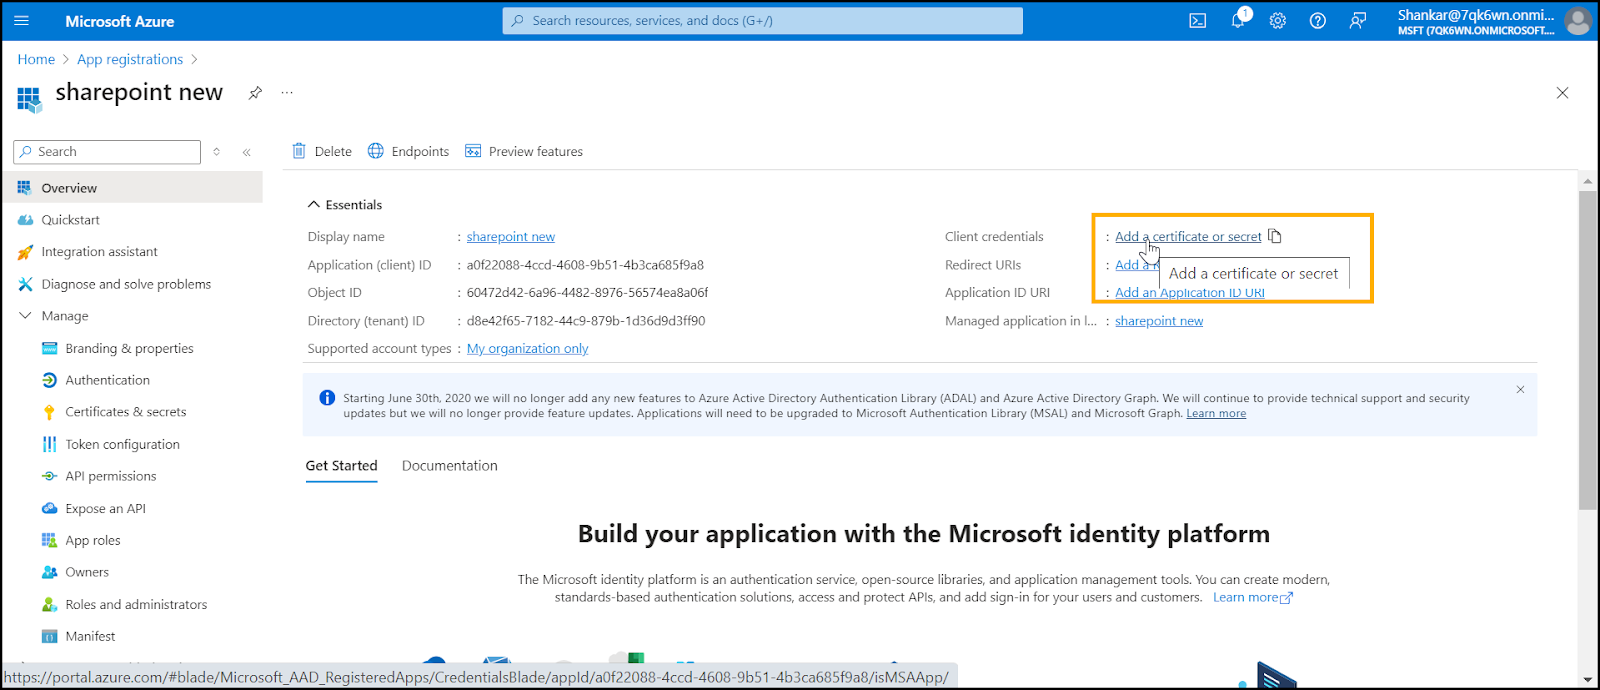
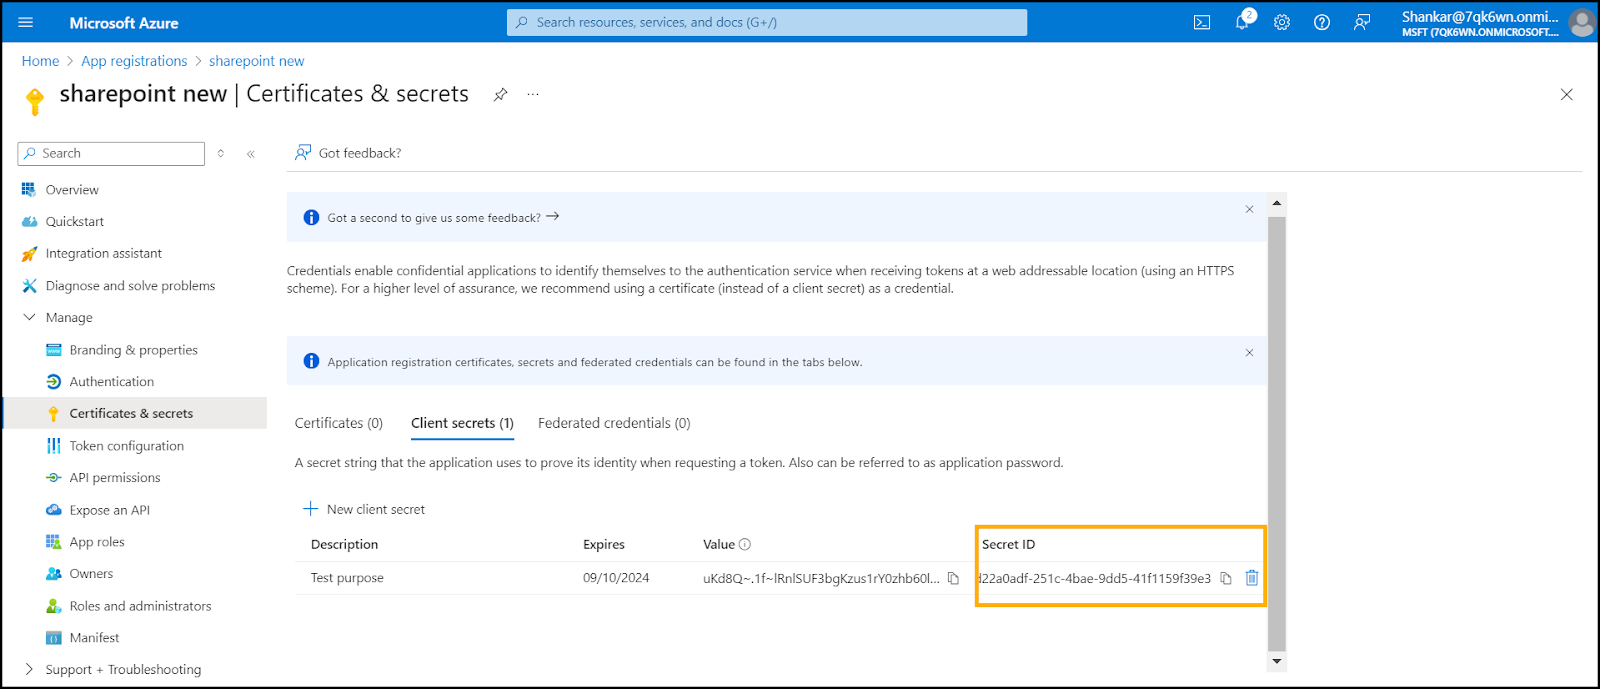
- Now, we need to generate client secrets. To generate the client secret, click on the secret as shown below:
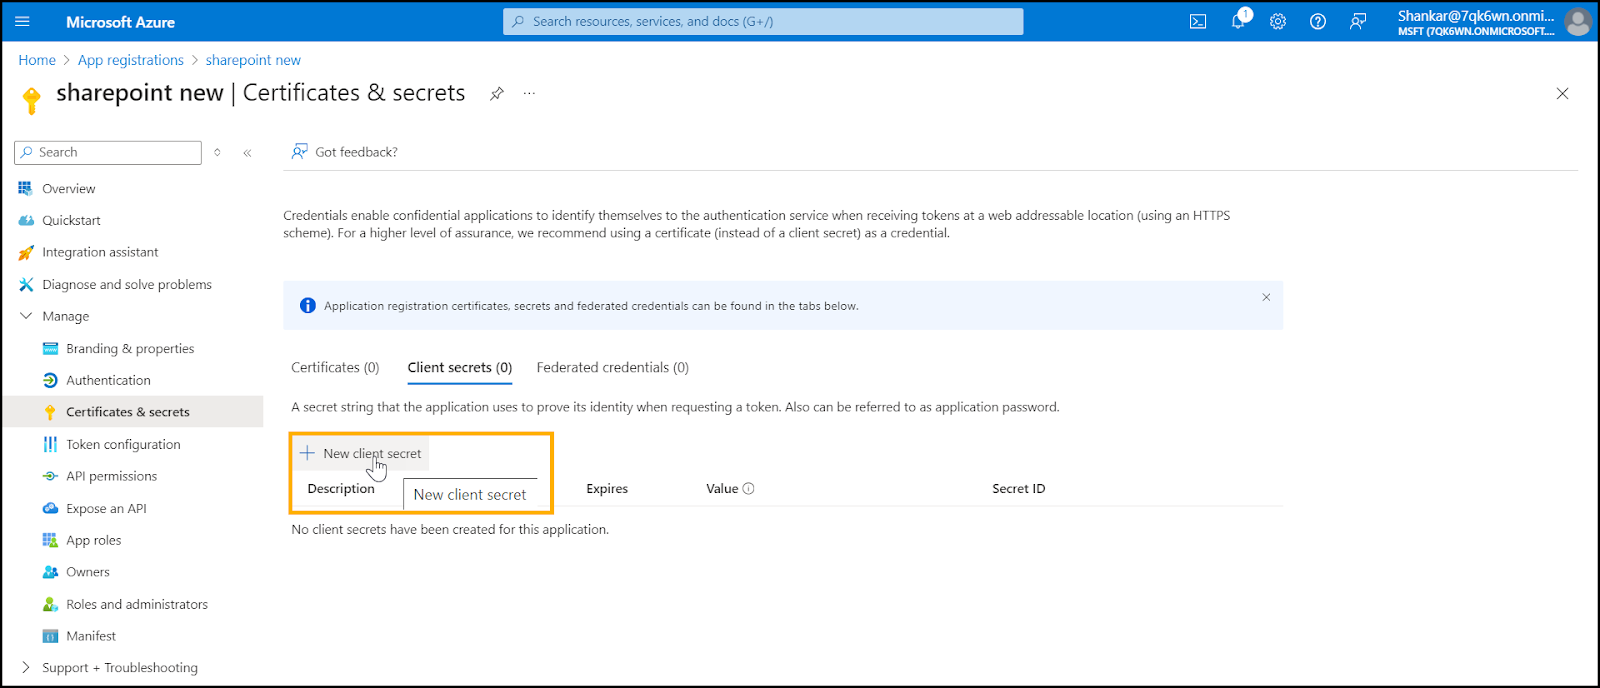
- Click New client secret.
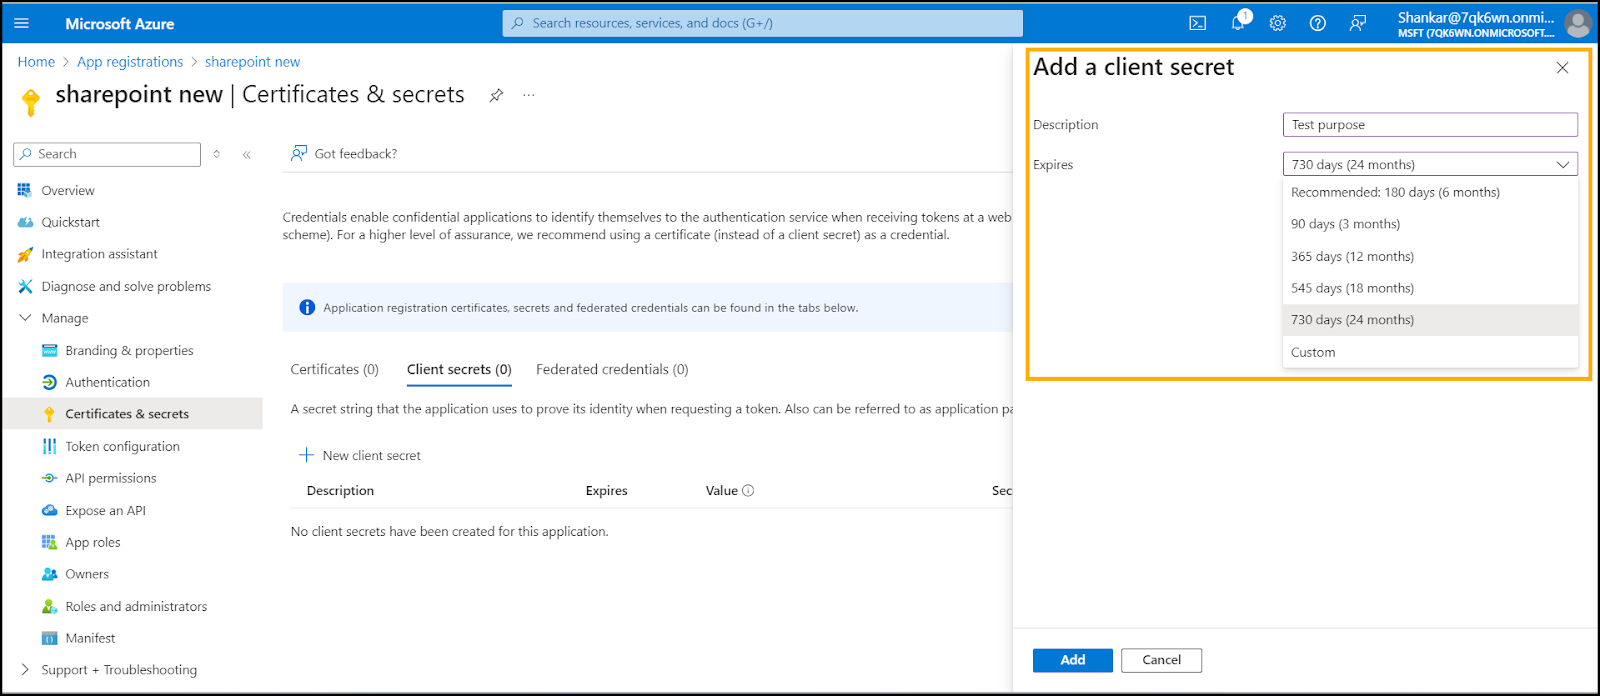
- Add the details as shown below, then click Add.
- A secret ID will be generated. Copy the code.
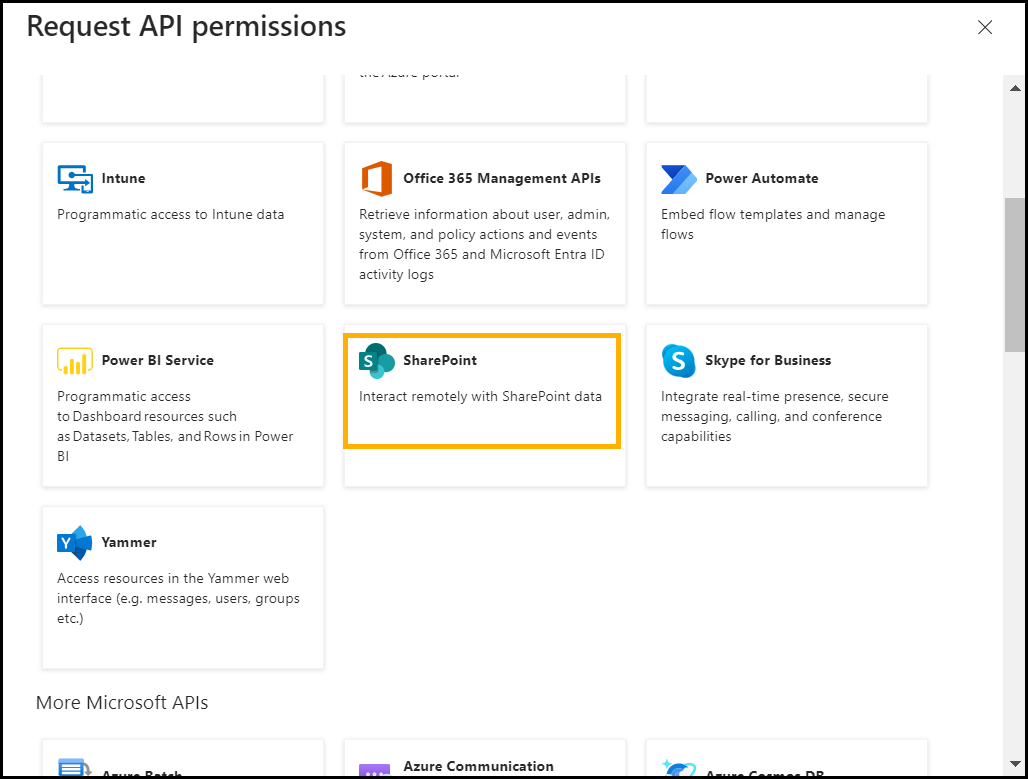
- Once the client secret has been generated, click API permissions.
- Click on Add a permission.
- Click Sharepoint.
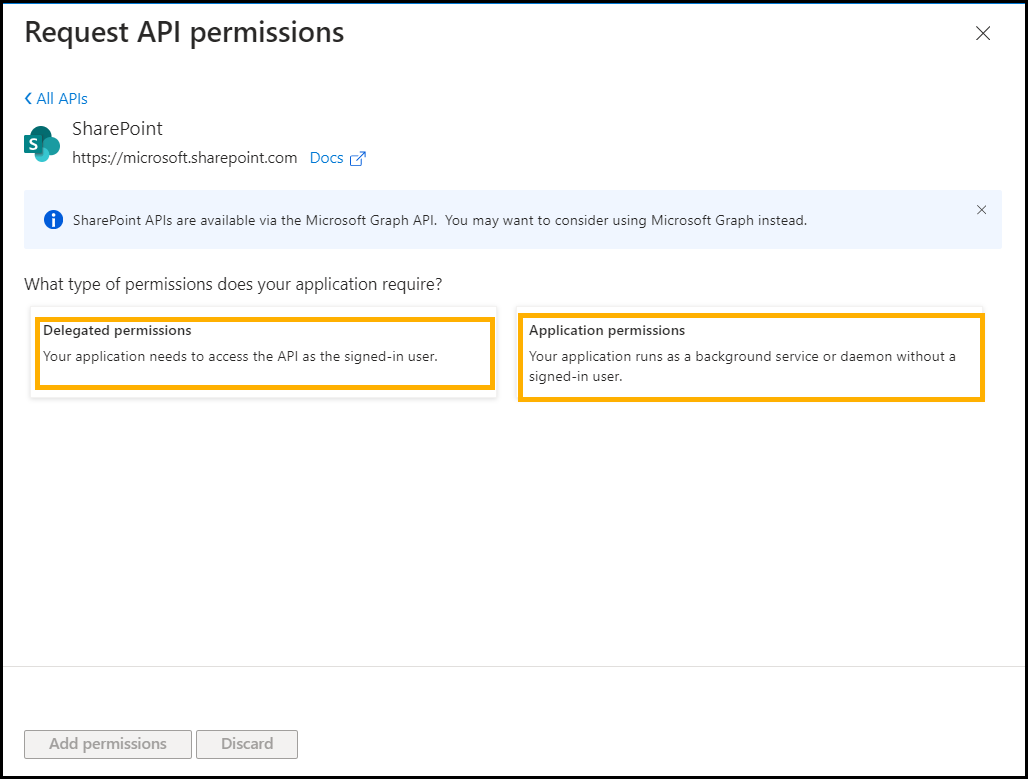
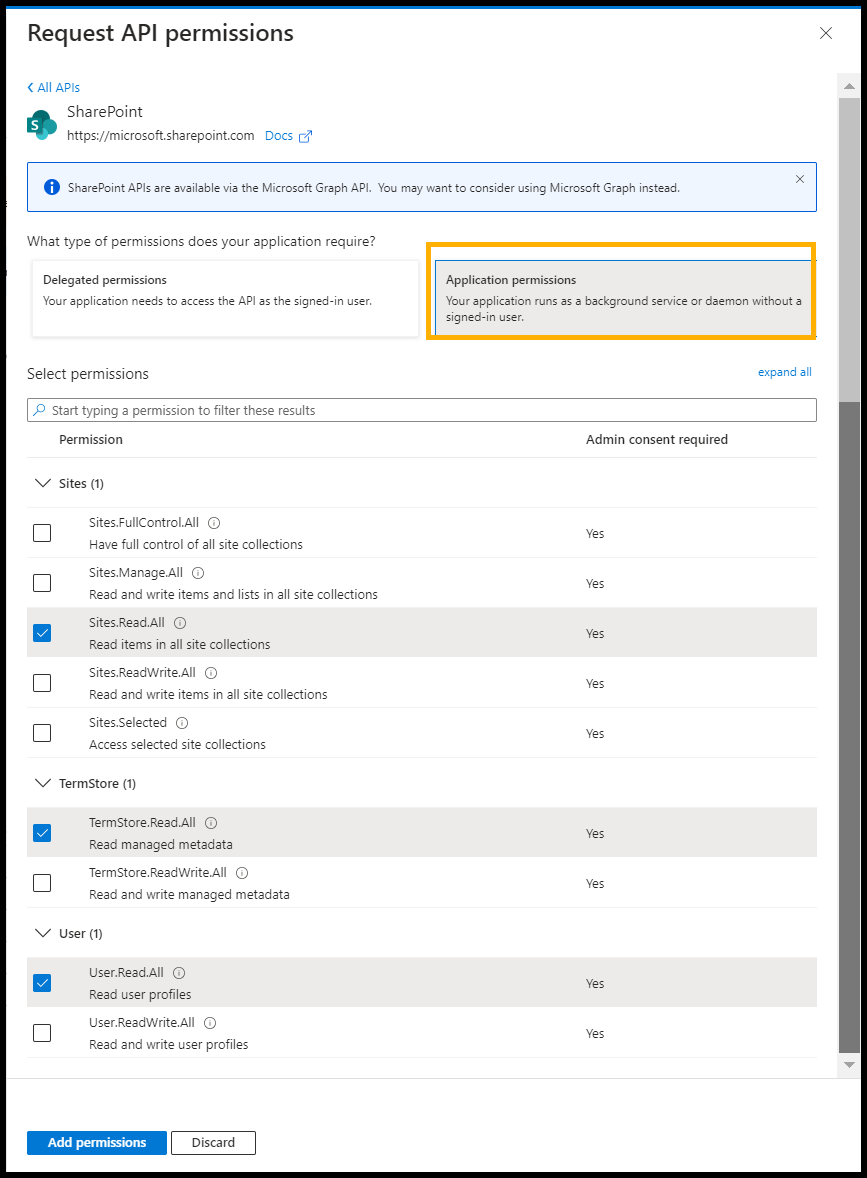
- Check the following permissions, which are mandatory.
- In the Application permissions, Admin can give any permission to the user based on their requirement. Then click on Add Permissions.
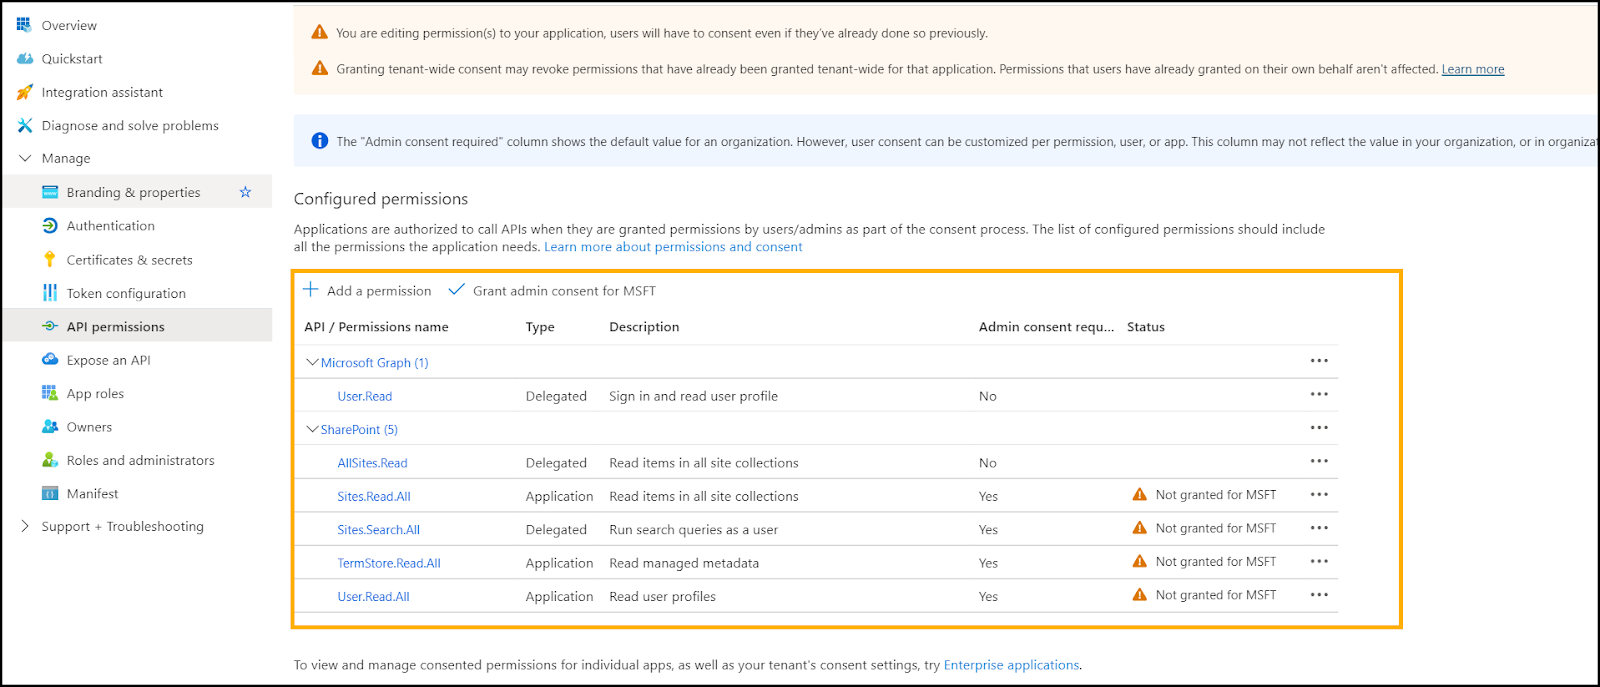
- All the above-selected permissions will be displayed in the screenshot below.
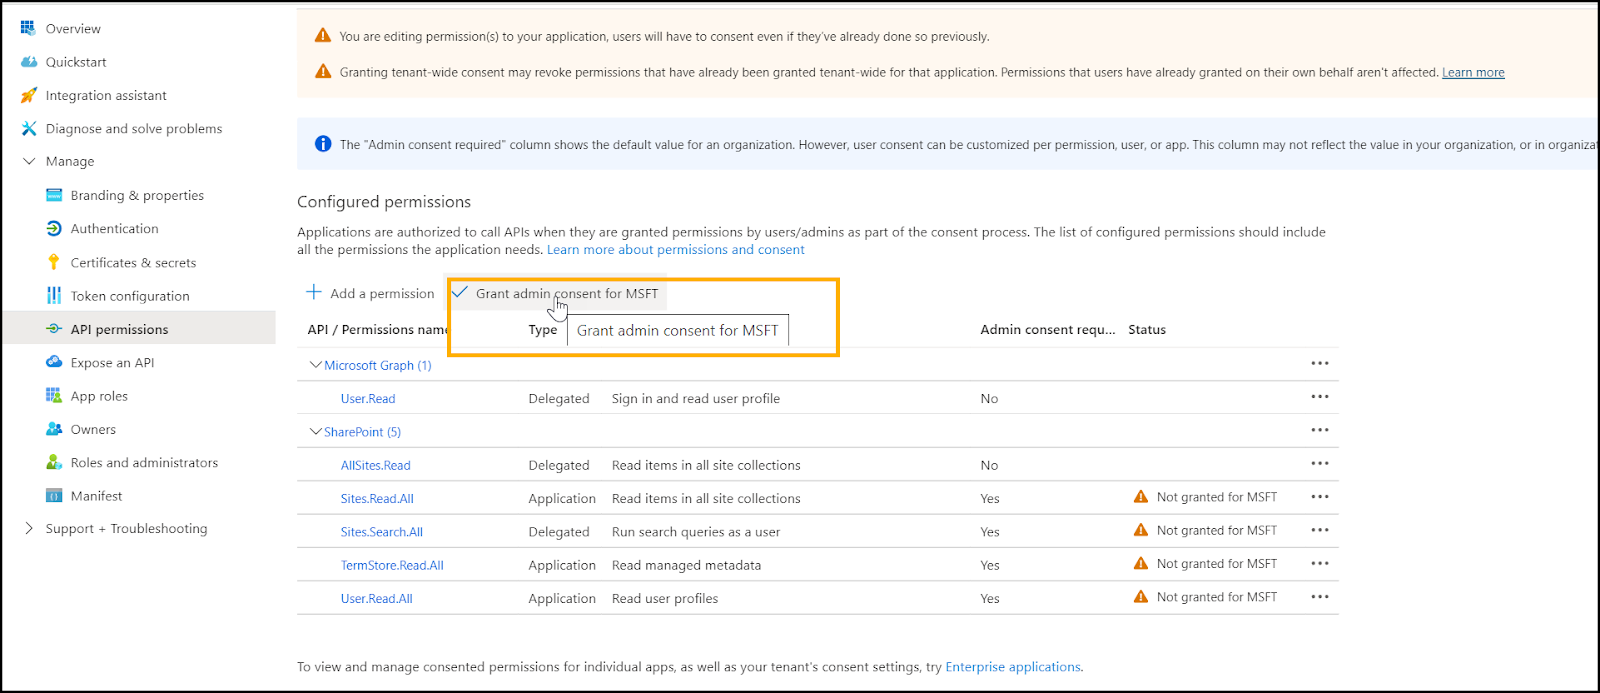
- Permissions need to be granted for all the added permissions.
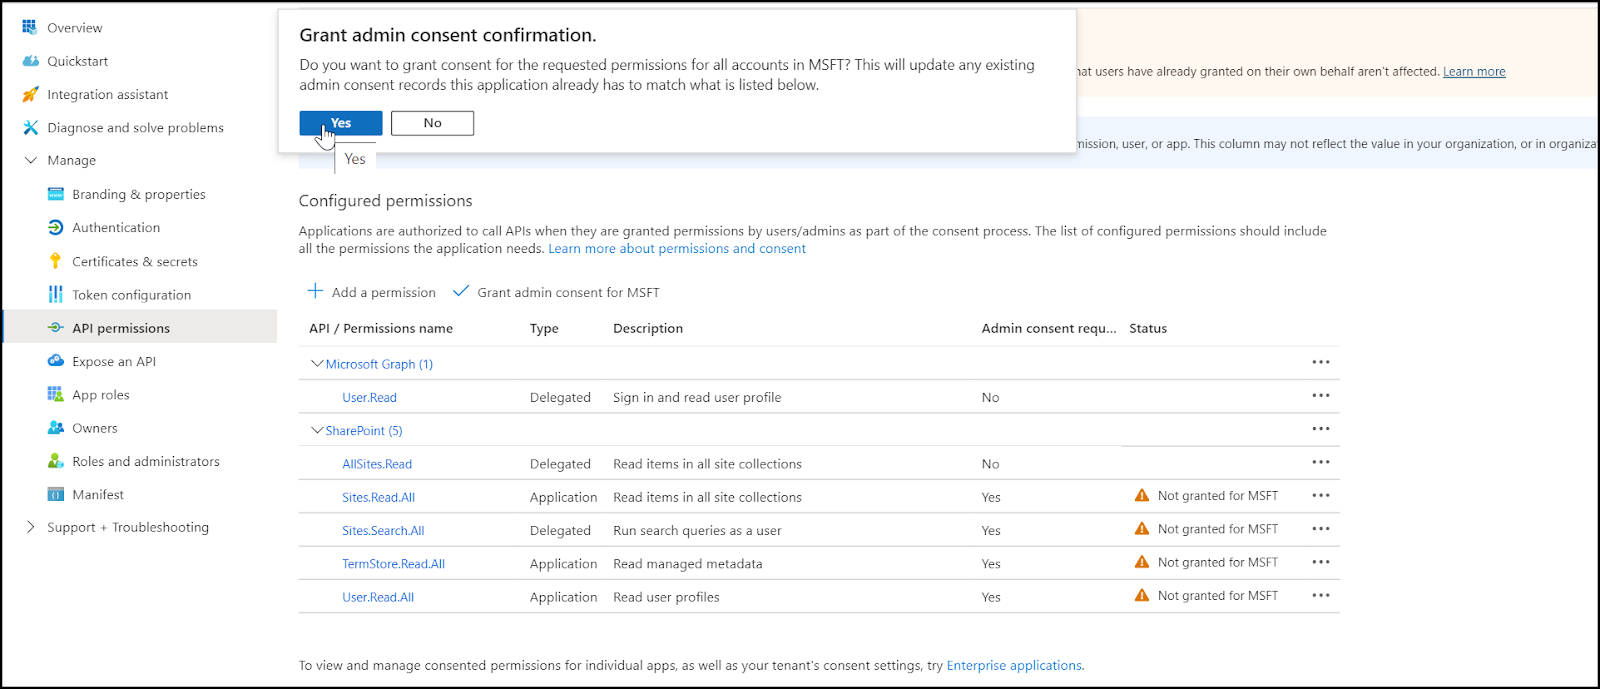
- A pop-up will appear; click Yes. Permissions will be granted.
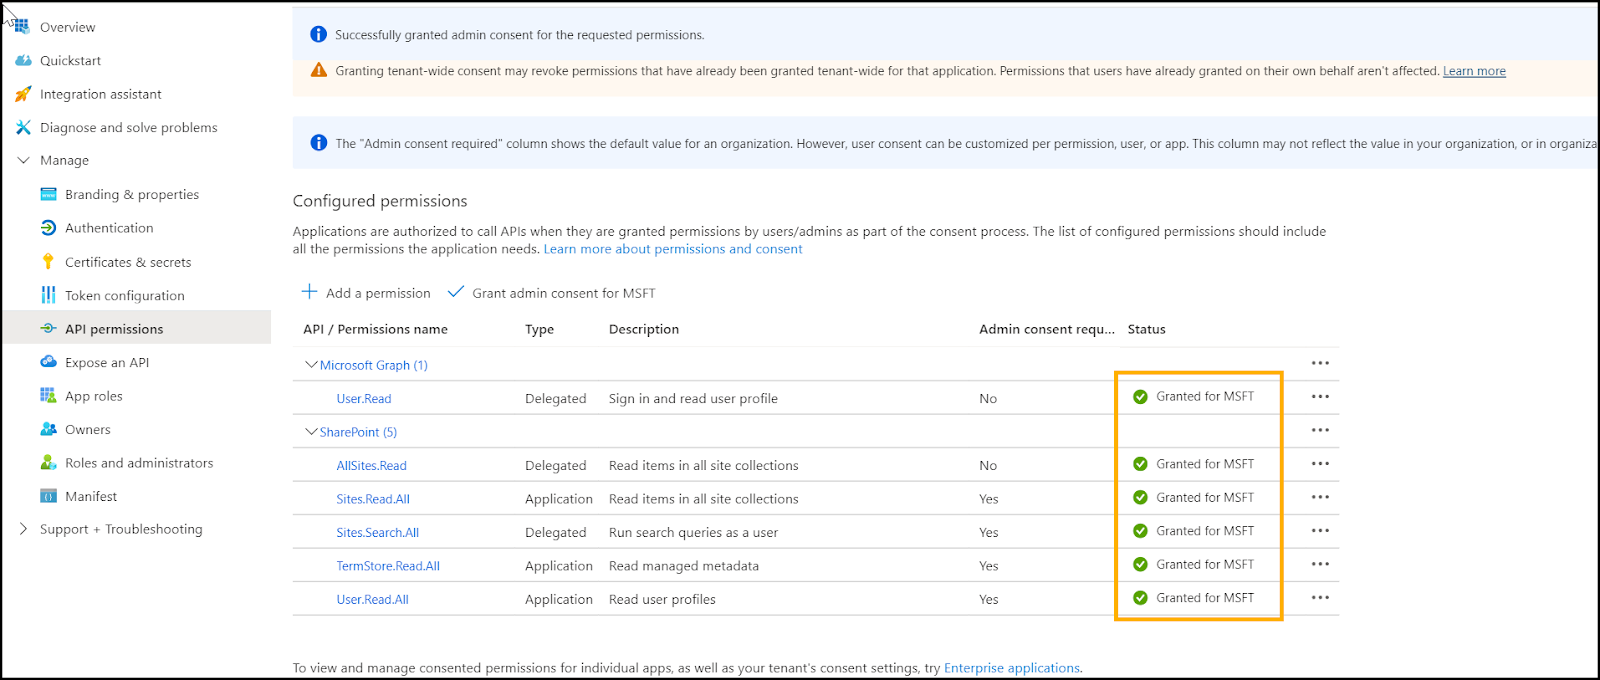
- All the granted permissions can be viewed as shown below.


Copyright © 2025, OvalEdge LLC, Peachtree Corners GA USA