Article Summary
This article provides an in-depth exploration of OvalEdge's Service Desk, focusing on its purpose and the various methods available for raising and efficiently managing service requests. By examining these key aspects, readers will gain a comprehensive understanding of the advanced functionality offered by OvalEdge's Service Desk.
Introduction
The Service Desk functions as a robust ticket management system, serving as the interface between individuals requiring specific access controls or permissions and the designated authorities responsible for granting them. Through streamlined workflows, a wide range of requests can be efficiently handled.
Within the Service Desk, users can track and monitor service requests at every stage of their lifecycle. From submission to approval or rejection, users stay informed about the progress and status of their requests.
Access to the Service Desk is inclusive and available to all users, regardless of their role or privileges. Whether an administrator or not, users can leverage the service desk to submit requests and seek the necessary permissions. Administrators, however, have the ability to control the visibility of service requests under the "All Requests" tab, granting them greater flexibility and control over Service Desk operation by restricting specific roles from viewing these requests.
Key Features of the Service Desk
- Service Request Creation: Users with limited permissions for specific data objects can utilize the Service Desk to raise service requests. This provides users with increased control over the management of these data objects, allowing them to initiate various service requests such as access requests, content changes, or reporting data quality issues for specific data assets. By submitting these requests, users ensure prompt resolution of their data requirements.
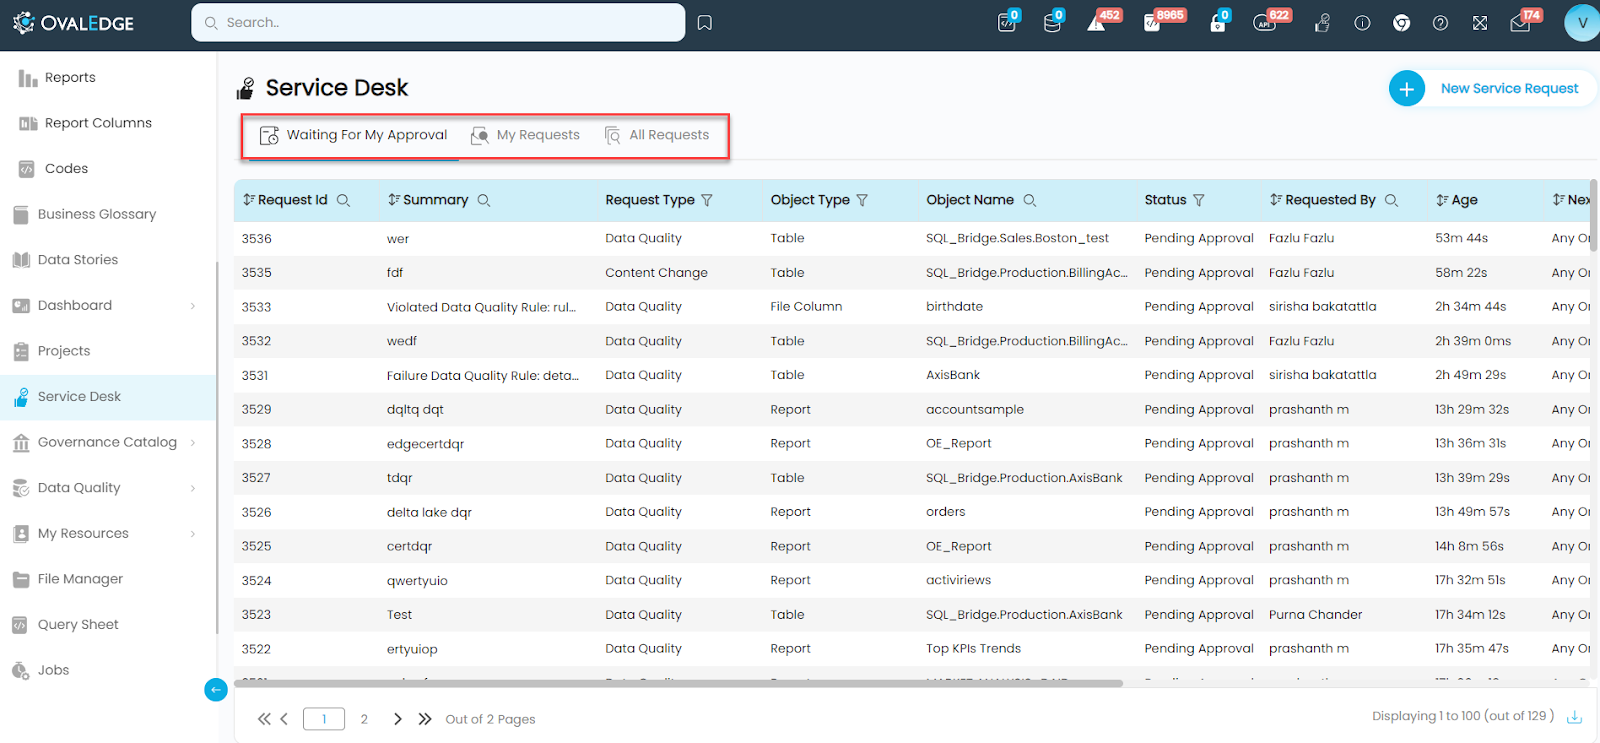
- Viewing Created Service Request Tickets: Users can conveniently access and track their service requests through dedicated tabs within the Service Desk, including:
- Waiting for My Approval: This tab displays requests requiring approval from designated authority figures, enabling approvers to review and authorize the requested actions.
- My Created Requests: This tab provides an overview of service requests initiated by the user, along with their respective statuses.
- All Requests: This tab displays all raised requests that have been explicitly approved for the user, allowing for a comprehensive overview of the requests’ lifecycle.
- Servicing/Addressing Service Requests: Authorized approvers responsible for handling service requests meticulously review mandatory fields within the ticket. After validating the information, they either advance the ticket to the next stage of approval or reject it.
By Utilizing these features, the Service Desk enables users to raise service requests, track their progress, and exert greater control over the data objects they are authorized to access.
Exploring Multiple Ways to Raise a Service Request
Raising a service request is flexible and convenient, addressing various service-related concerns. The subsequent methods can be utilized to initiate service requests:
- Raising a Service Request from the Service Desk: Users can initiate a service request for a data object or application-related issues. By navigating to the Service Request tab via the left panel menu of the OvalEdge application and selecting "New Service Request," a pop-up window will appear with different request options. Users can choose the request that aligns with their concern and proceed to raise the service request. This streamlined process ensures timely and efficient resolution of issues.
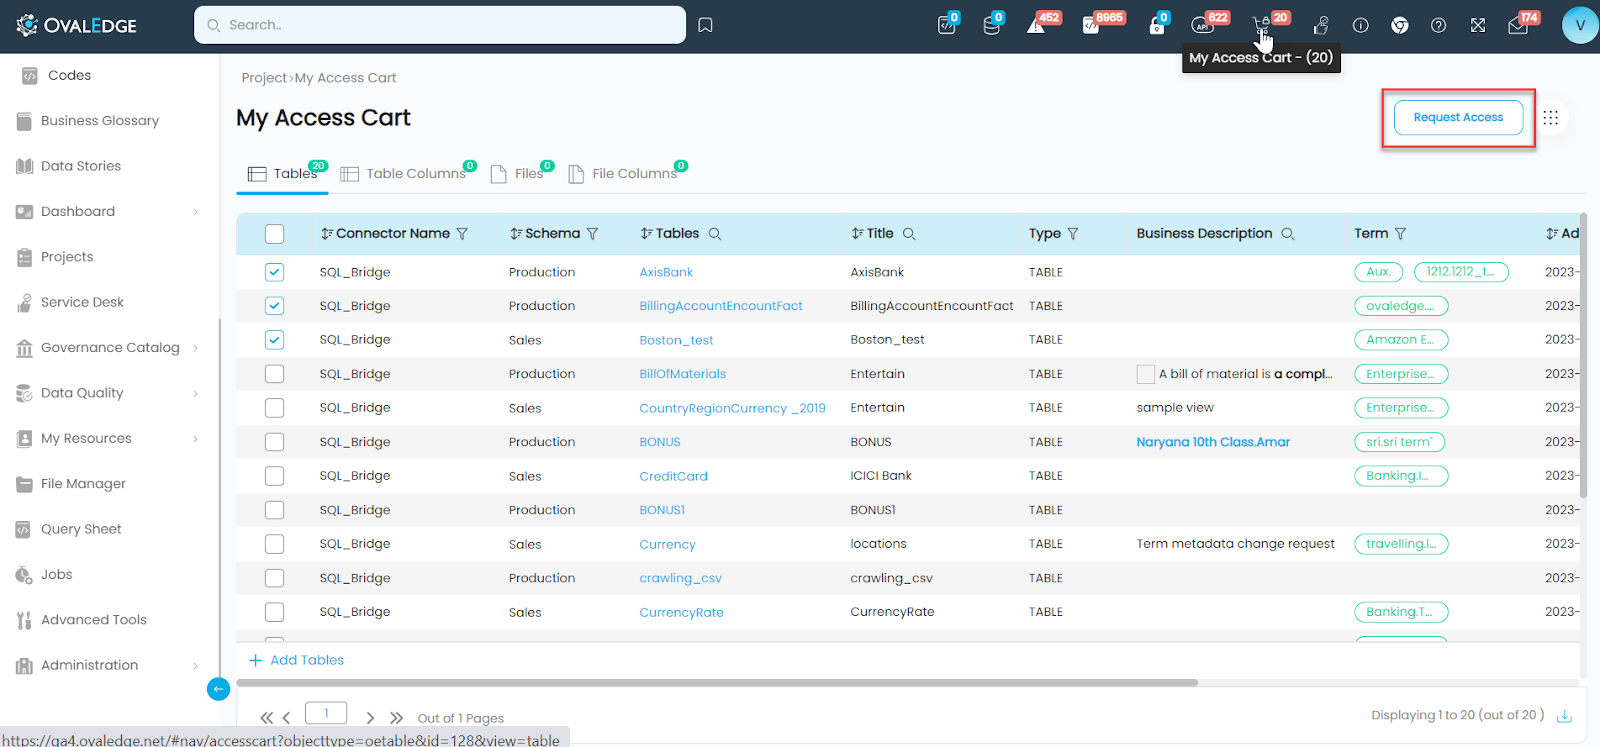
- Raising Bulk Service Requests from My Access Cart: The Access Cart feature simplifies the process of requesting access to multiple data objects simultaneously. Users can streamline the process by adding multiple data objects to the cart and requesting access in bulk based on grouping logic, such as similar approvers or object types. Access Cart can be accessed via the Projects section of the left panel menu, with My Access Cart set as the default project. Alternatively, you can access My Access Cart by clicking on the cart icon in the header menu. This feature saves time and eliminates the need for multiple access requests.
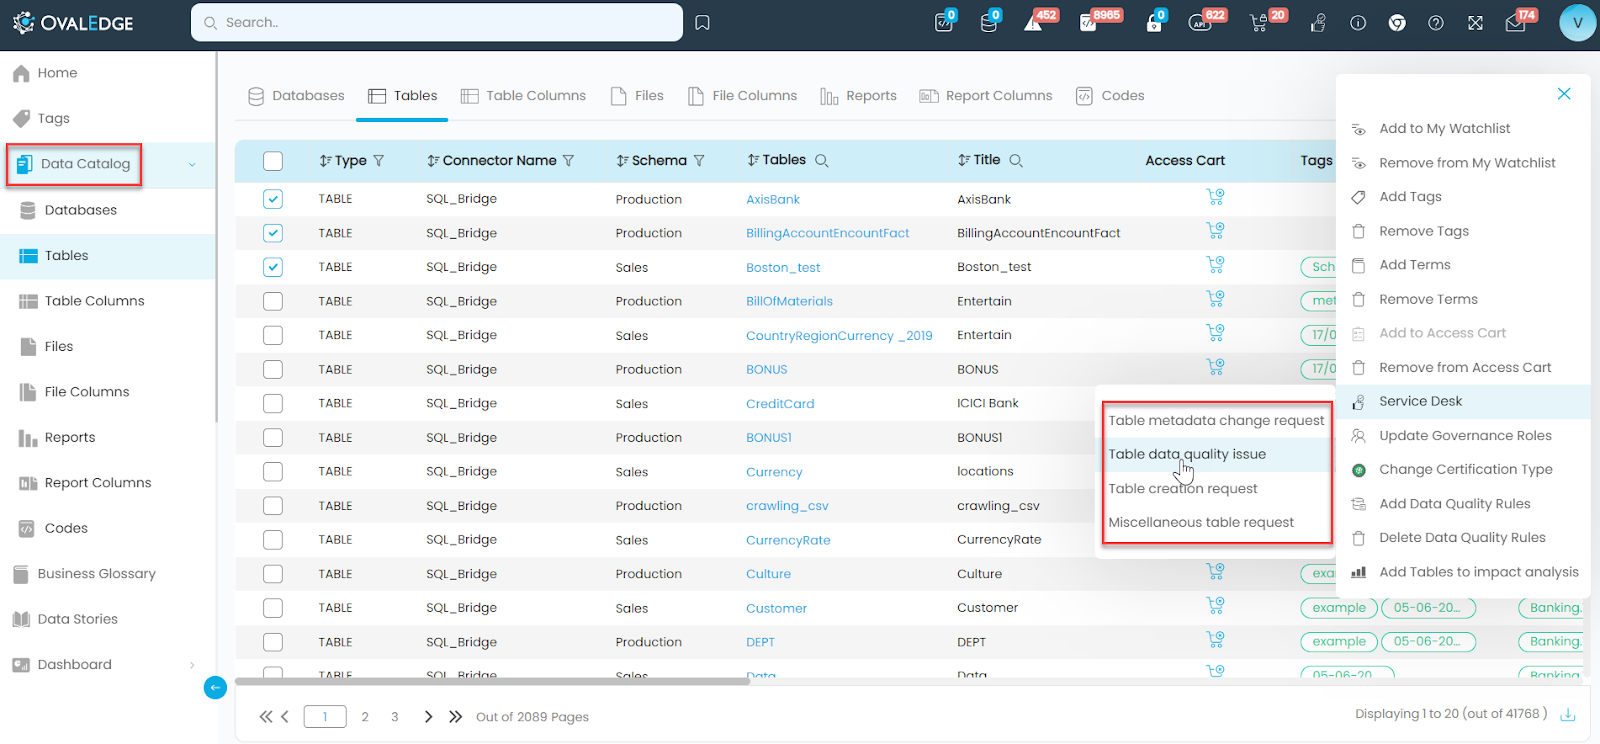
- Raising a Service Request from the Data Catalog: Users can raise service requests, such as access or content changes, directly from the Data Catalog. By selecting the desired data objects, clicking on the nine-dot menu, and accessing the Service Desk section, users can conveniently raise multiple service requests simultaneously, ensuring quick and efficient support.
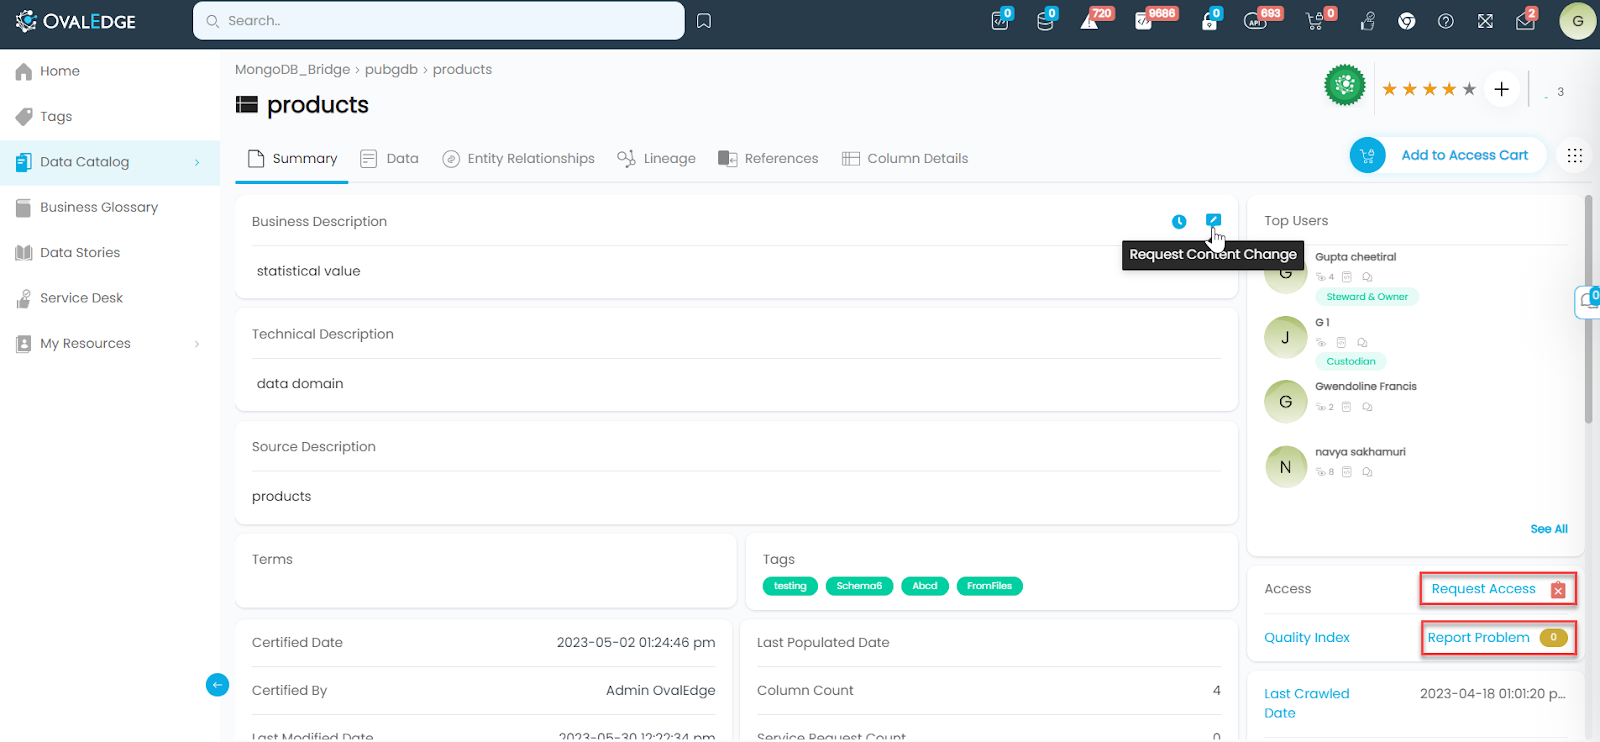
- Raising a Service Request from a Data Object: Users have the convenience of raising service requests for various purposes on the OvalEdge platform. By clicking on the nine-dot menu and selecting "Service Request," users are directed to the data object page, where they can provide the necessary details for their request. Whether requesting access, content changes, reporting data quality issues, or raising miscellaneous or creation requests, users can easily communicate their service-related concerns.
Specific access requests can be made by selecting the "Access Request" option visible on the summary page.
For content change requests, relevant sections like business descriptions, technical descriptions, tags, terms, or custom fields can be utilized to initiate the request.
If data quality problems are encountered, users can use the "Report Problem" option on the object page to raise a data quality request and provide relevant details.
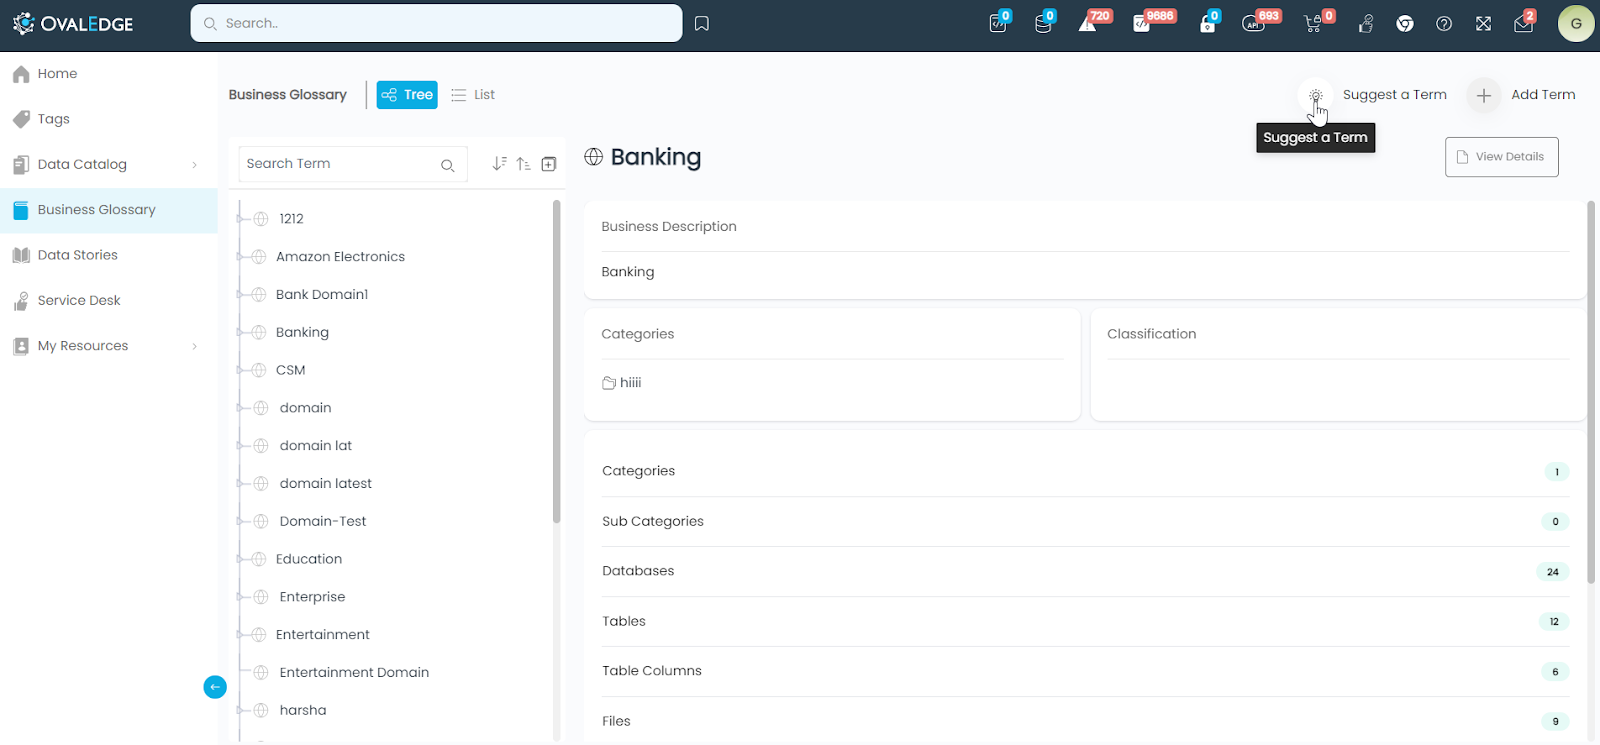
The Service Desk ensures a smooth experience, allowing users to raise service requests or address access-related issues. - Raising a Service Request from the Business Glossary: The business glossary provides users with the ability to raise various service requests to meet their needs, which can include term suggestions. Once a term is suggested and approved, it is automatically created. Users can also raise term approval or metadata change requests for existing terms requiring modification or approval. This ensures the accuracy and relevance of glossary terms.
Additionally, users can raise data quality requests to address and rectify issues related to specific terms. Miscellaneous requests or specific needs related to the business glossary can also be raised, actively involving users in maintaining and improving glossary quality and usability.
Through these diverse approaches, OvalEdge enables users to effectively raise service requests and receive the necessary support, enhancing the management of service-related concerns.


Tracking Your Requests: Where to View Your Service Tickets
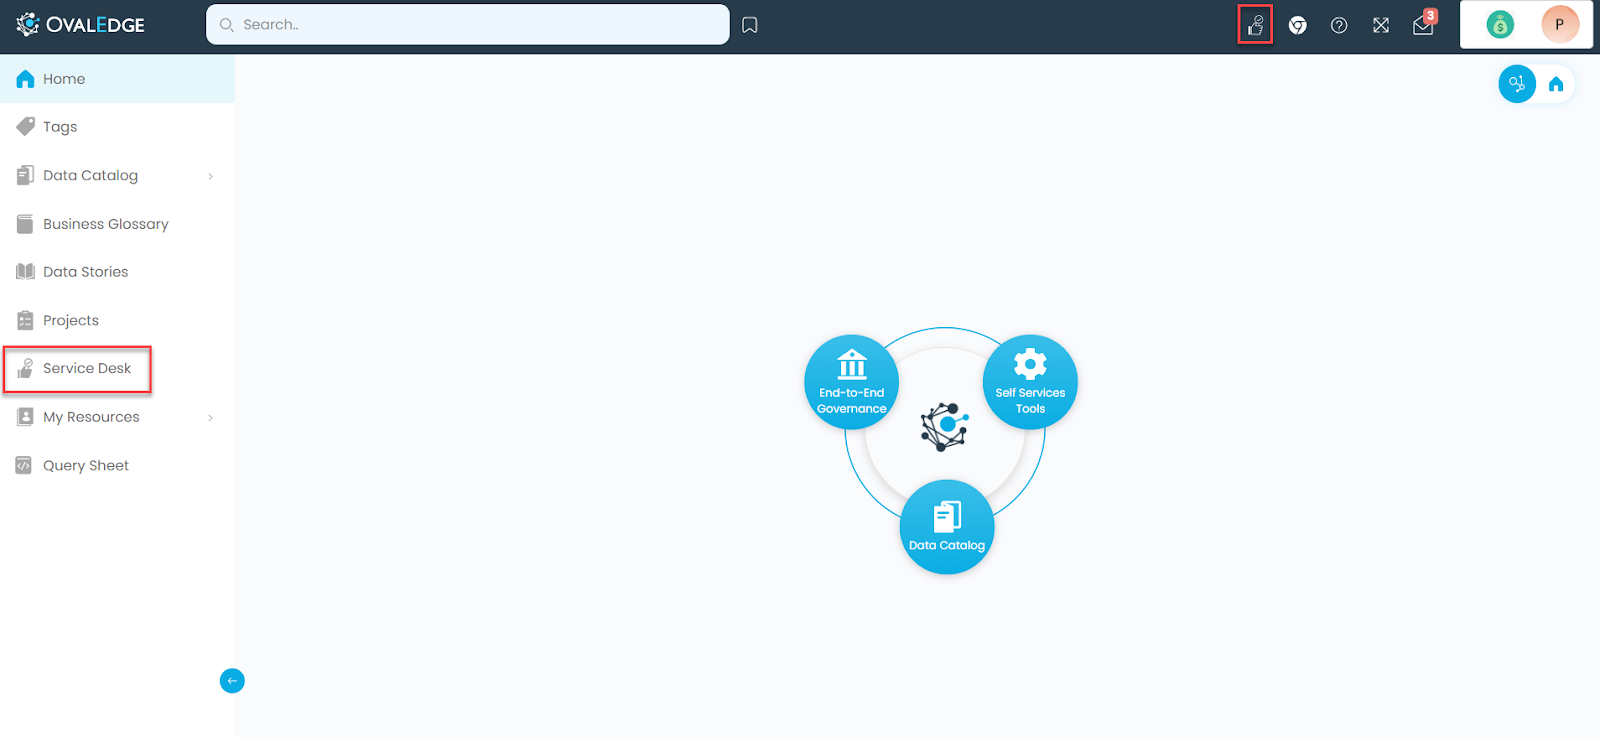
Multiple options exist for accessing and reviewing service-related tickets, tailored to suit individual preferences. The Service Desk icon, conveniently located in the header menu of the OvalEdge application, provides easy access. Alternatively, users can access the Service Desk from the left panel of the application.
Another option is to click on the hyperlink indicating the number of service requests raised on the data object/business glossary summary page. This allows users to effortlessly keep track of all their requests and monitor their progress. The Service Desk is just a click away, offering flexibility and convenience.

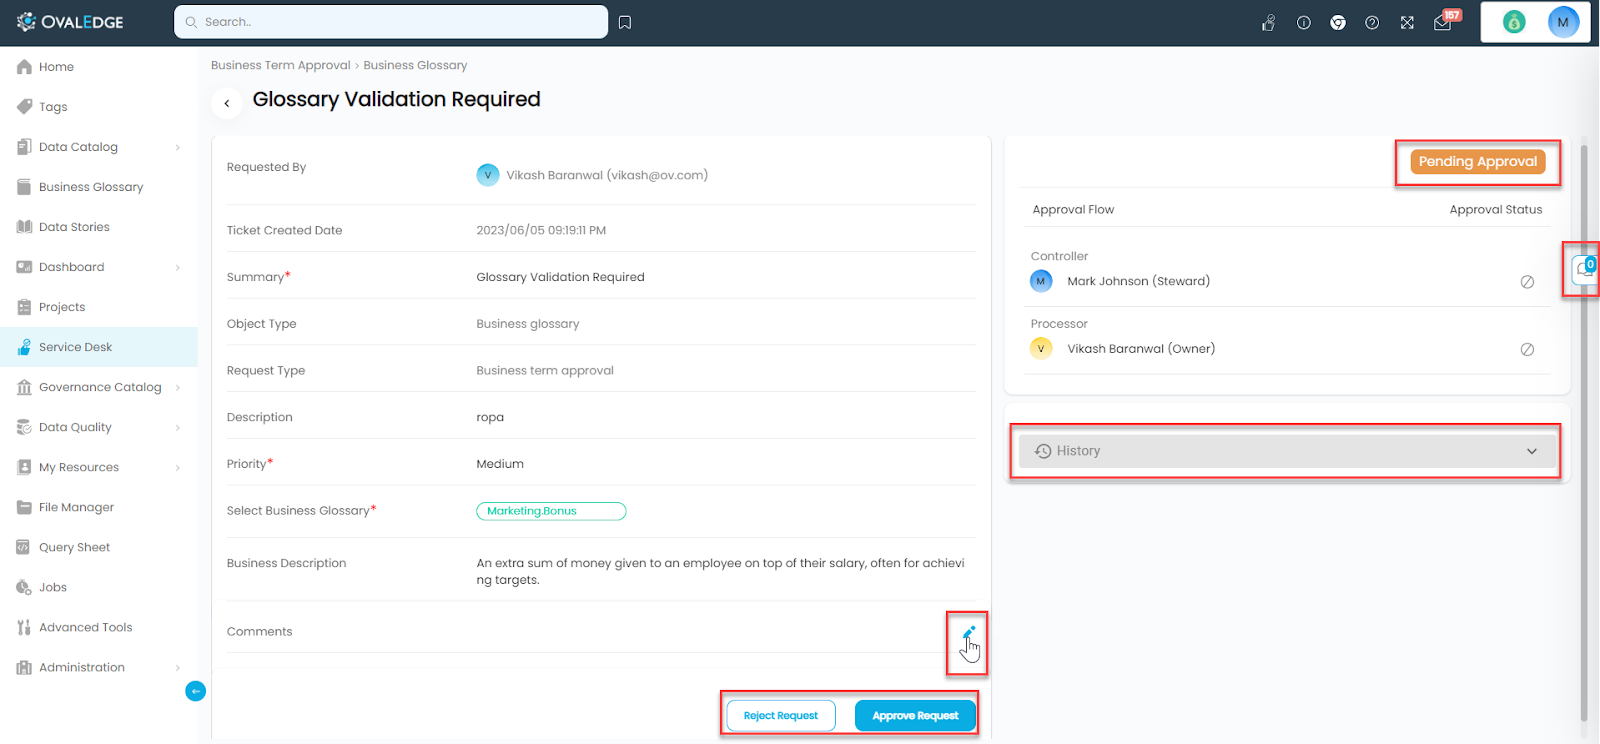
The Service Request Ticket Page Walkthrough
When the user visits the service desk request page, they'll find themselves on the summary page, where important details are outlined. This includes a concise overview of the content called the summary, along with its priority (ranging from low to highest). The type of data object is automatically filled in. In the top right corner, the user will see the approval status, which reflects the current state of the service request, such as pending approval, approved, rejected, expired, resolved, fulfillment processing, fulfillment completed, fulfillment successful, partially fulfilled, fulfillment failed, reopened, closed, and waiting for Okta fulfillment.
The purpose of request fulfillment is to determine whether the desired action or change requested by users has been implemented or not. In OvalEdge, there are two types of Fulfillment Modes - Manual and Automated. The manual flow involves a detailed process that requires human intervention to fulfill the request. On the other hand, the automated flow utilizes advanced job and system-defined classes to streamline and automate the fulfillment process.
Regarding fulfillment request statuses, they are explained as follows:
|
Status |
Description |
|
Pending Approval |
When a service request is raised, it enters the pending approval status, requiring configured approvers to review and take action. |
|
Resolved/Rejected |
The service request status is set to resolved when the approver(s) approve the request, and it is marked as rejected when the request is not approved. |
|
Fulfillment Processing |
This status indicates that the request is being processed and the fulfillment workflow has started. For example, if a data access permission request is made, the owner is notified and proceeds to assign the requested access permissions to the specified users. |
|
Partially Fulfilled |
This status is displayed when some parts of the request are fulfilled, but not all. |
|
Fulfillment Successful |
The status shows that the request is completely fulfilled, and all requested actions have been successfully executed. |
|
Fulfillment Failed |
This status indicates that the request was declined or not processed, resulting in a failure to fulfill the request. |
|
Fulfillment Completed |
This status represents the completion of the fulfillment process, indicating that all the necessary actions or tasks related to the request have been completed. |
In addition to the fulfillment information, the Fulfillment History provides users with a tracking mechanism that displays the different stages of fulfillment the request has gone through. Furthermore, users can conveniently access and view comments left by the approver in the comments section on the summary page.
To enhance Collaboration, OvalEdge provides a collaboration icon represented by the "@" sign. By clicking on the collaboration icon found on any data object screen, the user can communicate with others while maintaining context. This feature allows the user to refer to various elements such as databases, tables, table columns, files, file columns, reports, report columns, queries, endorsements, business glossary, data stories, governance policies, projects, and data quality rules.
A small window appears when the user clicks on the collaboration icon, allowing them to start typing a message. They can use the "@" symbol to trigger a list of options to select from, such as mentioning users with "@US," referring to the business glossary with "@BG," tables with "@TB," and so on. This enables effective communication and collaboration within the OvalEdge platform.
Conclusion
In conclusion, the OvalEdge Service Desk offers a user-friendly and customizable solution for managing service requests. Whether you're an approver, requester, or administrator, the service desk enables you to streamline your workflow, track requests, and enhance collaboration within your organization. Start utilizing the OvalEdge Service Desk today and experience a seamless service request management process.
Copyright © 2023, OvalEdge LLC, Peachtree Corners GA USA