The following are the different types of authentication and single methods supported by OvalEdge for Users and API:
|
Authentication for |
Authentication Method |
Platform |
Protocol |
Supported in OvalEdge |
Remarks |
|
Users |
Proprietary |
OvalEdge |
Local Authentication |
Yes |
|
|
Directory Services |
Microsoft Active Directory |
LDAP |
Yes |
||
|
Azure AD |
SAML 2.0 |
Yes |
Other protocols can be implemented on request |
||
|
Others |
LDAP |
Yes |
|||
|
Federated for SSO |
Okta |
SAML 2.0 |
Yes |
Other protocols can be implemented on request |
|
|
GitHub |
OAuth 2.0 |
Yes |
Other protocols can be implemented on request |
||
|
|
OAuth 2.0 |
Yes |
Other protocols can be implemented on request |
||
|
Microsoft ADFS |
SAML 2.0 |
Yes |
Other protocols can be implemented on request |
||
|
OneLogin |
SAML 2.0 |
Yes |
Other protocols can be implemented on request |
||
|
APIs |
Proprietary |
OvalEdge |
HTTPS (Username, password) |
Yes |
Basic authentication |
|
OvalEdge |
API Token |
Yes |
JWT Token used, with expiry policy enabled |
User Registration
OvalEdge provides the feasibility to add new users in the following methods:
- Method#1: The new users can be added directly to the OvalEdge with local authentication. Here the users and their respective credentials are managed within the OvalEdge.
- Method#2: The new user can also be added through directory services platforms with which the OvalEdge is integrated. In this mode, users already present in the directory service platform can log in to OvalEdge and provide the required credentials. Here the authentication request is routed to the service provider and once authentication is successful, users can access OvalEdge resources with their prescribed roles and permissions.
Local User Registration
OvalEdge also provides the feasibility for the new users to register themselves with a minimum system role and permissions using the Self-Registration process. Here the users registered through the Self-Registration process are automatically assigned with the OE_PUBLIC system role and their respective license type and permissions.
The following are the steps that need to be followed for the self-registration process:
- Navigate to the OvalEdge Sign In page and click on the Register New User link.
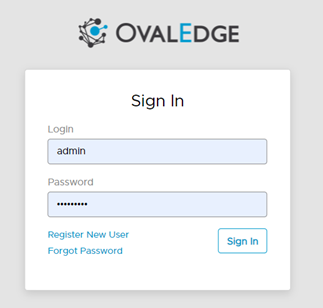
- In the OvalEdge Sign In page, when the user clicks on the Register New User link. The User Registration popup window is displayed.
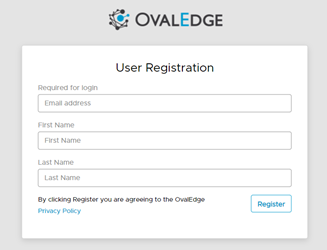
- In the User Registration popup window, enter the data in the required fields and click on the Register button. The details entered are validated and a notification email is sent to the provided email address to set the password.
User Registration through AD Service Providers
In enterprise scenarios, the preferred way is to enable employees to use their enterprise credentials to log in to OvalEdge. Users can enter their enterprise login credentials in the Login screen and they will be automatically registered in OvalEdge, with either the roles assigned to them in the AD system or to OE_PUBLIC in case they are not assigned to an OvalEdge specific role.
Note: Refer to Chapter 16: User Manager in OvalEdge user manual for more details on user management.
Synchronizing Roles between OvalEdge and AD Systems
The integration with the AD systems allows the OvalEdge to support user role management through the remote system. Here the Users can be added or removed from roles in the AD system, and the same will be synchronized periodically (configurable) by OvalEdge, allowing data administrators to manage user roles centrally.
To synchronize roles between the OvalEdge and AD Systems, complete the following steps:
- Enable the integration with the AD system.
- Recreate the roles available in OvalEdge in the AD system and ensure that all roles are available in the AD system. Here the OvalEdge will remain the master system for roles.
- Map the users to roles in the AD system and the changes will be automatically synchronized to OvalEdge.
User Authorization and Security
The security for OvalEdge resources and data objects is enforced through roles and permissions. Here the access to all objects in the platform is defined through ACLs created through role management. The following are the key aspects of the roles, permissions, and user management:
Roles
- Permissions assigned for the role to data resources in the platform are applicable to all the users in the role.
- To facilitate ease of role permission mapping to data resources, default permissions for roles can be defined, which are then applied to all the new data objects discovered through crawling. For this, the role has to be specified as a default role.
- These default role permissions can also be changed when being assigned to individual resources to meet specific data access needs.
- Custom roles can be defined by users, in addition to the default system roles, to reflect the context of their enterprise.
- Roles are flat and do not contain child roles.
- The system defined roles available by default in OvalEdge are:
- OE_ADMIN
- OE_PUBLIC
User Roles
- All users must belong to at least one role.
- Users can be added and removed from roles, and this will reflect dynamically on the access to the resources in the platform.
- When users belong to multiple roles, access to the data resources is governed by the highest permission among all the roles to the specific object.
Data Objects
- Roles and permissions can be mapped to individual data objects to provide fine-grained granularity for controlling access.
- In addition, similar data objects can be grouped into Data Access Groups (DAG) and roles and permissions for such groups can be managed at the group level.
- The role permissions mapped to a DAG object, are cascaded to all the objects that are part of the DAG.
Permissions
- All-access to data objects is governed through Permissions.
- Permissions available for a role are controlled by the role license type mapped to it.
License (Role) Type
Permissions Group Type (Meta Permissions Options)
Applicable Data Permissions for Data Objects
Author
Read-Write
Write | Read | Preview | No Access
Read-Only
Read | Preview | No Access
Reader
Read-Only
Read | Preview | No Access
Reader Preview
Read-Only
Preview | No Access
Note: Refer to Chapter 17: Security in OvalEdge user manual for more details on managing roles and permissions.
Copyright © 2019, OvalEdge LLC, Peachtree Corners GA USA