Scheduling is the process of planning activities to achieve goals and priorities. Effective scheduling can help to accomplish the priority tasks even when you are unaware of them.
In the OvalEdge application, the schedule helps you to track the jobs that are scheduled and submitted to run on a particular date and time.
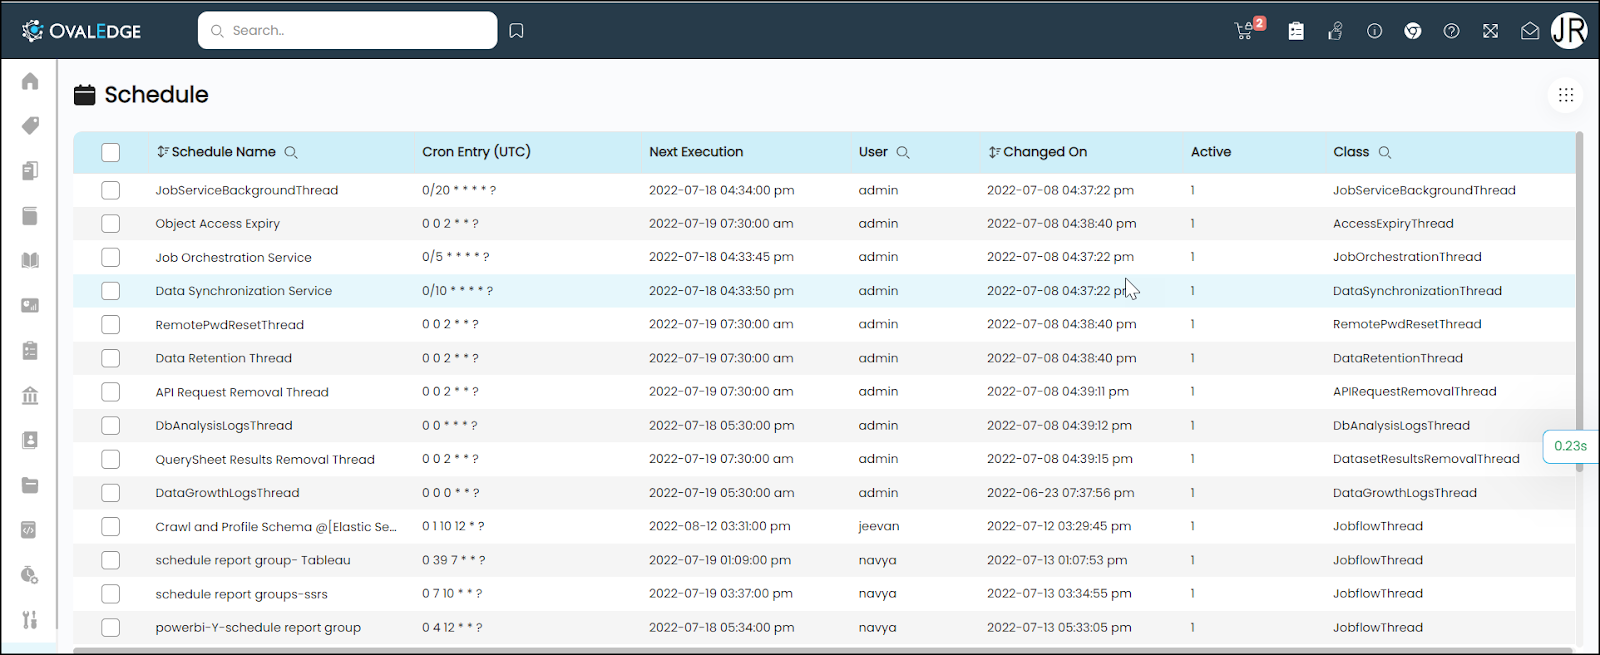
When you schedule a job workflow on the Administration > Crawler page or on the Administration > Jobworkflow page, after saving the details, you can see all the scheduled activities on the Administration > Schedule Page.
You can navigate to the Schedule page via, Administration > Schedule.
The below table describes the fields available on the Schedule page.
|
Field |
Description |
|---|---|
|
Schedule Name |
Displays the name of the schedule. |
|
Cron Entry |
Displays the date and time of execution. Cron jobs can help to automate workflow to run at a scheduled time. The job will be run in Universal Time (UTC) and the data will be archived. |
|
Next Execution |
Displays the next schedule of execution. |
|
User |
Displays the username who has scheduled this task to run. |
|
Changed On |
Displays the recent date when any modifications were made on this scheduled task in the selected Time Zone. |
|
Active |
Displays the status of the schedule. If the Schedule is in active status, then it will be displayed as 1, and if the Schedule is in an inactive state, it will be displayed as 0. |
|
Class |
Displays the unique code/ logic given to the schedule in the backend. |
Search Functions
You can search the schedule name, User name, and class by using the search icon available on the respective column.
To search for the desired data, you need to click on the search icon available on the particular column. You can see eight dots available on the search bar.
- Click on the Eight dots, and the select condition pop-up will be displayed. Select the condition and enter the data you want to search.
- When you click on apply, you can see the desired search result appear on the screen.
Tasks Performed on Schedule
The Nine dots icon is available on the Job Workflow page to perform the below tasks:
- Reload Schedule: When a job is stuck, reload schedule will help start the job execution process thread by killing the current job.
- Delete Schedule: You can delete a particular schedule using this Nine dots feature.
Steps to Reload a Schedule
When the job is stuck, you can refresh the schedule using the Reload Schedule option.
To reload a schedule:
- Enable the check box available against the schedule on the Administration > Schedule page.
- Click on Nine dots to display all the nine dots options.
- Click on the Reload Schedule option. A successful message will appear on the Schedule main page.
Steps to Delete a Schedule
When the schedule is no longer applicable, you can delete the schedule using the nine dots option.
To delete a schedule:
- Go to Administration > Schedule.
- Select a schedule and click on the Nine Dots, which will display all the available options.
- Click on the Delete Schedule, and a confirmation message is displayed.
- Click on the Yes button if you want to delete the schedule, or else click on the No button to exit from the Delete Schedule.
Once you click Yes, you will receive a successful message, and the selected Schedule will be deleted.
Editing a Schedule
The Schedule Name on the Schedule main page is editable. You can update the Schedule Name and Scheduled time to run the job using the edit icon available on the Schedule Name column. When you hover over the Schedule Name, you will view the edit icon configured to edit the fields.
To Edit a Schedule:
- Go to Administration > Schedule to view the Schedule Page.
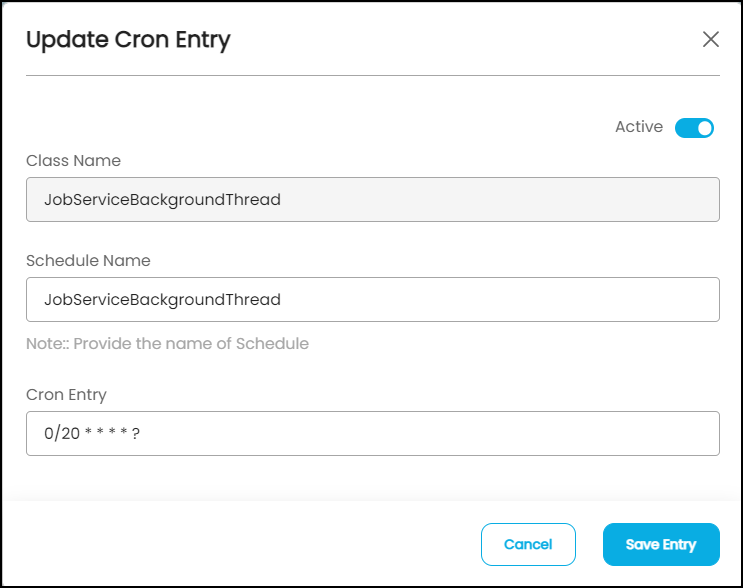
- Click on the Schedule Icon available on the Schedule Name Column to display the Update Corn Entry Pop-up window.
Note: On the Update Corn Entry Pop-up window, the Schedule Name and Cron Entry fields are editable. You can't edit the Class name. - Click on the Schedule Name Field to update the Schedule Name.
- Click on the Cron Entry field to update the Scheduled time to run the Job.
- Click on the Save Entry button to save the details.
Note: You can change the Schedule from Active state to Passive and vice versa, using the toggle icon available on the Update Corn Entry Pop-up window.
Copyright © 2019, OvalEdge LLC, Peachtree Corners GA USA