Introduction
The OvalEdge Query Sheet is a dynamic and user-friendly interface designed to streamline the process of building, summarizing, saving, and executing queries in alignment with unique business needs. The Query tool enables users, including those without extensive SQL expertise, to effortlessly perform various query operations. With a single click, users can execute tasks such as aggregation, joining datasets, creating unions, grouping data, sorting, and applying filters.
The OvalEdge Query Sheet equips users with a range of powerful capabilities, making it a versatile tool for efficient data management and analysis.
Overview of key functions and features offered by the Query Sheet:
1. Access Data from OvalEdge Repository Tables:
The Query Sheet enables users with data write permission to seamlessly access data stored in the OvalEdge repository tables. This access is facilitated through the Query window, providing a gateway to valuable datasets.
2. Streamlined Query Operations:
Users can use shortcuts in the Query Sheet to perform important query operations like filtering, aggregating, sorting, joining, and grouping. These shortcuts make data manipulation easier and more efficient. Each of them has been explained in detail in the section below.
3. Query Execution and Saving:
The Query Sheet empowers users to not only perform queries but also execute them within the Ovaledge query sheet and save the executed code in Data Catalog for future references.
4. Cataloging and Sharing of Saved Queries:
Saved queries can be cataloged, simplifying the process of organizing and locating specific queries. Furthermore, the Query Sheet supports the sharing of saved queries, facilitating collaboration and knowledge transfer among users.
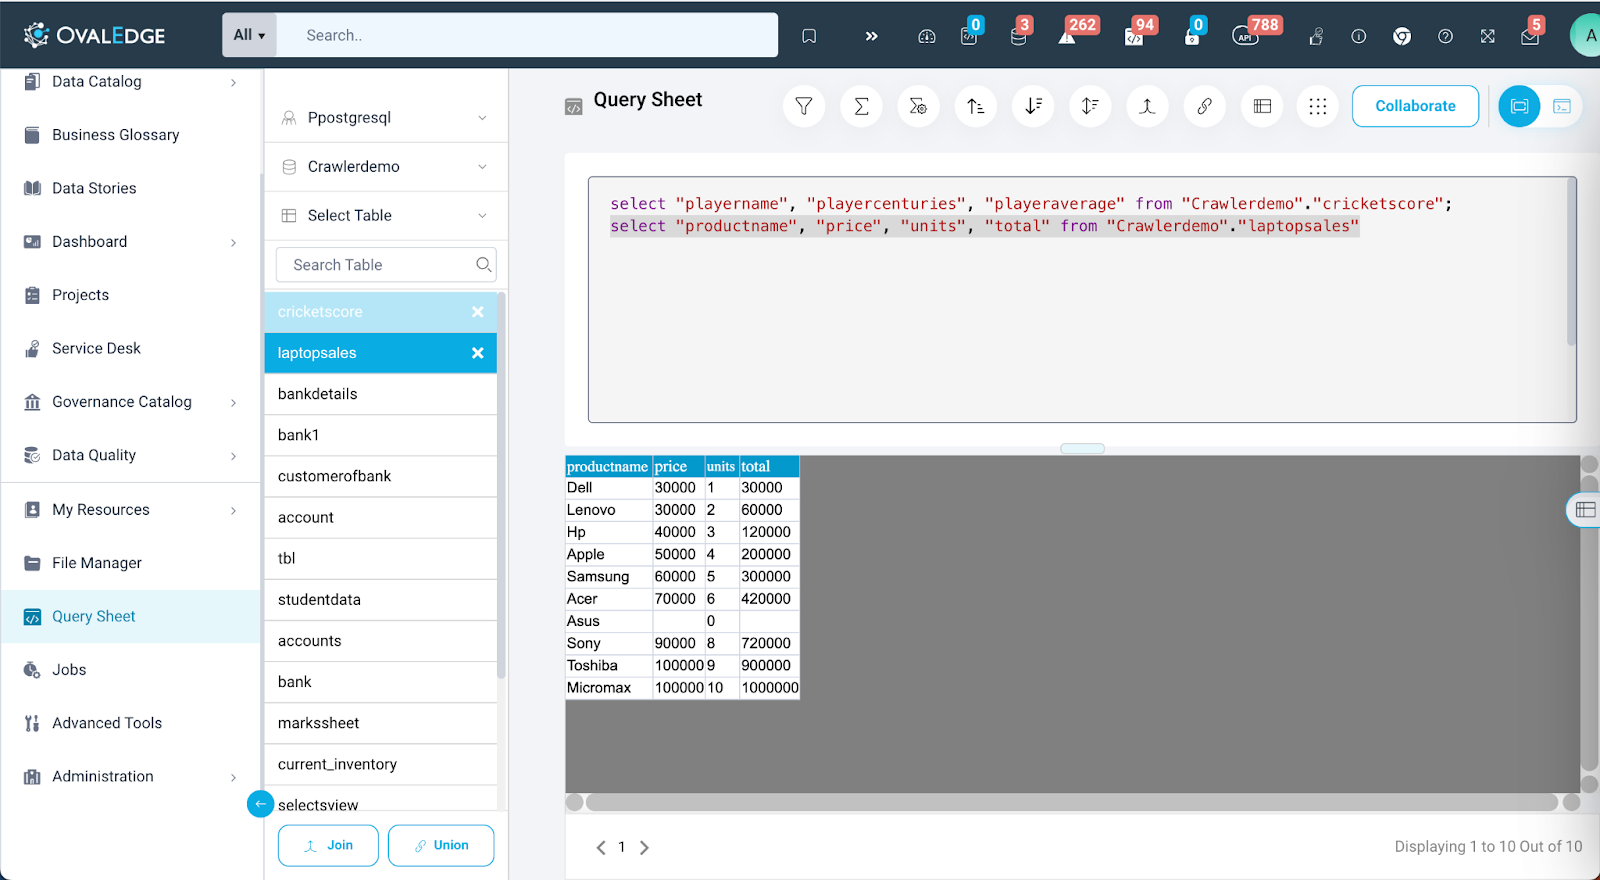
Navigating Query Sheet
To access the Query Sheet, users can conveniently locate it on the left panel menu.
The Four Key Sections of the Query Sheet:
- Object Explorer: This section provides users with an Object Explorer, a vital tool for selecting and exploring the contents of data objects. Users can seamlessly navigate through databases, schemas, tables, and other data repositories. It serves as a comprehensive data directory.
- User Interactive Function Menu Bar: The Function Menu Bar is a user-friendly and interactive control center for query operations. It simplifies the execution of essential query tasks such as filtering, aggregating, sorting, and more. While using this menu, certain options may appear disabled, indicating they can be activated after specific actions are taken.
- Query Editor Window: For those who prefer manual query composition and advanced query operations, the Query Editor Window is a valuable resource. Users can manually write queries, fine-tune their query logic, and explore more advanced query capabilities. Additionally, this window can be swiftly accessed via a keyboard shortcut (CTRL+Q), enhancing the user experience.
- Result Window: The Result Window provides users with a platform to view the outcomes of their executed queries. It displays query results, enabling users to examine and interpret the data effectively.
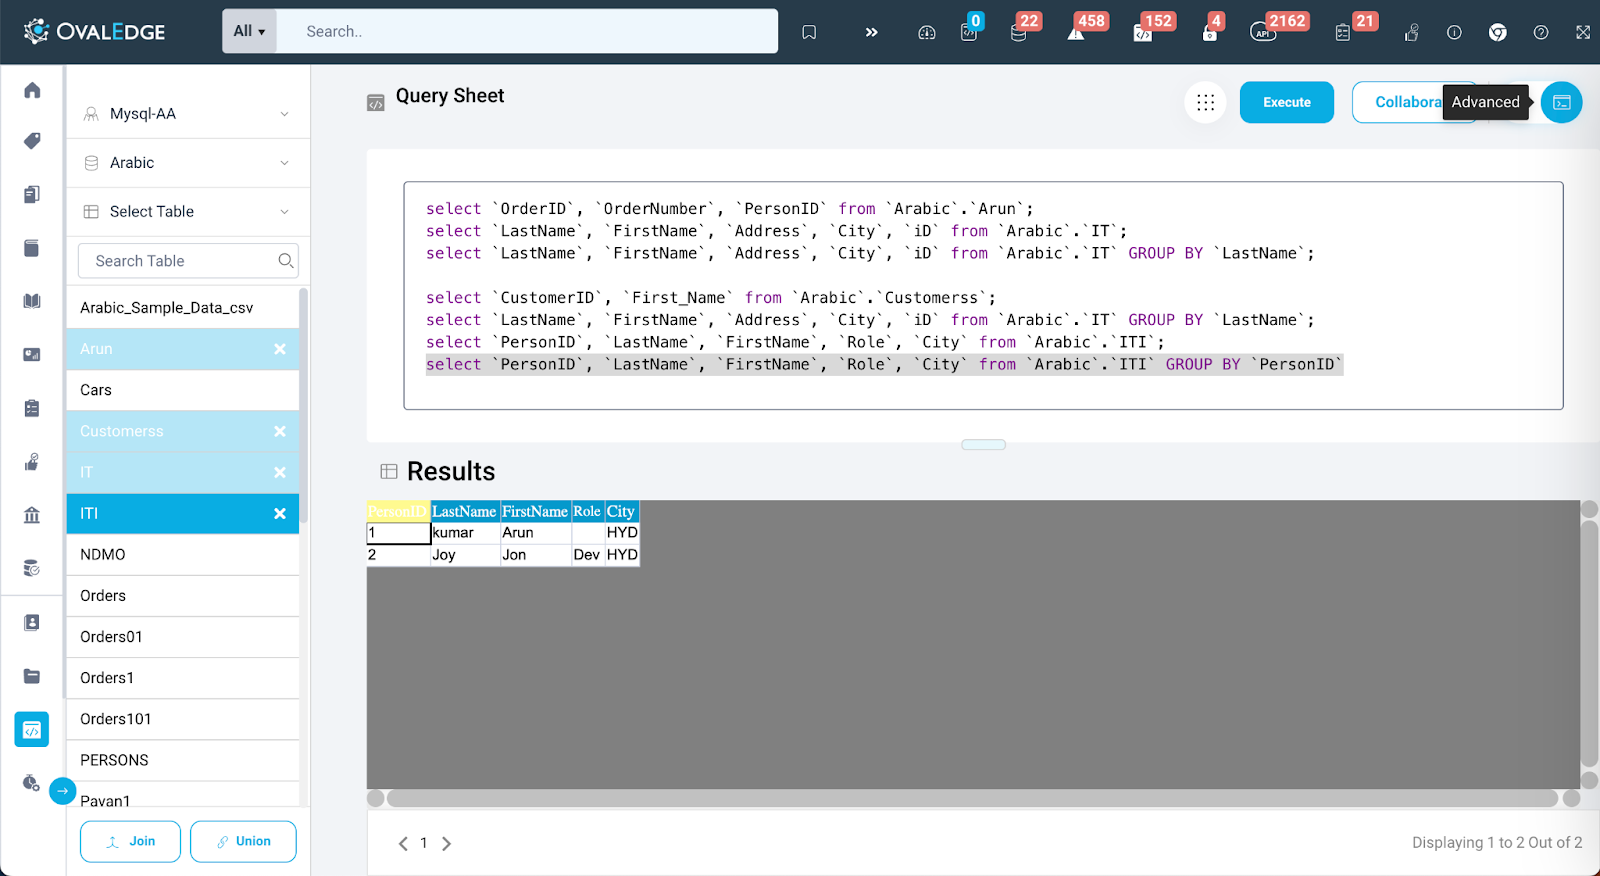
Function Menu Bar & Query Editor
The Function Menu Bar in the Query Sheet is like a user-friendly command center for doing different things with your data. It makes tasks like filtering, aggregating, and sorting easy. In the OvalEdge Query Sheet, there are two modes to choose from: Auto SQL and Advanced SQL. These modes are designed for different levels of expertise and specific user requirements.
-
Auto SQL
Auto SQL mode is perfect for users who may not be SQL experts but need to work with data in the Query Sheet. OvalEdge has created a user-friendly toolbox called the Function Bar within this mode. It is a versatile set of tools that allows the user to do various things with the data, like filtering, joining, grouping, and more. The next sections will explain each function in detail.
1. Functions supported in Auto SQL Editor
-
-
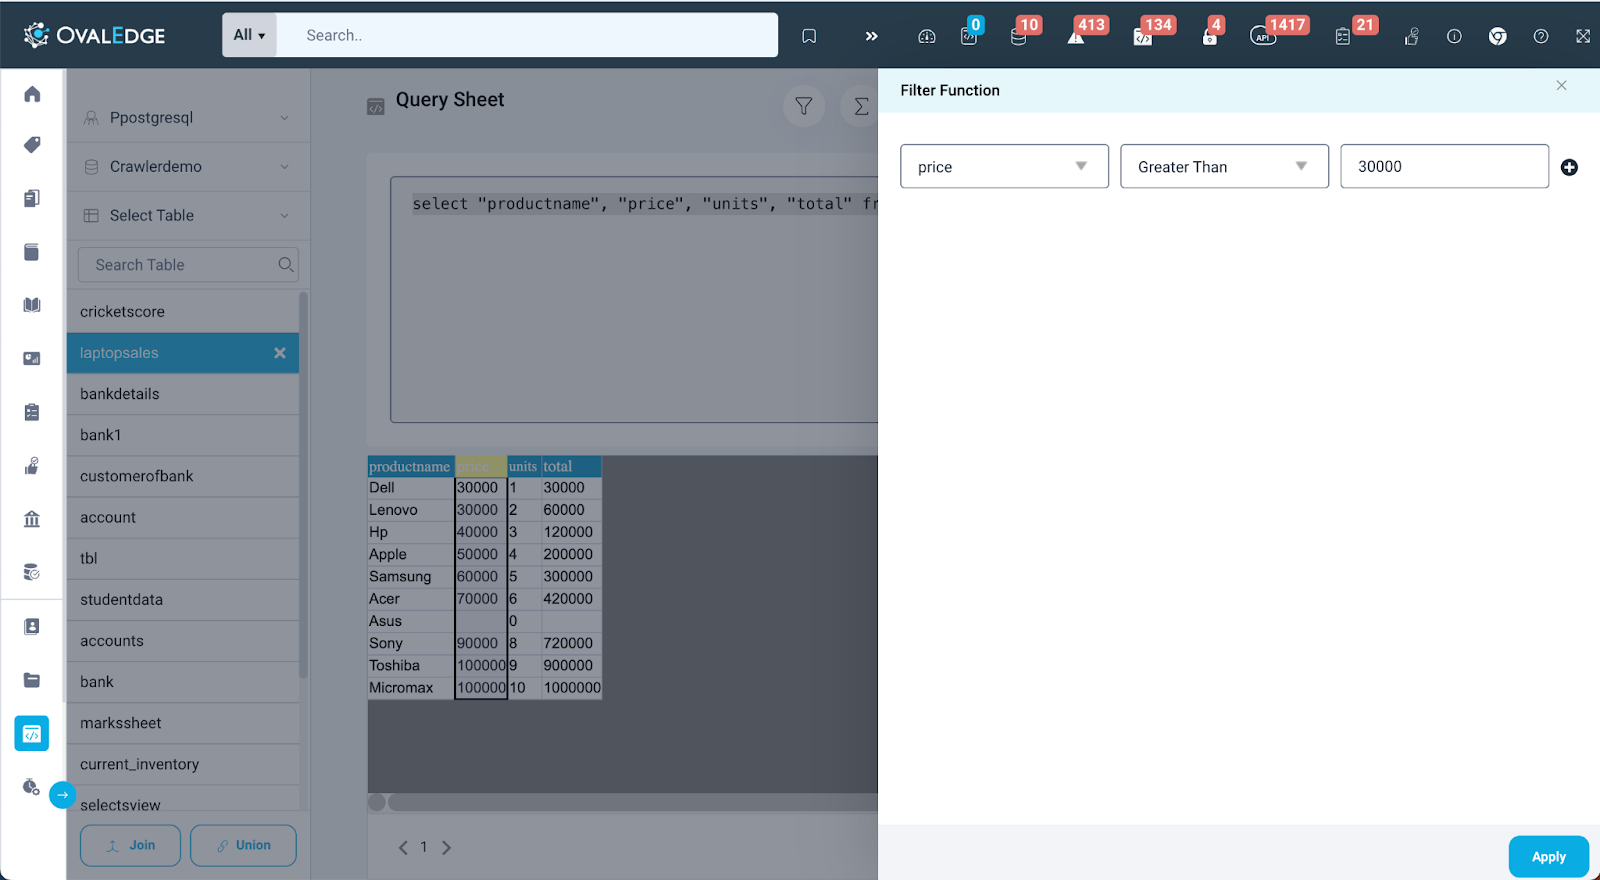
Filter
-
Data filtering in OvalEdge allows the user to pick and choose specific rows in the data based on certain rules. It is as easy as using a filter to find and extract rows from a table that have specific words or patterns.
-
-
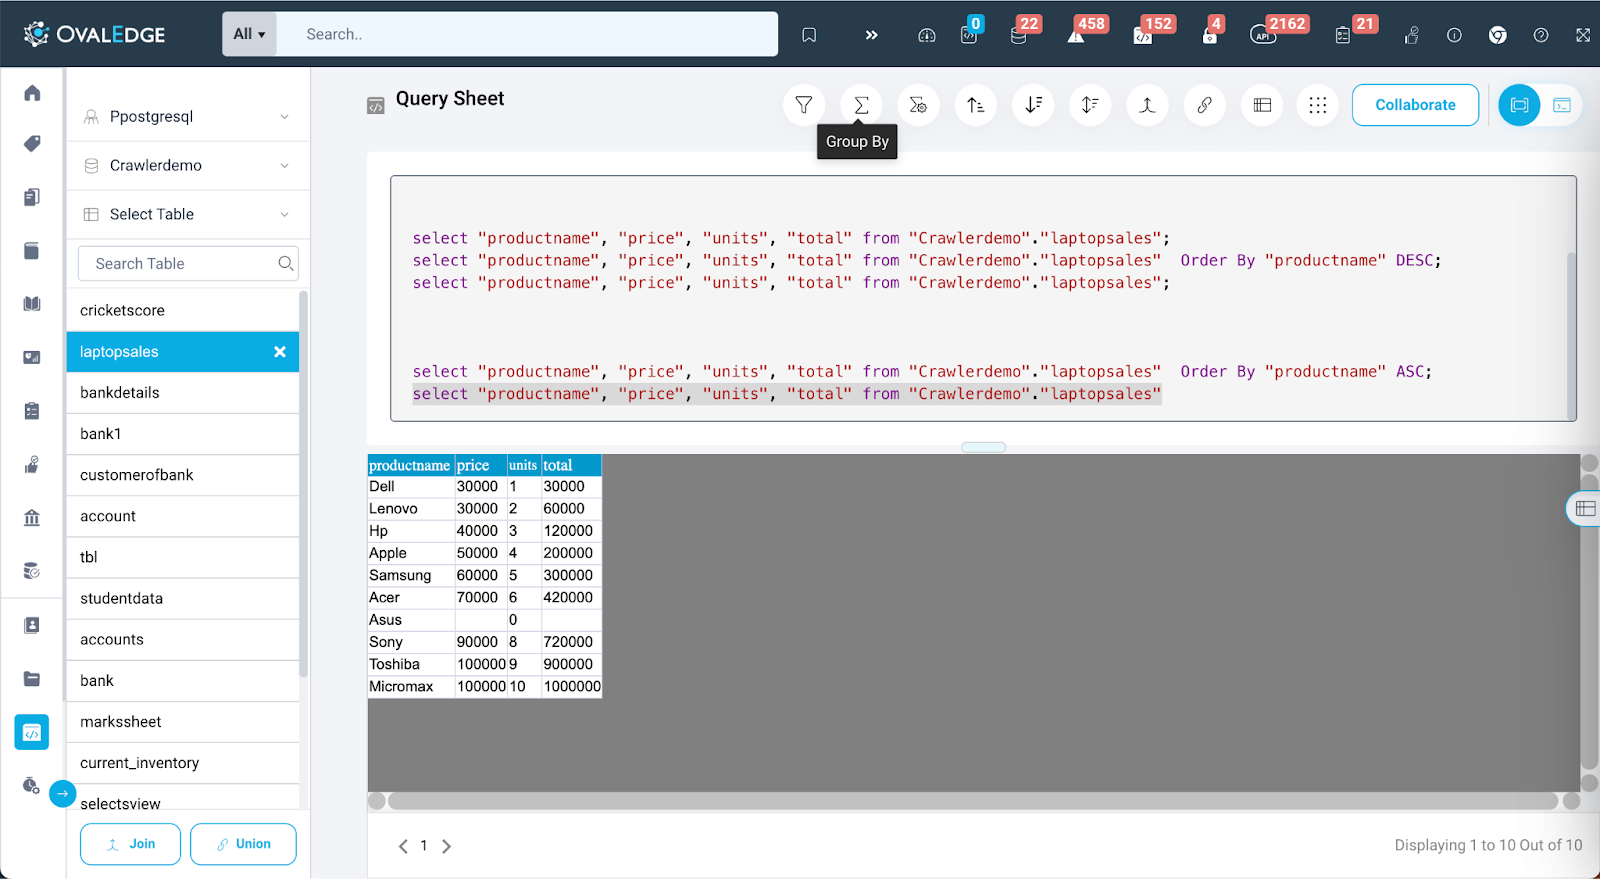
GroupBy
-
The users with data write permissions can eliminate any duplicates from the chosen columns by grouping them by function.
-
-
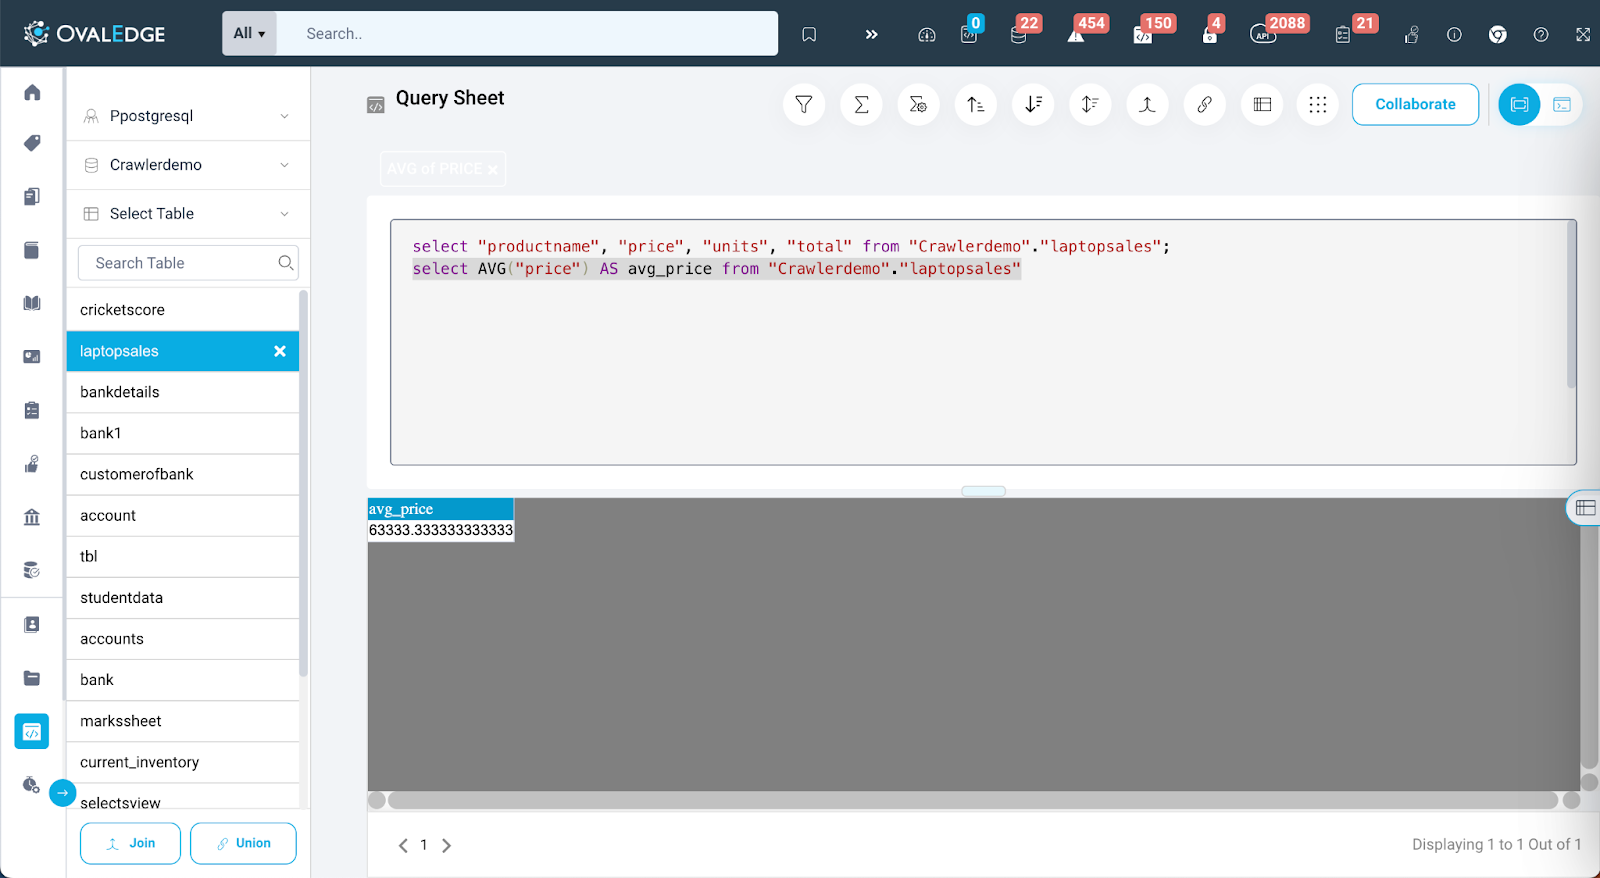
Aggregate
-
Aggregate functions perform the calculation for the function selected by the user like Average , Min , Max etc on a set of grouped values and return a single value. Aggregate Functions return the same value any time that they are called by using a specific set of input values. Aggregate functions are like “HAVING CLAUSE” in the SQL Queries. Different functions available are:
-
- Avg : It will calculate the average for the column and will return single average value.
- Count: It will return the value of count of data points (cell with data in the column) in the column.
- Max : It will calculate and return the maximum value from the column.
- Min : It will calculate and return the minimum value from the column.
- Sum: It will calculate the sum of the values in the column and return a single value as sum.

-
-
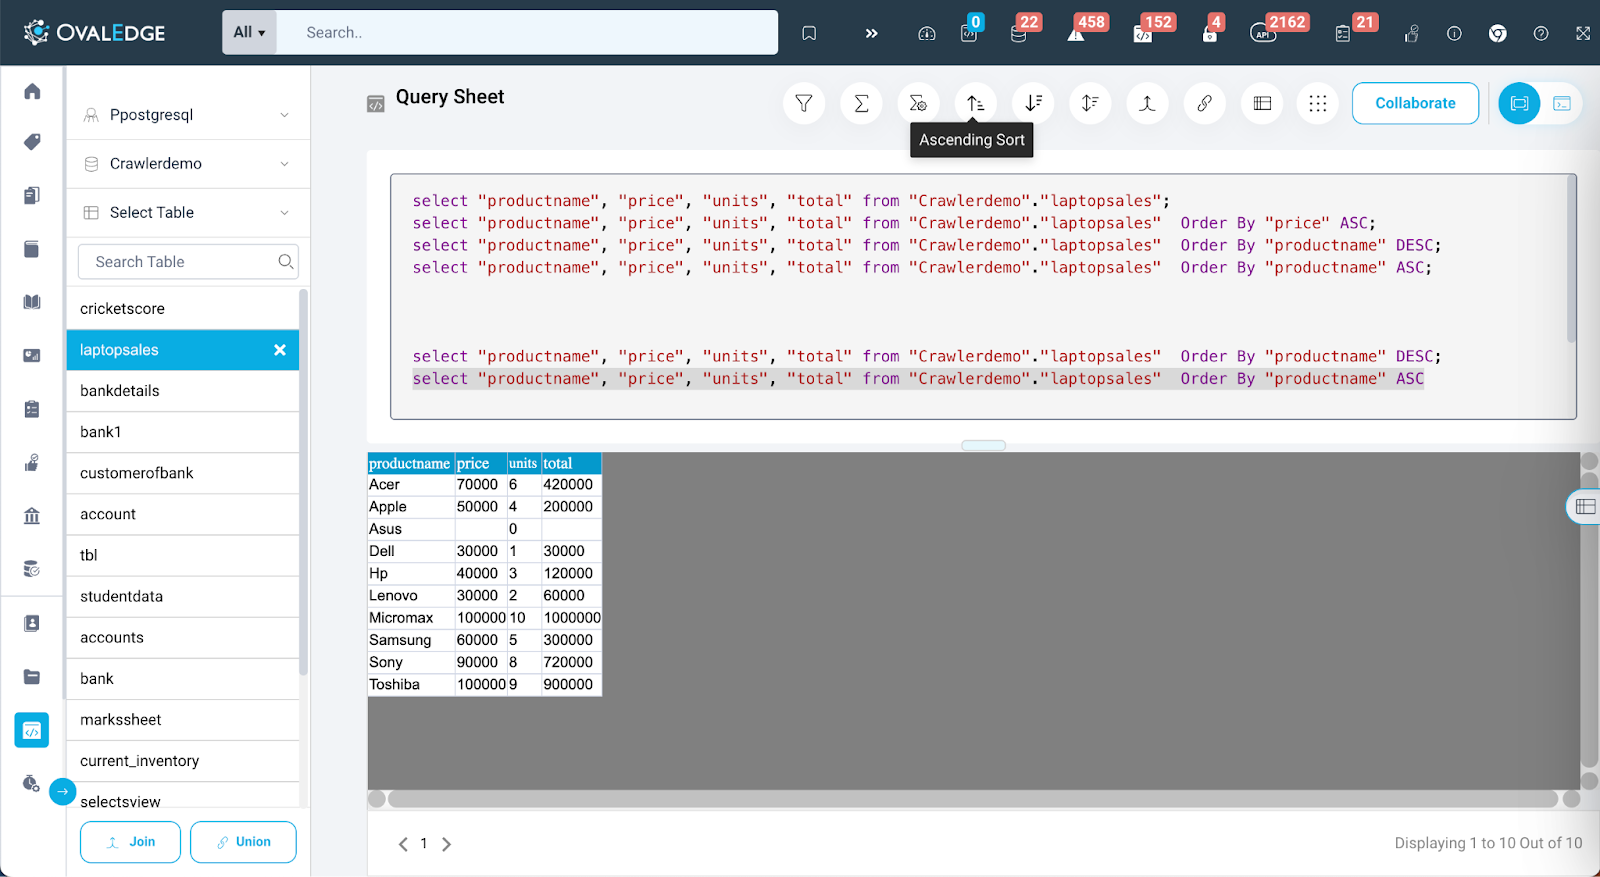
Ascending Sort
-
The Ascending Sort option permits users to arrange column values in ascending order If the column selected for sort contains only alphabets, then it will sort from A-Z, For numerical value 1 -9 and for the columns which have alphabets with numbers then it will sort the numbers first then will sort the Alphabets like : If you have values like 1A, A1, B2,1B,2B then after applying ascending sort , the result will be : 1A,1B,2B,A1,B2
If no specific column is selected, it will automatically sort the first column.
-
-
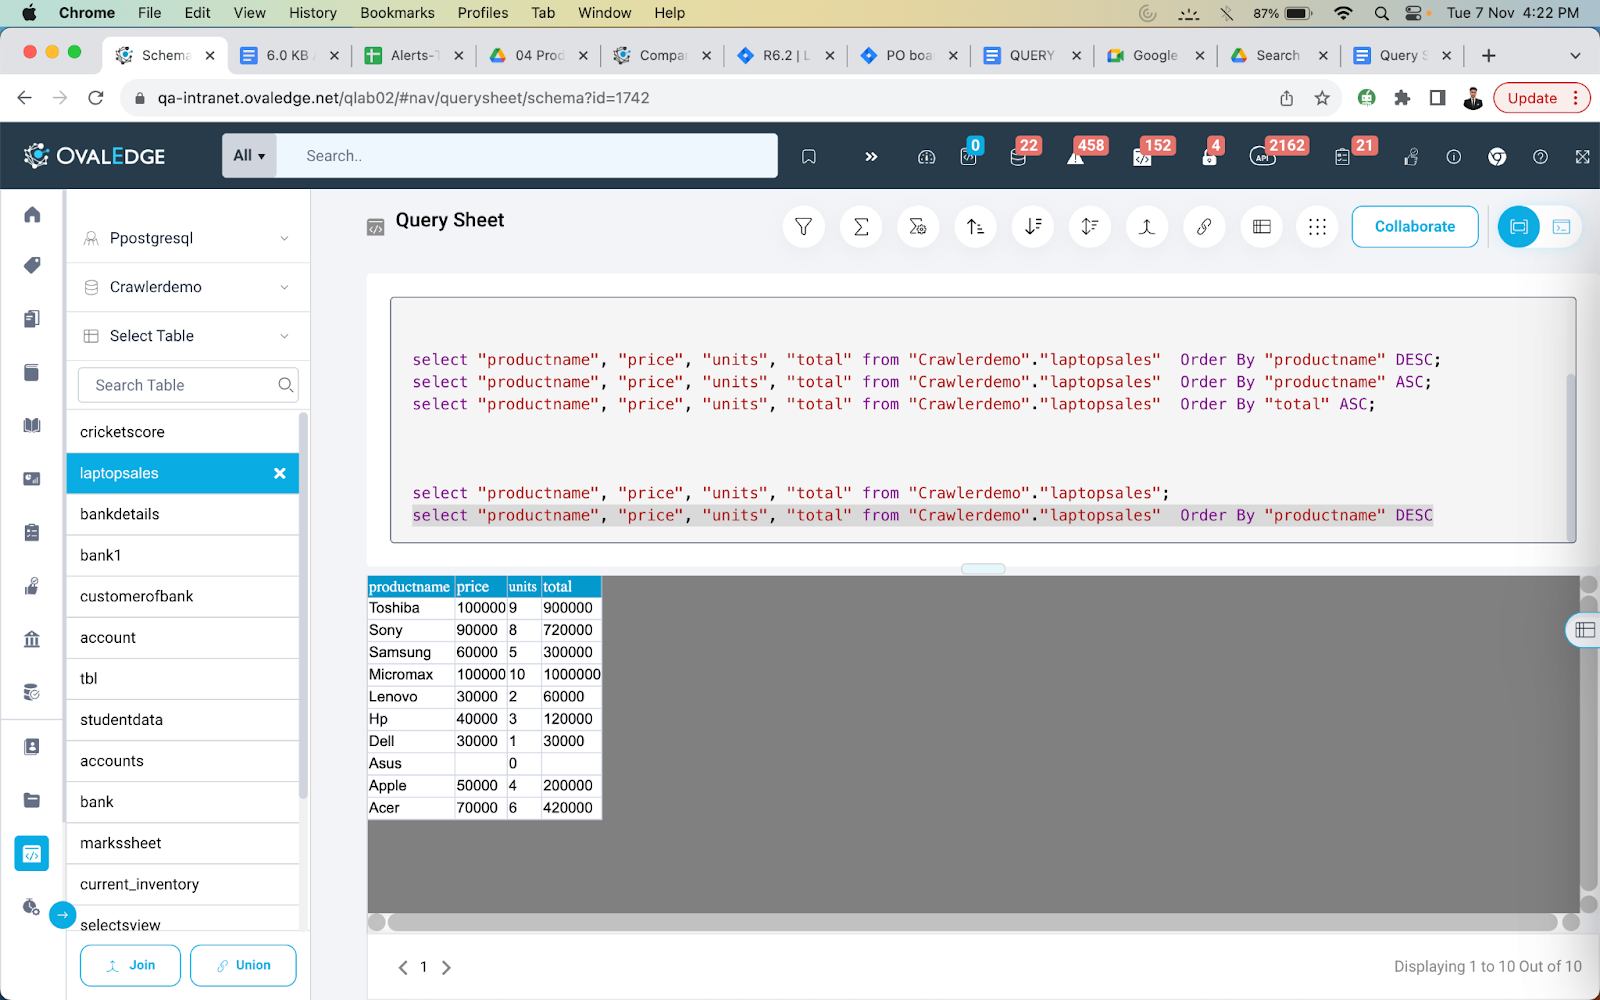
Descending Sort
-
The Descending Sort option enables users to organize column values in descending order. In case no column is selected, it will default to sorting the first column.
-
-
Original Sort
-
The Original Sort feature allows users to arrange the data in the exact order and sorting it was in the remote system at the time of being crawled into OvalEdge.
-
-
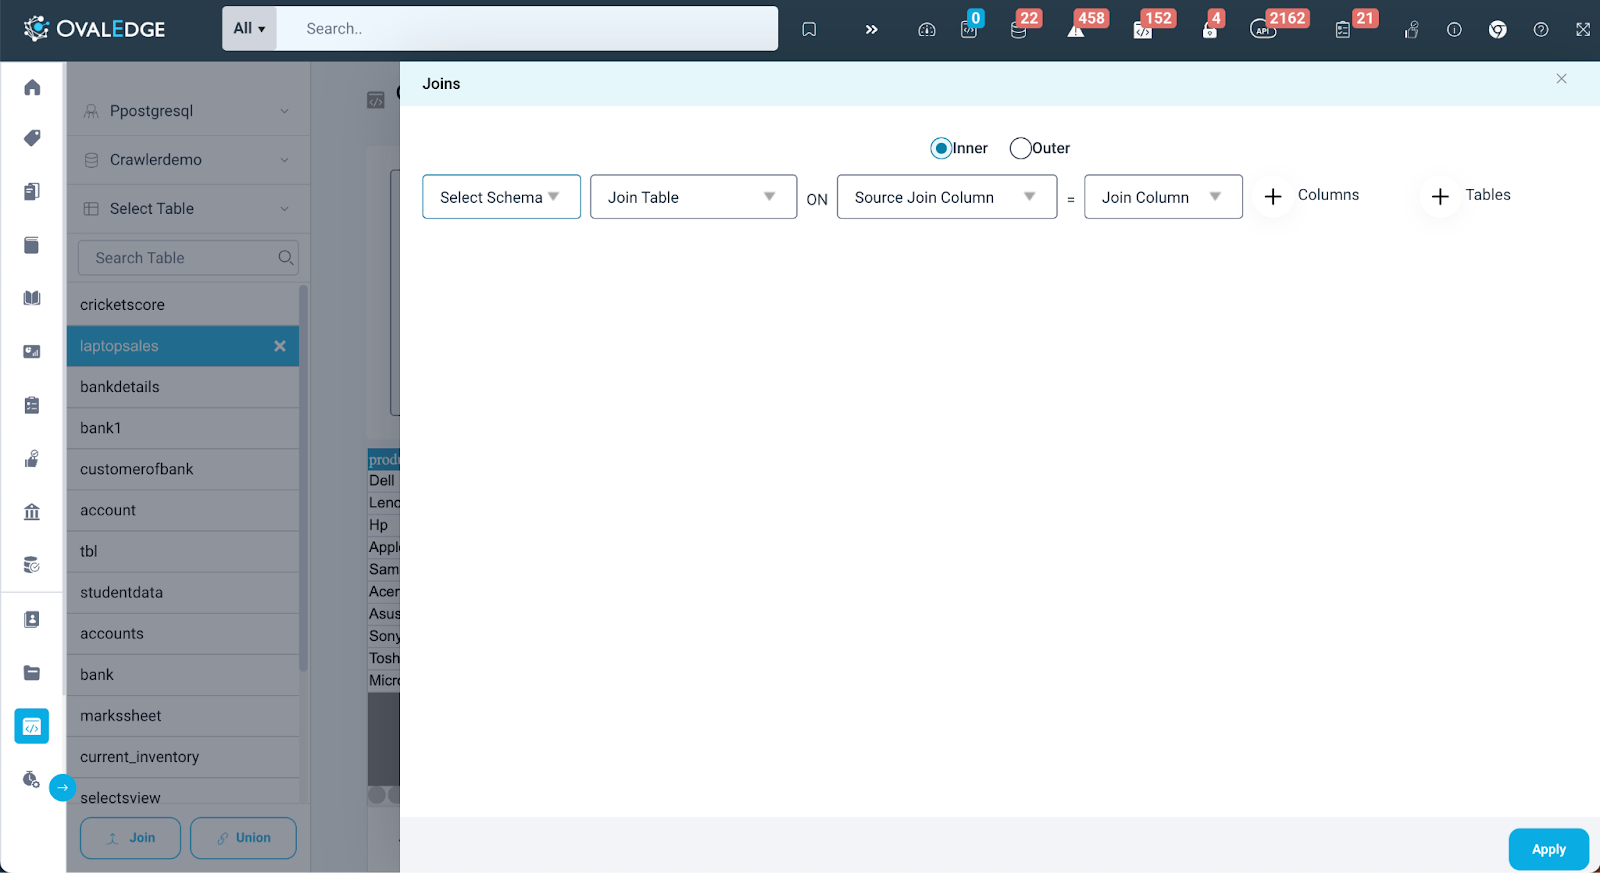
Join
-
OvalEdge uses machine learning algorithms to make strong recommendations for the users and possible joins with other tables that have matching columns. OvalEdge provides users the capability of joining the columns manually.
-
-
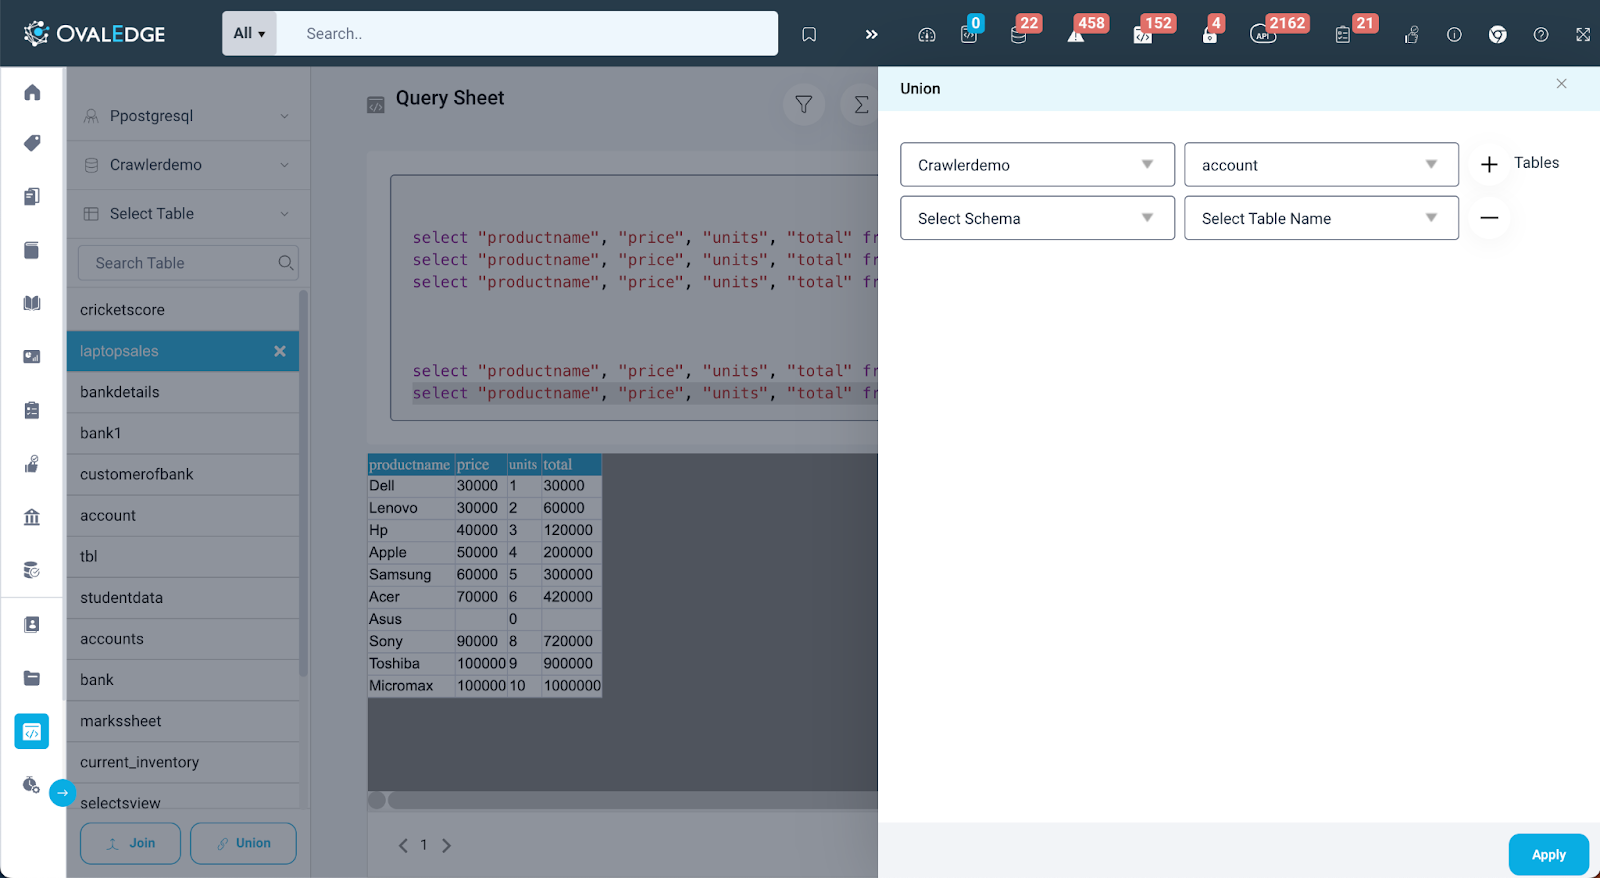
Union
-
Union is a method for combining data by appending rows of one table into the master table.
For example, to add new Customer IDs from one table to a list of Customer IDs in the master table, make sure the tables to the union have the same number of fields(columns), field names, and field data type.
To union two tables on a matching field manually :
This item enables users to manually perform Union on tables. A union of tables creates a single table that contains all rows from tables, with several null values.
-
-
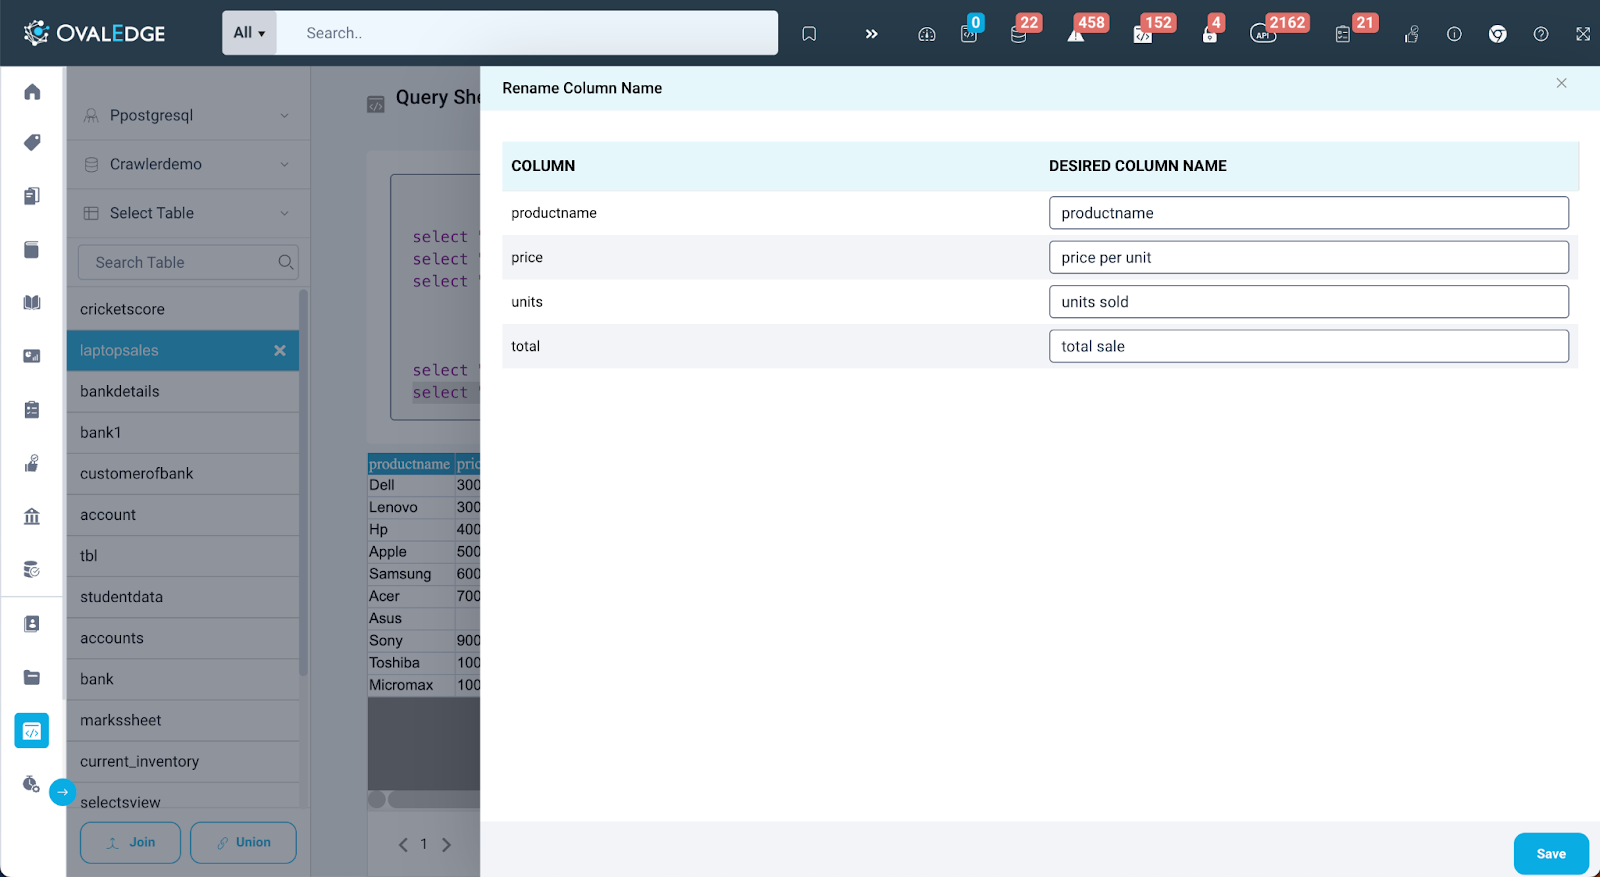
Rename Column Name
-
This enables the user to rename a column name. This will rename the column of the table in the OvalEdge.
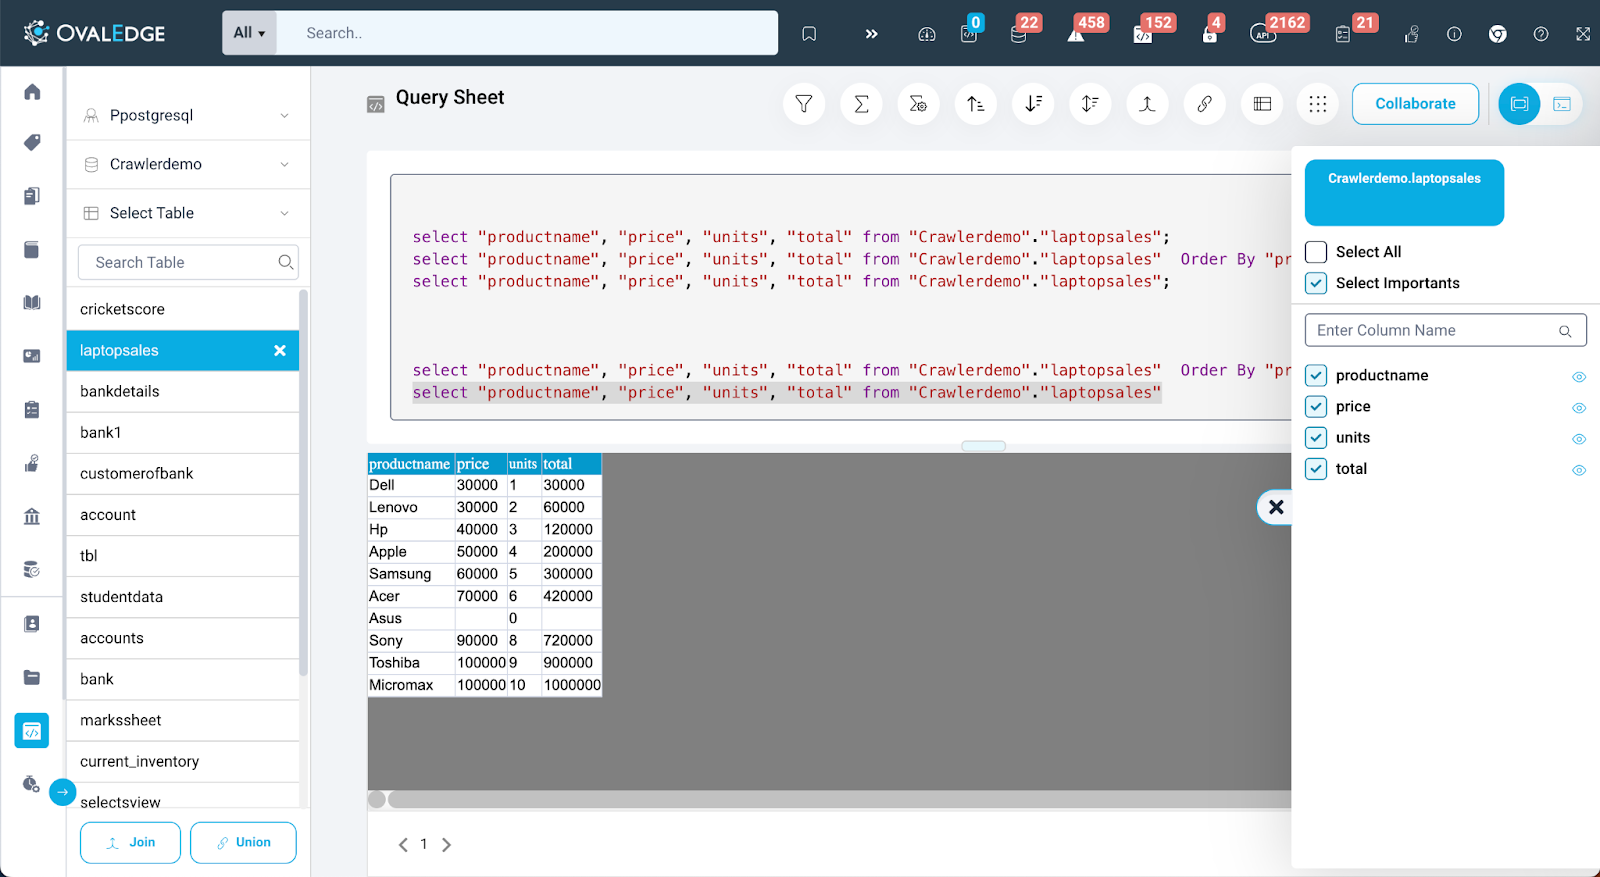
2. Manage Table Columns
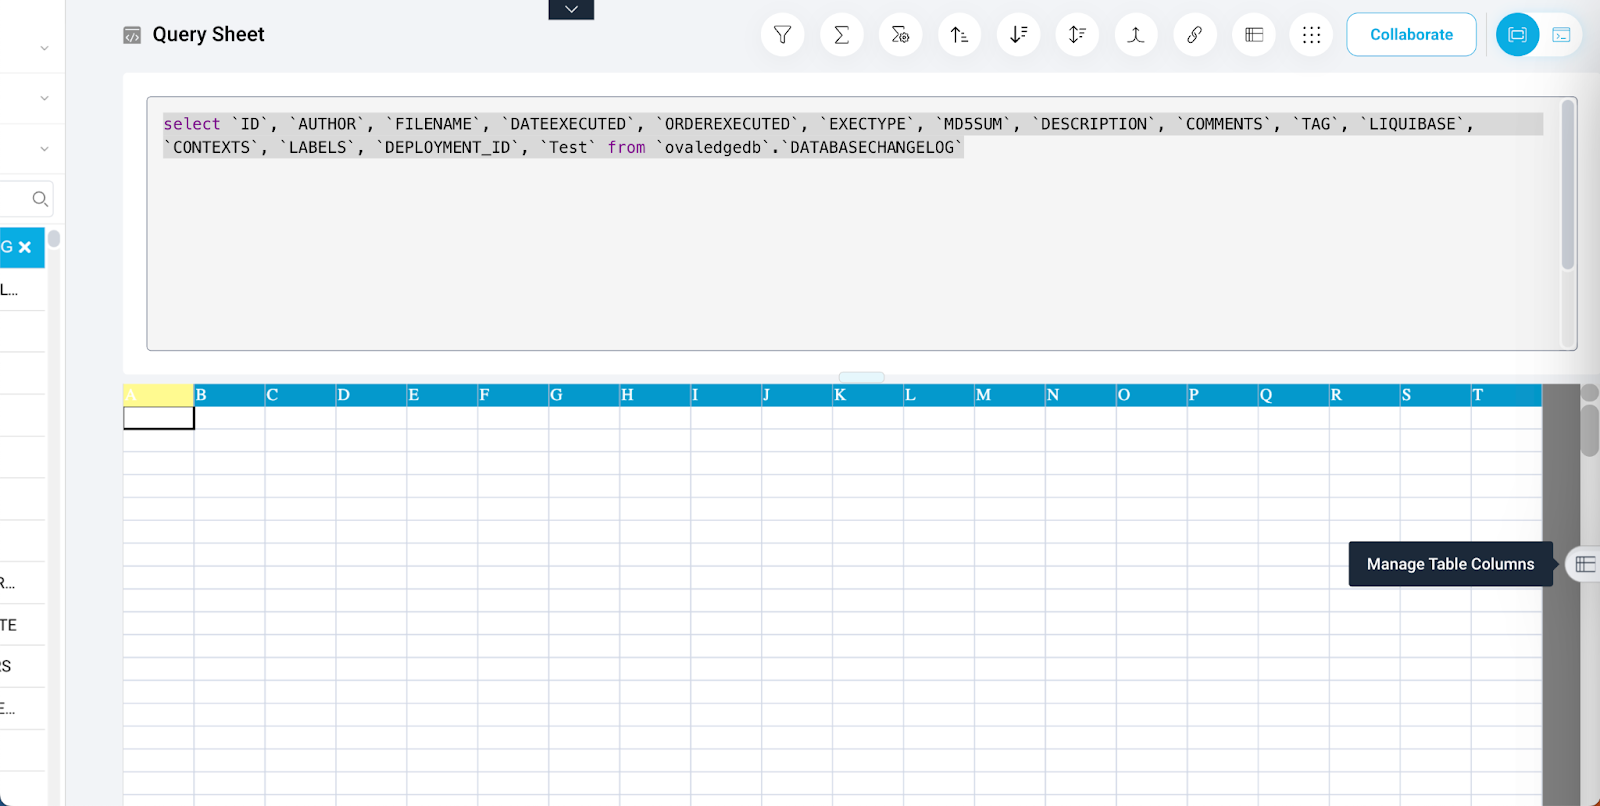
This option is available at middle right in Auto SQL mode which gives users the ability to show or hide the column in the result section according to their preference. Users can also have a quick look at the columns by clicking on the ‘Eye’ icon in front of every column.
-
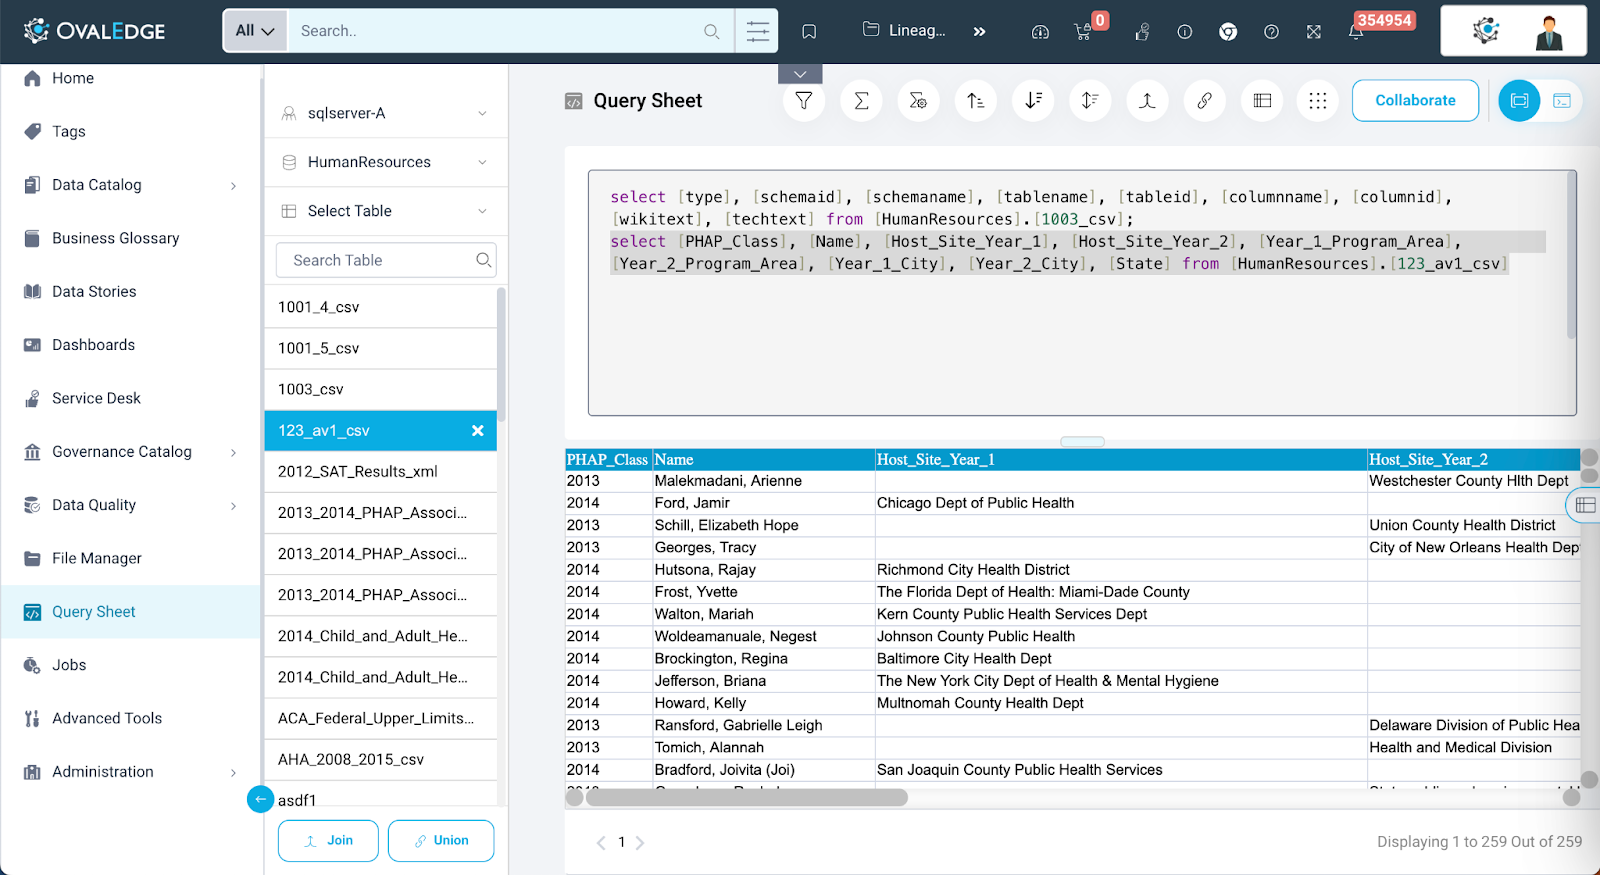
Advanced SQL
For users who are SQL proficient and want to have more control over the queries, there is the Advanced SQL mode. This mode allows the user to use their SQL skills to run complex queries and get specific results.
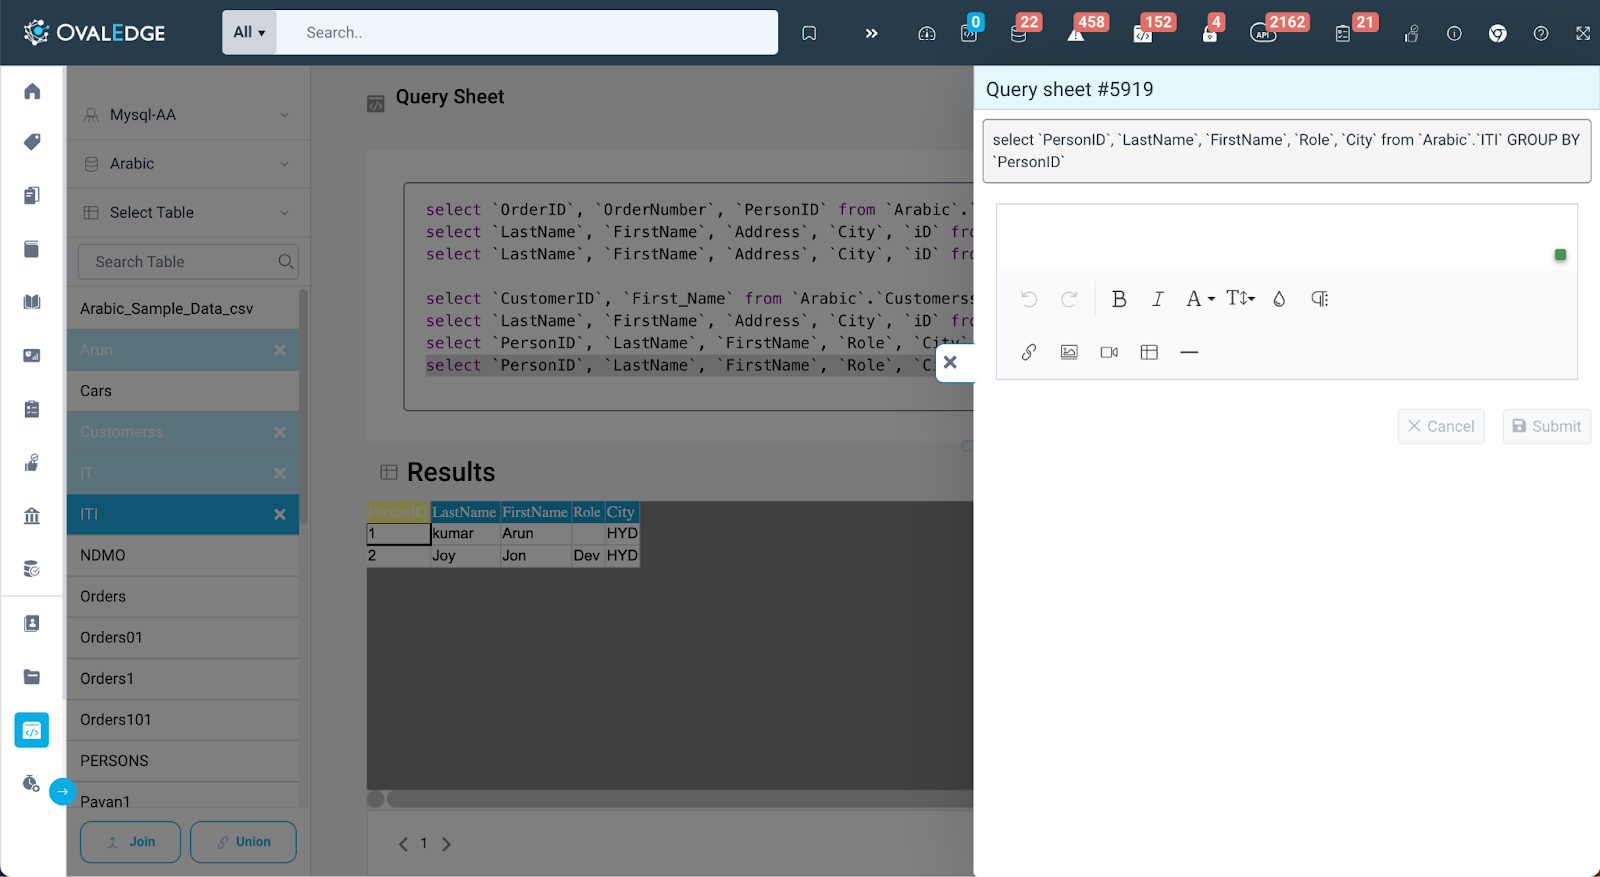
Collaborate on Query
Within OvalEdge, users have the valuable capability to collaborate on a specific query with their team members. This collaborative feature is easily accessible through the "Collaborate" button, making it effortless for multiple users to work together on a query, share insights, and contribute to the analysis process seamlessly. It fosters teamwork and enhances the efficiency of query-related tasks, making collaborative data analysis a straightforward process.
Options in Query Sheet (9 Dots)
-
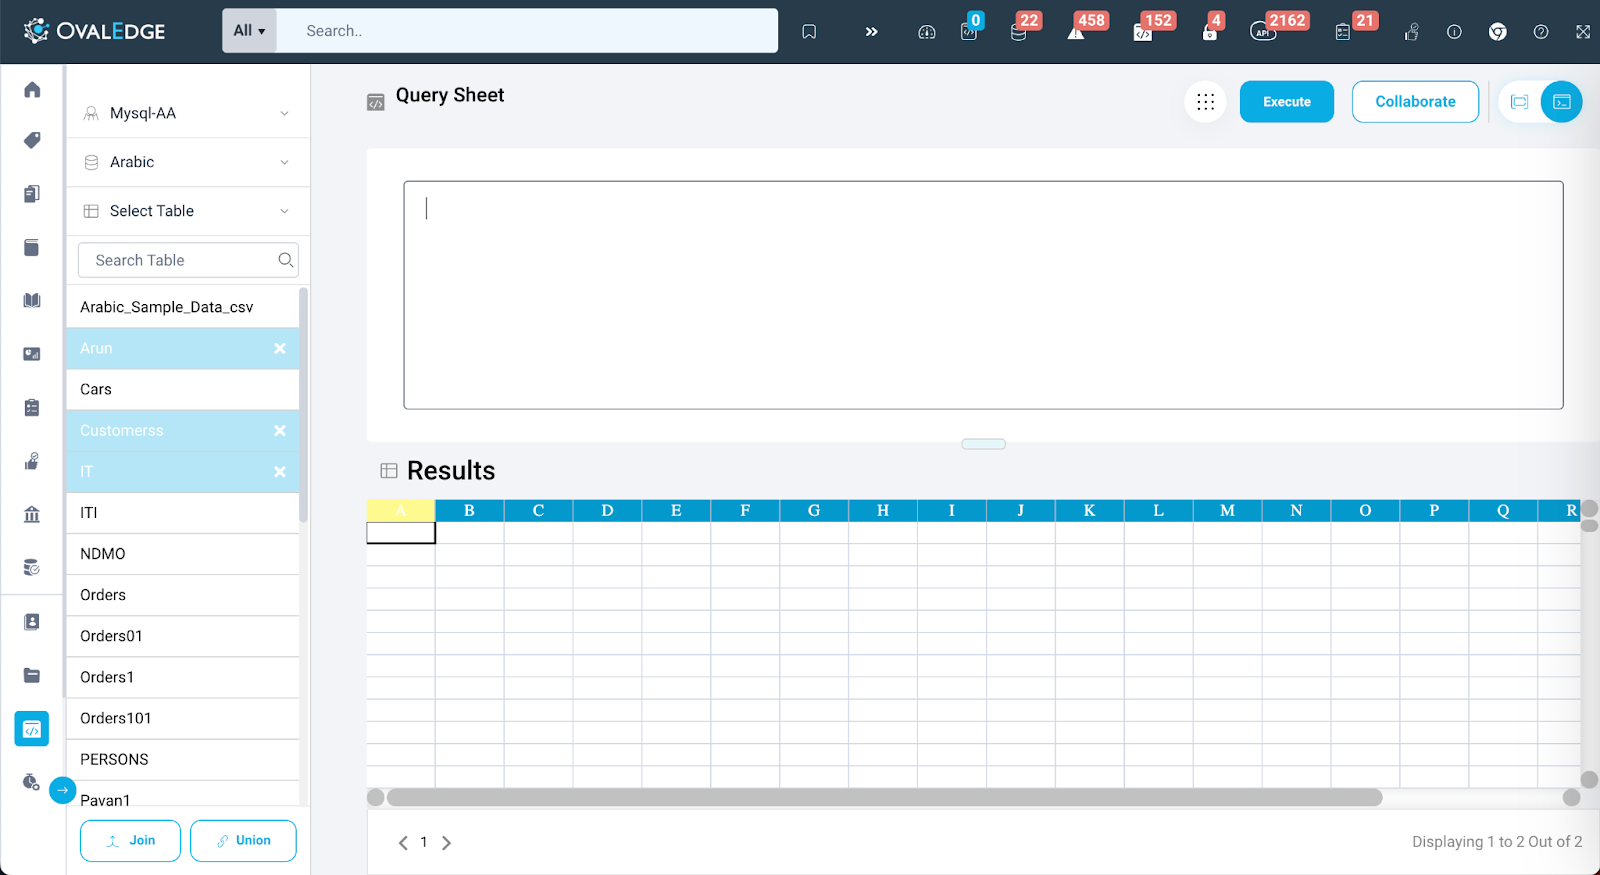
New Queries
OvalEdge offers a feature that lets users create new queries within their selected schema, improving their data analysis. This feature is available only in Advanced SQL mode and is perfect for users who need detailed control over their queries and want to conduct in-depth data analysis.
-
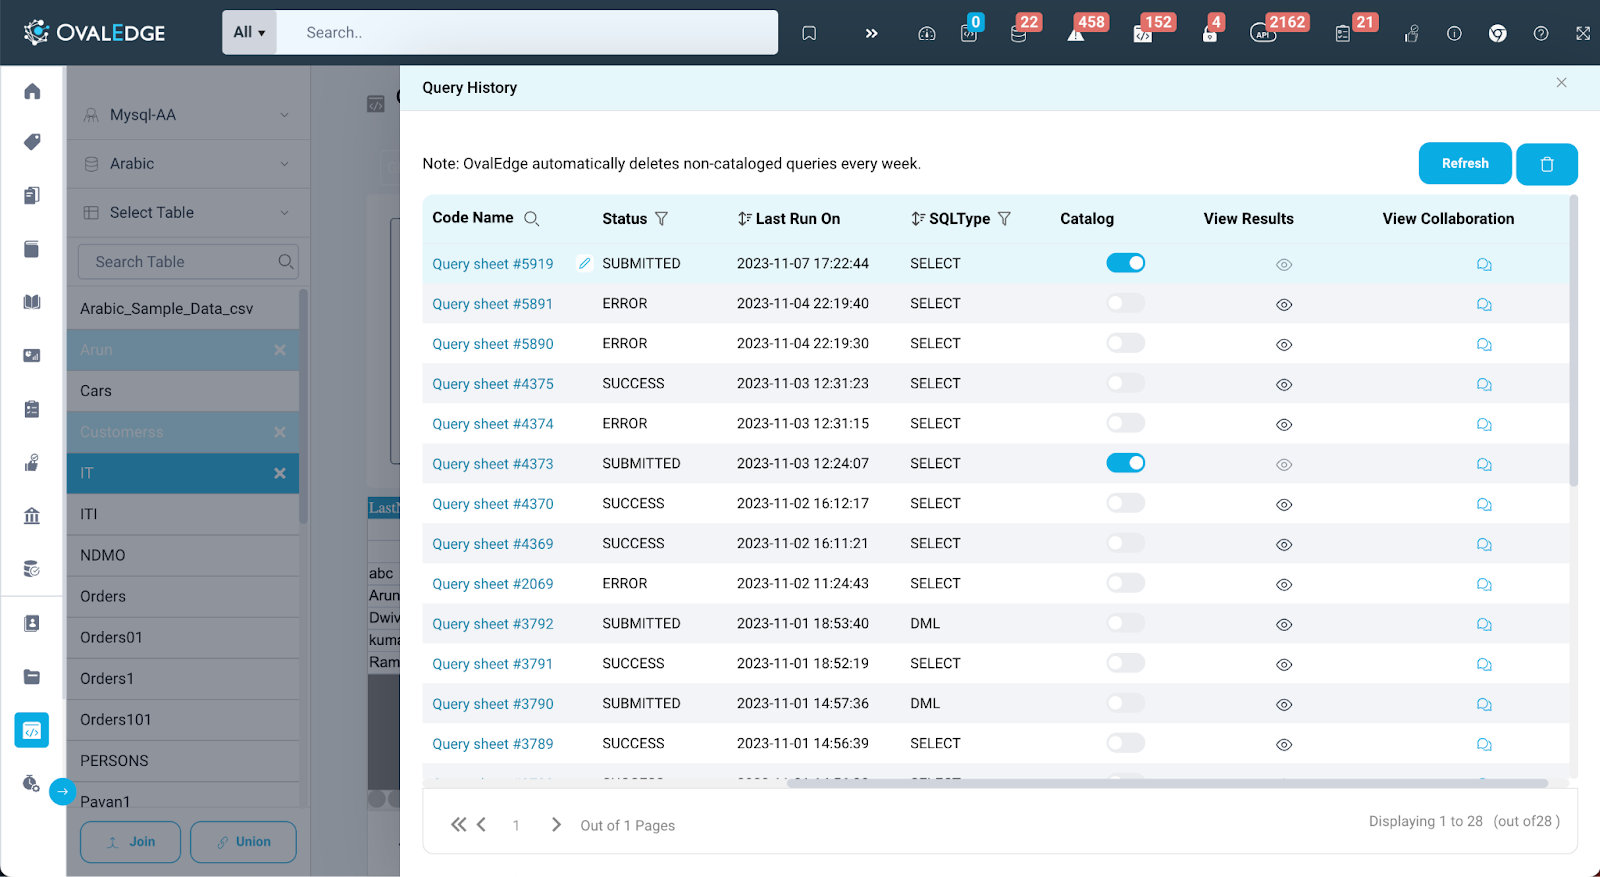
Query History
In OvalEdge, every query, users perform in the query editor is saved as a historical query. Users can access and save their test query using the "Catalog" button. Users can also check the results of their past queries by clicking the "View Result" icon on the same page. If users want to explore the collaboration history of a specific query, they can easily do so from the "History" tab. This approach makes it simple for users to manage and review their queries and their outcomes.
Note: OvalEdge automatically deletes non-cataloged queries every week from Query history tab.
-
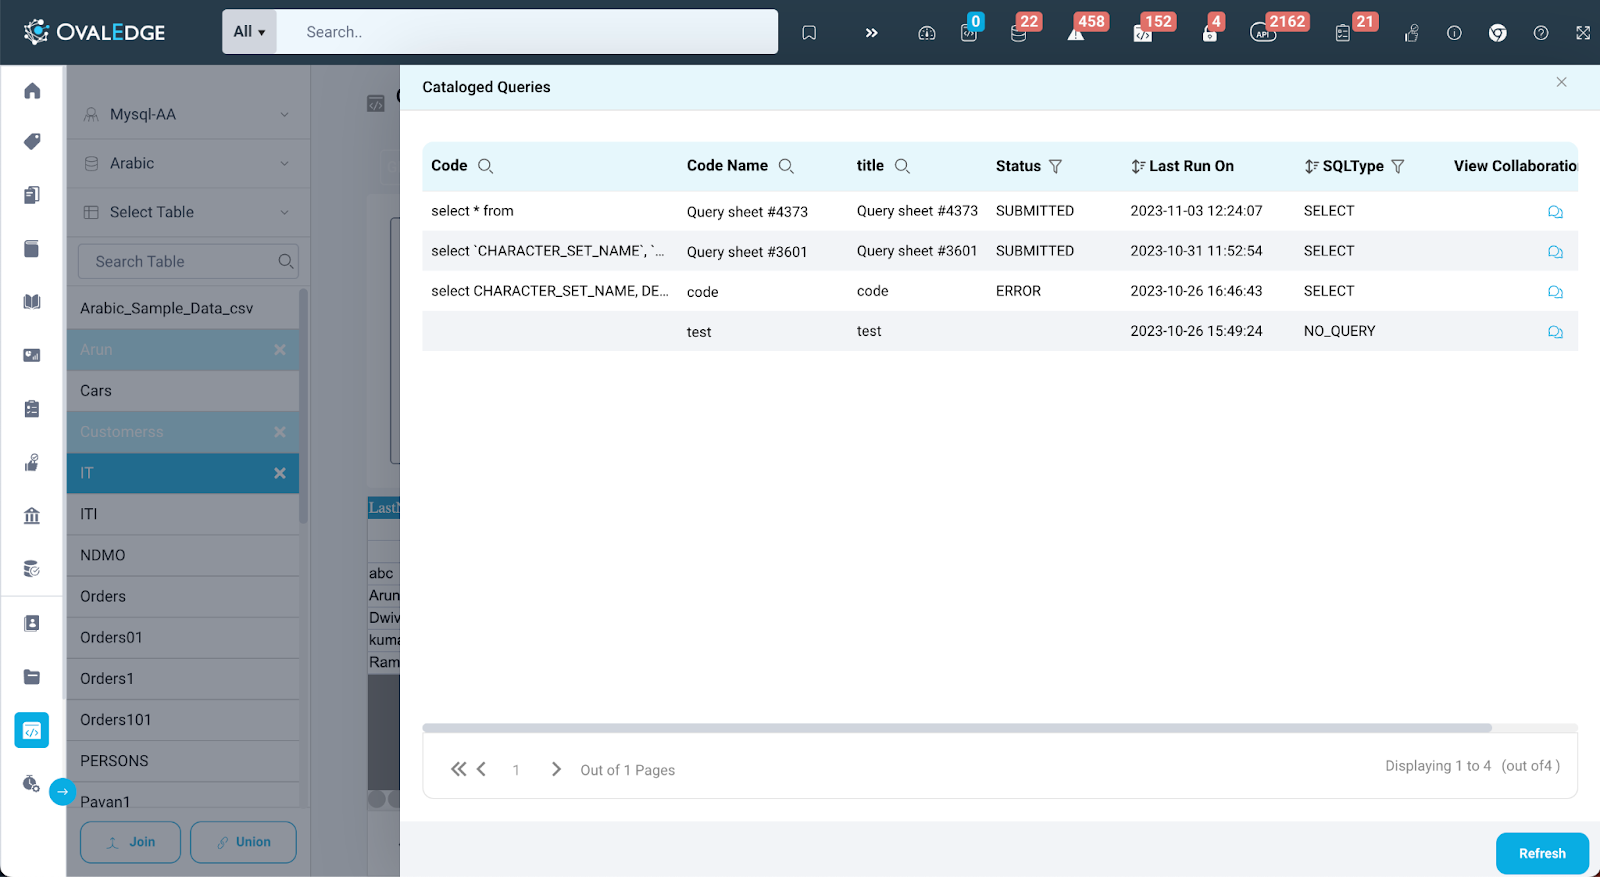
Cataloged Query
All saved queries are displayed in the cataloged query window along with the status of the query. Users can directly redirect to the query summary page in the Data Catalog by clicking on the code name.
Connector Settings
-
Query Policy
The Query Policies are included in the crawler-specific connector settings for the connectors, which are supported with Query Sheet functionality. OvalEdge will allow the user, under specific roles, to restrict the usage of the selected query type (UNION/SUM/AVG, etc.) on the Query Sheet for fetching the required data as per the operation or functions applied.
To provide the restriction for users to use specific Query Types, the Integration admin needs to follow the following steps:
- Integration Admin, need to go to connector page, select the connector for which they want to define the query policy and click on 9 dots.
- Select the Settings options and display the connectors Setting page.
- Click on the Query Policies, and the data grid with existing Policies details with Role, Query Type, Access Type, and Delete columns are displayed.
- To include new query policies, click on the +Add Query Policy button in the inline row with Role, Query Type, Access Type, and Cancel options displayed.
- Select the desired Role, Query Type, and Access Type from the respective dropdowns and click the Save Changes button
- The selected Query Policy will be displayed in the Datagrid.
Example: If you select the Role as “OE_ADMIN”, Query Type as “JOIN,” and the Access Type as “DENY,” then the users associated with the OE_ADMIN privileges are restricted to use the JOIN function in the Query Sheet page.
- In the Query Sheet, if the user associated with the OE_ADMIN role tries to use the JOIN function, then the error message “User does not have permission on this <TableName> to perform this Function: Join” is displayed.
-
Data Access
-
Data Access Authorization
The Data Access Authorization is included in the crawler-specific connector settings to ensure that the right user is accessing the query sheet and queries in the data catalog. Here the system validates the user credentials and allows that particular user to access the query sheet and queries in the data catalog.
-
-
OvalEdge follows OvalEdge data permissions
-
When this option is selected, the OvalEdge application uses a service account for creating the connection in the Data Catalog Data page, Data Catalog Code, and Query Sheet.
-
-
OvalEdge follows Remote system permissions
-
In this case, users are prompted to enter the remote data source credentials on the Data Catalog Code page, Data Catalog Data page, and Querysheet, and then the credentials are used to establish the connection and fetch the data. These credentials will be cached and cleared after 7 days of inactivity, and the user has to then enter the credentials again.
System Settings on Query Sheet
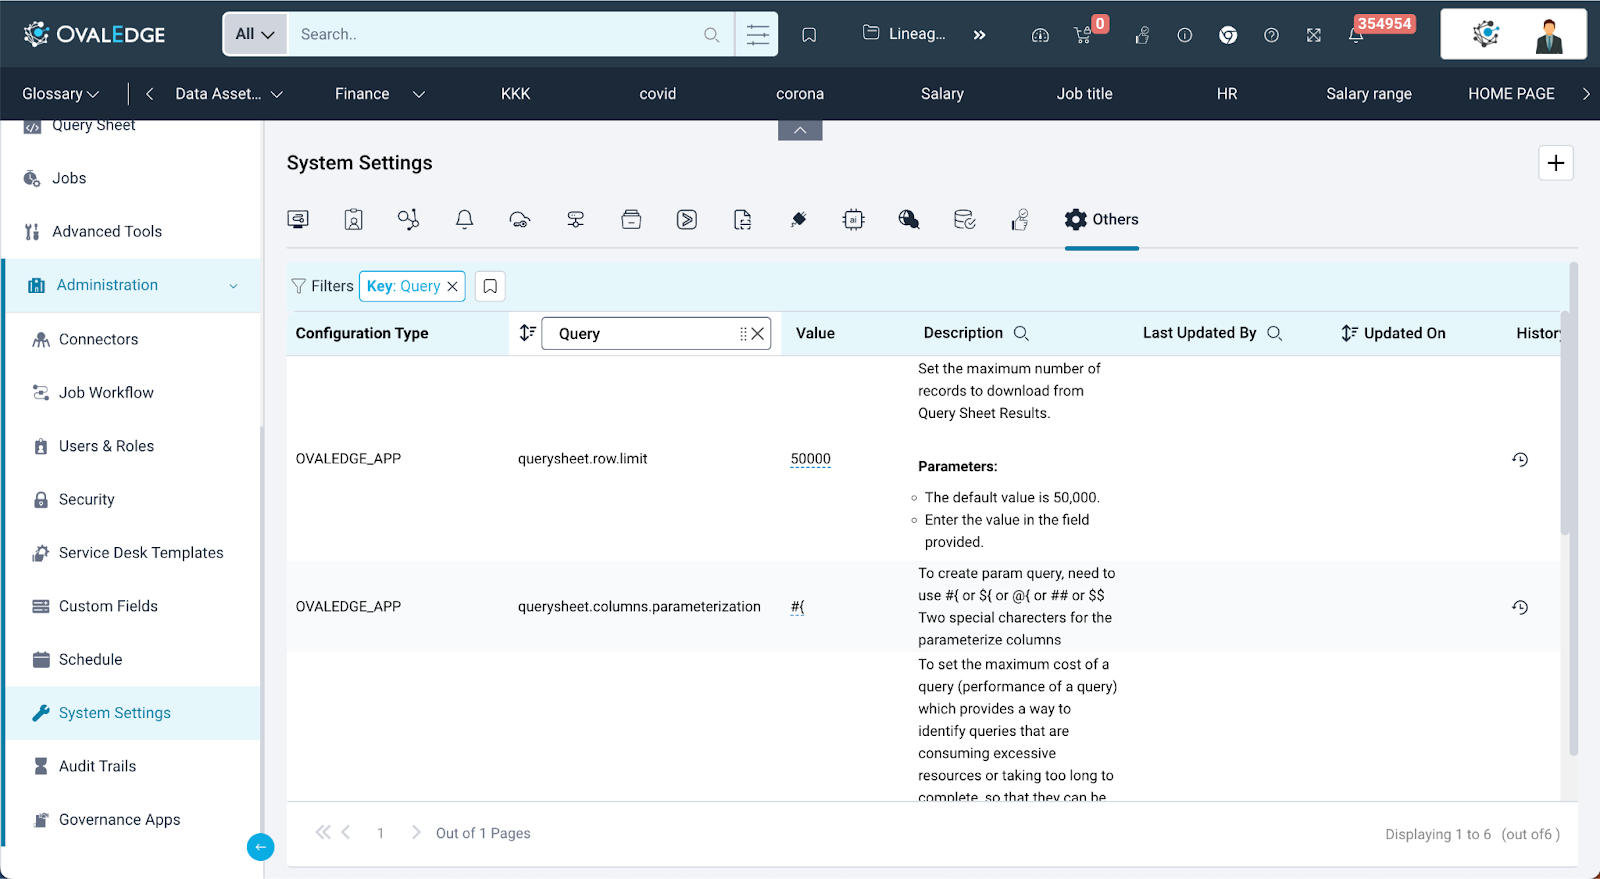
Steps to apply the settings :
- Navigate to the Administration tab located in the left panel.
- From the Administration tab, select System Settings.
- Within the System Settings, proceed to the "Others" tab.
- Utilize the search functionality to locate "Query" in the key column.
- querysheet.row.limit
Allows the admin user to set the maximum number of records to download from Query Sheet Results. The default value is 50,000. Admin users can enter the desired value in the field provided in the System setting (others).