Use the Oracle connector to access Oracle database systems and perform various read, write, and load functions. OvalEdge supports Oracle 11 and 12.
Connect to Oracle
OvalEdge Connector provides connectivity to the Oracle databases that enable you to connect and crawl the metadata from this relational database. In this document, you can see how to establish a connection with your Oracle instance. OvalEdge supports Oracle 11 and 12.
Before we begin
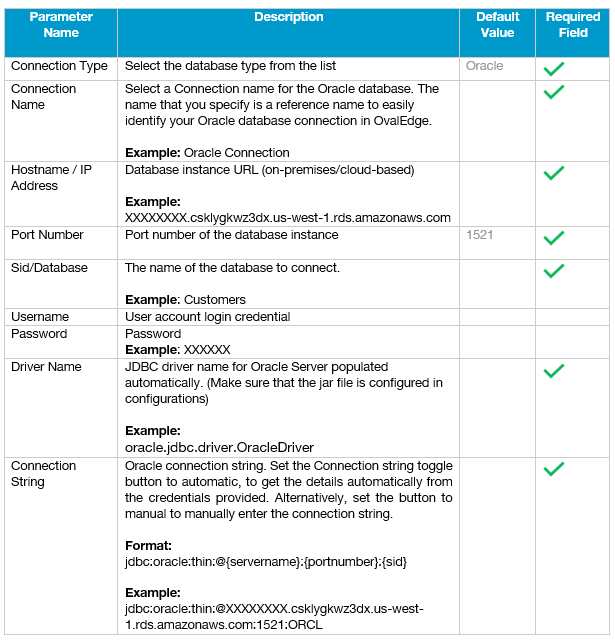
To implement a connection to your Oracle from OvalEdge, you must have the following:
- Hostname or IP address for an On-premise or Cloud-based Oracle instance.
- The user name and password of the service account.
- The port number for the database.
- Database name.
- Choose and add the right Oracle drivers into the OvalEdge Jar path to communicate to your Oracle database. Check the configuration section for further details on how to add the drivers to the jar path.
Connection Details
Connect and Validate the Oracle from OvalEdge
- Select the Administration tab and click the + button to expand the functions.
- Select the Crawler.
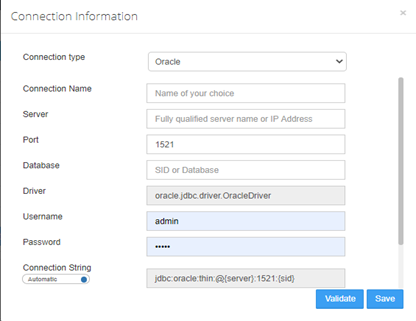
- Click the New Database from the Crawler window. The dialog box for configuring a database connection is displayed.
Example:
-
Select the Connection type in the drop-down menu.
-
Enter the connection details.
-
Click validate to test the database connection.
When validation completes, click save to finish the configuration of the reporting system connection.
Crawl the Connection
In OvalEdge, each database can be crawled at a Schema level. In other words, when there are multiple schemas within a database, you have an option to select a specific schema and crawl.
To crawl a specific Schema or multiple schemas:
- Select the Administration tab and click the + button to expand the functions.
- Select the Crawler.
- Select a database from the list.
- Click the Crawl/Profile button on the crawler page.
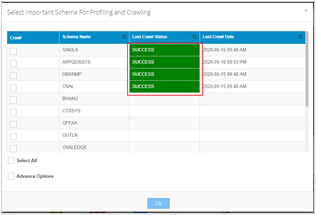
The dialog box to select Important schema for crawling and Profiling is displayed.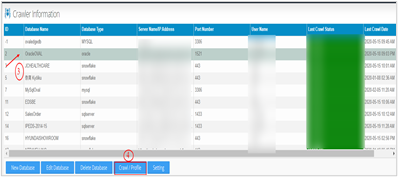

- Click the Checkbox next to the schema name and select a single schema or multiple schemas to crawl and profile.
- To crawl all schemas, click Select All.
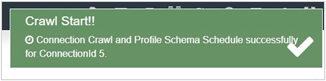
- Click OK to initiate Crawling the database connection immediately.
Alternatively, select Advanced options to schedule a Crawl and Profile action later. - A dialog box displays that a crawl job is Initiated
- Select the Jobs tab in the object explorer(left side of the window) to know the status of the job submitted.
- Check the Job step status and click the Refresh button.
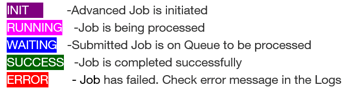
- Go to the Crawl window to check the Last Crawl Status of the selected Schemas.