The OvalEdge OneLogin Configuration is a single authentication window. This is an identity management platform that provides a secure workplace for customers and partners. The OvalEdge OneLogin Configuration handles web applications that do not support storing usernames and passwords for multiple applications. This enables enterprises to provide their users with Secure Single Sign-on(SSO) for all web applications.
To register and access the OvalEdge OneLogin configuration portal, please follow the below steps.
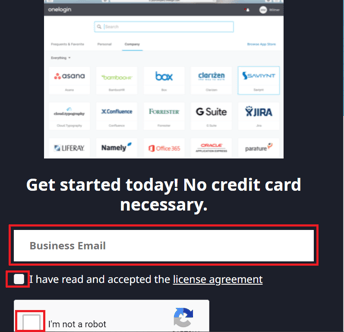
- Register on the OneLogin page by providing the Business Email ID and accepting the license agreement.
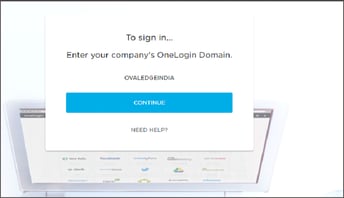
- Once after providing the required details, the To Sign in page is displayed.
- Click on Continue button, the OneLogin page is displayed.
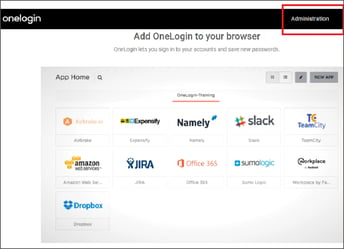
- Click on Administration; the User page is displayed.
-2.png?width=688&height=320&name=pasted%20image%200%20(4)-2.png)
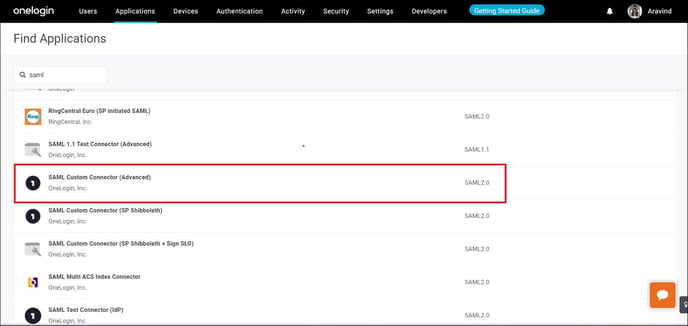
- Go to the Applications and in the search bar, enter SAML and select SAML Custom Connector (Advanced) option. The Info page is displayed.
- In the Info page-
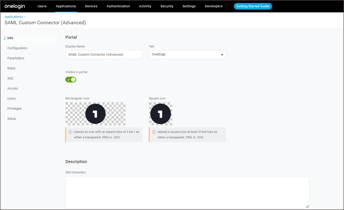
- Enter the Display Name as SAML Custom Connector, Tab as OvalEdge, and insert an image for the regular icon and rectangular icon. Also write some descriptions, which must not exceed 200 characters, and also add notes if anything is there.
- Click on the Save button, the Configuration page is displayed.

- Enter https://<DNS-IP> followed by /ovaledge/saml/metadata for Audience.
- Enter https://<DNS-IP> followed by /ovaledge/saml/SSO for recipient.
- For ACS (Consumer) URL Validator, enter ^https:\/\/<DNS-IP>\/ovaledge\/saml\/SSO$. Please set this with Regular Expression.
- Enter https://<DNS-IP>/ovaledge/saml/SSO for ACS (Consumer) URL.In the Configuration page
- After entering all the above mentioned details, click on the Save button. The entered data is saved and the Parameter page is displayed.
-
Click on the ‘+’ sign to add the below details.
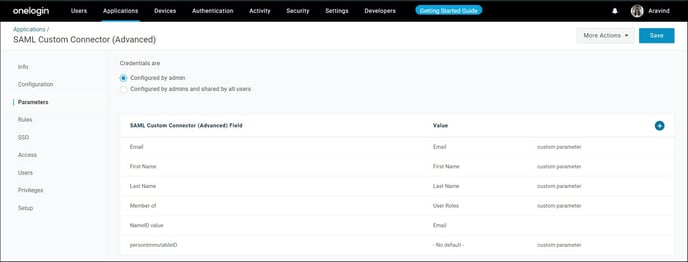
Note: Ensure that the “configured by admin” option is checked for credentials.In the Parameters page:
-
Adding Email- For Field Name, Enter Email, and then click on save. For the value, search email in the search bar and select email. Click on save to save the data.
Note: Ensure to enable the ‘Include in SAML assertion’ option for Flags. -
Follow the above step to add First Name, Last Name, Member of attributes.
Note: Set the value as User role for Member of the attribute. For other options, Field Name and value will be the same. -
Click on the Save button, the entered data is saved and the SSO page is displayed.
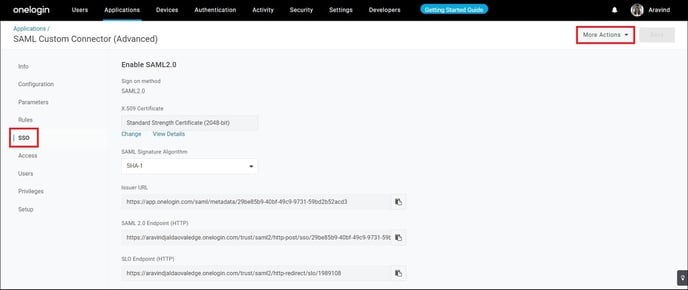
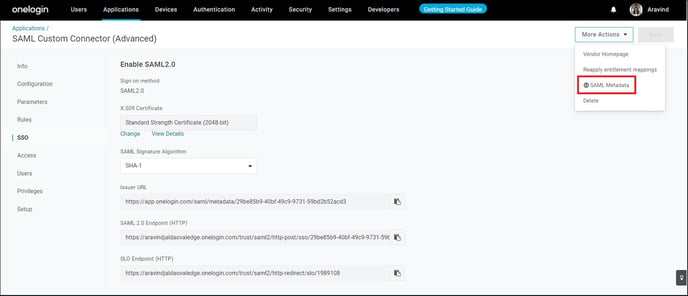
- In the SSO page, go to more actions, right click on SAML Metadata and click on Copy Link Address. This URL serves as SAML Metadata. Paste it into the oasis.properties file located under Apache Tomcat’s webapp/ovaledge/WEB-INF/classes folder or in an external folder, created.

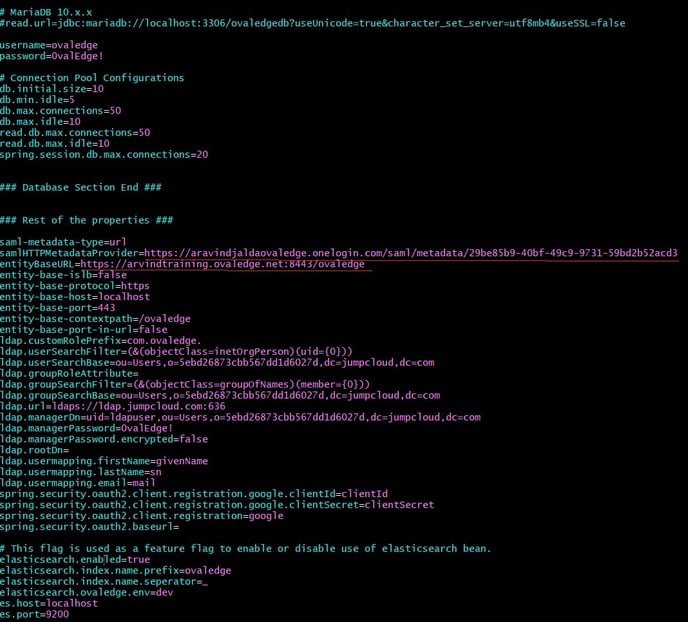
- Go to the Tomcat’s bin folder, Edit the setenv.bat file or Create it if not existing. set CATALINA_OPS=”-DOVALEDGE_SECURITY_TYPE=saml”.


- Restart the tomcat.
- Once the server is up, Go to Browser and Enter the web application URL. For example, https://<DNS-IP>:<PORT>/ovaledge. The login page is displayed.

- Click on Login; the credentials page is displayed.
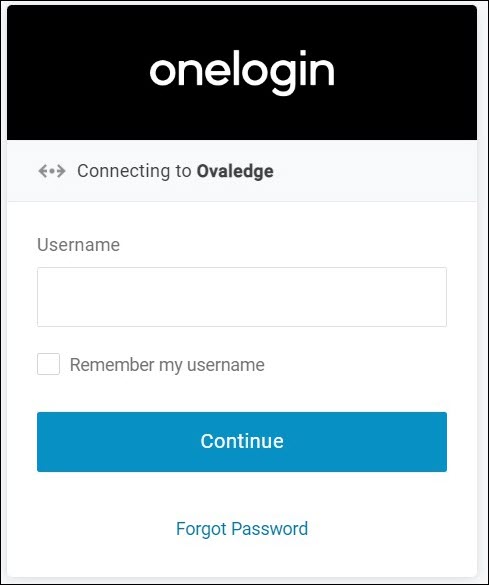
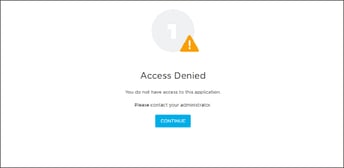
- Enter your Username, which you have registered for OneLogin Account. As no user is assigned to this application, an access denied window will appear after logging in.
- Create roles, Groups, and Users and assign the created SAML application.
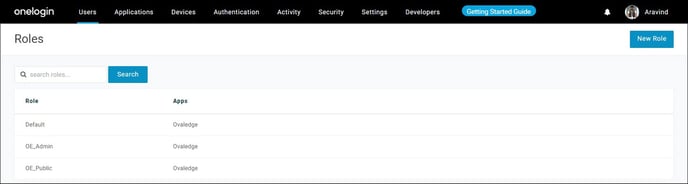
- Creating a new role- Place the cursor on the User and click on the role. Click on New Role.
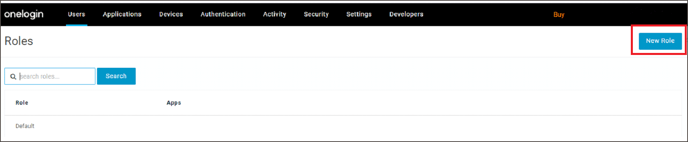
- Add the title on the bar present below Roles. Eg: OE_Admin, OE_Public. Then click on save for saving the new roles.
- Under Users Click on Groups, the Groups page is displayed.

- Click on New Group to create groups. Please create two types of groups, eg: OE_Admin, and OE_Public. Then click on Save.

- Under Users Click on mapping, the Mapping page is displayed. Add new mapping for the admin role.
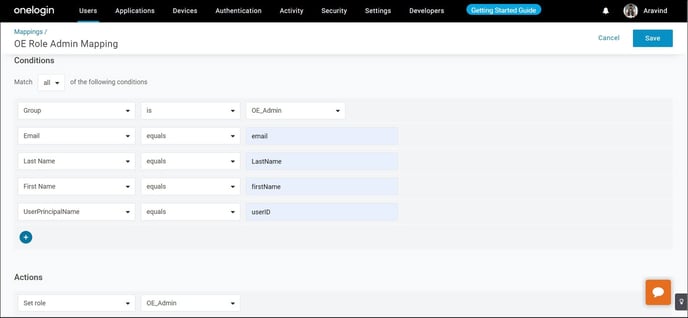
- Click on the Save button to save the new mapping created for the admin role.
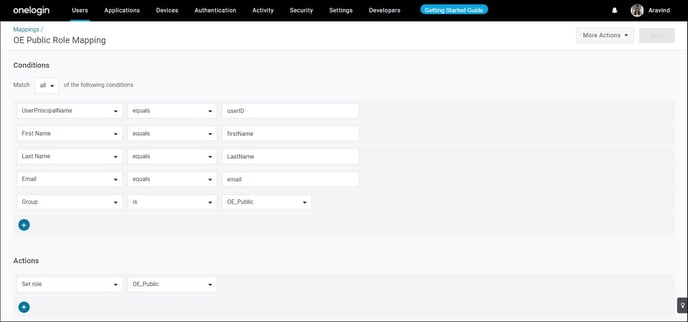
- Also, add mapping for public roles and click on the Save button.
- Click on a new user, to create users, the Create User page is displayed.
- Click on New User. Enter the First Name, Last Name, Email, and Username.
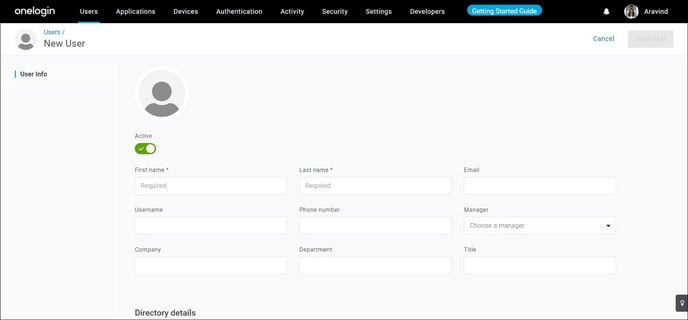
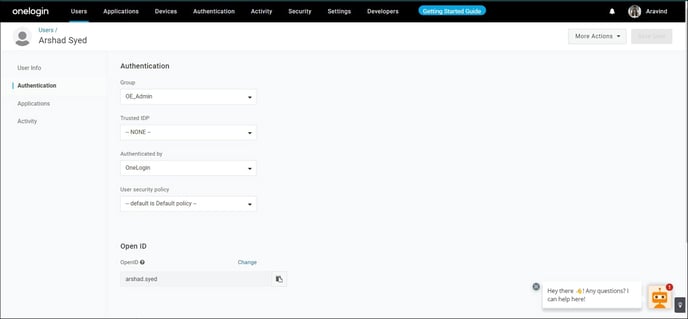
- After entering all the required information, click on the Save button and click on Authentication. The authentication window is displayed.
- In the authentication window, select the created group.
- Creating a new role- Place the cursor on the User and click on the role. Click on New Role.
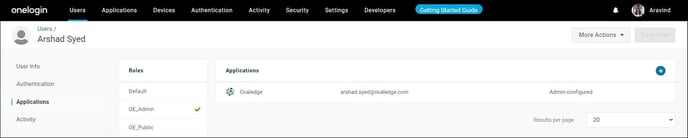
- Click on Application, the application page is displayed. Assign a role and click on save.
- Log in to the application. The created user authorized with the Admin role is authenticated into the application.