Upgrading MySQL from version 5.7 to 8.0 is a crucial task that should be performed with caution to avoid data loss. This guide outlines the steps to upgrade MySQL on an Ubuntu 18.04 server. It is essential to create a backup of your MySQL data before upgrading, ensuring you can restore it in case of any issues.
Please note that the provided commands and steps assume you have administrative privileges on the server and that you have already installed MySQL 5.7 on the system.
Step 1: Backup Your MySQL Database
Before starting the upgrade process, create a backup of your MySQL data using the mysqldump command:
|
bash |
|
mysqldump -u root -p ovaledgedb > ovaledgedb.sql |
Replace "root" with the appropriate MySQL user and enter the MySQL password when prompted. This command will create a SQL dump of all your databases and save it in the ovaledgedb.sql file.
Step 2: Backup MySQL Configuration File
Ensure to back up the MySQL configuration file before proceeding with the upgrade using “cp command”
|
bash |
|
sudo cp /etc/mysql/my.cnf /etc/mysql/my.cnf_bkp |
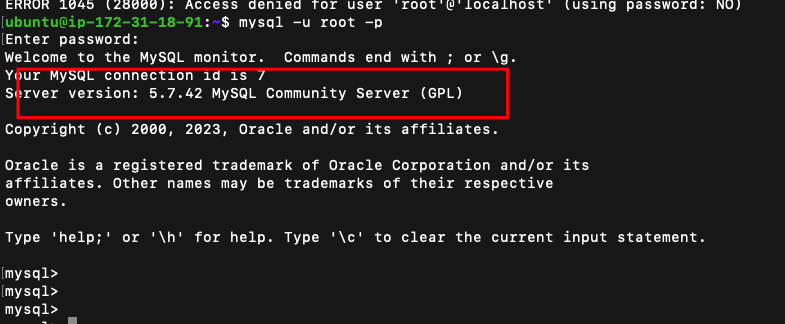
Step 3: Check the database version.
Check the version of the database by logging into the MySQL database by using the below command
|
bash |
|
mysql -uroot -p |
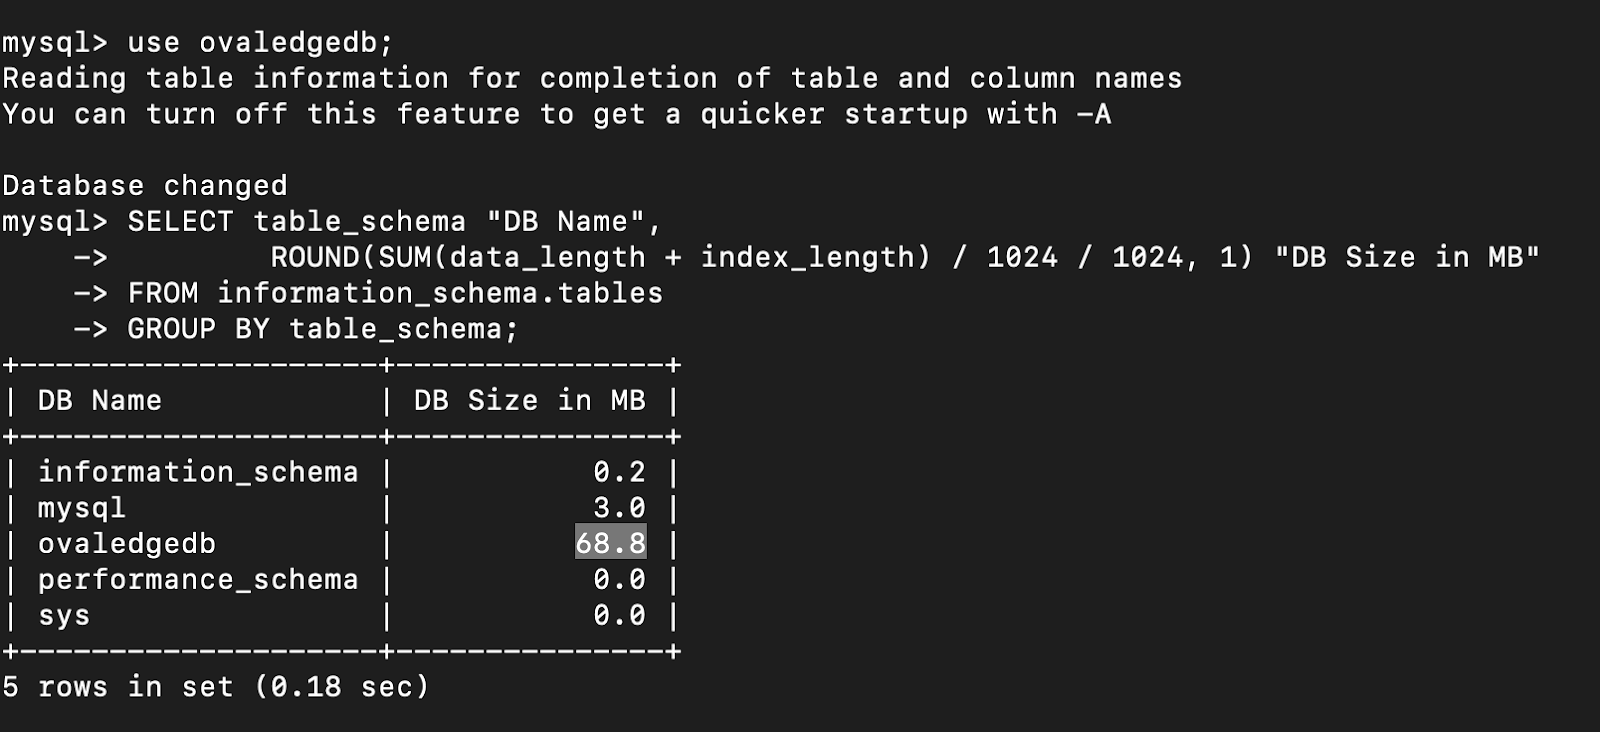
Step 4: Check the Database Size (Optional)
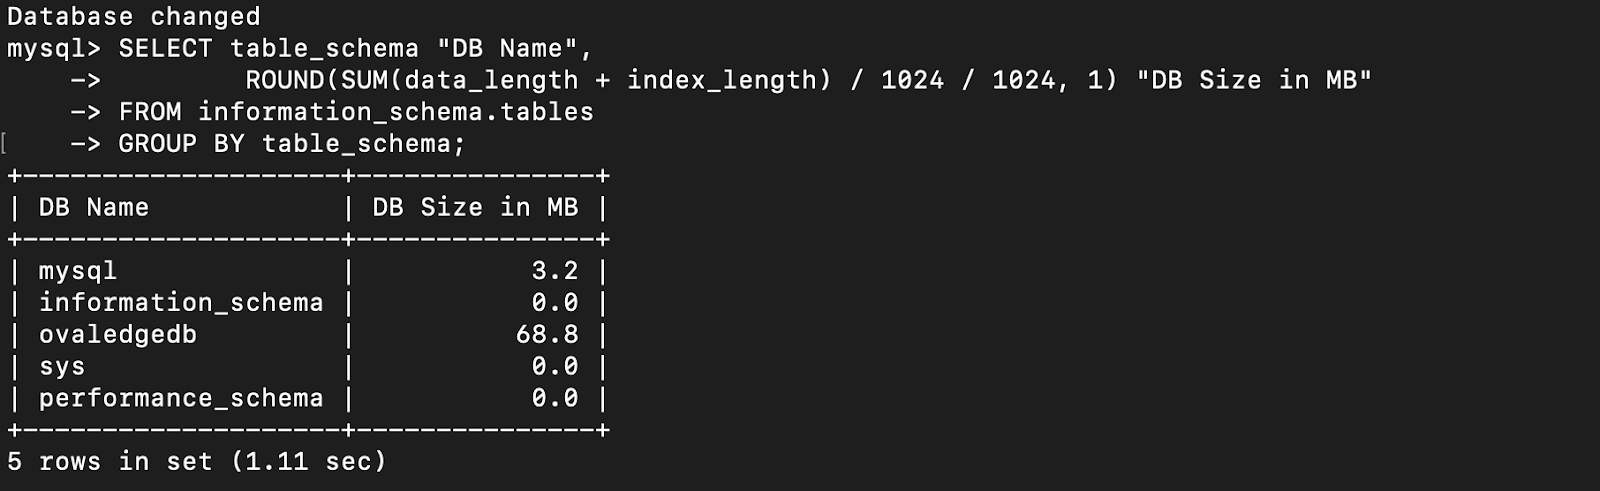
If desired, you can check the size of your databases before the upgrade. Connect to the MySQL server and run the following query:
|
SQL |
|
SELECT table_schema "DB Name", ROUND(SUM(data_length + index_length) / 1024 / 1024, 1) "DB Size in MB" FROM information_schema.tables GROUP BY table_schema; |
Step 5: Stop MySQL Server 5.7
Before the upgrade, stop the MySQL server 5.7 using systemctl:
|
bash |
|
sudo systemctl stop mysql |
Step 6: Add MySQL 8.0 Repository
To install MySQL 8.0, add the MySQL APT repository:
|
bash |
|
wget https://dev.mysql.com/get/mysql-apt-config_0.8.20-1_all.deb |
The packages are downloaded and if you want to download the package of any other version can visit the official website of MySQL.
Step 7: Installing the package
Install the package by using “dpkg command” in the command line terminal
|
bash |
|
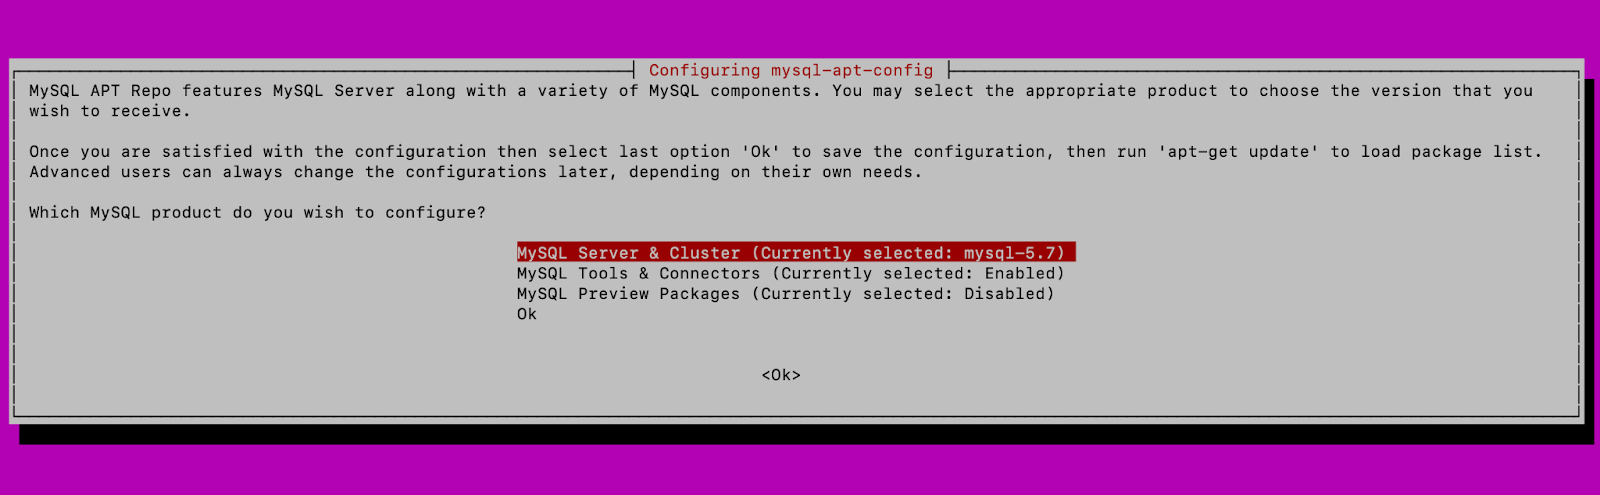
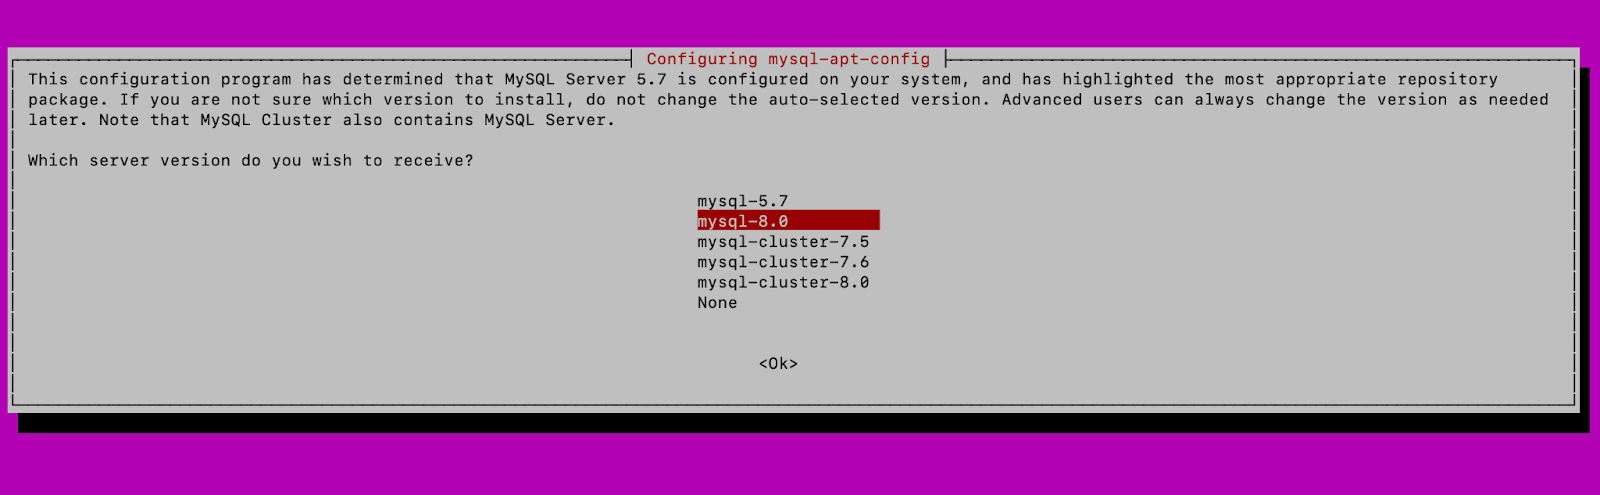
sudo dpkg -i mysql-apt-config_0.8.20-1_all.deb |
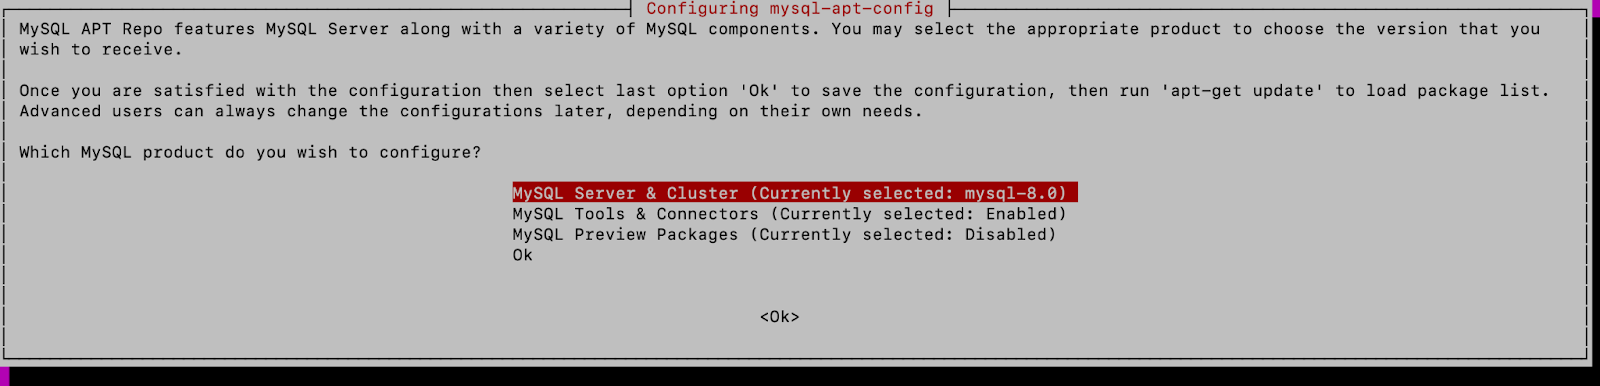
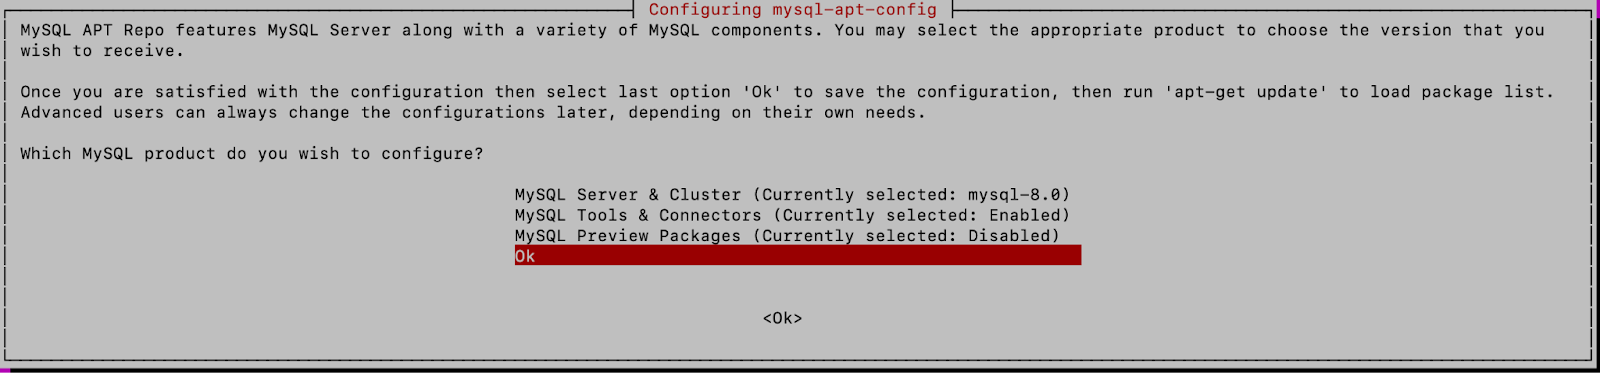
During the installation, you may receive prompts while installing the .deb package into the Ubuntu Server to choose the MySQL version. Select MySQL 8.0 from the options provided.
Step 6: Upgrade MySQL Server from 5.7 to 8.0
After adding the repository, update your package list and install MySQL 8.0:
|
bash |
|
sudo apt-get update sudo apt-get install mysql-server |
During the installation process, you will be prompted to choose a default authentication plugin. Select "Use Strong Password Encryption" and click "OK."
Step 7: Check MySQL Version
After the upgrade, verify the MySQL version:
|
bash |
|
sudo systemctl status mysql |
Then, log in to the MySQL server to check the version:
|
bash |
|
mysql -uroot -p |
Step 8: Verify Database Size (Optional)
If desired, you can re-check the database sizes to ensure they are intact after the upgrade:
|
SQL |
|
SELECT table_schema "DB Name", ROUND(SUM(data_length + index_length) / 1024 / 1024, 1) "DB Size in MB" FROM information_schema.tables GROUP BY table_schema; |
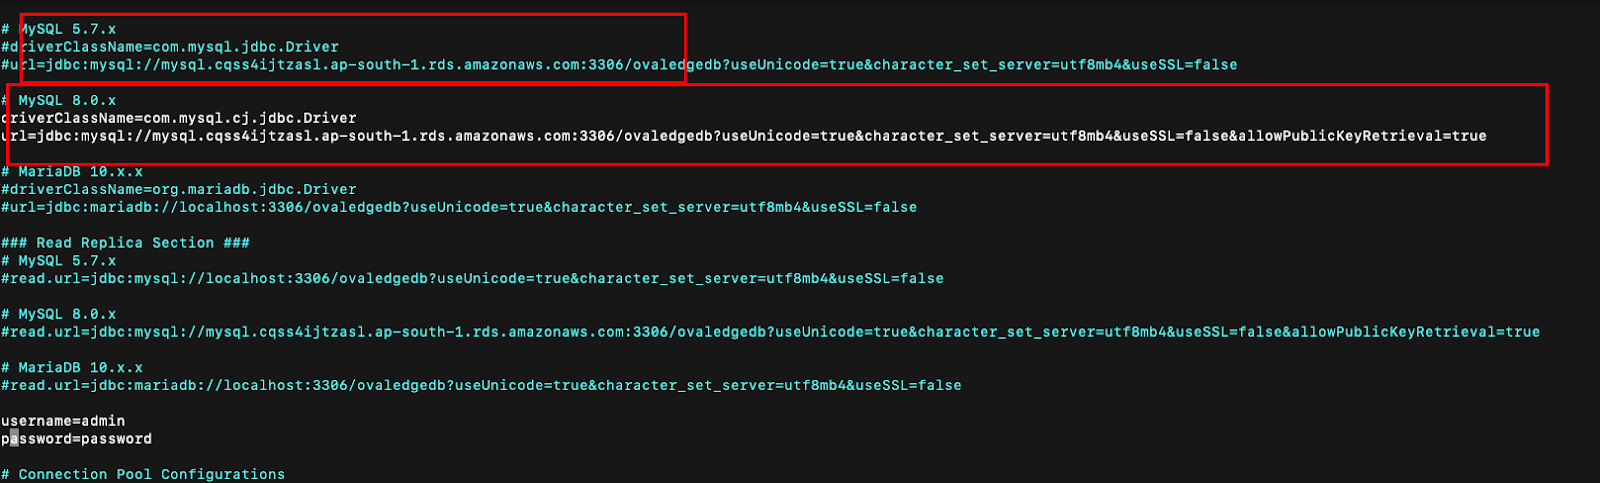
Once the RDS is migrated to MySQL 8.0.X start the tomcat server by changing the RDS details in the oasis properties file, as shown in the below screenshot.
Copyright © 2024, OvalEdge LLC, Peachtree Corners, GA USA