Java Upgrade Guide
Upgrading your Windows Java Development Kit (JDK) ensures your system benefits from the latest features and security updates.
This guide provides step-by-step instructions for upgrading to JDK 8u422, setting environment variables, and verifying the installation.
Steps to Upgrade Java to 8u422
1. Stop Dependent Services
- Stop Tomcat:
- On the OvalEdge Virtual Machine, type "services" in the Windows search bar and press Enter. Locate the Tomcat service in the list and stop it.
- On the OvalEdge Virtual Machine, type "services" in the Windows search bar and press Enter. Locate the Tomcat service in the list and stop it.
- Taking Backup:

-
- Backup Existing Java Configurations:
-
-
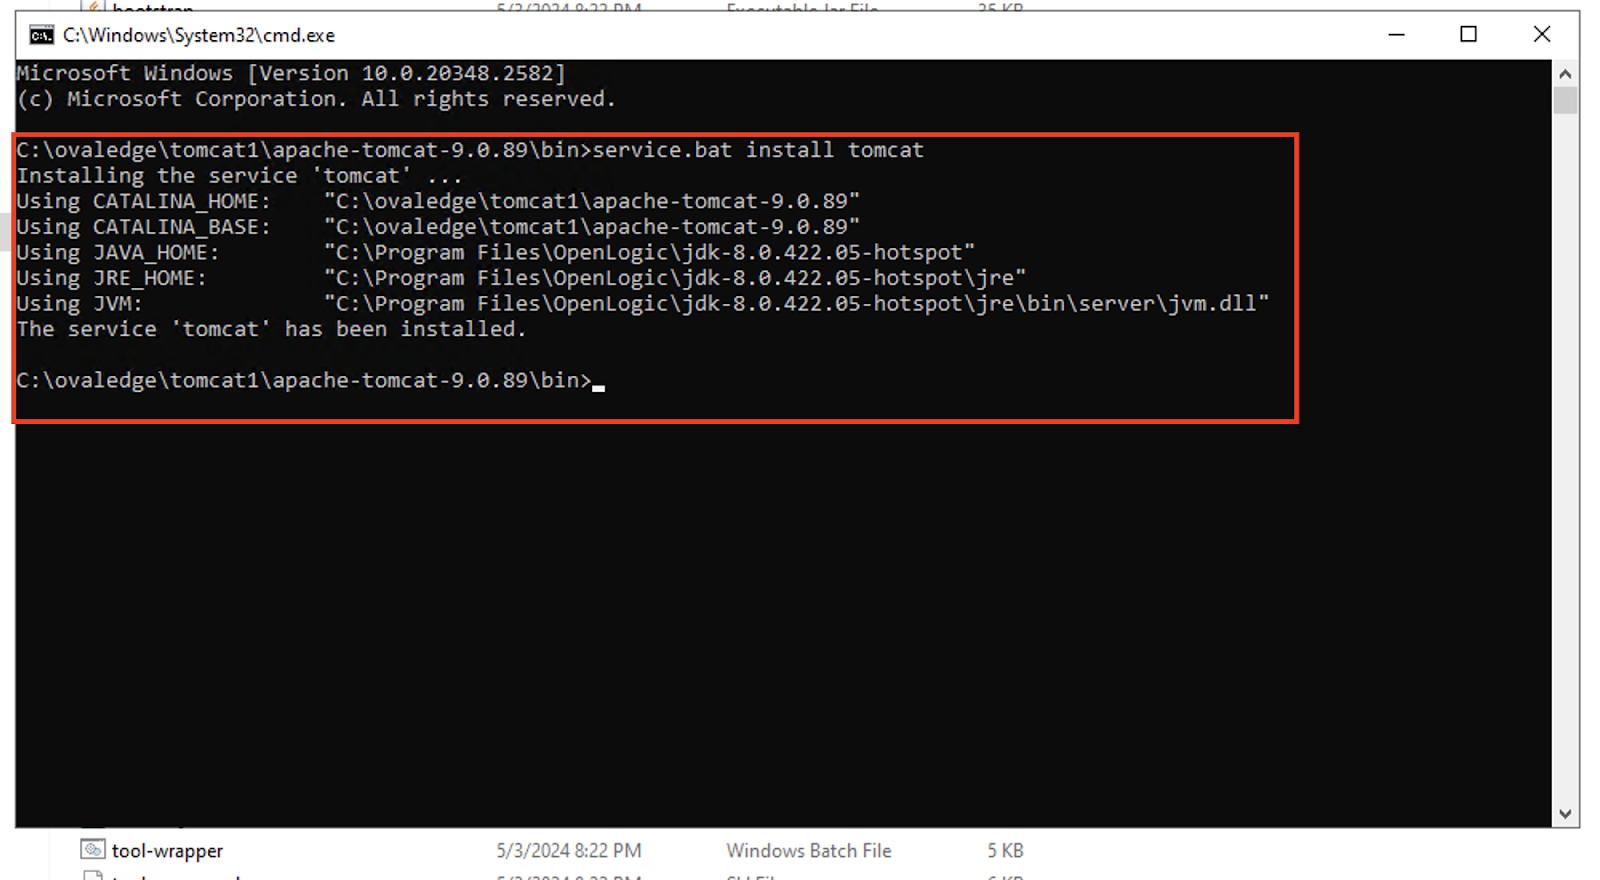
- Open a Command Prompt as Administrator.
- Navigate to the bin directory of the Apache Tomcat installation:
cmd: cd <path_to_tomcat>\bin
-
-
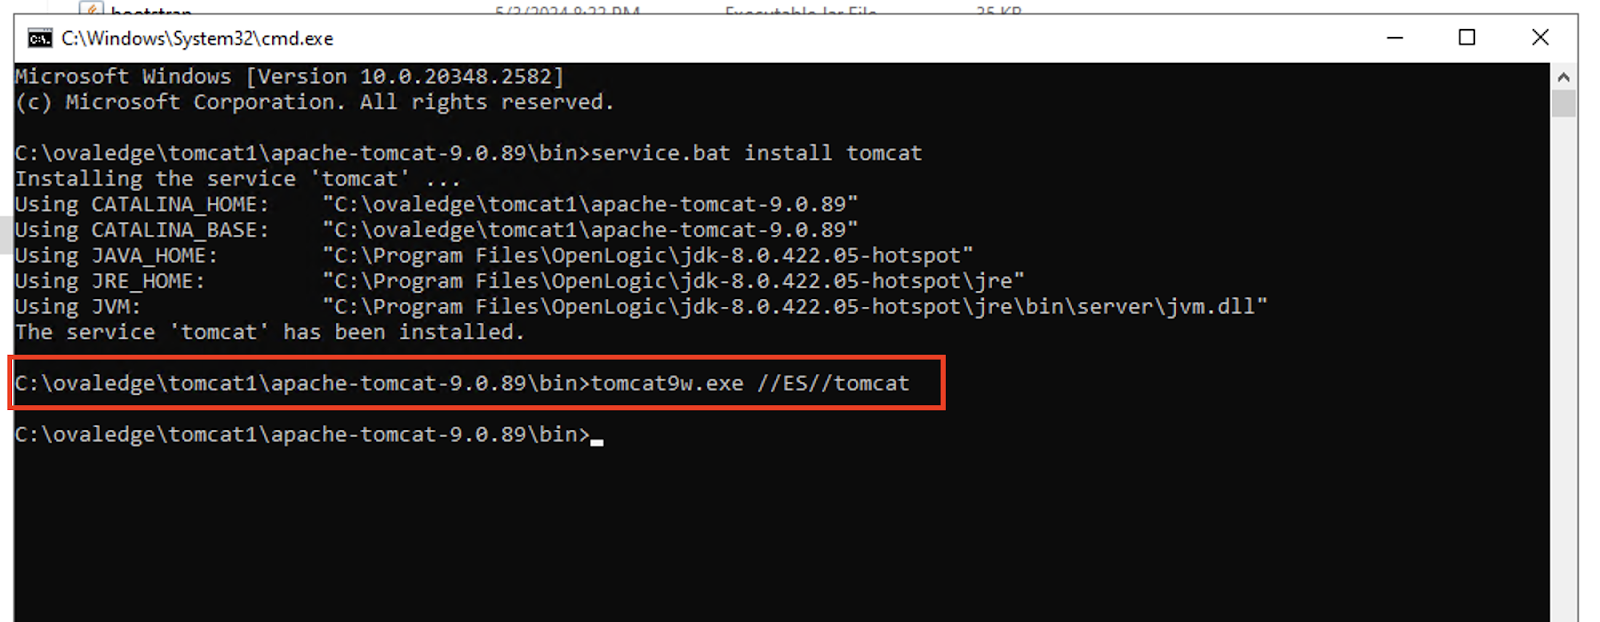
- Open the Tomcat Configuration Tool:
-
-
- Run the following command to launch the tomcat9w configuration utility:
cmd: tomcat9w.exe //ES//<tomcat_servicename> - Replace <tomcat_servicename> with the name of your Tomcat service.
- Run the following command to launch the tomcat9w configuration utility:
-

-
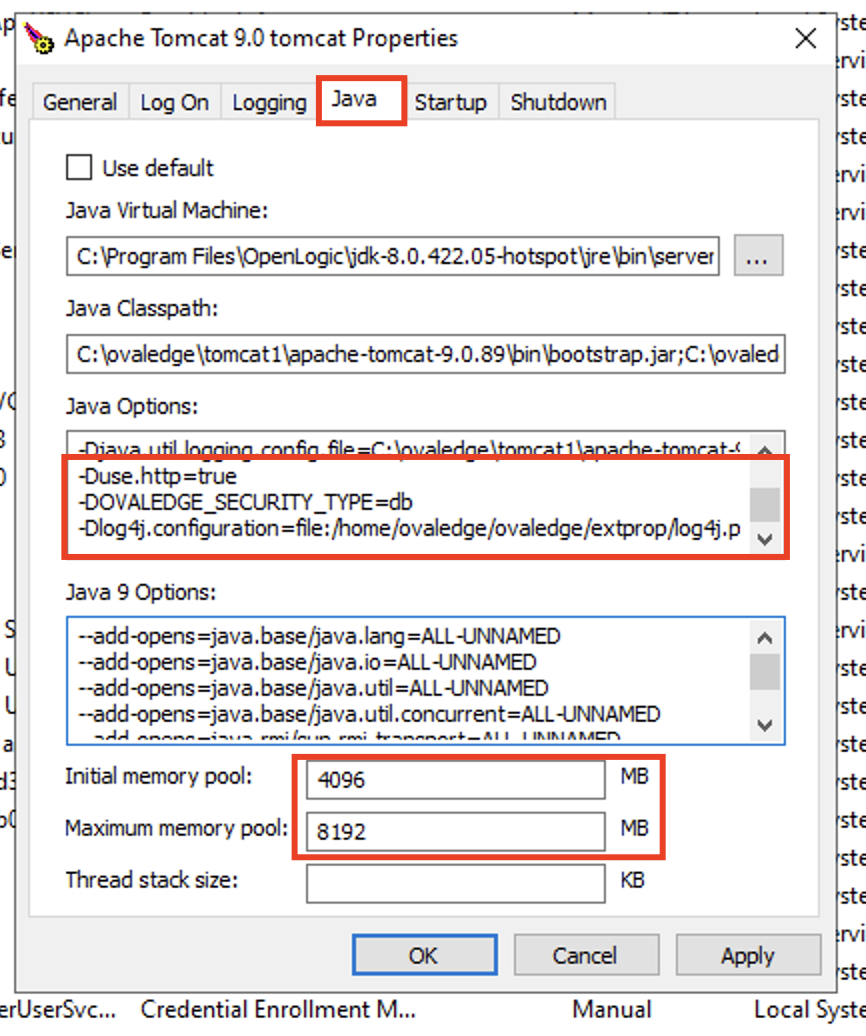
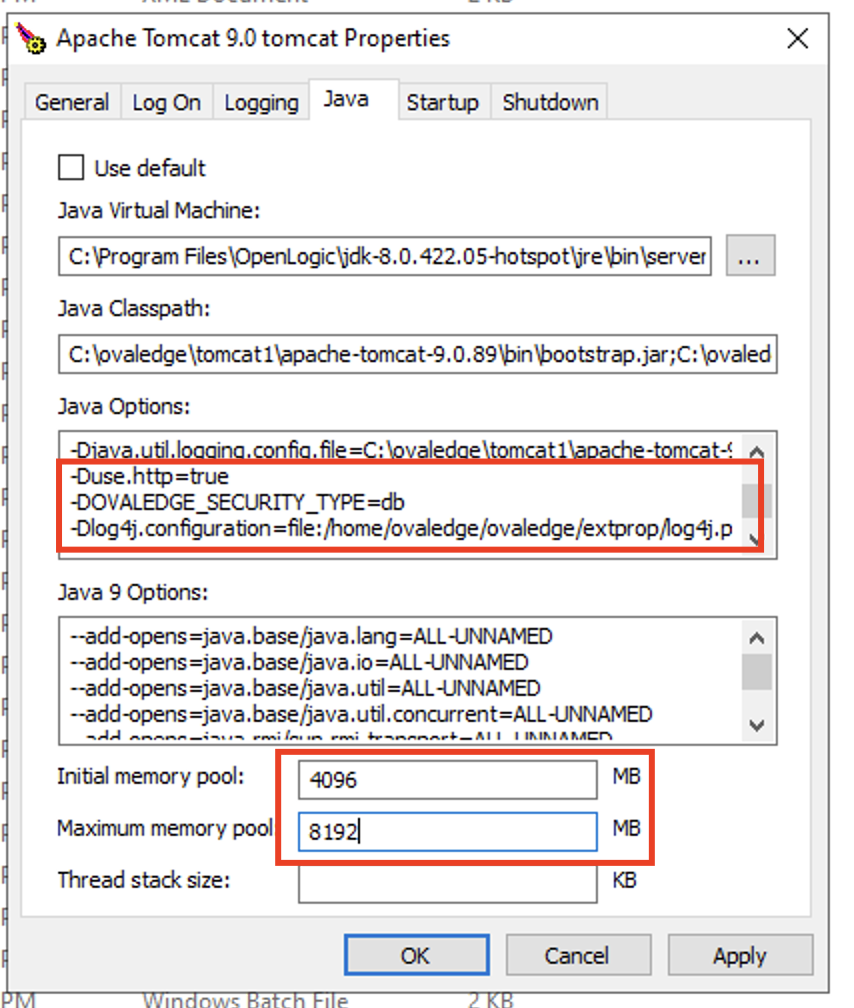
- Save Java Configurations:
-
-
- In the Java tab of the configuration tool, copy all Java options and paths.
- In the Java tab of the configuration tool, copy all Java options and paths.
-
-
-
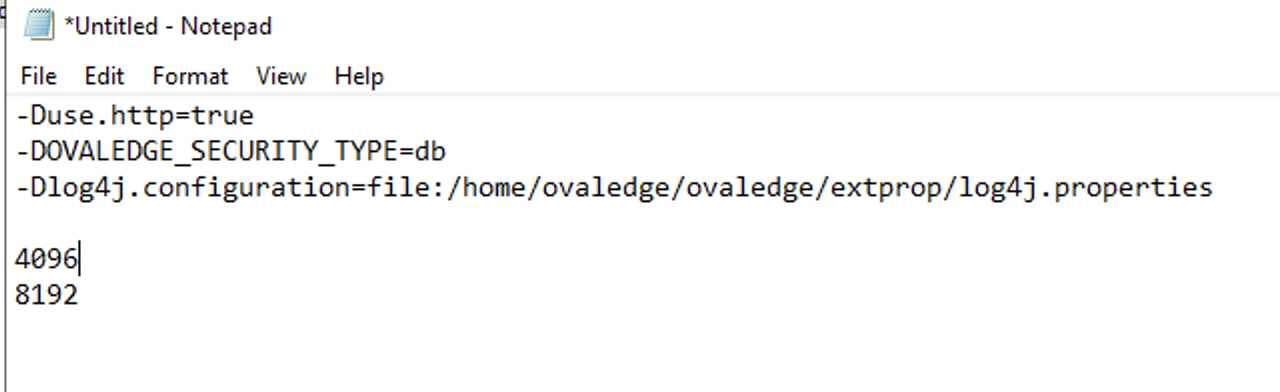
- Save this information in a text file for future reference.
-
- Saving Backup Details:
-
- Save the configuration details (e.g., paths, Java options) from the Tomcat properties for later use.
- Save the configuration details (e.g., paths, Java options) from the Tomcat properties for later use.
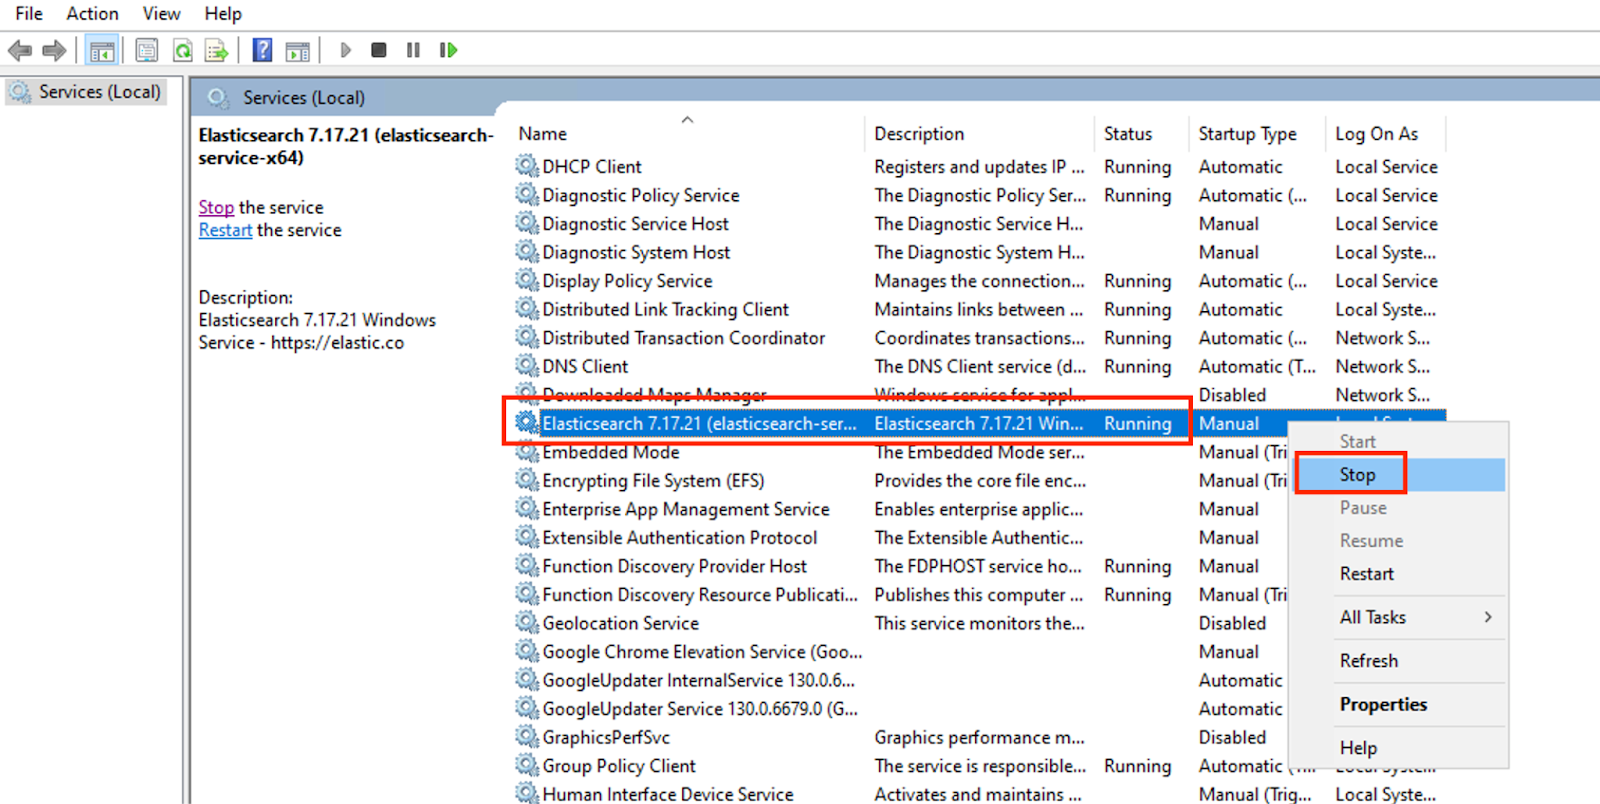
- Stop Elasticsearch:
- In the Windows search bar, type "services" and press Enter. Locate the Elasticsearch service in the list, right-click, and select Stop to stop the service running on the machine.
- In the Windows search bar, type "services" and press Enter. Locate the Elasticsearch service in the list, right-click, and select Stop to stop the service running on the machine.
2. Remove the Tomcat Service
-
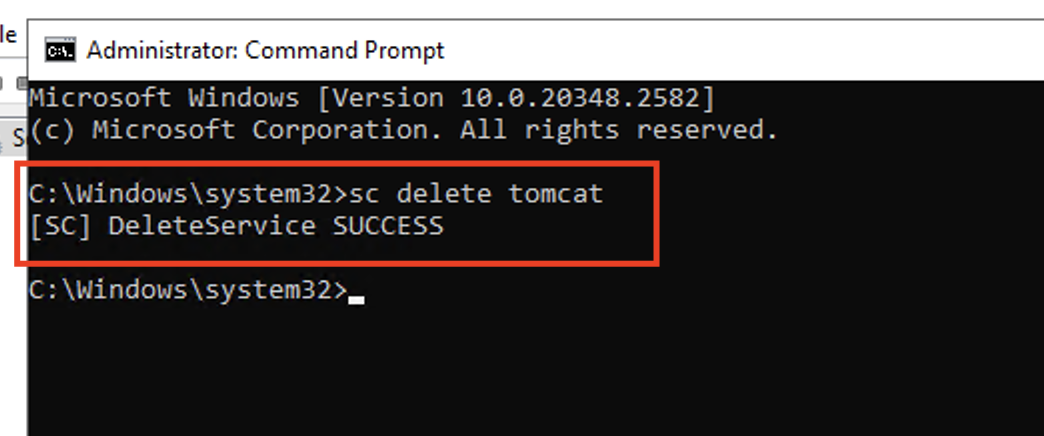
- Open a Command Prompt as Administrator.
- Execute: sc delete <tomcat_servicename>
- Replace <tomcat_servicename> with your Tomcat service name.
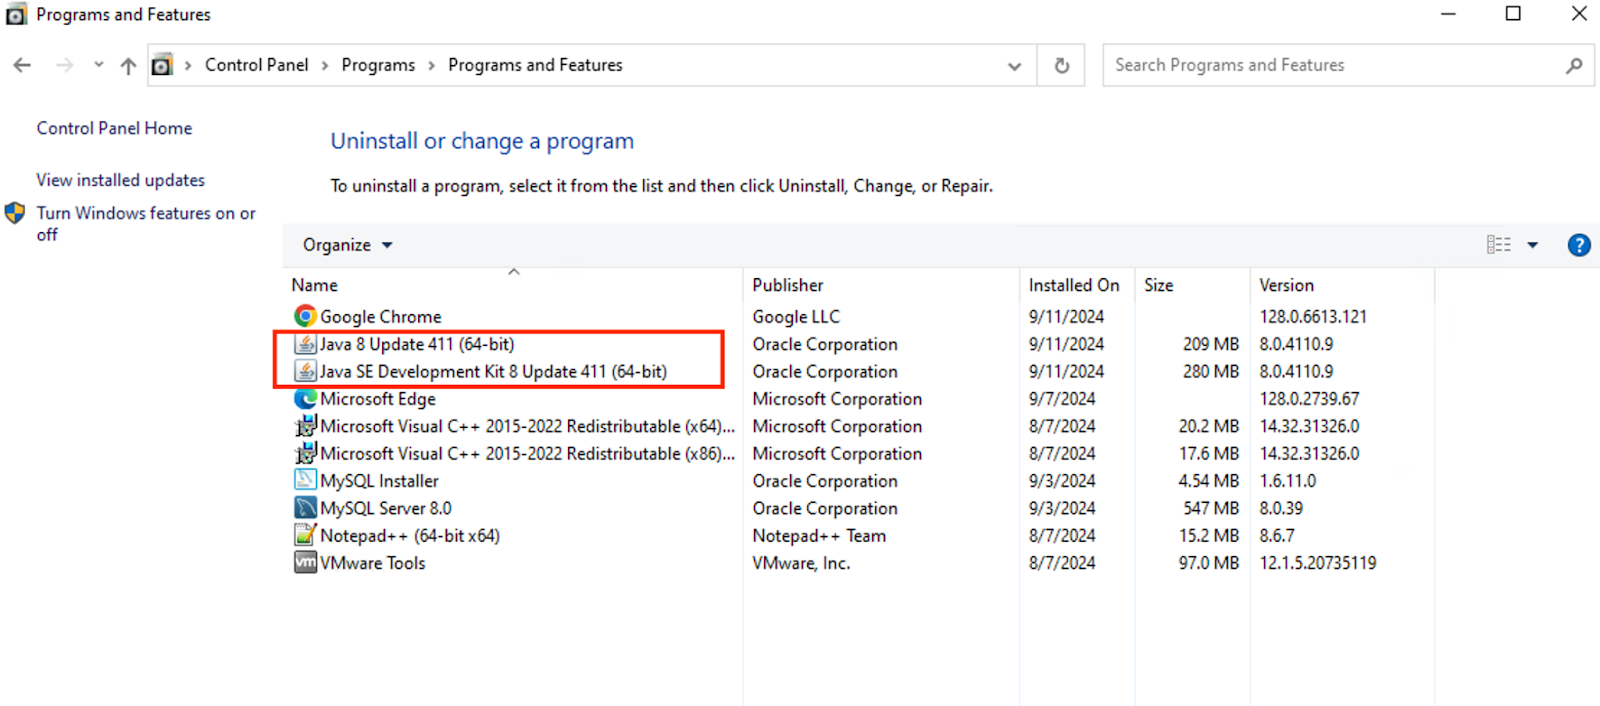
3. Uninstall Oracle Java
-
- Go to Control Panel > Programs and Features.
- Select the installed Oracle Java version and click Uninstall.
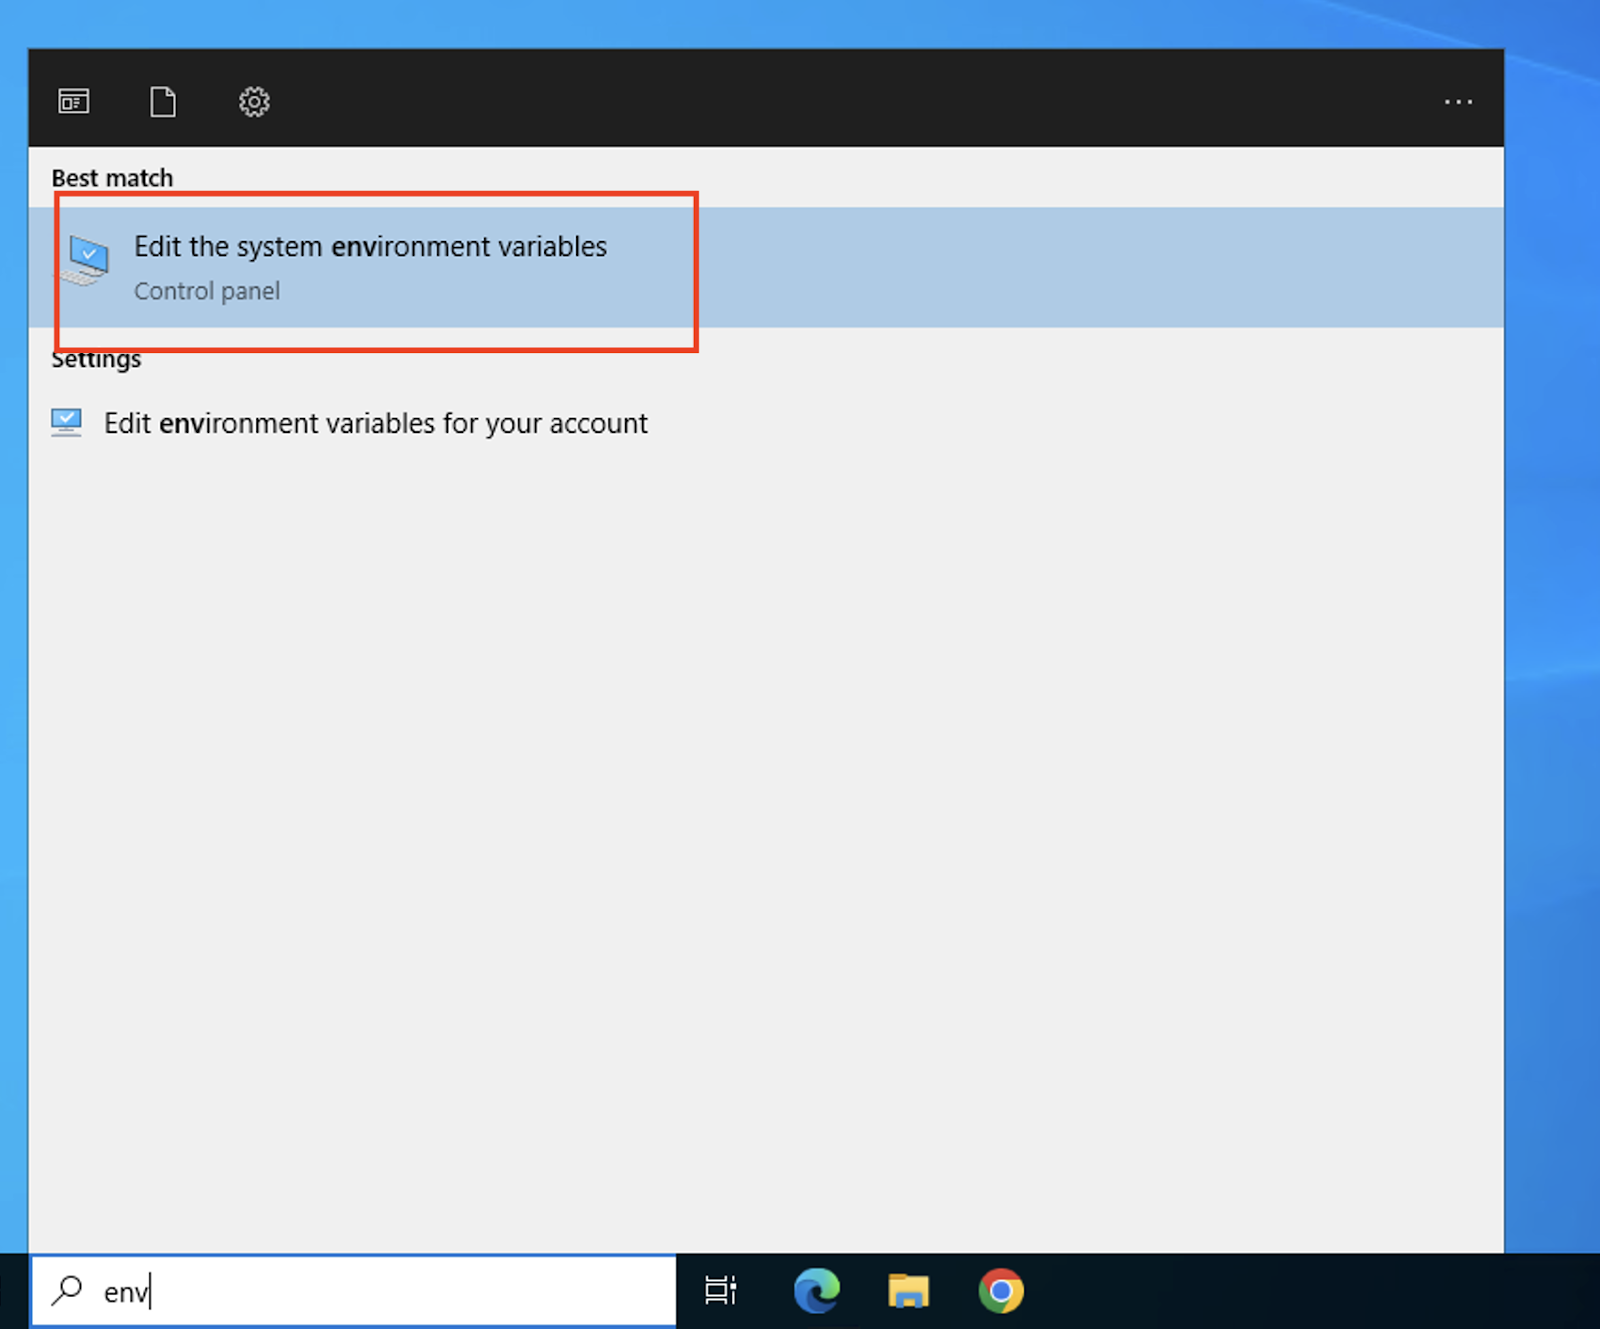
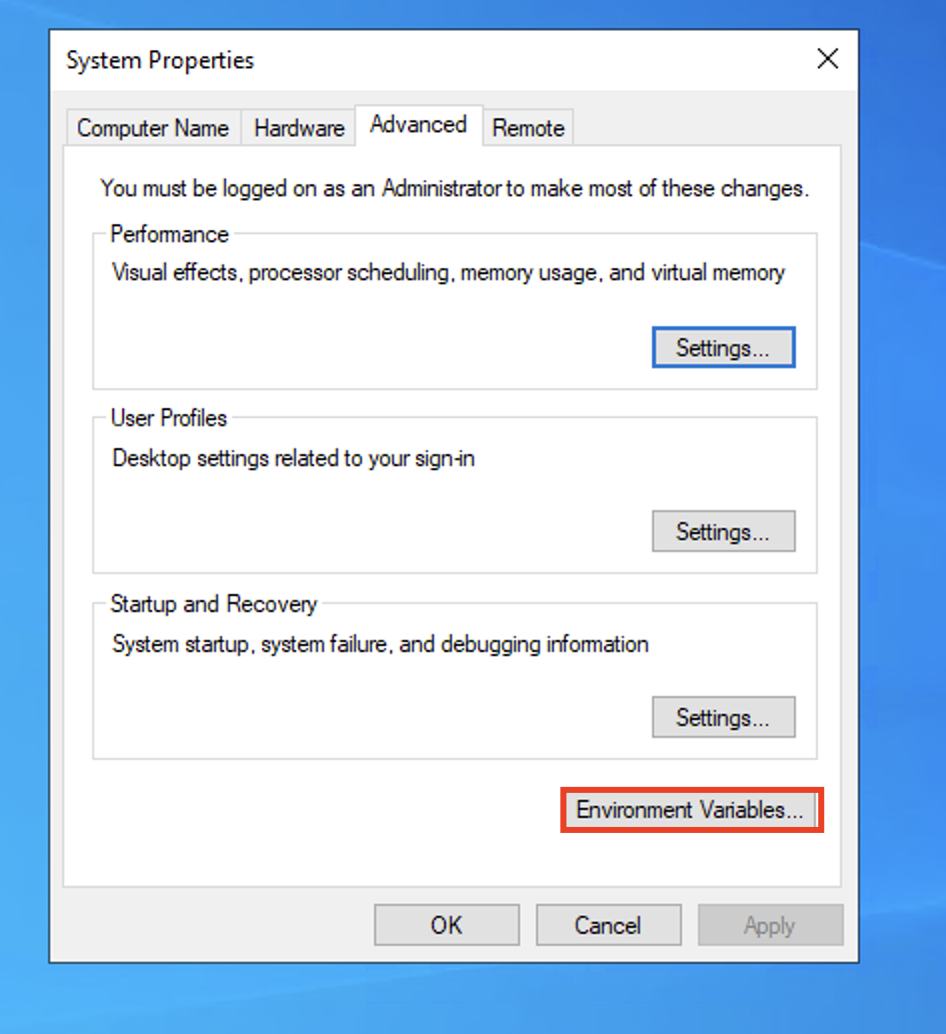
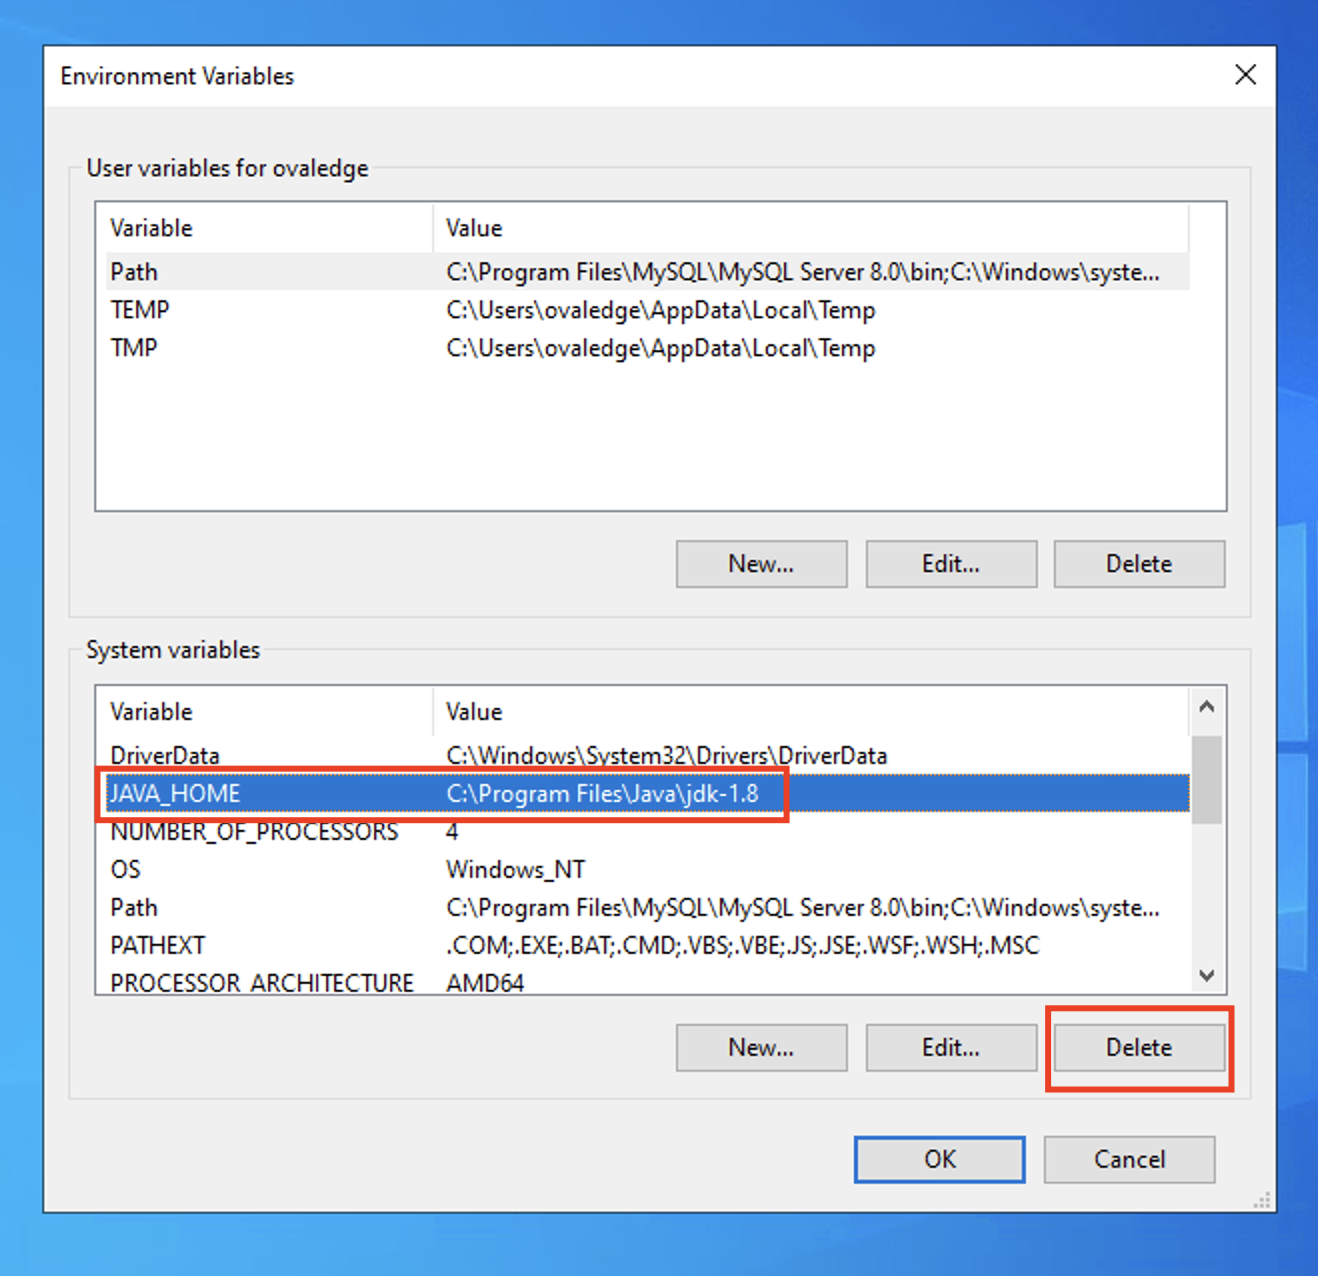
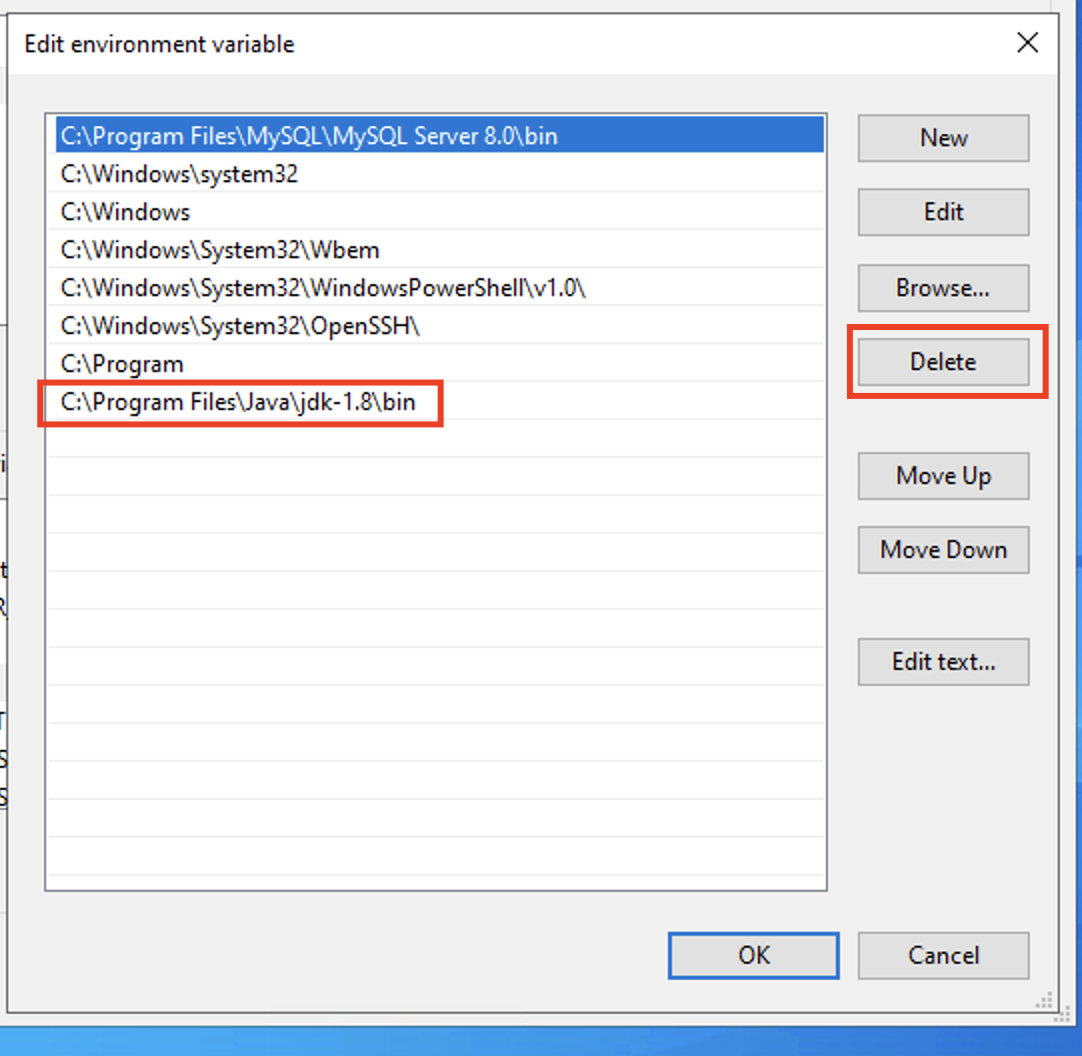
- Navigate to the Environment Variables:
- Delete the JAVA_HOME variable.
- Remove any Java-related paths from the Path variable.
- Verify Uninstallation:

-
-
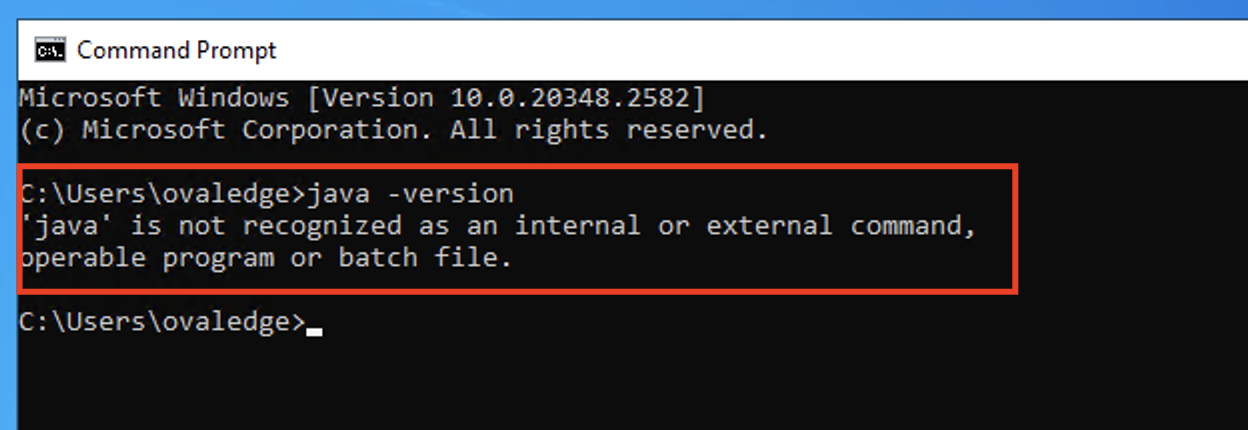
- Open a Command Prompt and run: java -version
- It should throw an error confirming Java is uninstalled.
-
4. Install OpenJDK Java 8u422
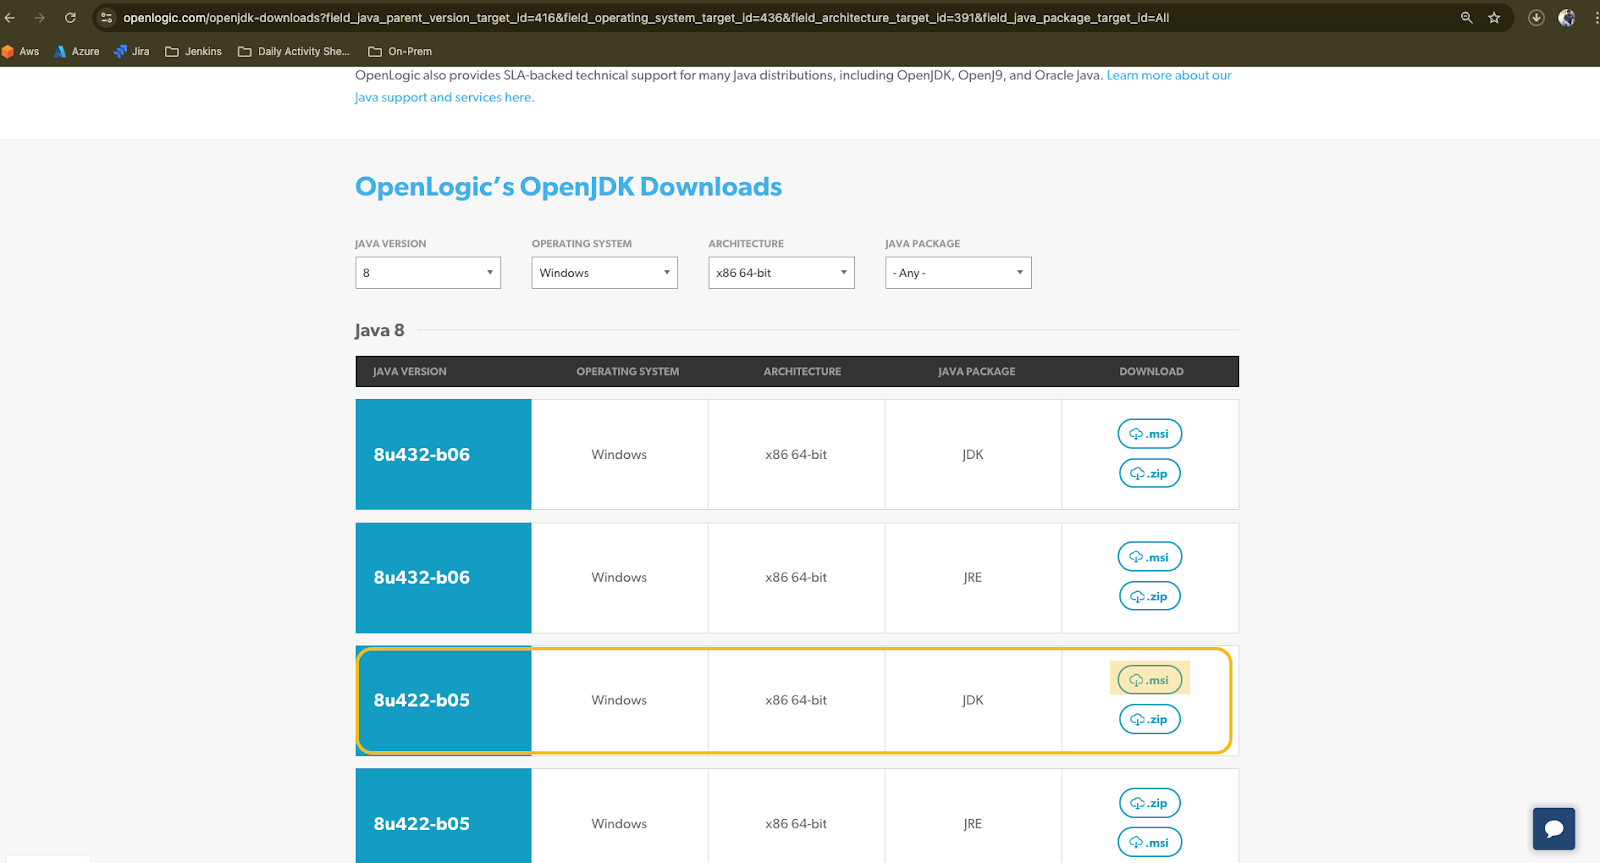
- Download OpenJDK 8u422:
- Visit the OpenLogic Downloads Page.
- Download the installer for Windows.
- Install OpenJDK:
-
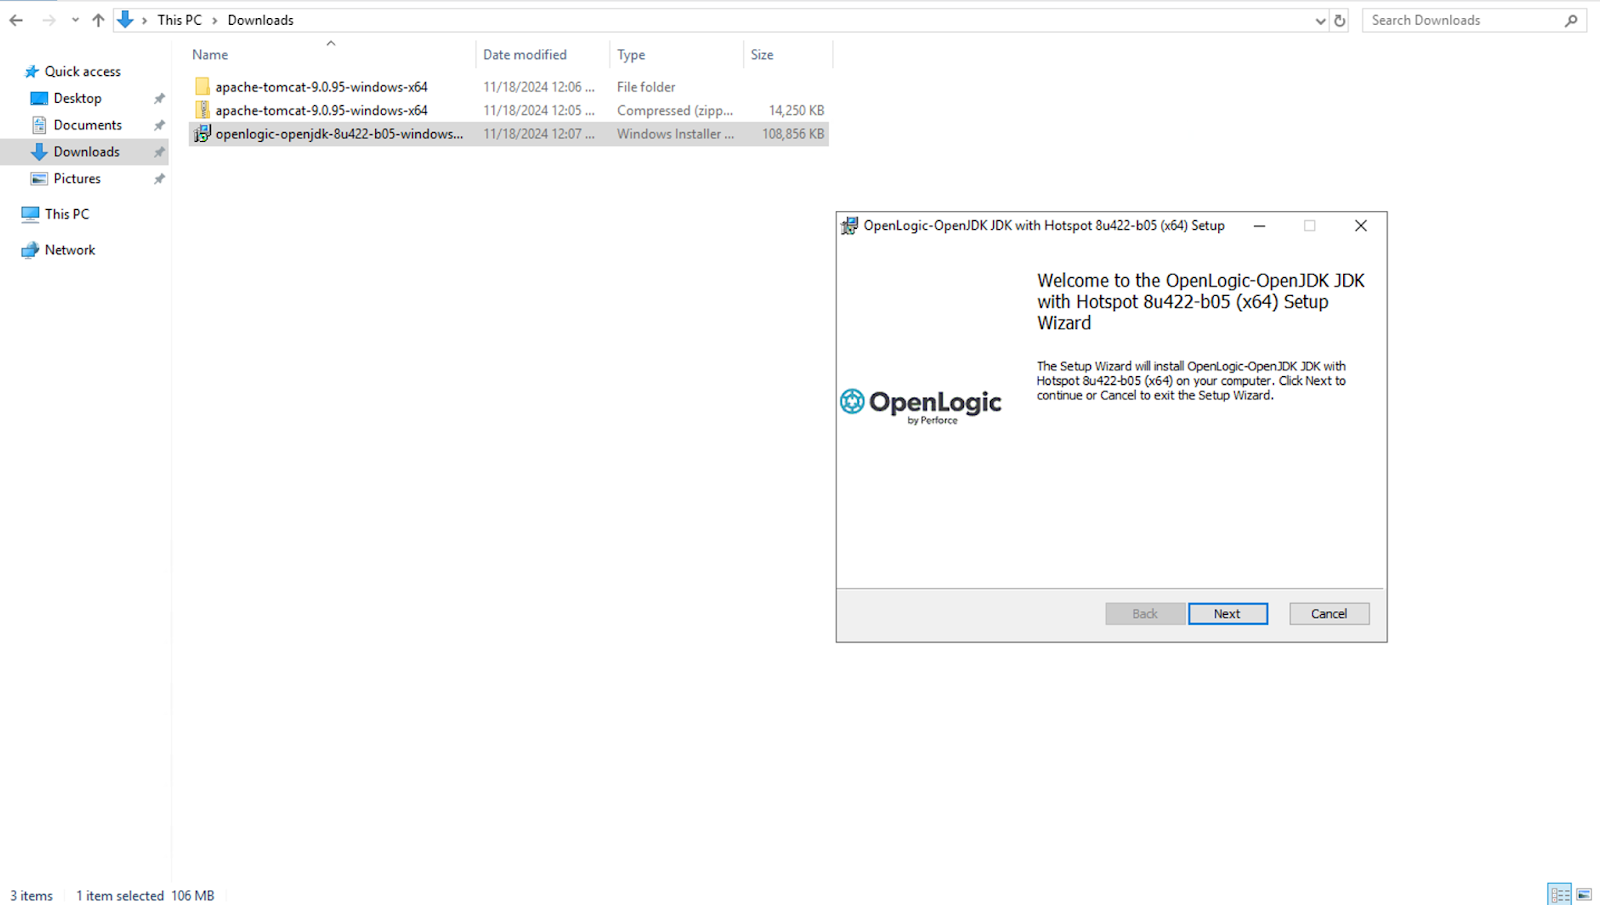
- In the Downloads folder, double-click the installer file. Follow the wizard instructions, clicking Next at each step, to complete the installation.
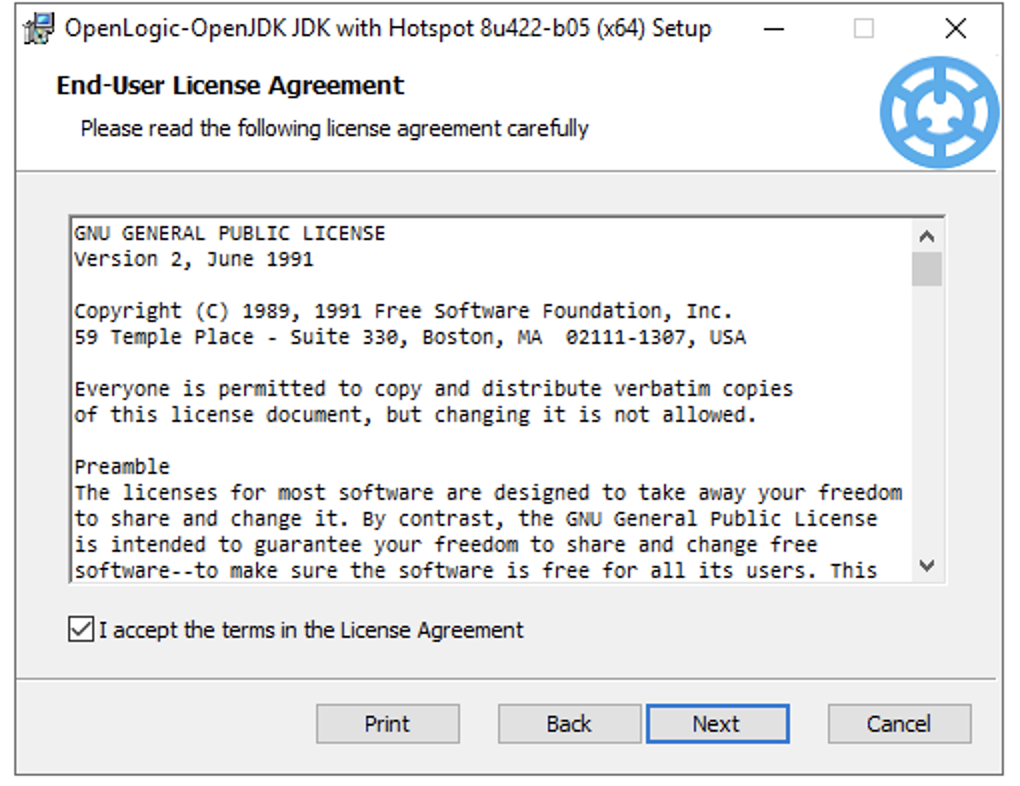
- Review the End User License Agreement, select the checkbox to accept the terms and conditions, and click Next to proceed.
- Choose the appropriate Java Development Kit (JDK) version from the options provided and click Next to continue.
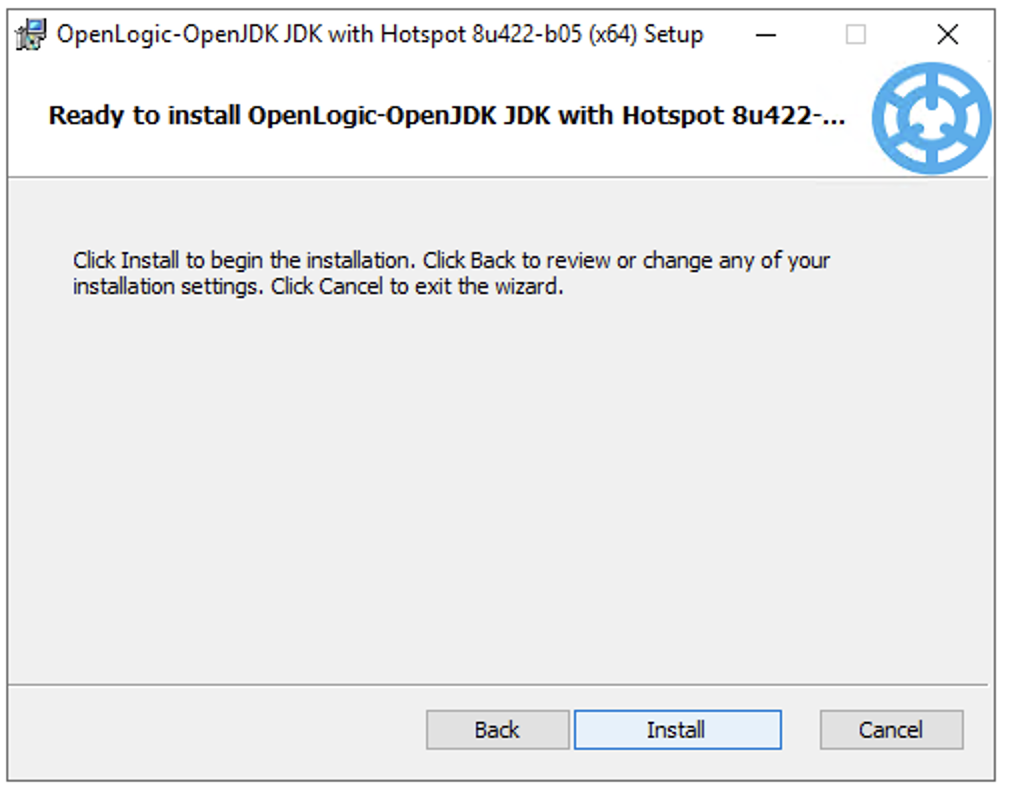
- Click on the Install button to begin the installation.
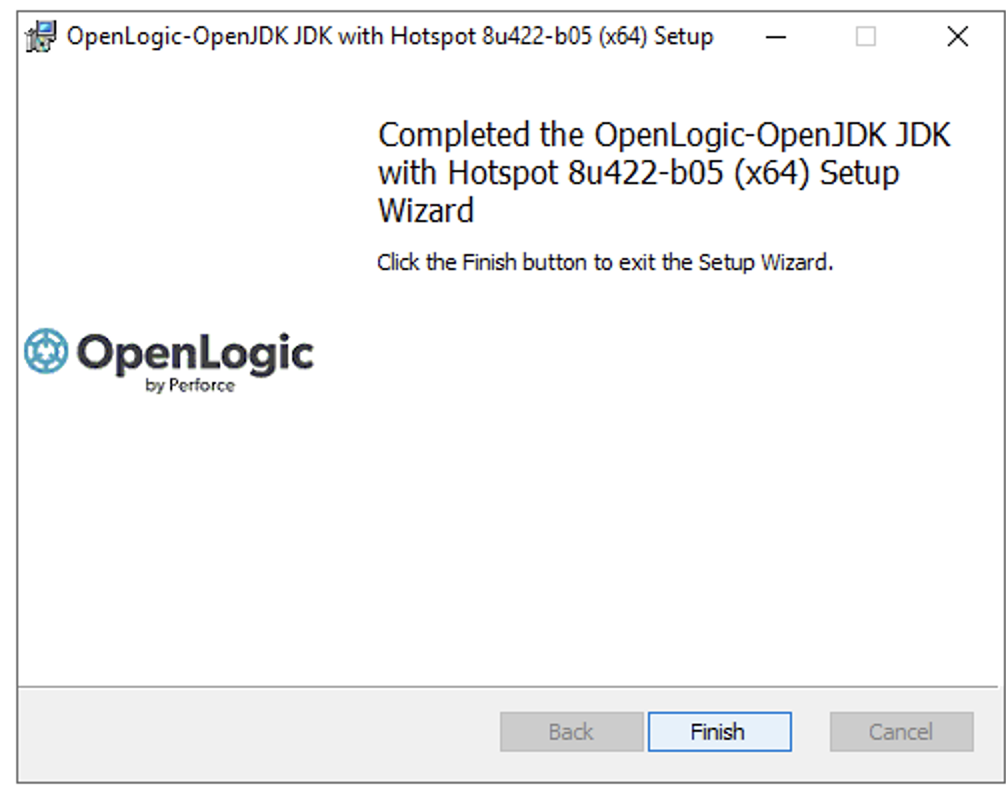
- Once the installation is completed, click on the Finish button.
- In the Downloads folder, double-click the installer file. Follow the wizard instructions, clicking Next at each step, to complete the installation.

-
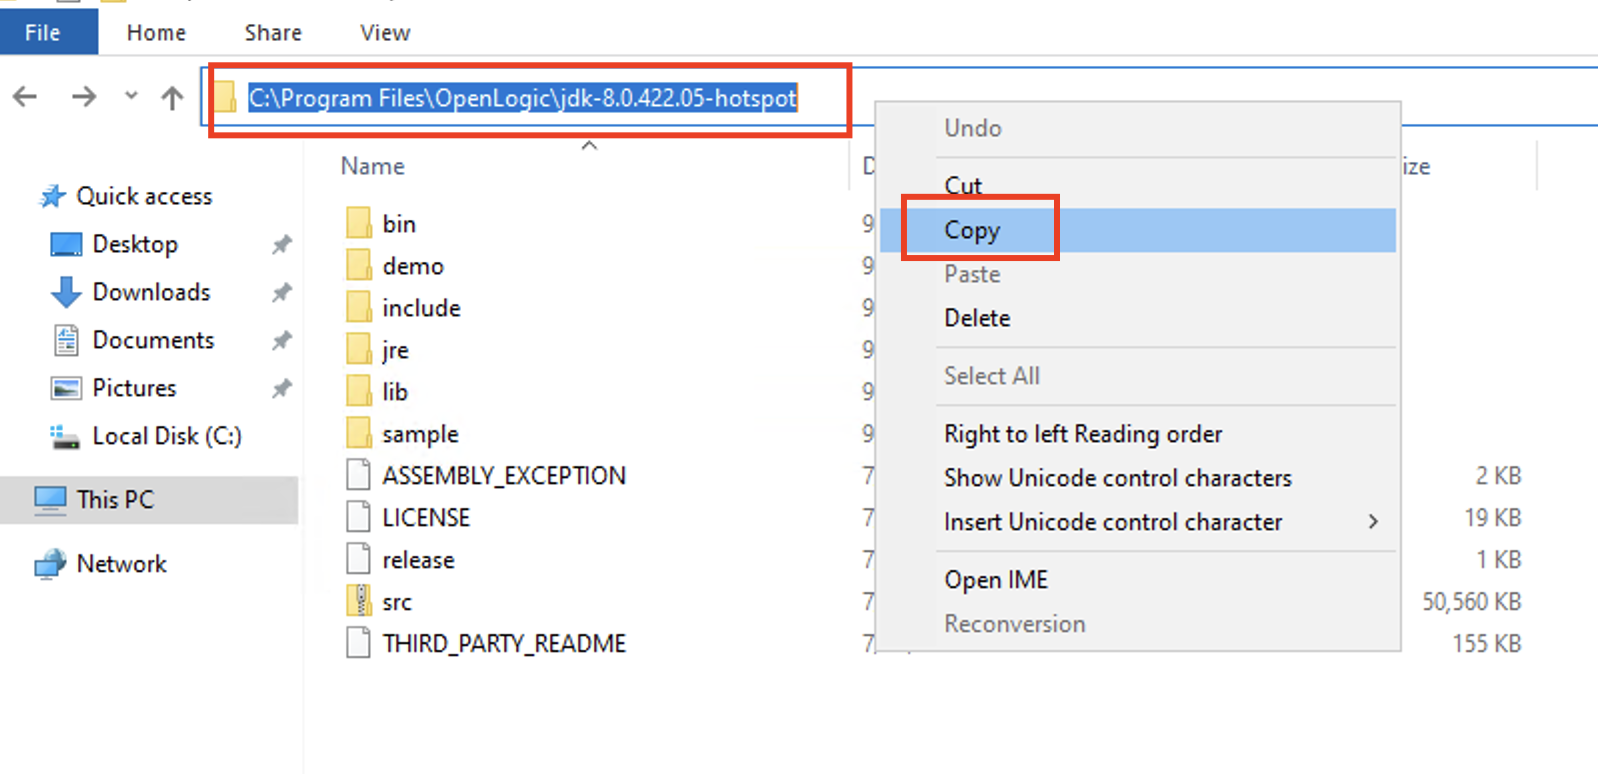
- Navigate to the folder where the OpenJDK is installed and copy that path.
- Navigate to the folder where the OpenJDK is installed and copy that path.
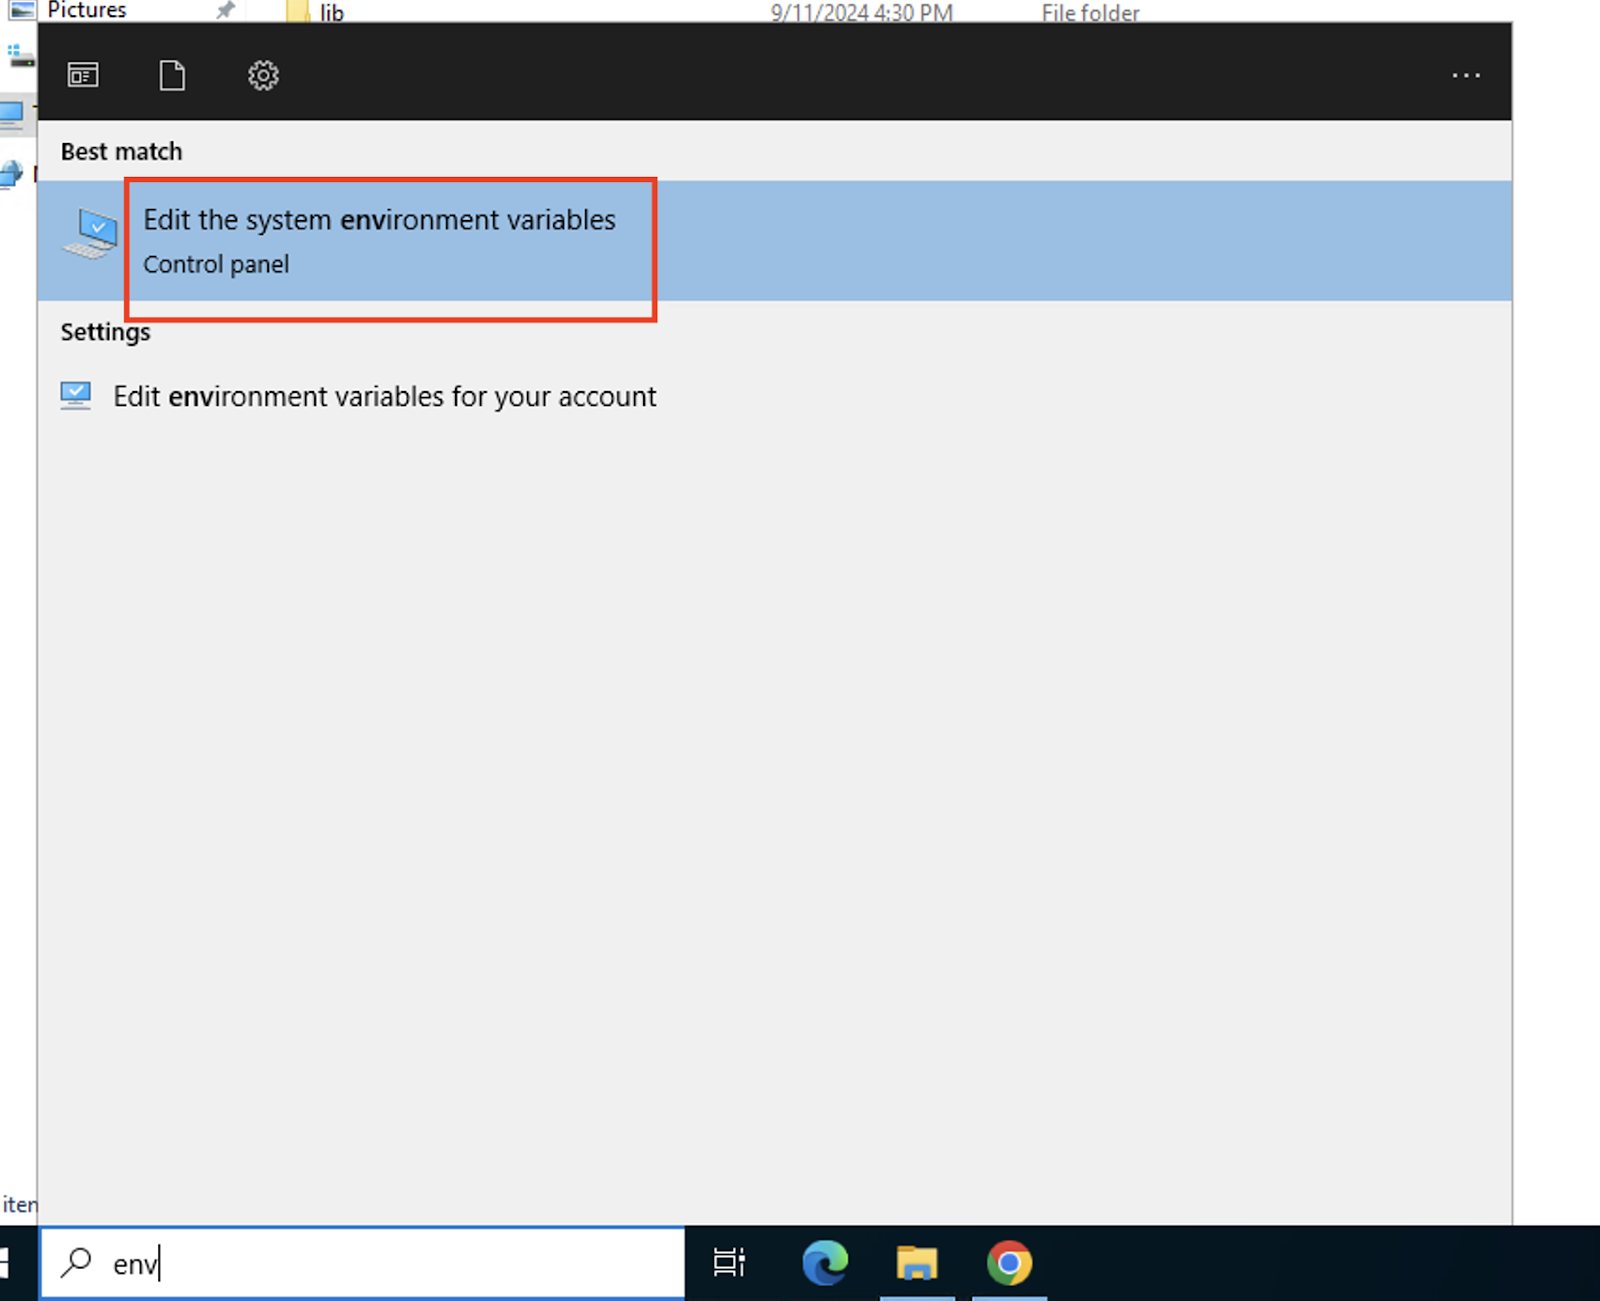
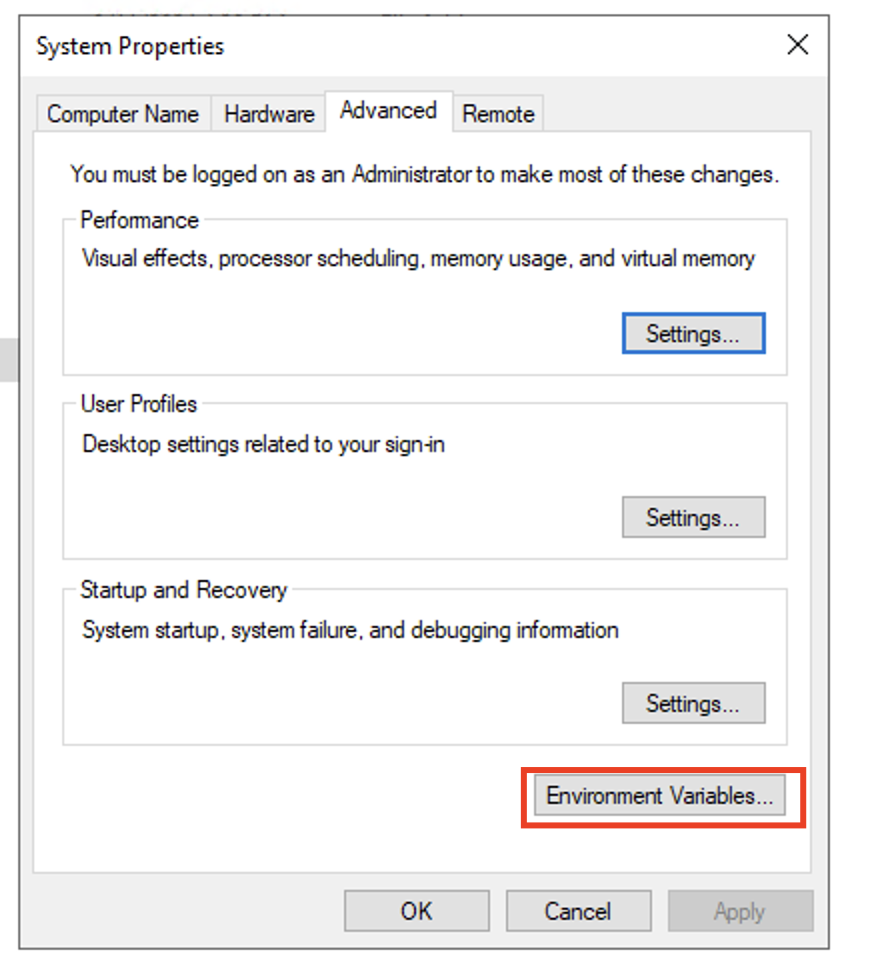
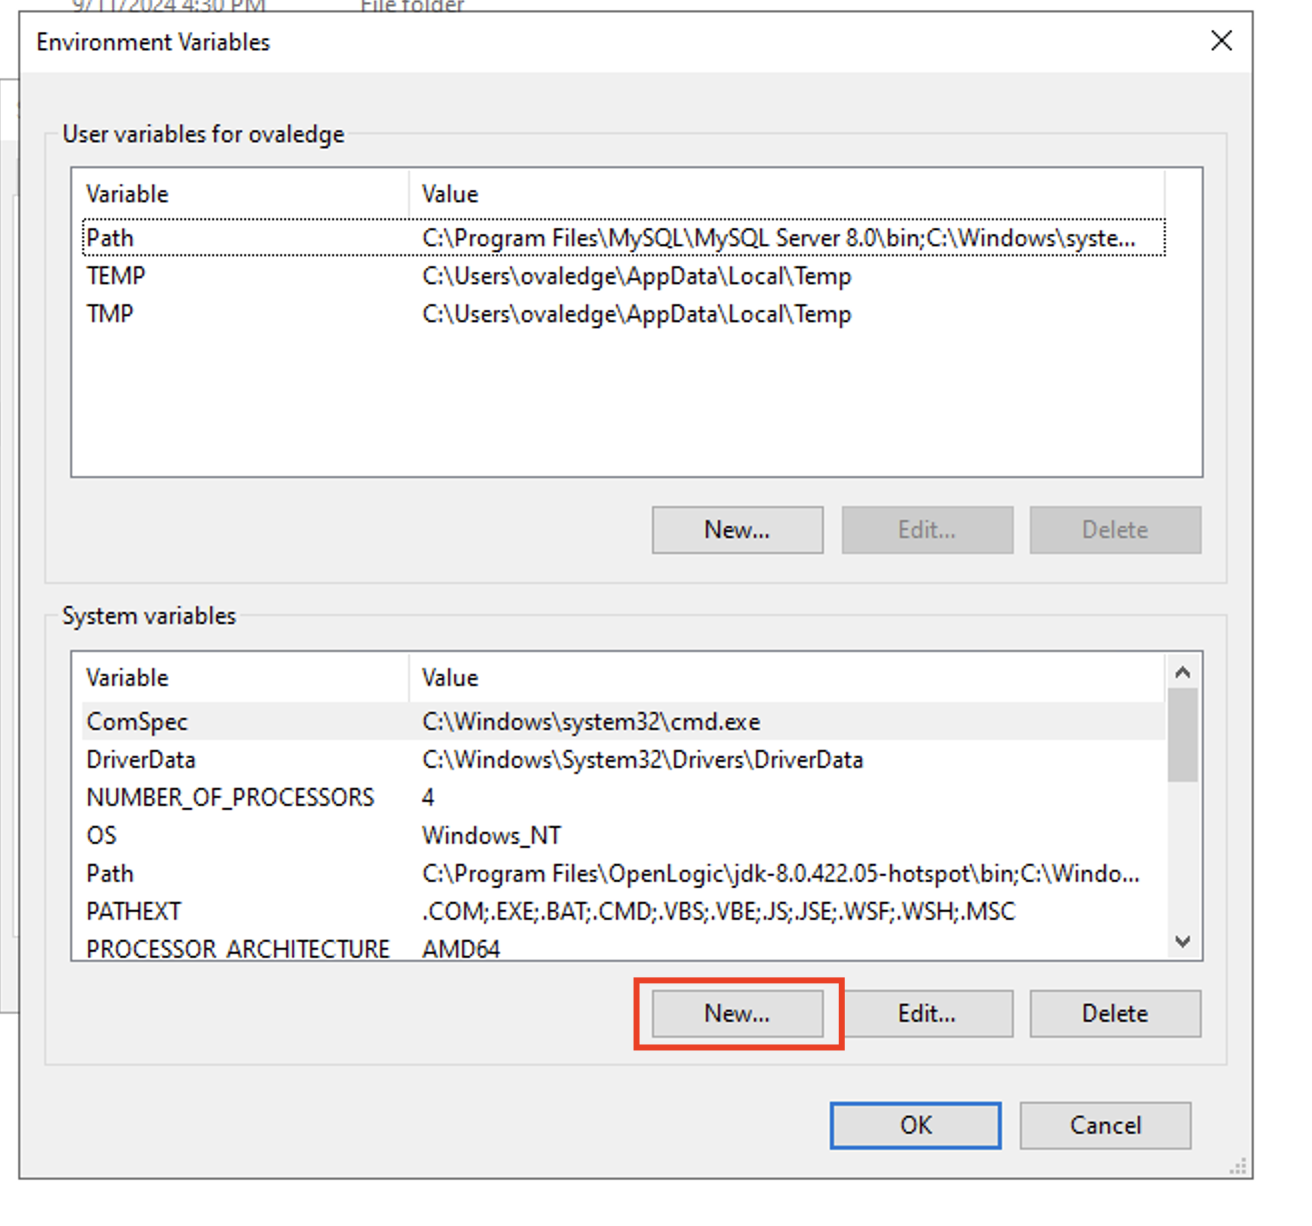
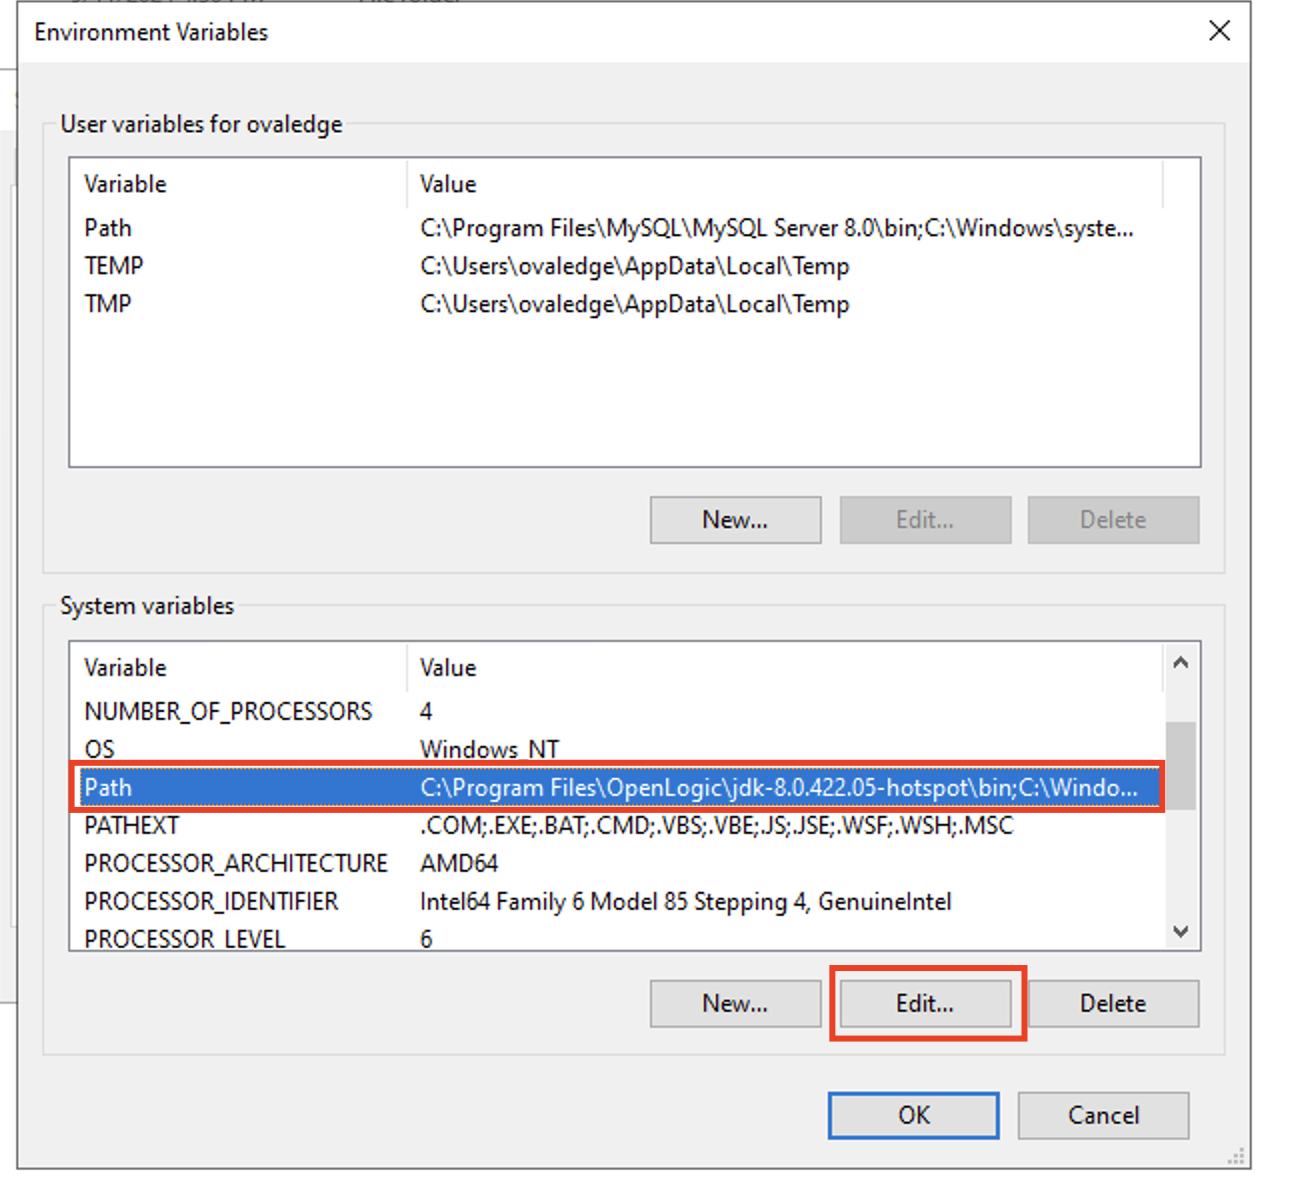
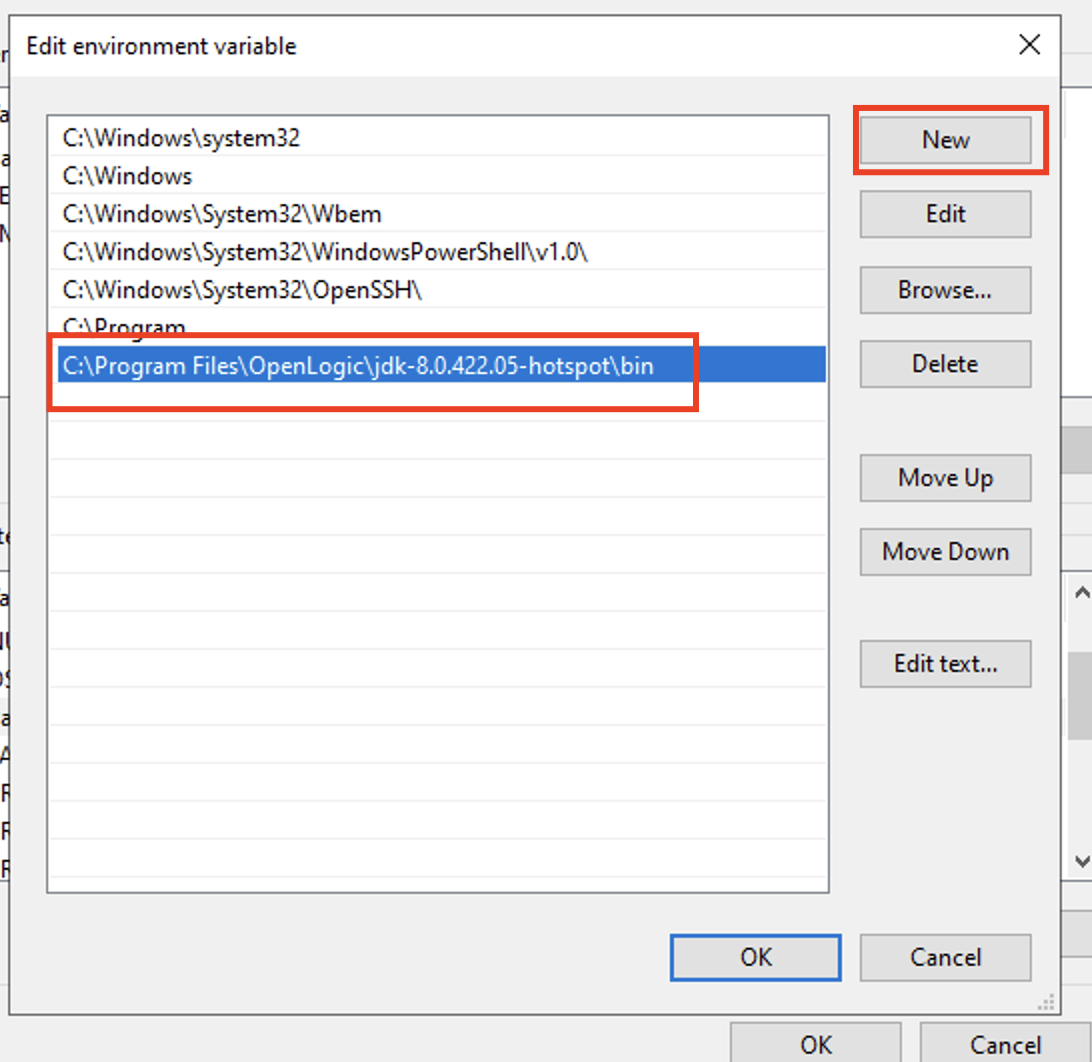
- Set Environment Variables:
- Navigate to System Properties > Environment Variables.
- Navigate to System Properties > Environment Variables.
-
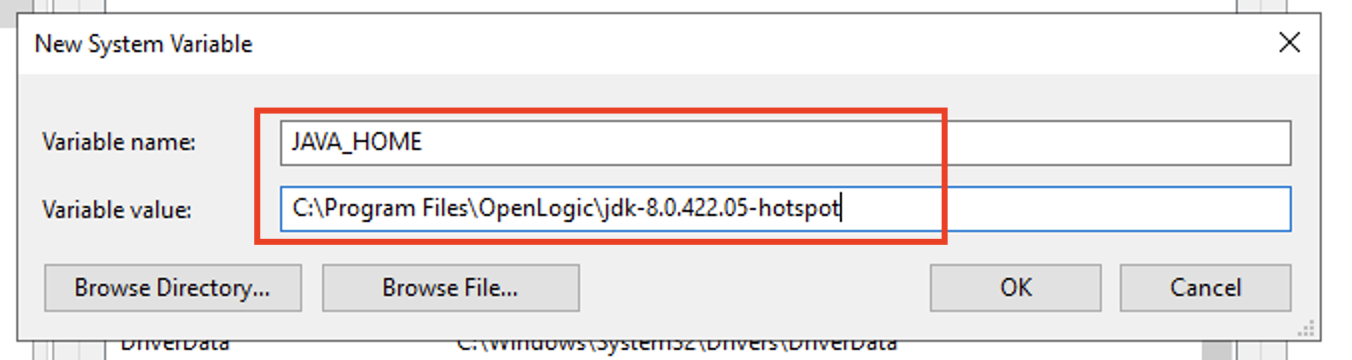
- Add a new JAVA_HOME variable pointing to the JDK installation directory.
- Edit the Path variable:
- Add a new entry with the path <JAVA_HOME>\bin.
- Add a new entry with the path <JAVA_HOME>\bin.
- Add a new JAVA_HOME variable pointing to the JDK installation directory.
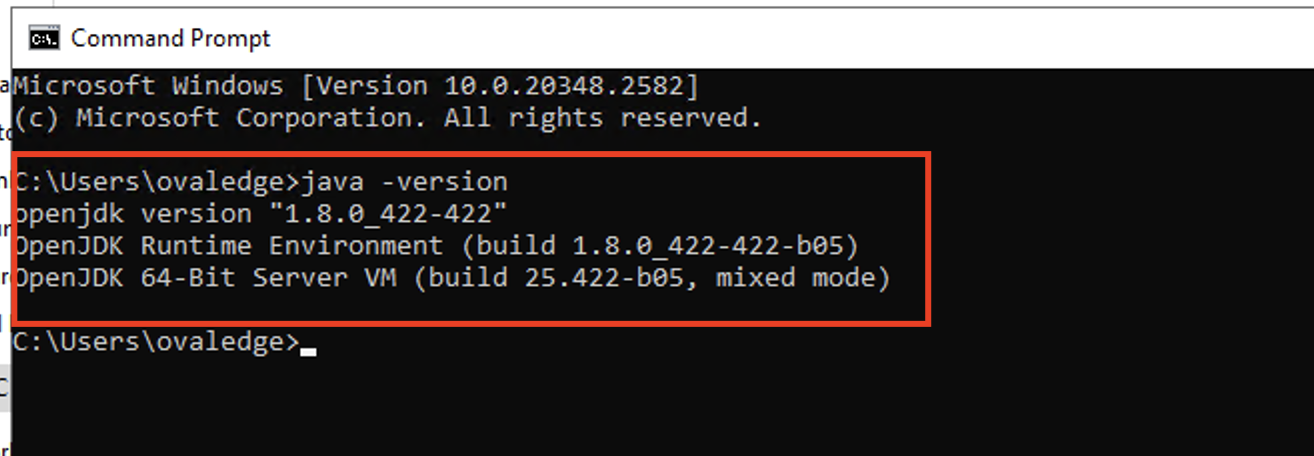
- Verify Installation:
- Open a Command Prompt and run: java -version
- Ensure the output displays the new version (8u422).
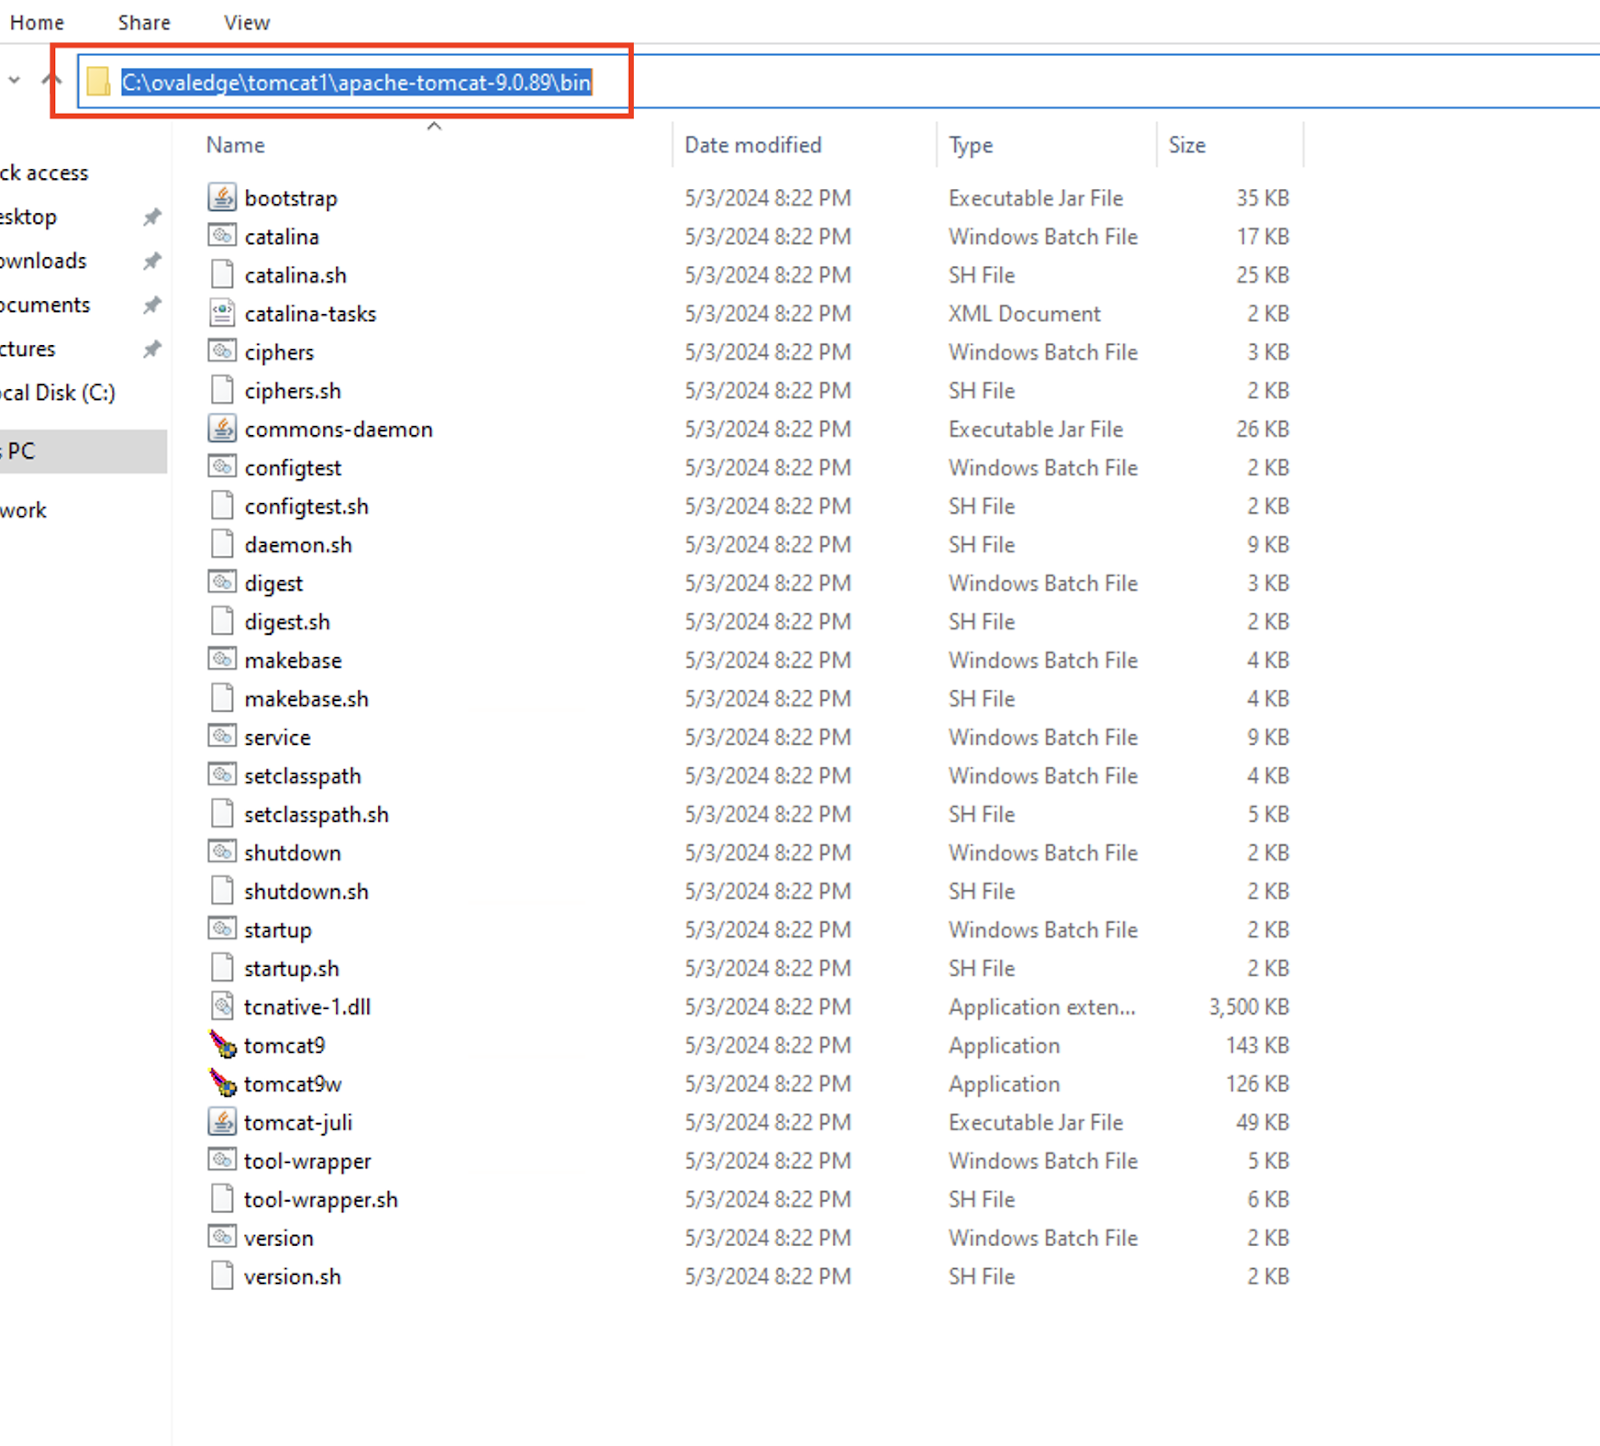
5. Reconfigure and Start Tomcat
-
- Navigate to the Newly installed Apache-Tomcat bin directory:
- Open a Command Prompt as shown in the screenshot, and run the following command:
Replace <tomcat_servicename> with your desired service name. - In the same path run the command for the Tomcat service configuration:
tomcat9w.exe //ES//<tomcat_servicename> - Restore the previously saved Java options paths and memory pools in the Java tab of the Tomcat properties.
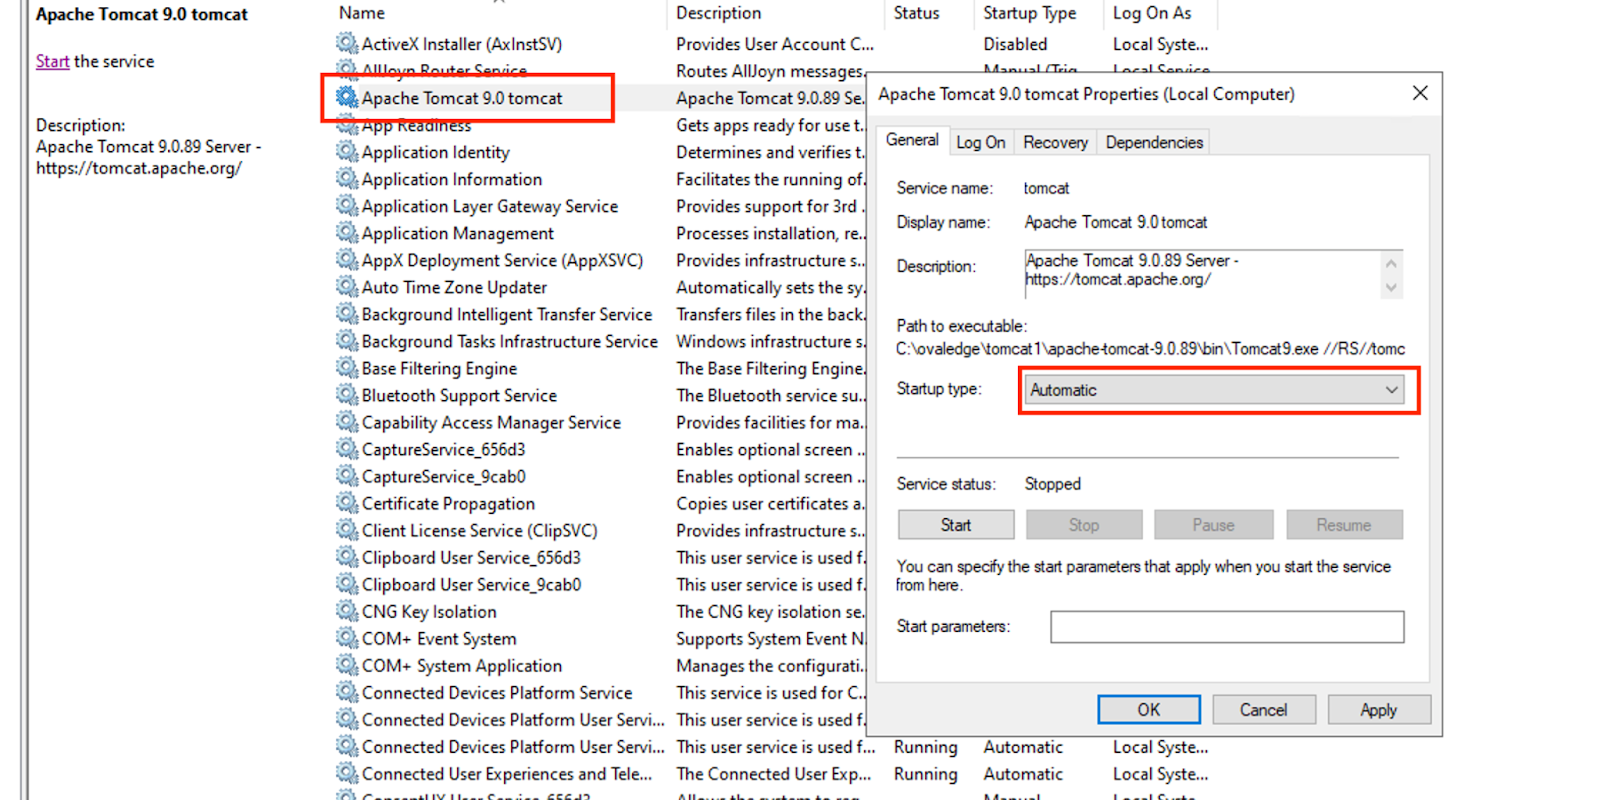
- In the Windows search bar, type "services" and press Enter. Locate the newly created Tomcat service in the list, right-click on it, and select Start to initiate the service.
Note: In the Service General Startup type, make it as “Automatic”.
- Navigate to the Newly installed Apache-Tomcat bin directory:

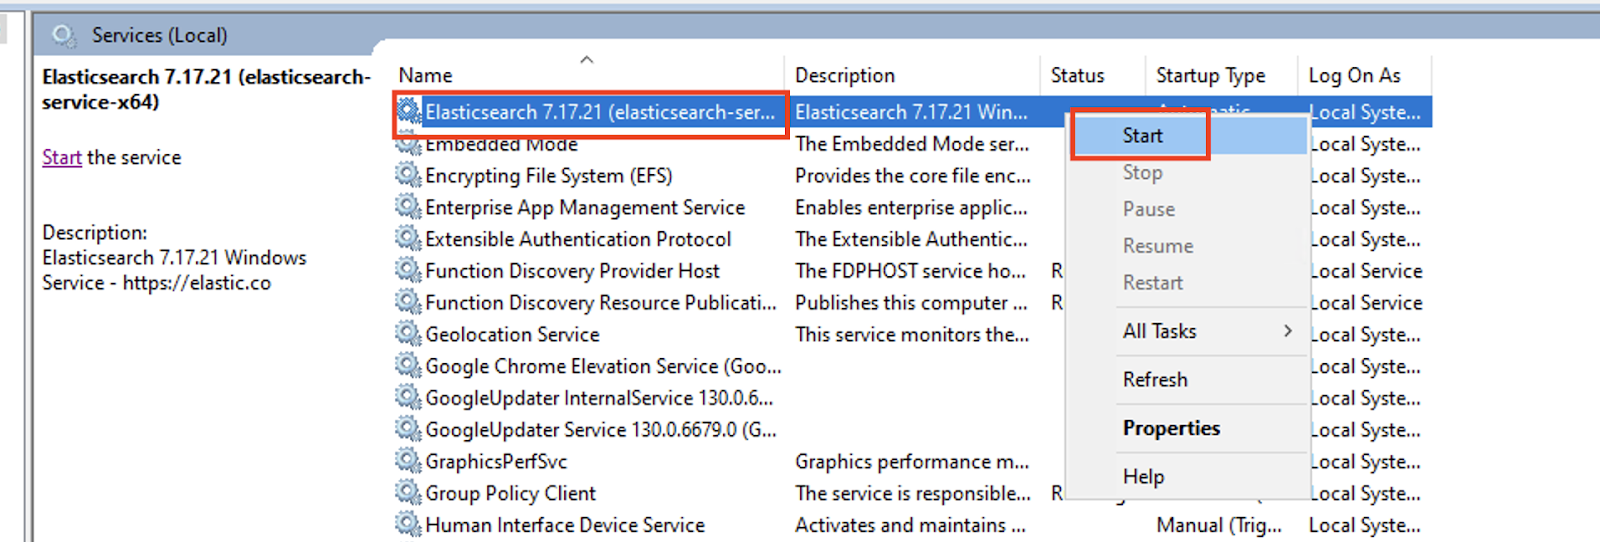
6. Start Elasticsearch
-
- In the Windows search bar, type "services" and press Enter. Locate the Elasticsearch service in the list, right-click, and select Start to start the service running on the machine.
- In the Windows search bar, type "services" and press Enter. Locate the Elasticsearch service in the list, right-click, and select Start to start the service running on the machine.
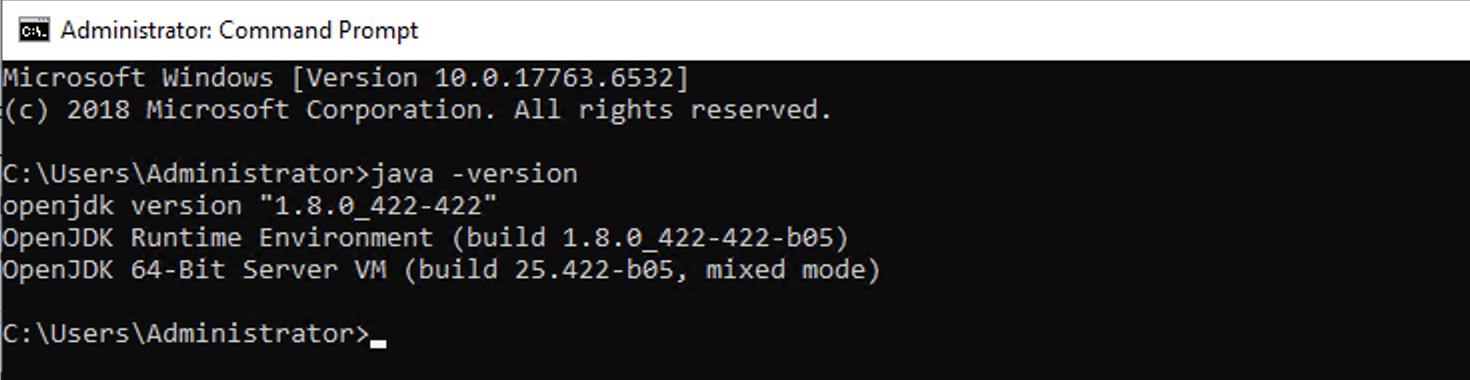
Verification
Open a Command Prompt and run: java -version
- Ensure the displayed version is 8u422.
- Verify Tomcat and Elasticsearch services are running correctly by accessing their respective endpoints.
This completes the upgrade to Java 8u422 and the reconfiguration of dependent services.
Copyright © 2024, OvalEdge LLC, Peachtree Corners, GA USA