Overview
OvalEdge offers various methods to catalog metadata from remote data sources, crawling the remote data sources being the primary mode. The Load Metadata from Files allows bulk upload of metadata into OvalEdge.
Metadata for any type of data object can be added through the Load Metadata From Files option. Example data objects are - Schemas, Tables, Table Columns, Files, File Columns, Reports, Report Columns, Tags, Dataset, Lineage, Column Relationships, Dataset Correction, Data Quality Rules, Impact Analysis Objects, Users, Roles, APIs, API Attributes, and Domains.
The Load Metadata From Files, out-of-the-box Excel templates come with predefined fields. Users only need to fill in the appropriate fields within the template. This approach minimizes errors, especially for organizations dealing with large volumes of data and frequent updates. Governance teams are encouraged to collaborate and validate metadata content before uploading to ensure the accuracy of metadata.
Navigating Load Metadata from Files
Load Metadata from Files can be accessed by Author Users (Users with Metadata Write Privileges) from the Advanced Tools module.
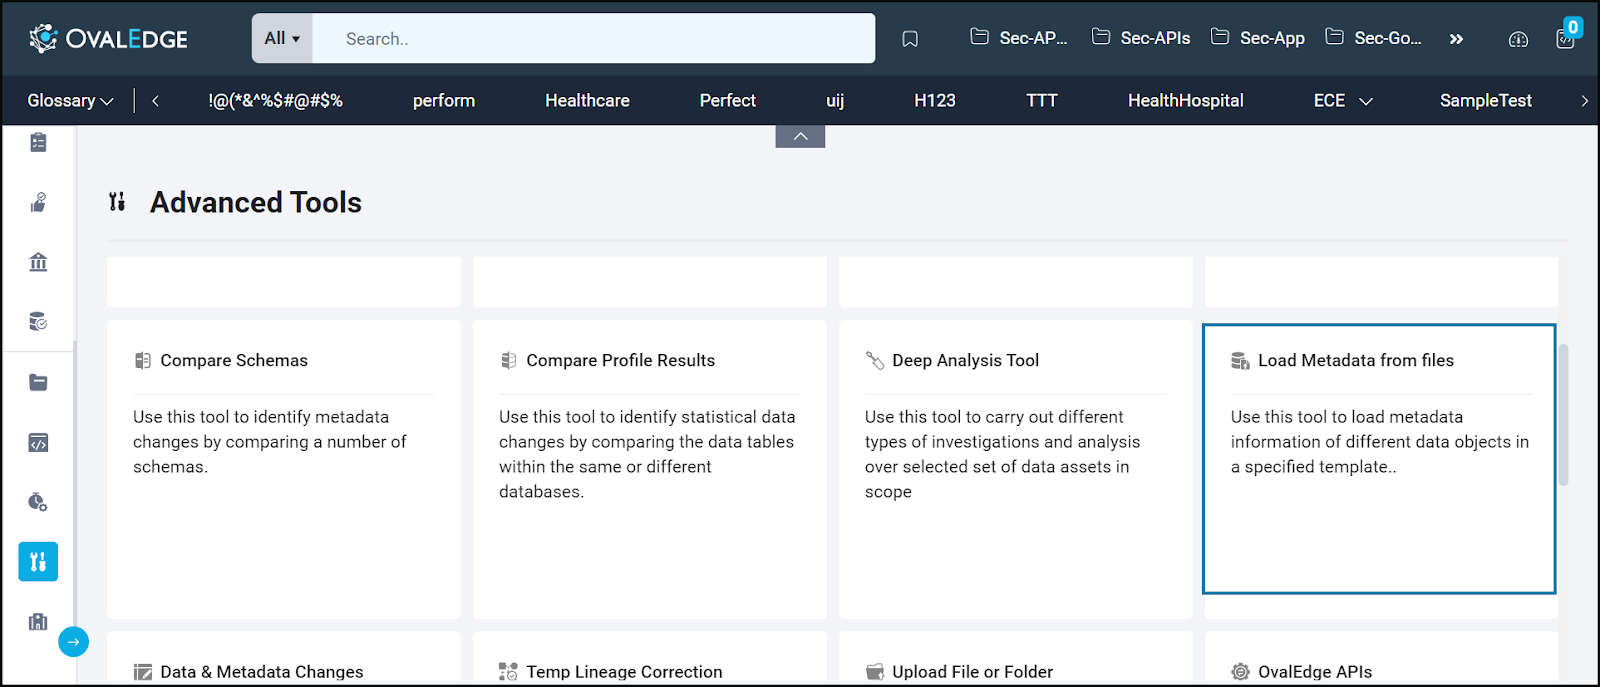
Select Object
After selecting Load Metadata from Files, users are presented with the 'Select Object' page, featuring templates for 20 distinct objects for uploading metadata into the application.
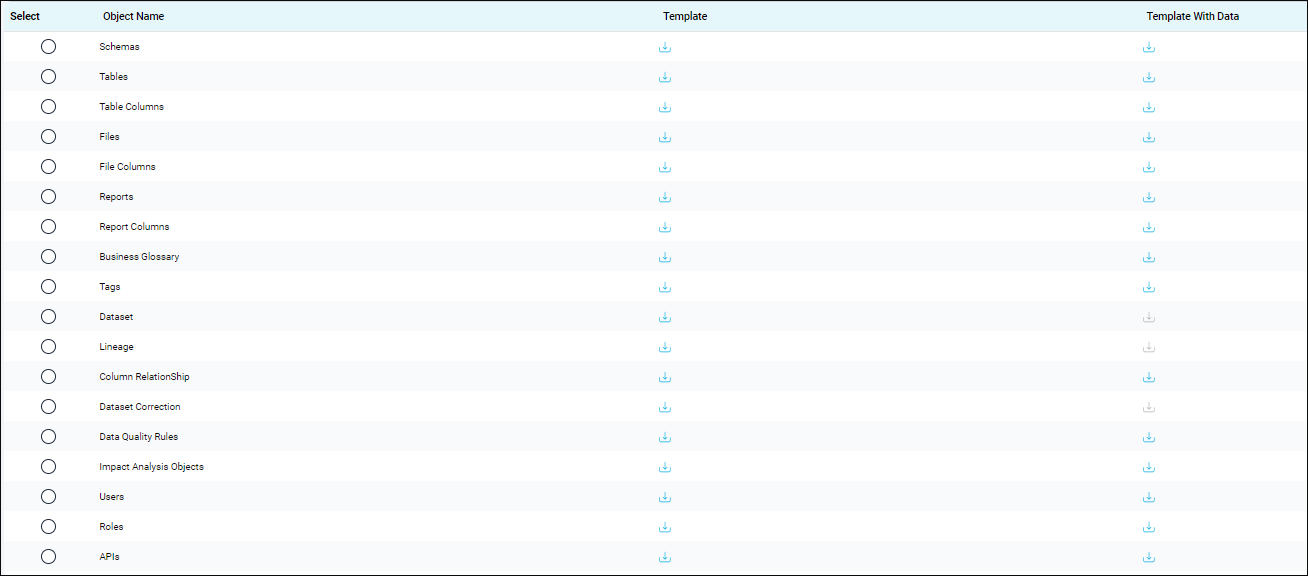
Two types of templates are available: Download Template and Download Template with Data. A download icon is provided next to every data object type.
- Download Template: When downloaded, these templates are blank, with predefined fields ready for updating. They are useful when a bulk upload of metadata is performed for the first time or if the user wants to add new objects to Manual Connectors.
- Download Template with Data: These templates allow users to download existing metadata, make necessary changes, and then upload to update metadata. Download initiates a background job Upon successful completion of the job, a notification is sent to the user’s My Profile > Inbox > System Alerts, including a template link. Users can click on the link to download the template containing existing data. The template can also be downloaded by accessing the logs of the corresponding job.
Upload File
To apply the curated modifications made in the template in the UI application, select the radio button corresponding to the preferred object type. This selection will activate the "Next" button located at the top right corner of the page. Clicking the "Next" button will navigate the users to the "Upload File" page.
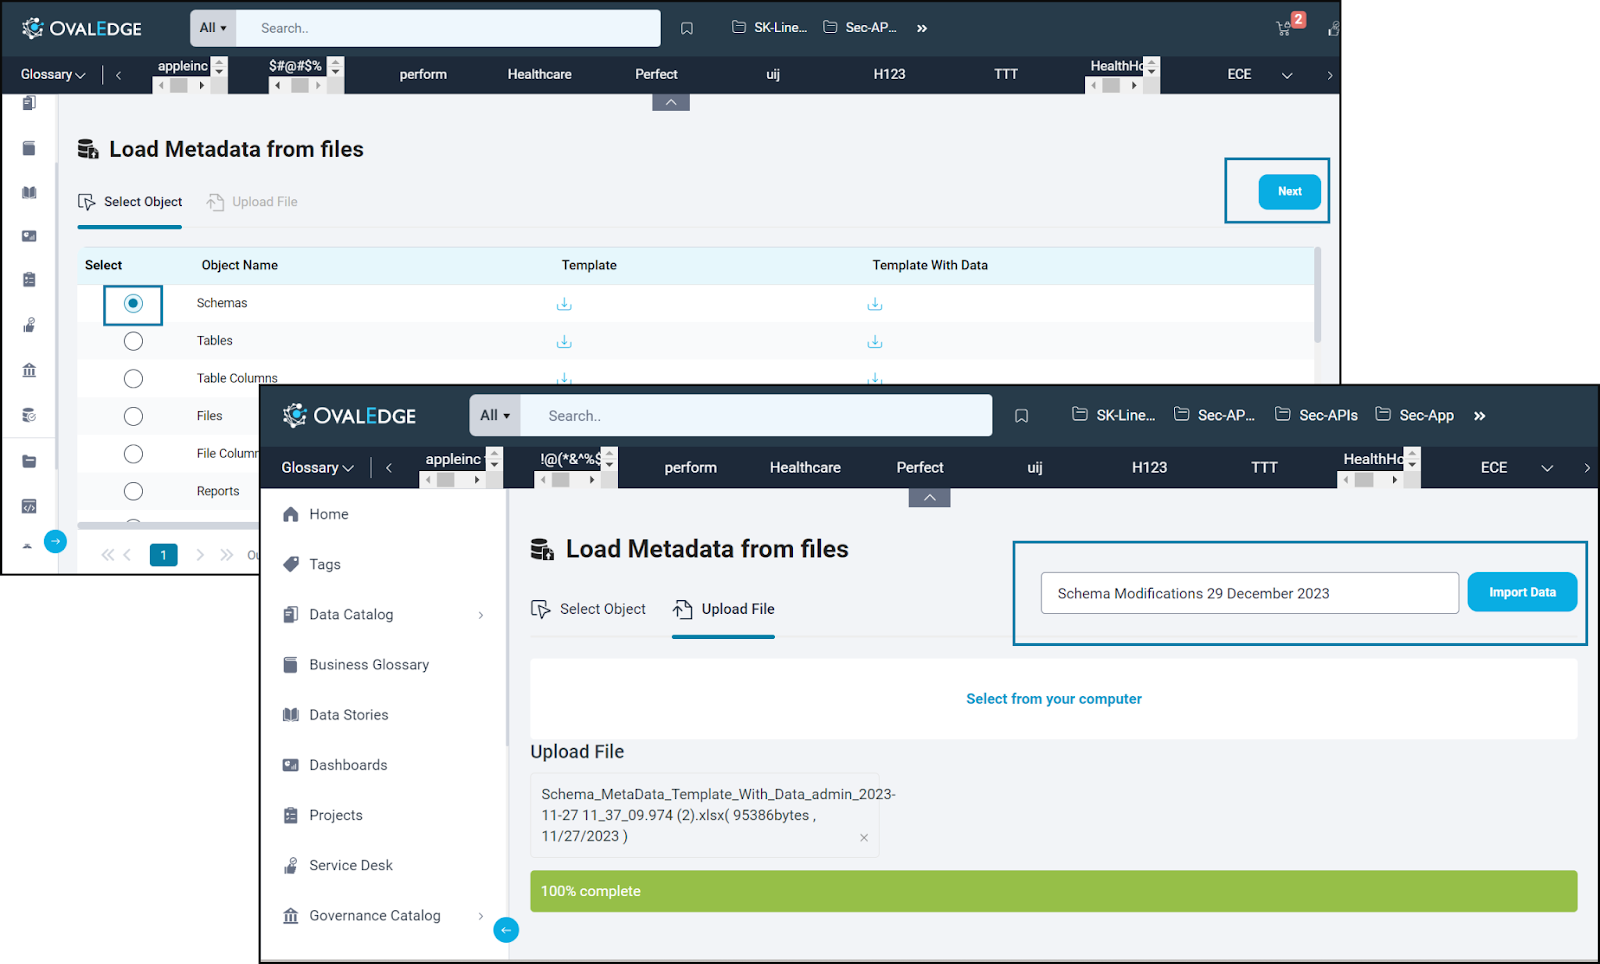
In the Upload File tab, users can upload their curated template for the data object that they have chosen. They can click on the ‘Select from your computer’ option and upload the .xlsx file from their local.
To complete the data import, users can enter a job name in the 'Provide job step name' field and click the 'Import Data' button. This action initiates the job to commence the upload process.
Success/ Failure Notification
Once the upload template job is completed, users will receive a notification in My Profile > Inbox > System Alerts on the uploaded template. This notification contains a link to the template. By clicking the link, users can download and access the status of each updated line item in the template, including the action status, action status message, and action failure message.
- Action Status: Indicates the Success/Failure status for Action (Add or Modify).
- Action Success Message: This field provides the detailed job log corresponding to the successful completion of the respective action.
- Action Failure Message: In the event that the action fails to be completed, this section provides a detailed job log that explains the reasons behind the failure.
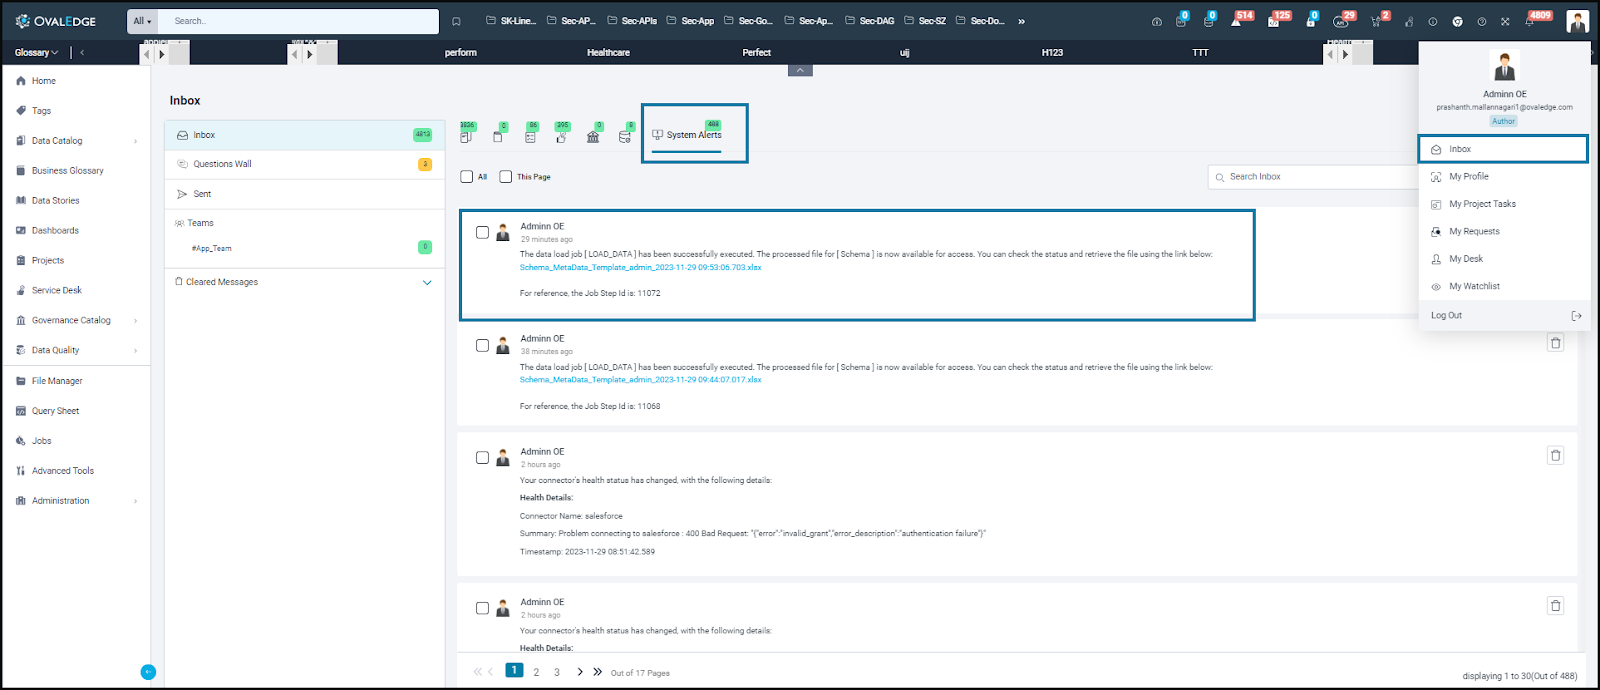
Users can access detailed job logs by navigating to the Jobs module from the left panel menu. Within the job logs, the template's upload status (success, failure, or other) is indicated.
Click the eye icon to view detailed logs. Additionally, a link is provided to access the status of each updated line item in the template, including the action status, action status message, and action failure message.

Attributes in the Template
All Load Metadata from File Templates have individual attributes to trigger specific actions. A detailed explanation of each attribute of all the templates can be accessed through the following link: Load Metadata from Files - Attributes
|
Note 1: Each entry in the template triggers a specific action: Add, Modify, Delete, or No Action. Choose the appropriate action for each line item. Note 2: The action on each line item for Tags, Terms, Business Description and Technical Description depends on the configurations set on the first page of the template. |
Configurations of LMDF Templates
Users are presented with a set of configurations on the first sheet of the Data Catalog and the Business Glossary templates. These configurations control the behavior of tags, terms, business descriptions, and technical description attributes during the template updation. They determine whether to append, replace, or Ignore If Empty.
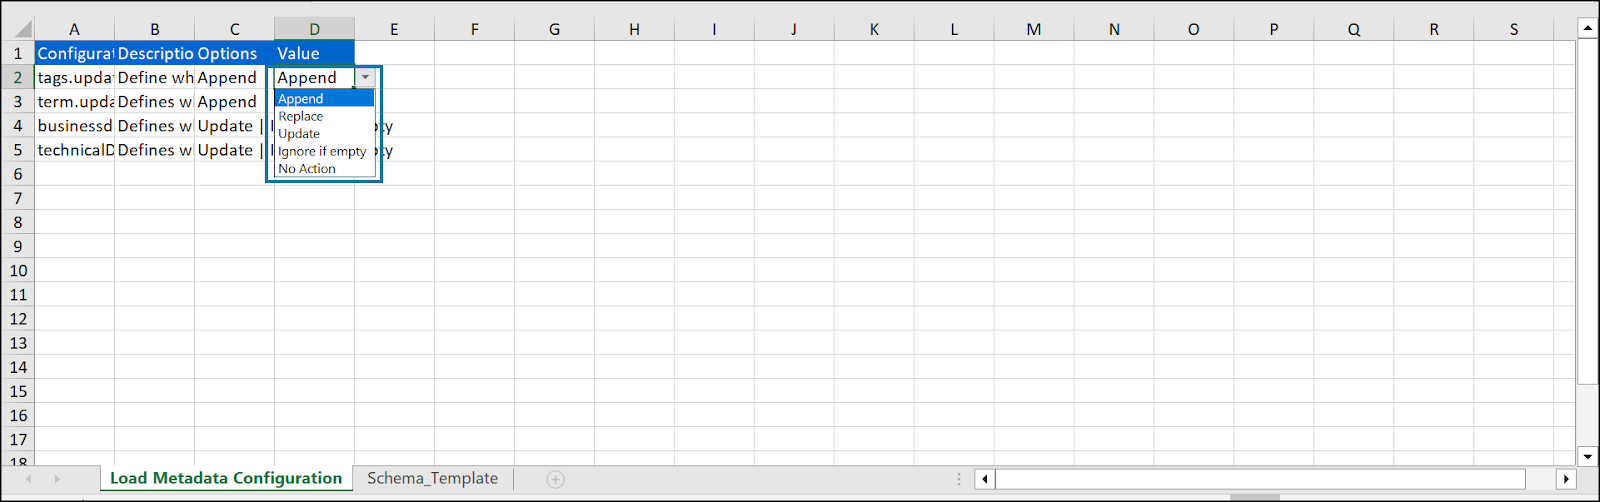
The image shows the configuration options on the Load Metadata Configurations page

The image shows the Action options on a schema template with details
|
Note 1: These configurations are applicable only when the line item action for the template is set to "modify". Note 2: If the user chooses ‘Add’ as the Action, the above parameters will not apply. |
Depending on the chosen configuration settings, the modifications to tags, terms, business, and technical descriptions will take effect. Additionally, the template includes an Action column for each line item, featuring a dropdown list of options such as Add, Delete, Modify, and No Action.
The attributes listed below come with configurable options and their corresponding effects:
|
Configuration Parameter |
Description |
Default Value |
|
tags.update.action |
Define what happens to the tags when the data is uploaded.
|
Append |
|
term.update.action |
Define what happens to the terms when the data is uploaded.
|
Append |
|
businessdescription.update.action |
Defines what happens when the business description of the object is uploaded.
|
Ignore if empty |
|
technicalDescription.update.action |
Defines what happens when the technical description of the object is uploaded.
|
Ignore if empty |
|
description.update.action |
Defines what happens when the description of term is uploaded,
|
Ignore if empty |