Data Lineage tracks the hierarchy or interrelation between objects. It helps to understand the origin of the data and describes the path - how it reaches the target and all the transformations it undergoes in its lifecycle. It provides the ability to track, understand, record, and visualize the dependencies and data transformation along with its path from source to destination. The Flowcharts help you track the flow from source to target or from target to source at multiple levels.
- Helps users make strategic decisions using accurate information and perform system migrations effectively.
- It helps automate data mapping
- It helps discover errors in data processes by validating the accuracy and consistency of the data.
- Analyze impacts on data objects.
- Showcases the dependencies at multiple levels.
- Perform root cause analysis on low-quality data.
Lineage Techniques
In OvalEdge, lineage can be built in three ways:
- Manually: Manually, Source and Destination objects can be added to a data object (Table, File, Report) using the Advanced Tools > Lineage Maintenance.
- Build Auto-Lineage: To view end-to-end lineage, you can use the Advanced Tools > Auto-Build Lineage, where the Cataloged Queries or Source (for both Standard and Auto Lineage License types).
Administration > Crawler > Nine Dots > Build Lineage (for Auto Lineage License type).
Auto Build Lineage
Lineage by Parsing is one of the most advanced lineage forms. It supports numerous tools and programming languages used to transform and process data, such as SQL, JAVA, XML, Jason, and more, to automate end-to-end data lineage.
The Auto build lineage and build lineage using the crawler settings are both automated processes where lineage is built for cataloged queries. The Cataloged queries are the queries that are fetched from remote or source while crawling and the queries that are executed in the OvalEdge application using the Query sheet.
Manual Lineage
Lineage Maintenance thus helps to manually add data objects to a Table, File, or Report to understand the data, view transformations, and drill down into the table, column, and query-level lineage.
For Example: An organization can have numerous reports which are used to make decisions for the long-term survival of the organization. However, to create these reports, several data sets may have been used. So, to find errors in any report, you can use the Lineage flowchart and trace the data set source of the error. You can visualize which reports are duplicates or reports that rely on obsolete or non-existent data.

Understanding Lineage Diagrams
This section provides details on building Lineage manually by adding Source or Destination objects and mapping columns to understand the data holistically. To view a lineage of a data object, navigate to Data Catalog > Tables > Select a table > Table detailed page > Lineage.
The following figure shows an example of a data lineage diagram.
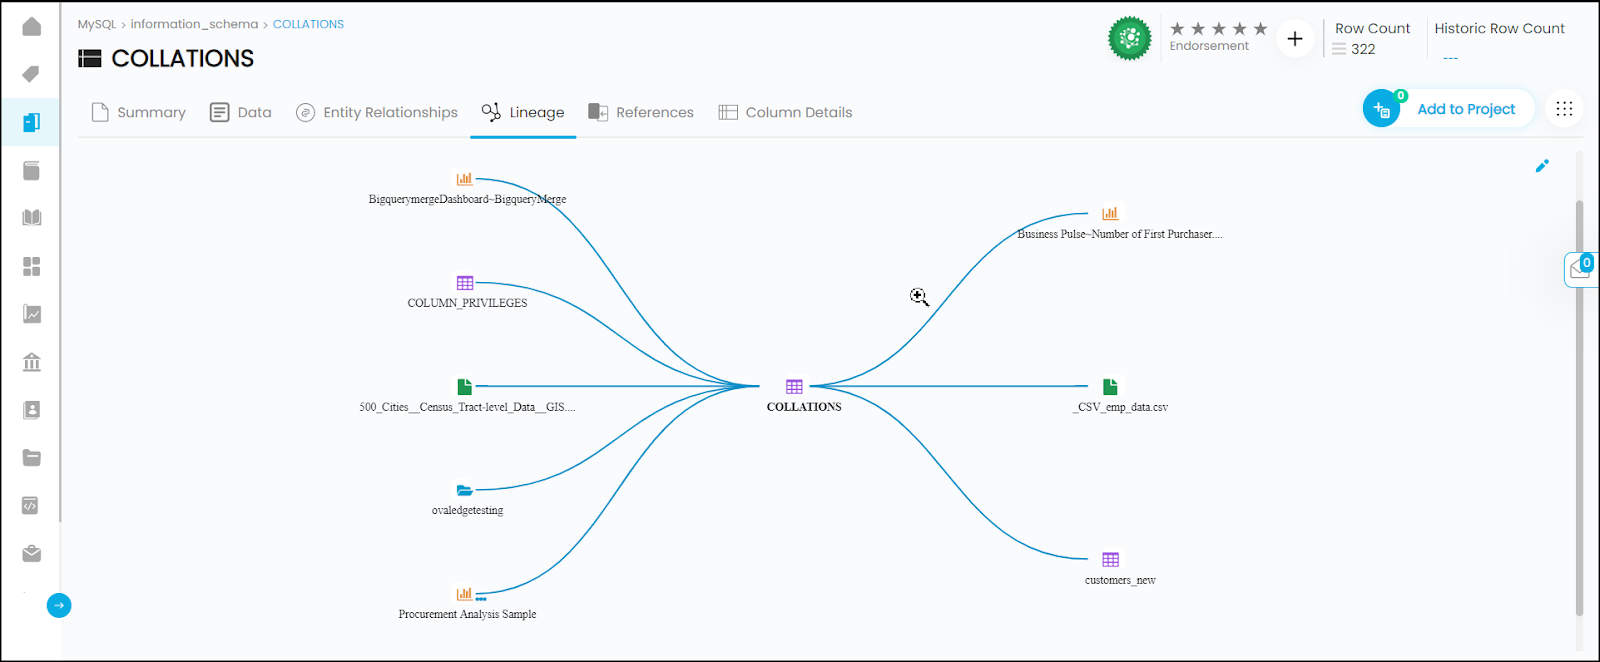
A lineage diagram illustrates the path of a single object’s data flow. In the lineage hierarchy, The data’s full lifecycle is shown using the associated source objects and destination objects.
Source Objects: The Source objects, also referred to as upstream objects, tell you where the data came from (upstream objects).
Destination objects: The Destination objects, also referred to as downstream objects, tell you where the data is flowing to (downstream objects).
Hovering on to a data object displays the data object details (database.schema.objectname). You can drill down deep into data assets by clicking on the node or thread (connector lines) to drill down more into the details and view Column Mappings and Query Codes. The below-mentioned details are displayed in a pop-up window.
- Summary: It is an editable field where you can add more information about the Lineage between them. Click on the edit icon to add descriptions about the lineage.
- Code / Query: It displays the responsible query extracted from the source system.
- Column Mapping: It displays the column mapping between the Source and Target if any mapped. (Refer to column-level lineage for more information). Hover on to a column name to view the Column Transformation Notes.
Editing Table-level lineage
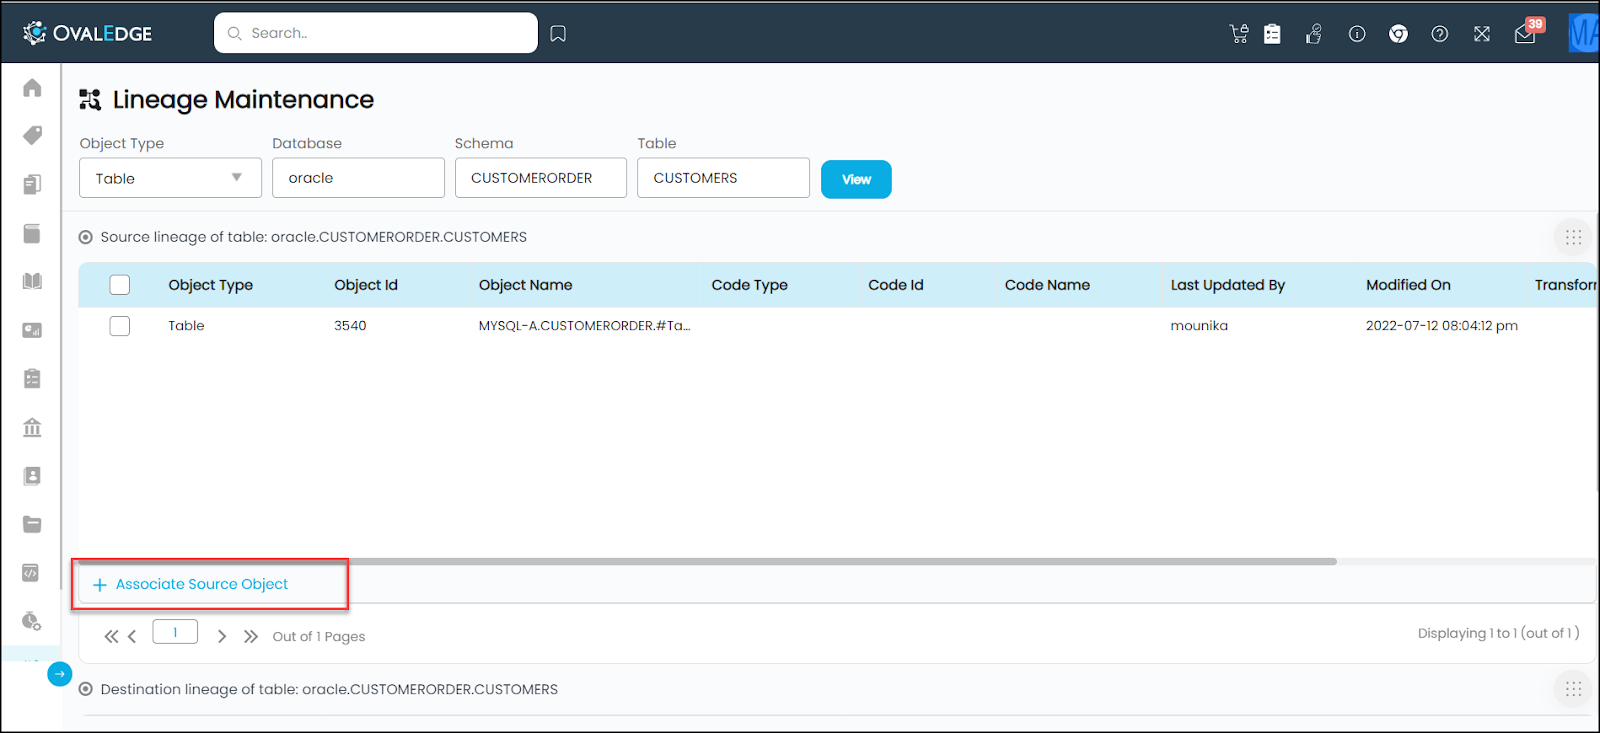
In Manual Lineage, you can add / update / delete the Source or Destination (Target) objects associated with a data object. To manually build a lineage, an edit icon is enabled in the top right corner of the lineage page as per your preferences. Click on the edit icon, and you will be navigated to the Advanced Tools > Lineage Maintenance page.
- The data object details to which the source or destination objects are to be added are displayed at the top.
- The grid displays the existing associated source objects, if any are added. To add source objects, click on the Associate Source Object button enabled in the bottom left.
- Select a Data Object to add the respective object.
Example: When adding a Table Database / Schema / Table / Query - respective drop-down fields are displayed. Upon selecting a data object, click the Save button, and the source object is added. - To add Destination objects, click on the Associate destination Object button enabled in the bottom left.
- Select a Data Object to add the respective object.
- You can add multiple Source and Destination objects.
- Once the data objects are associated, click on the View button in the top center to view the added source/destination objects in the lineage.

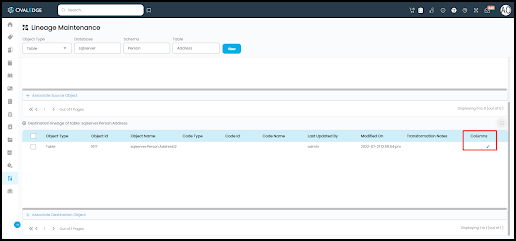
- Once the Source or Destination objects are added, click on the edit icon under the Columns field to add the Column level details.
- Using Map Column Via AI
- Manually mapping source columns to target columns.
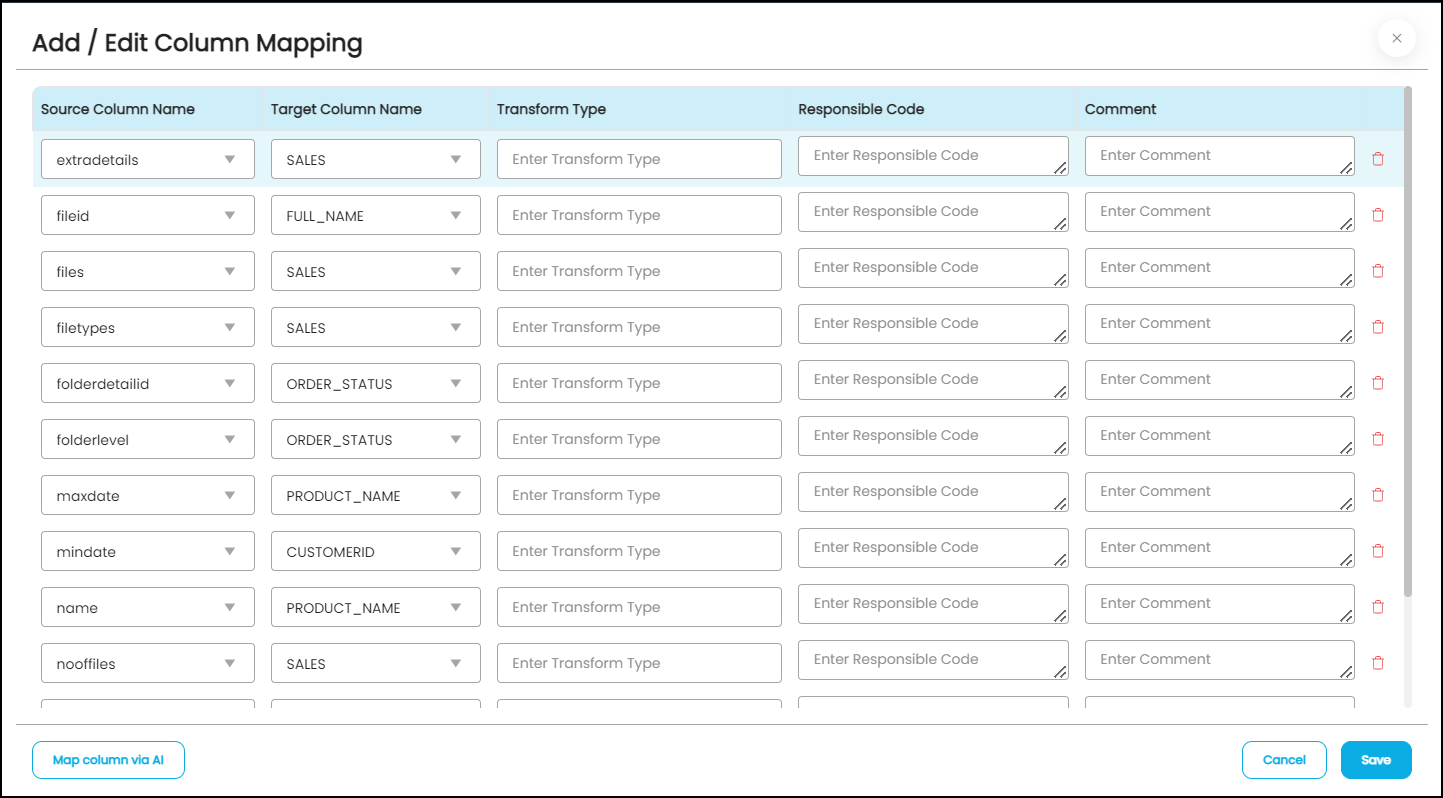
- Click on the edit icon. An Add / Edit Column Mapping pop-up opens with a Map Column Via AI button enabled at the bottom left corner.
- Click on the Map Column Via AI button to view all the column mappings between source and target.
- You can add Transformation notes, Responsible Code, and comments in the fields provided.
- Click on the Save button to save the Column Mappings.
- A delete icon is provided to delete a column mapping you don't wish to add.
- To view the column mapping, go to Object level lineage > click on the thread between source and target. A pop-up window is displayed with a summary, query code (if any added), and Column mapping.
- Select the Column mappings tab to view the mappings.
- To view the column mapping in Tabular view, click the Toggle button in the top right

Manual Column Mapping:
- Click on the edit icon, and an Add / Edit Column Mapping pop-up opens with a +Add New Row link.
- Click on the link to view a row added to the pop-up where you can add a source column from the Source name drop-down and a Target column from the Target Name drop-down.
- You can add Transformation notes, Responsible Code, and comments in the fields provided.
- Click on the Save button to save the Column Mappings.
- A delete icon is provided to delete a column mapping you don't wish to add.
- To view the column mapping, go to Object level lineage > click on the thread between source and target. A pop-up window is displayed with a summary, query code (if any added), and Column mapping.
- Select the column mappings tab to view the mappings.
- To view the column mapping in Tabular view, click on the Toggle button enabled in the top right.
- The added Source/destination objects can also be deleted using the Nine Dots icon on the right of respective source/destination grids. Additionally, you can edit the Query and Transformation notes.
Note:- Lineages can also be built at the Column level as mentioned above.
- The height, width, and other configurations pertaining to lineage can be set from Administration > Configuration > Lineage.

Copyright © 2019, OvalEdge LLC, Peachtree Corners GA USA