Overview
A Job Workflow is a sequence of steps for a job, capable of running sequentially, in parallel, or using a combination of both approaches. It enables users to organize, automate, and execute multiple tasks, including crawling, profiling, generating AI term recommendations, and executing data quality rules. The Job Workflow facilitates the organization, tracking, and creation of recurring jobs, consisting of thirteen job types that can be configured to create a workflow. This allows OE_Admin and Author licensed users to perform a set of operations, providing them with execution flexibility and task organization for various benefits. The OE_Admin has the capability to perform all operations within the Job Workflow, while Author licensed users are limited to selecting, designing, and saving a workflow.
Creating Job Workflow
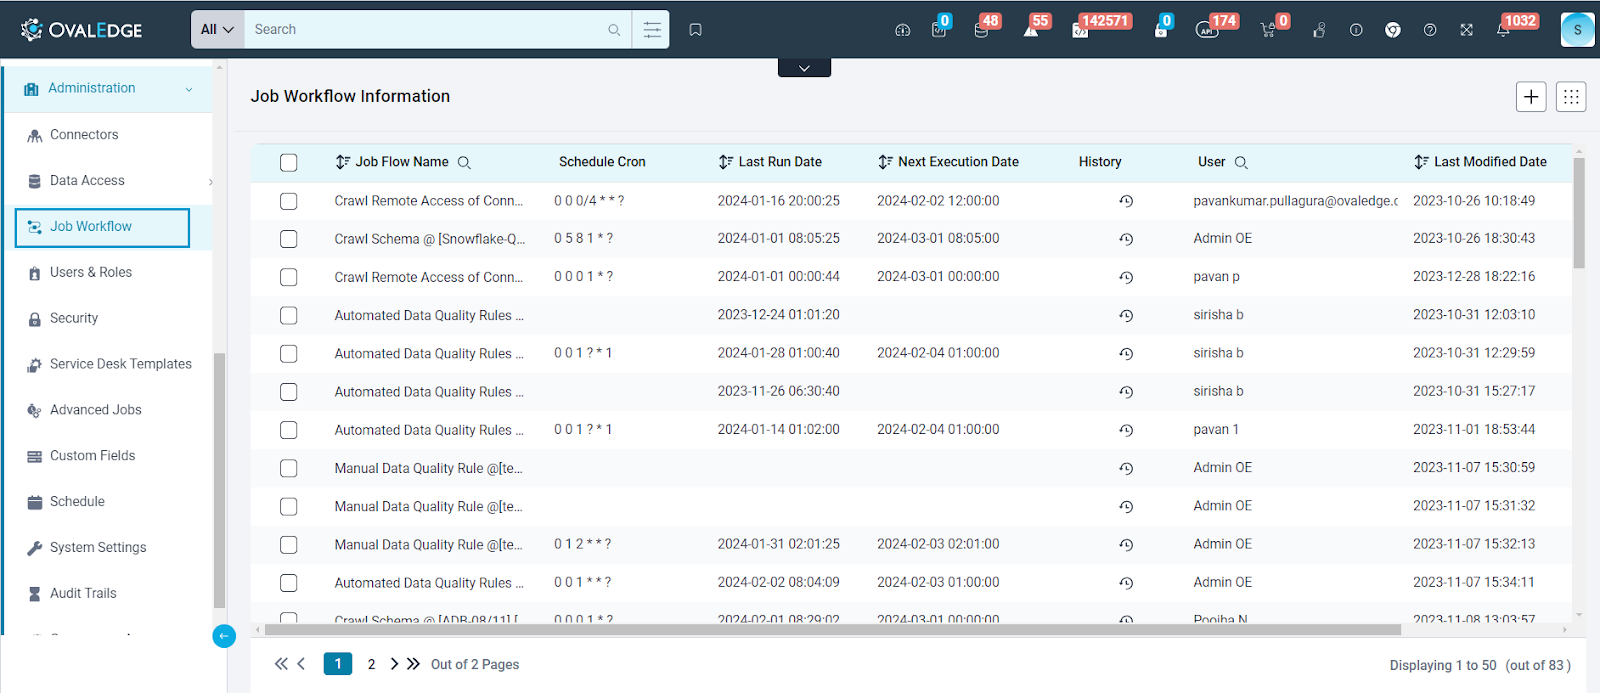
To create a Job Workflow, OE_Admin, and Author licensed users can navigate to the Administration module and select the Job Workflow option, which displays a list of configured Job Workflows.
To initiate a new Job Workflow, users can click the "Add New Job Workflow" button (represented by a "+" icon), leading them to the Job Workflow creation page.
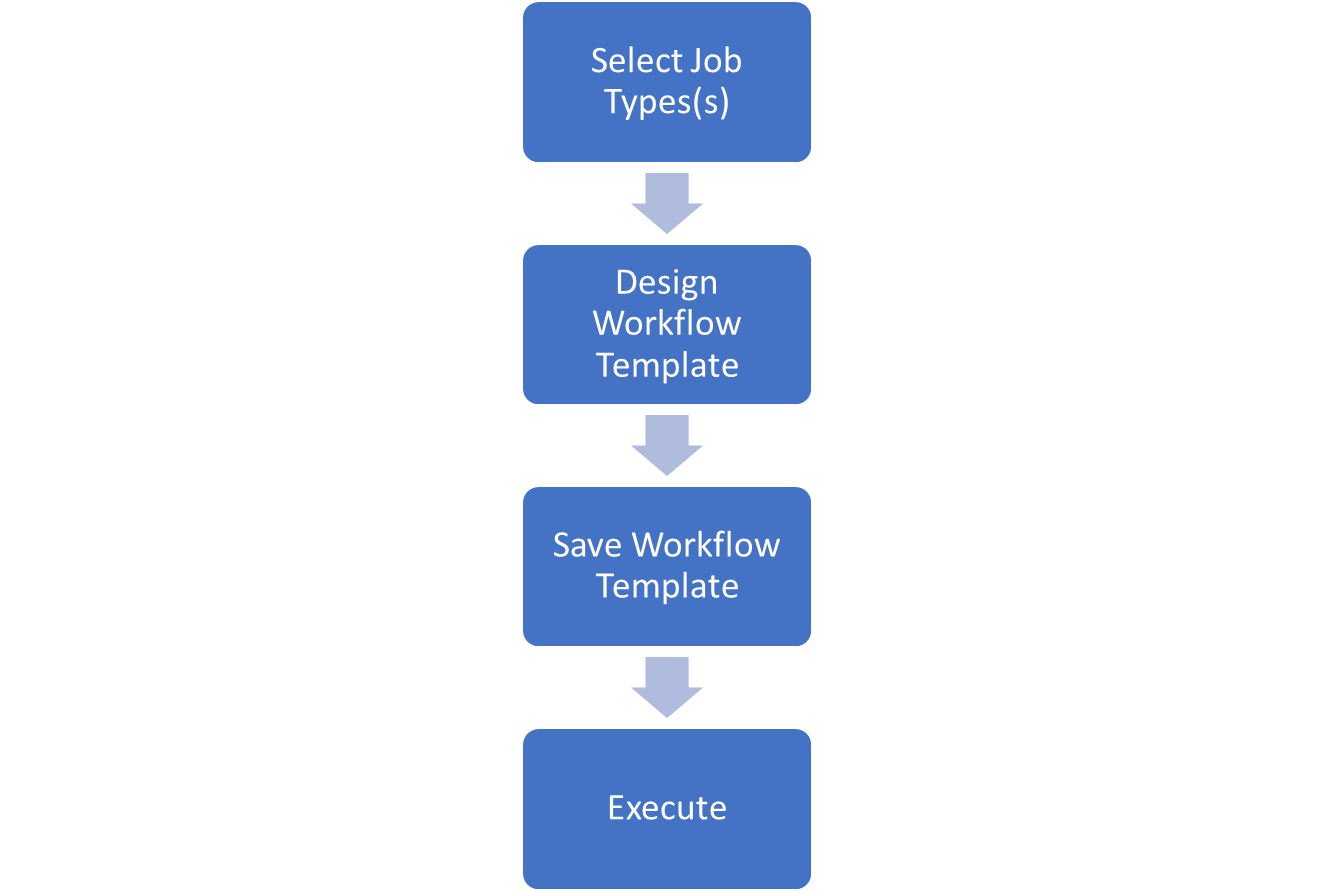
The Job Workflow creation page is divided into two sections, providing a straightforward way to configure the Job Workflow. The first section involves selecting the job type, while the second focuses on designing the workflow. Users should follow the outlined steps to create a Job Workflow successfully.
Selecting Job Type
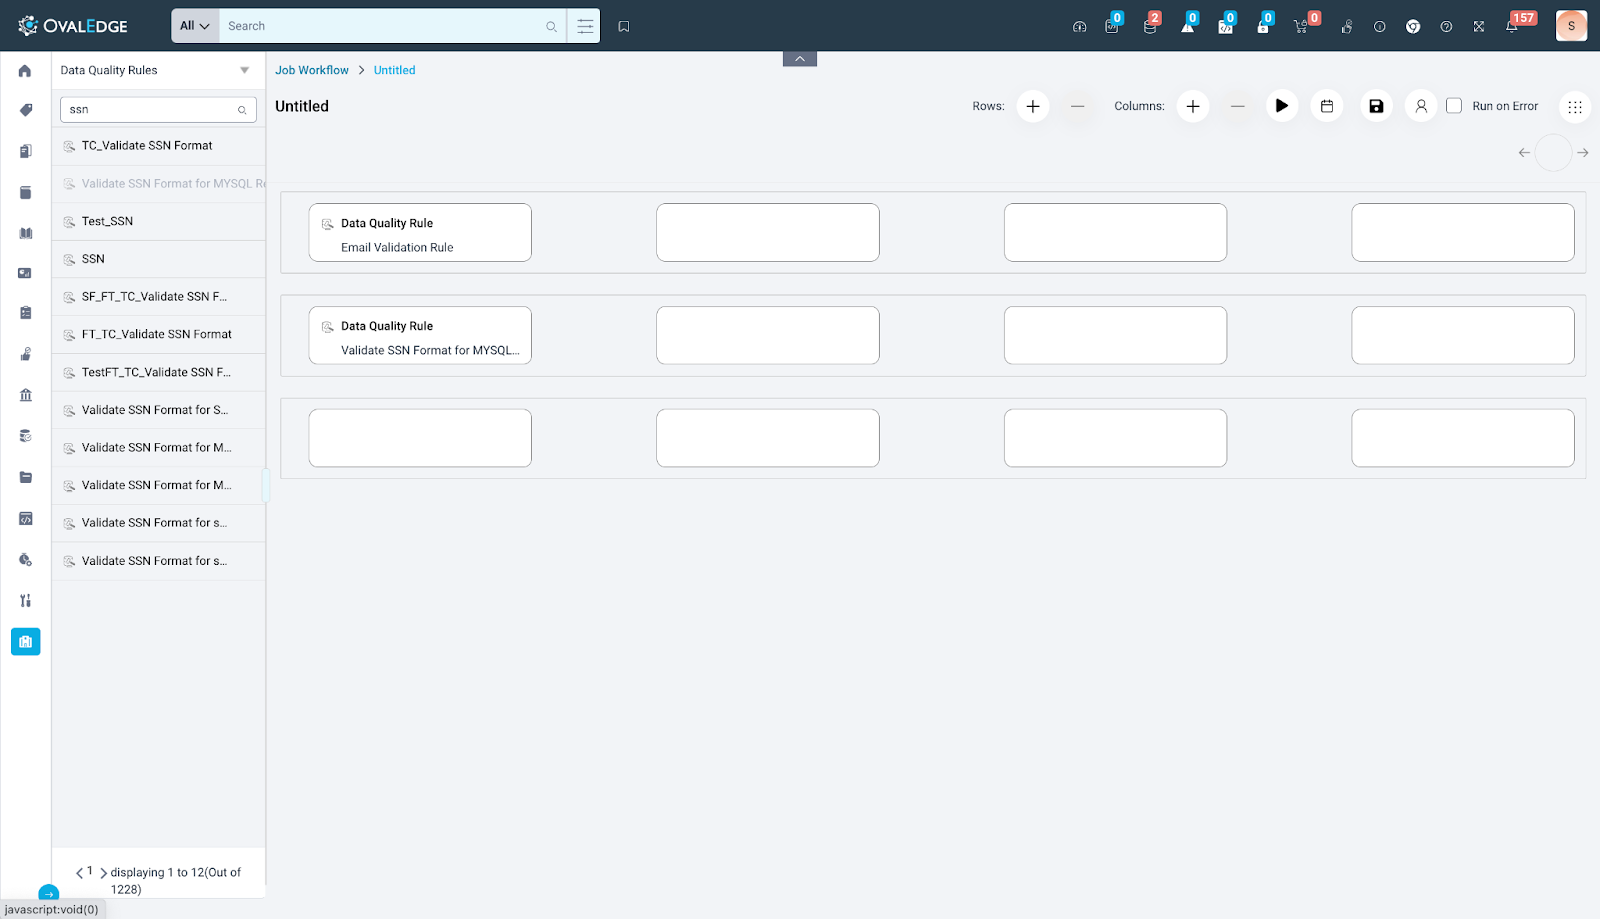
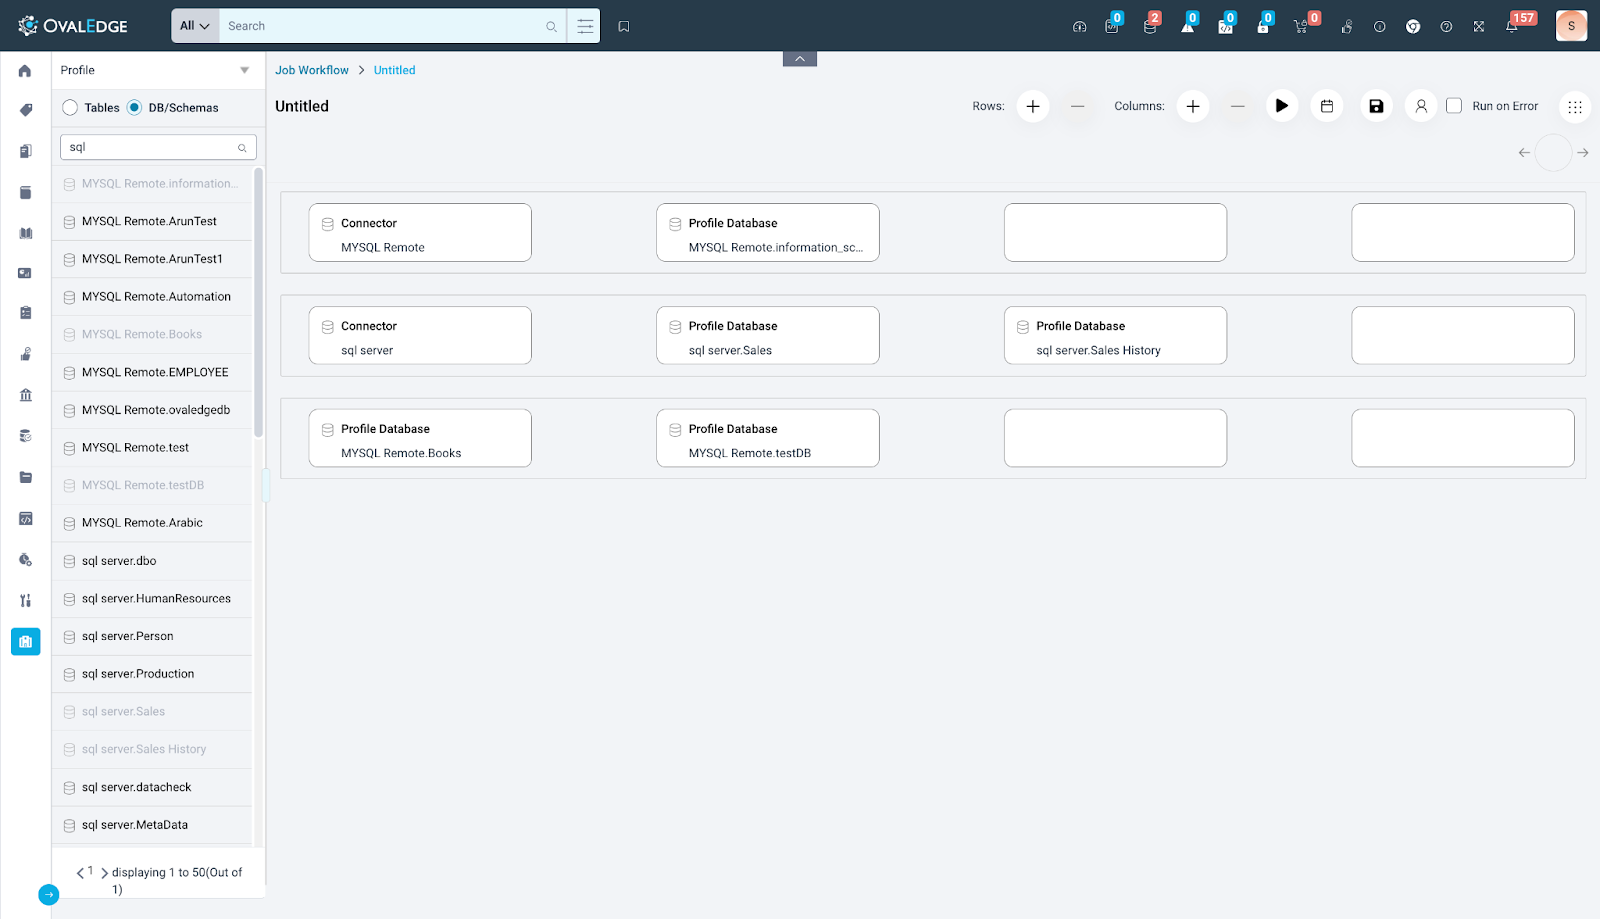
Users need to add specific job types to the workflow design to create a Job Workflow. A dropdown menu on the left of the Job Workflow design page allows users to search for and select multiple job types. OvalEdge supports various job types, all of which can be added to design a seamless workflow.
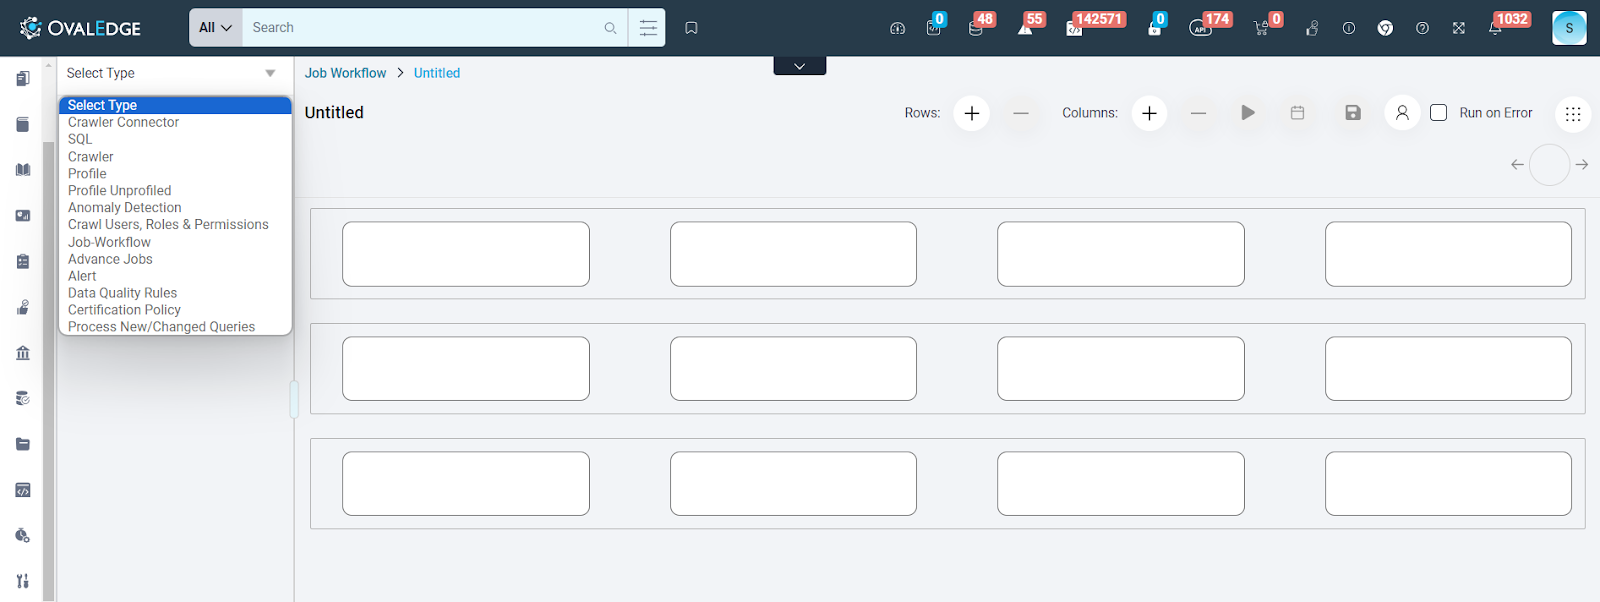
The supported job types for integration into the workflow design include:
- Crawler Connector
- SQL
- Crawler
- Profile
- Profile Unprofiled
- Anomaly Detection
- Crawl Users, Roles, and Permissions
- Job Workflow
- Advanced Job
- Alert
- Data Quality Rules
- Certification Policy
- Process New/Changed Queries
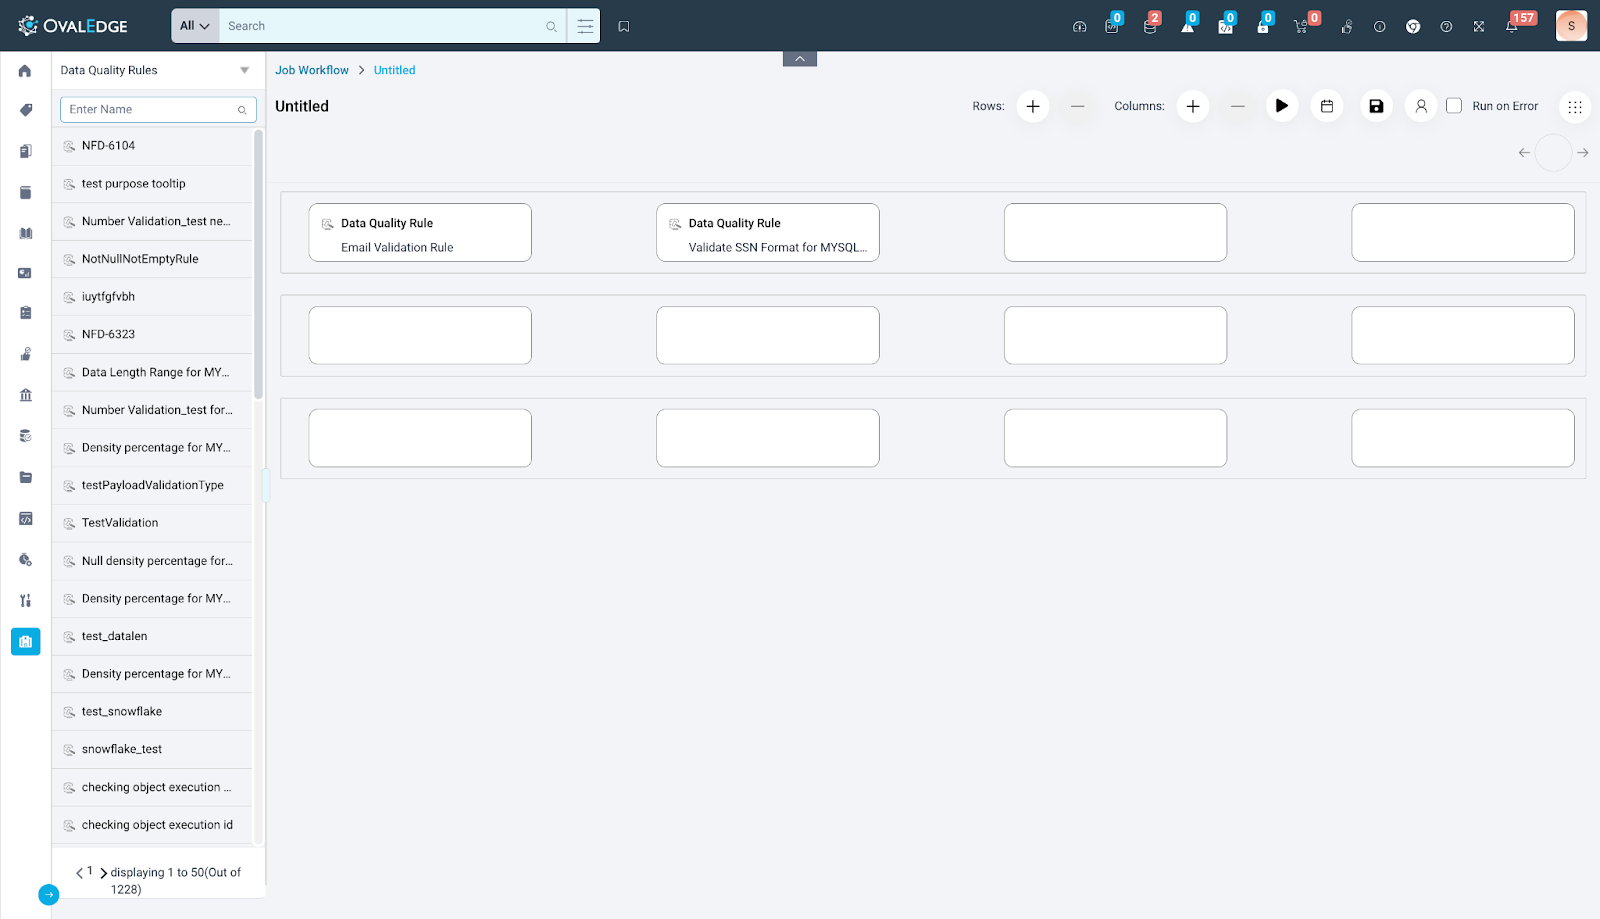
Designing Workflow
The right side of the Job Workflow creation page assists OE_Admin and Author licensed users in designing workflows in OvalEdge. There are three ways to design a Job Workflow:
- Sequential Job Workflow: Multiple jobs can be integrated and executed in a step-by-step progression. This involves the consecutive execution of jobs, with each job triggering after completing the previous one.
- Parallel Job Workflow: In a Parallel Job Execution Workflow, multiple jobs can be integrated and executed simultaneously. The first and second jobs added to the workflow run concurrently without dependency on each other.
- Hybrid Job Workflow (Combination of Sequential and Parallel): Users can create a combination of sequential and parallel job execution, providing flexibility to configure the workflow according to business requirements.
Options on the top right of the Job Workflow design screen assist users in designing workflows.
Adding/Removing Rows and Columns
- Users can add or remove rows and columns using the + or - icon to adjust the number of jobs in the workflow.
Saving Job Workflows
- To save a Job Workflow, users must provide a name and configure the workflow design. Once configured, they can save the workflow by clicking the "Save" button.
Scheduling Job Workflows
- A Job Workflow combines independent jobs into a single workflow and schedules their execution. To schedule the execution of job workflows, OE_Admin users can use the Cron job scheduler. If the schedule is not configured, the default execution schedule is applied to the Job Workflow.
Note: Only OE_Admin users can schedule a Job Workflow.

- Scheduling automates workflow execution at specific or recurring times. Users automate selected tasks by saving and scheduling the workflow, reducing manual intervention. During scheduled job execution, observers or experts are notified of the job's status, whether it fails, succeeds, or partially succeeds.
For example, if AI Term Recommendations are scheduled to run every month on the specified date and time (Month/Day/Hour/Minutes: 5th, 02 hours 10 min), the job will execute, updating existing data accordingly.
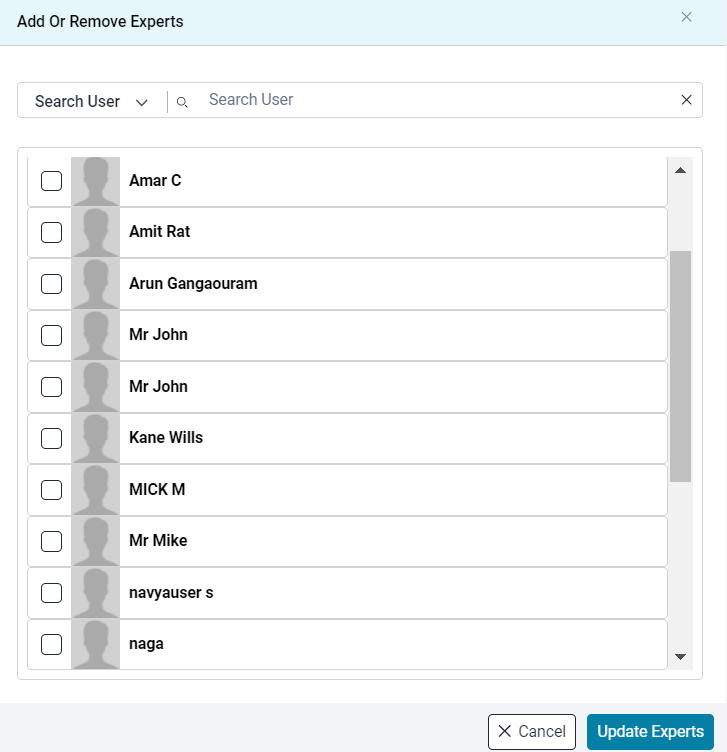
Job Workflow Experts
- In the context of a Job Workflow, an expert is a user who initiates, understands, and has business relevance to the included jobs. These experts are the intended recipients of notifications regarding the execution information of a specific Job Workflow.
While the Job Workflow creator is the default expert, multiple users with Author and Viewer licenses can be added, encouraging better collaboration. Viewer licensed users, however, do not have access to the module and are restricted to receiving Inbox Notifications only.
Run-on Error
- The run-on error option allows Job Workflow Experts to rerun the entire workflow if an error occurs during the execution of any configured job within the workflow.
User Actions Using 9 Dots
The 9 Dots within the Job Workflow design page offer users various options to perform different operations, as listed below:
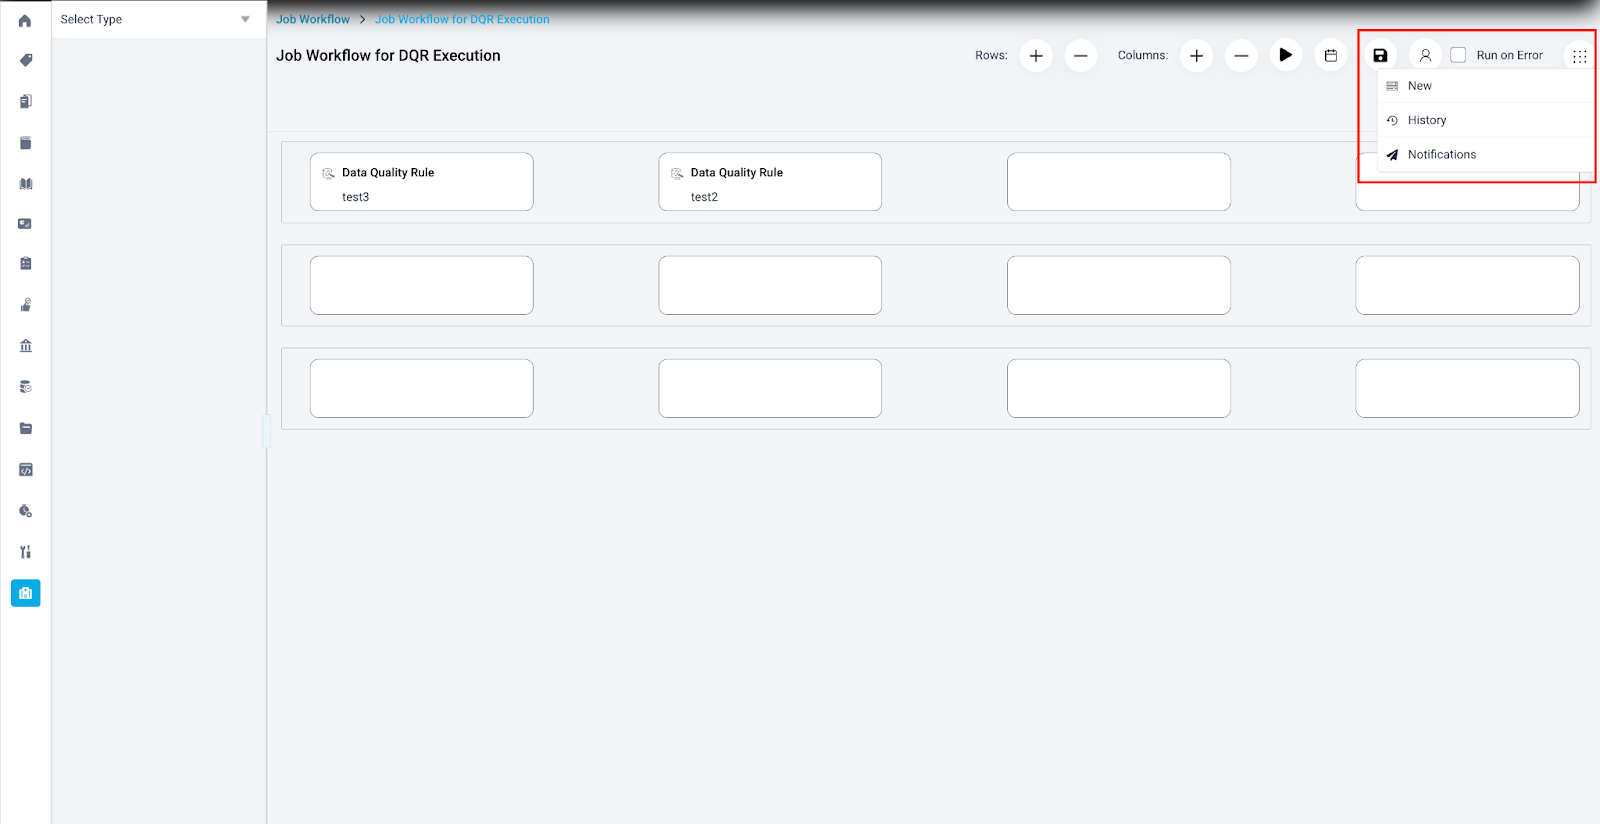
New Job Workflow
Creating a New Job Workflow allows users to generate a fresh Job Workflow. Selecting the New button prompts a confirmation popup, asking users to save the existing Job Workflow before creating a new one. Upon confirmation, users are redirected to a new Job Workflow design page.
Job Workflow History
The Job Workflow History option allows users to monitor the status of different jobs configured within a workflow. Choosing the History option directs users to the Jobs page, enabling them to track job statuses within a workflow. After redirection, users can view results specifically filtered by the chosen Job Workflow Name.
Job Workflow Notifications
In Job Workflows, notifications are triggered through three distinct actions, and they are delivered to the inboxes of both OE_Admin users and Job Workflow experts.
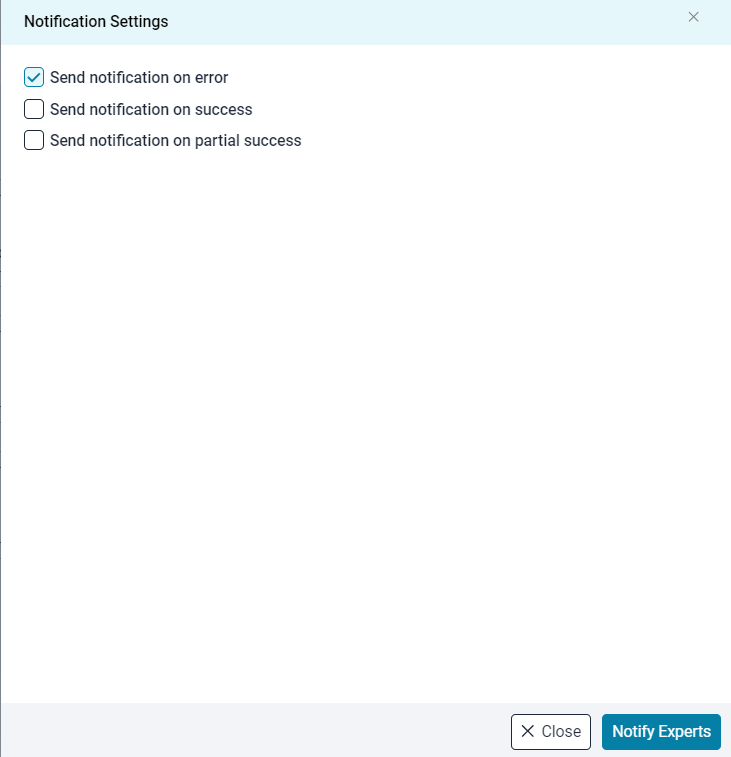
Users can choose one or more options from the available actions, each of which is detailed below:
- Send Notification on Error - Enabling this option triggers notifications whenever an error occurs during the execution of any job configured within the Workflow.
- Send Notification on Success - Enabling this option notifies users upon the successful completion of the Job Workflow execution.
- Send Notification on Partial Success - Enabling this option notifies users about the partial success of the Job Workflow execution, indicating that some jobs within the workflow were successful while others may have encountered issues.
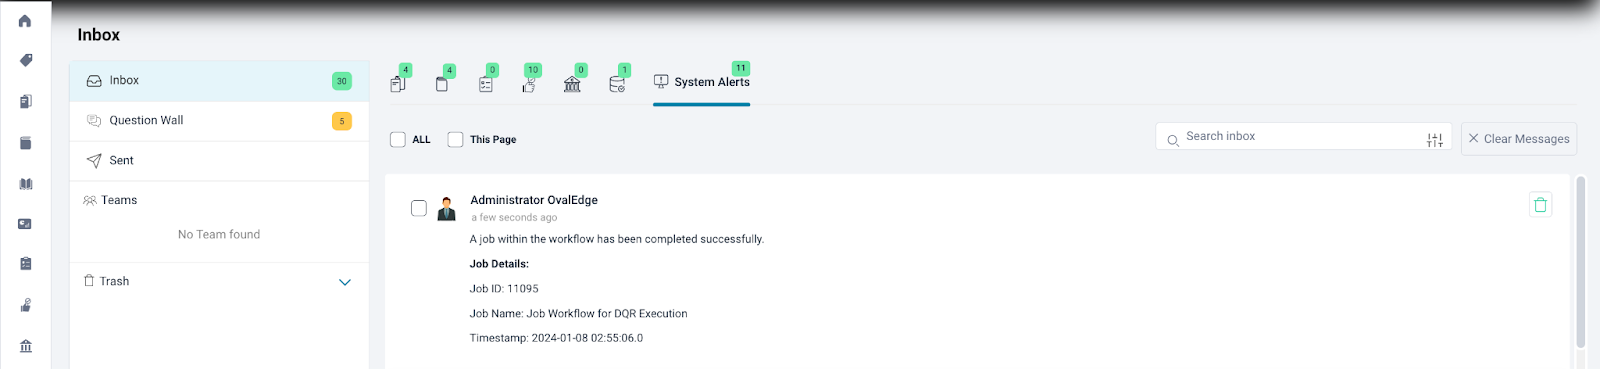
When viewed in the inbox, these notifications provide essential details, including the executed job's status, Job ID, Job Name, and the timestamp of job execution.
Job Workflow Status
The Job Workflow status offers users insights into the execution details of that specific workflow. In the OvalEdge application, a Job Workflow can be in one of the following statuses:
- INIT: The Job has been initiated.
- RUNNING: The Job is being processed in the submitted order.
- WAITING: Submitted Job is in the queue, awaiting execution.
- SUCCESS: An invoked task is completed successfully.
- ERROR: The job has failed. Check the error message in the Logs.
- KILLED: The initiated job has been terminated.
- PARTIAL SUCCESS: The initiated job has been completed partially.
Job Workflow Details
On the Job Workflow landing page, Author-licensed and OE_Admin users can access comprehensive information about existing job workflows. The page provides sorting, filtering, and searching options for various columns, enhancing user accessibility.
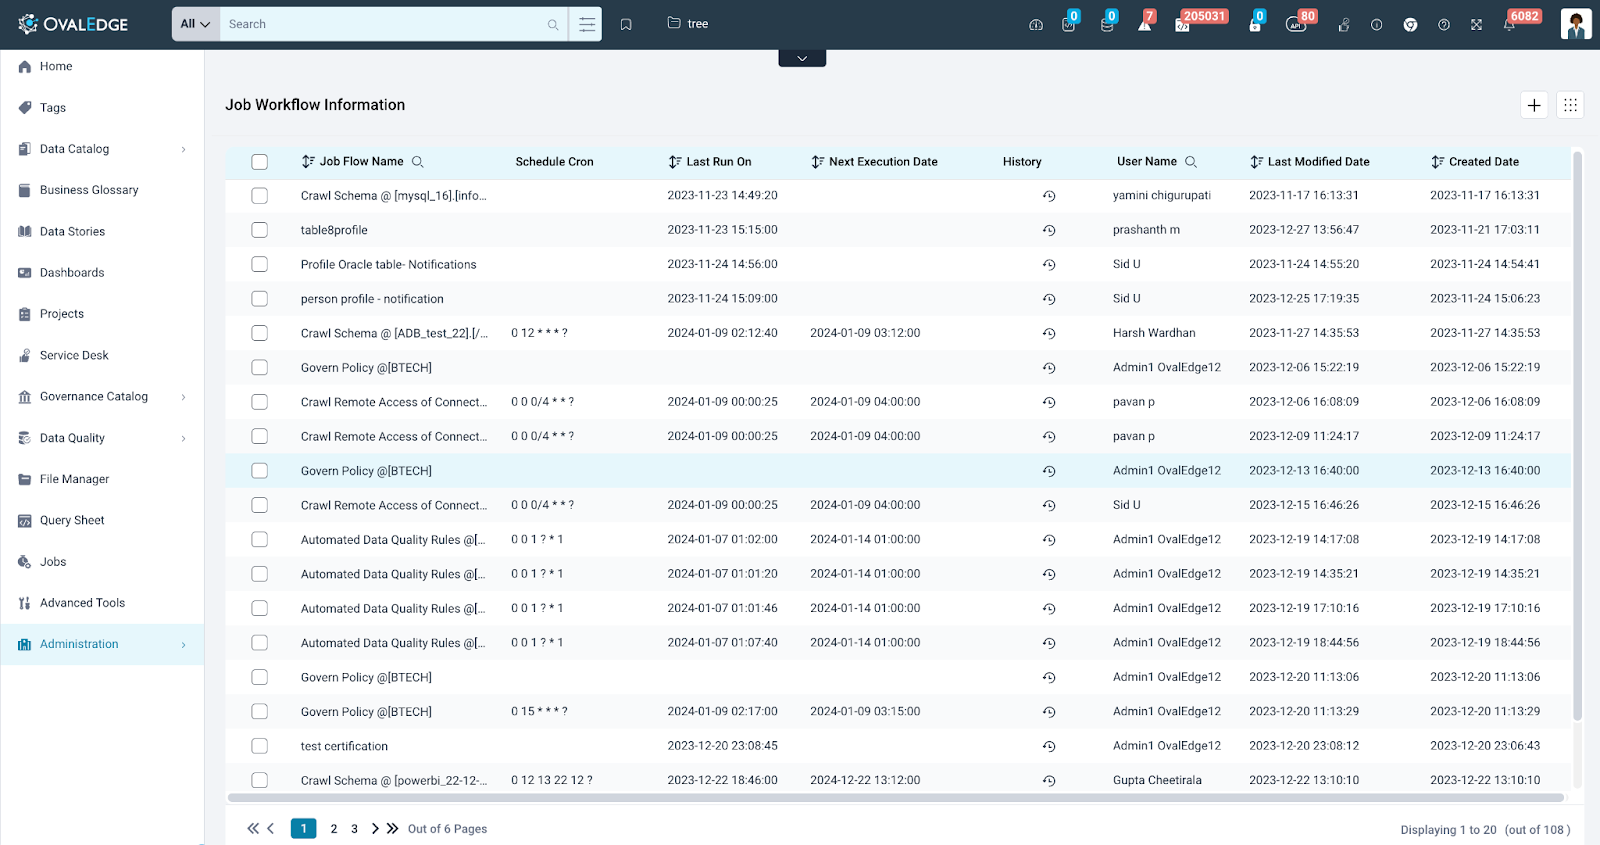
The following details are available on this page:
- Job Flow Name - This column displays the names of all configured Job Workflows in the system. Users can efficiently search and sort through the names of existing Job Workflows. Hovering over each field reveals the complete workflow name and the corresponding cron entry.
- Schedule Cron - This column provides cron entries representing the configured execution schedule for each Job Workflow. Hovering over each field reveals the actual execution time in text format.
- Last Run Date - This column provides users with the timestamp of the latest execution of existing workflows. Sorting options allow users to identify the earliest and most recent executions for better management.
- Next Execution Date - This column offers insights into the upcoming scheduled executions of Job Workflows. Users can plan and manage tasks effectively to ensure important job schedules are not impacted. Sorting options help users identify the most recent upcoming scheduled job workflow and the last one.
- History - It directs users to the Jobs page, where the complete execution history of jobs configured within the selected Job Workflow is displayed. Users can track and gain insights into the behavior of the configured jobs.
- User - This displays the names of users who created the Job Workflows. Users can utilize search options to view usernames based on their specific requirements.
- Last Modified Date - This column exhibits the date and time of any changes made to the existing Job Workflow. Users can utilize the sorting option to arrange dates in ascending or descending order based on the changes made.
- Created Date - This column indicates the date of creation for the respective Job Workflow. Users can easily identify the most recently created and earliest existing Job Workflow within the system by utilizing the sorting option.
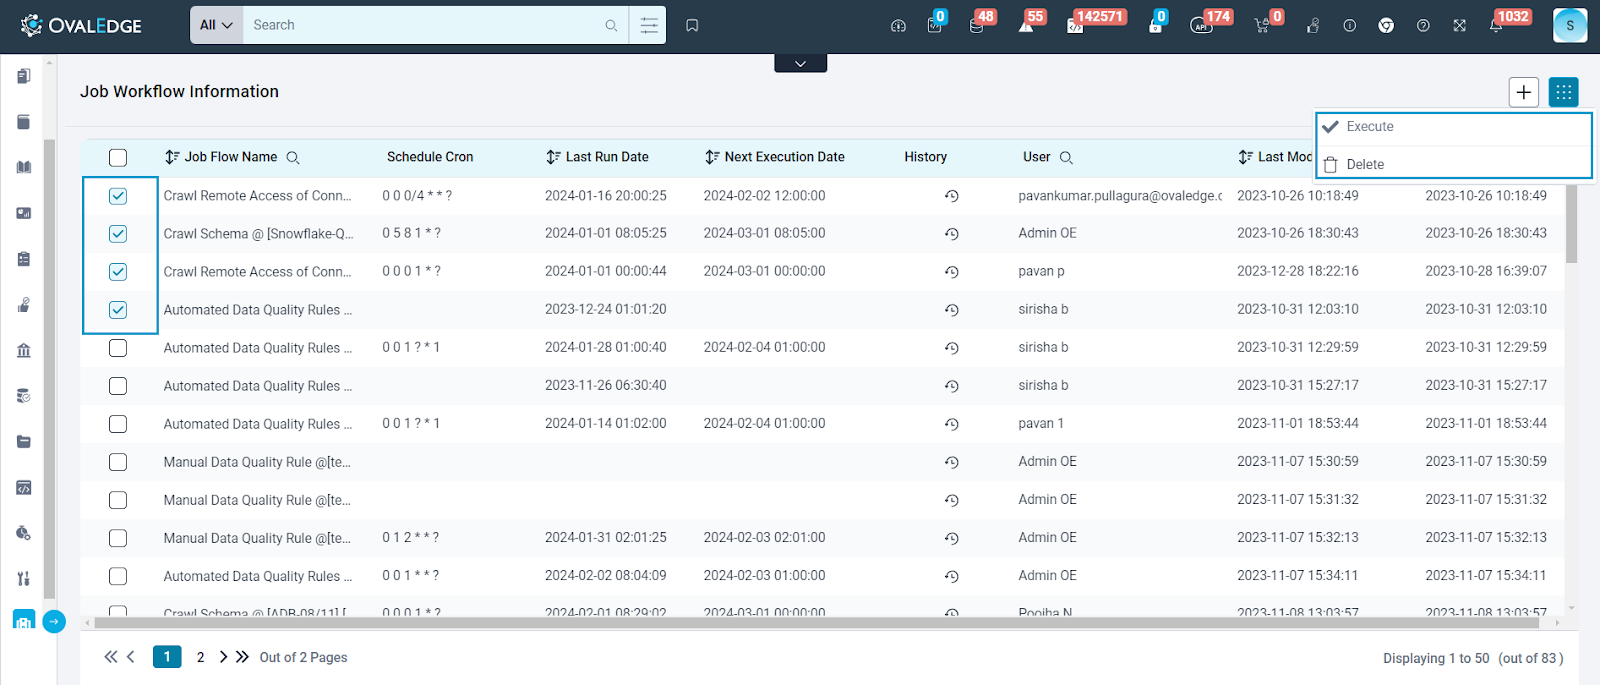
The 9 Dots feature allows users to perform bulk execution and delete the current Job Workflow. In Job Workflows, only OE_Admin users can modify and update any particular Job Workflow.