Job Workflow is the set of execution steps for the job that should be executed sequentially or parallelly. The Job Workflow feature allows you to organize, track, and create a series of recurring jobs. It is the set of steps that need to be executed to achieve different results for crawling, profiling, and you can also get customized results for the Data Quality rules.
With workflows, a user can:
- Run and troubleshoot jobs independently with real-time status feedback.
- Schedule workflows for jobs that should only run periodically.
- Run multiple jobs at a time.
In the OvalEdge application, two types of Job Workflow are defined.
- Sequential Job Workflow: Progresses from one step to the next and does not step back. In this workflow process, once the 1st job is run, it will trigger the 2nd Job.
- Parallel Job Workflow: Parallel Workflow allows some parts of the workflow to run simultaneously. In this Workflow process, there is no dependency between the two jobs.
The basic process for building a workflow job template is illustrated below.

You can navigate to the Job Workflow by Administration > Job Workflow.
Click on the + icon to add a new Job workflow. The newly added job workflow will be displayed on the Job Workflow Information page.
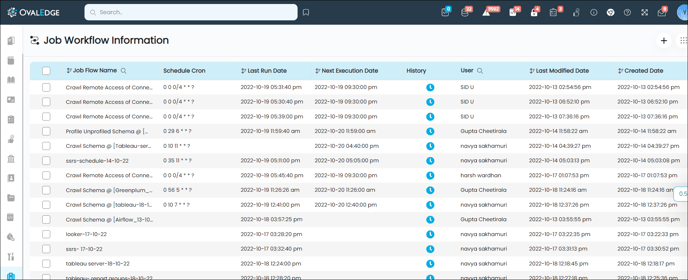
The below table describes the fields available on the Job Workflow page.
|
Field |
Description |
|---|---|
|
Job Flow Name |
Displays the name of all the created Job Workflow. |
|
Schedule Cron |
Displays the time scheduled by the user to run the job. |
|
Last Run Date |
Displays when the job was recently triggered. |
|
Next Execution Date |
Displays the time when the job will be triggered. |
|
History |
The history of jobs allows users to see the tasks that have been successfully completed in a workflow. |
|
User |
Displays the name of the User who has created the Job Workflow. |
|
Last Modified Date |
Displays the date when the Job Workflow was modified. |
|
Created Date |
Displayed the date when the Job Workflow was created. |
|
|
You can add a new Job Workflow using this icon. |
|
|
The Nine Dots icon will help you to execute the selected Job Workflow. You can also delete a Job Workflow using this option. |
Creating and Scheduling a Job Workflow
You can add a Job Workflow using the + icon available on the Job Workflow page.
When you click on the + icon, it will navigate to the Job Workflow page.

Tasks Performed on Job Workflow
You can perform the below tasks on the Job Workflow page:
- Naming the Job Workflow: Hovering on the Untitled button will display the edit icon. You need to add a name to the Job Workflow using the edit icon.
- Add or remove Rows and Columns: You can add or remove the rows and columns to add the Jobs using the + or - icon.
- Run: You can run the Job Workflow using the option.
Note: To run the Jobworkflow, you need to add a name to the Job Workflow and save it.
- Schedule: You can schedule the time to trigger the Job Workflow using this icon.
Note: Please save the Jobworkflow before scheduling it.
- Save: You can save the Job Workflow using this icon.
Note: Empty Job Workflow can’t be saved. - Expert: You can invite the users to check how the Job Workflow is defined using this option.
The Nine dots icon is also available on the Job Workflow page to perform the below tasks:
- New: Creates a new workflow by saving the existing workflow
- History: The history of jobs allows you to see the tasks completed in a workflow. When you click the history button, it will navigate you to the Jobs page.
- Notification: A notification alert will be sent to the user once the job is triggered. When a job succeeds/fails, a notification is sent using the configuration defined by the Notifier. Notifications can send as a system alert or an email.
To create a Job Workflow, it is required to add the job types to the job workflow. In the OvalEdge application, you can find multiple Job types, as mentioned below:
- Crawler Connection: Establish a connection to your data source and set up a scheduler on the Connections to crawl all the schemas within the connection without any restriction.
- SQL: You can include a request for a query.
- Crawler: Setup metadata fetching from source systems at scheduled intervals.
- Profile: Setup computing statistics and informative summaries about the data objects at scheduled intervals.
- Profile Unprofiled: Setup to compute statistics from the newly crawled or unprofiled tables.
- Crawl Users, Roles, and Permissions: For the RDAM connections you can crawl the Users, Roles, and Permissions to the OvalEdge application using the job.
- Job-Workflow: You can add existing Workflow templates as building blocks in another workflow.
- Advanced Job: The advanced jobs available within the OvalEdge application is listed here. You can select the required advanced jobs.
- Alert: Data Alert is an automatic message responding to an event.
- Data Quality Rules: Set up the data quality rules that are scheduled to run regularly.
- Certification Policy: A user can include the Certification policies scheduled to be executed at given intervals.
- Process New/ Changed Queries: Select a Schema to process all the unprocessed queries (Failed Queries) used for building lineage. This is only for the reports whose lineage is not built.
Steps to create a Job Workflow
To create a new workflow job template:
- Go to Administration > Job Workflow.
- Click the + icon on the Job Workflow Information page to create a new job workflow template.
- Enter a Job Workflow name.
- Click the Job types and choose the related jobs to be added to the workflow.
- Drag and drop the Jobs in the workflow space.
- Click on Save to the icon to save the Job Workflow.

Steps to Schedule a Job Workflow
Scheduling a workflow allows the user to run a saved workflow at a user-defined time.
Add a schedule to the existing workflow:
- Go to Administration > Job workflow.
- Click on the check box to select the Job Workflow to see the Job Workflow page.
- Click on the Schedule icon, it will display the calendar to define the schedule (Example: Every hour at 15 minutes past the hour, or 1st day of Every month at 1:30).
Note: By default, the calendar will add the system time. If multiple time zone is set up in the system, it will pick up the time as per the primary clock. - Click on the schedule icon to see the successful message on the screen.
- All the scheduled jobs will be displayed on the Administration > Schedule page, and the Job Workflow will be triggered at the scheduled time.
Note: A notification will be sent to the Expert once the Job is triggered. You can also view the history of the job workflow on the Jobs Page.
History of Jobs
The history of jobs allows users to view the tasks that have been successfully completed in a workflow.
To view the history of Jobs:
- Go to Administration > Job Workflow.
- Click on the Job Workflow, you want to view the history.
- Click on the Nine dots > History. It will redirect you to the Jobs page, where you can view the history of Jobs.
Work with Notifications
When you click on Notifications, it allows you to review any notification integrations they have set up.
To set a notification:
- Go to Administration > Job Workflow.
- Click on the Job Workflow, if you want to set the notification.
- Click on the Nine dots > Notifications to display the Notification Settings Pop-up window.
- Select the check box from the option, whether to send a notification on error or on success, or on partial success.
- Click on Notify Experts button to display a successful message on the screen.
Note: By default, the admin is set as the Expert. You can change the expert or add more experts by clicking on the Job workflow > Expert icon.
Execute the workflow
Scheduling the Job Workflow allows the Job to run at the scheduled time. Apart from it, you can also run the Job Workflow manually.
To run the Job Workflow:
- Go to Administration > Job Workflow.
- Click on the Job Workflow you want to run to display the Job Workflow page.
- Click on the Run icon
to run the job. You can view the completed jobs on the Jobs Page.
Job Workflow Status
In the OvalEdge application, the Job Workflow can have one of the following statuses:
- INIT - The Job has been initiated.
- RUNNING - The Job is being processed in the submitted order
- Waiting - Submitted Job is on Queue to get executed
- SUCCESS - An invoked task is completed successfully
- ERROR - The job has failed and the error message can be checked in the Logs
- Hold - The initiated job has been kept on hold.
- KILLED - The initiated job has been killed.
- PARTIAL SUCCESS - The initiated job has been completed partially.
Copyright © 2019, OvalEdge LLC, Peachtree Corners GA USA