Introduction
Slack is a cloud-based communication and collaboration platform designed to unite team members and streamline organizational communication. It allows teams to communicate in real-time through instant messaging, voice and video calls, and file sharing.
Slack's features include channels, which are dedicated spaces for specific topics or projects, and integrations with tools and services such as Google Drive, Trello, and Salesforce.
Slack's main goal is to simplify communication and collaboration, reduce email clutter, and increase productivity by providing a centralized platform for team members to work together.
OvalEdge Integration
Integrating OvalEdge with Slack is based on the extensibility of alerts that are sent through the mail to clients. Users can send a direct message to their desired Slack channel from OvalEdge.
The messages can be related to the Data Catalog (sharing the data definitions, data lineage, and data quality information), Workflow (sharing the data workflows, such as data preparation and data analysis), Data Asset (sharing information about data sources, data quality, and data usage) and Data Governance (sharing data governance tasks, such as data privacy and compliance).
To integrate OvalEdge with Slack, a couple of Slack parameters (optional and mandatory) and the configurations in the OvalEdge application are required.
Components of Slack
The following are some of the important components of Slack.
- Workspace in Slack
- Apps in Slack
- Channels in Slack
- Direct messages in Slack
Workspace in Slack
The Slack workspace consists of channels that team members can use to communicate and collaborate. You will likely be able to communicate with people from your organization or your specific team here daily.
Apps in Slack
Slack apps allow you to connect other software (like Google Calendar, Salesforce, or internal company tools) to Slack. In this use case, we connect Ovaledge to Slack. To receive OvalEdge notifications in their Slack workspace, clients must create an App.
Channels in Slack
Slack channels are used for teamwork and communication. A channel helps you share ideas, make decisions, and move work forward by bringing the right people together.
For example, A channel named #Mobile App Dev Team is created so that the group of people who are working on developing a mobile application will share their ideas and updates in this channel.
Direct messages in Slack
In this app, individuals can chat privately, similar to other communication apps.
Integrating OvalEdge with Slack
To integrate OvalEdge with Slack, follow these steps.
- Create a Workspace in Slack.
- Generate User OAuth Token in Slack.
- Configure the OAuth Token in OvalEdge.
- Slack Channel ID Creation
Creating a Workspace in Slack
To create a Workspace:
- Install Slack on your machine.
- Once the successful installation of Slack is complete, open the Slack application.

- Click on Create a new workspace link. The Slack login page is displayed.

- Enter your organization's email address (Ex, test@ovaledge.com). The 6-digit code is sent to your entered email address.
- Enter the code. The code entered is validated, and the Open Slack pop-up window is displayed.
- Click on the Open Slack button. The Add Slack Workspace page is displayed.

- Enter the name and upload the photo that helps your teammates recognize more easily, and click on the Next button. The Add Teammates window is displayed.

- Enter the email addresses of your teammates who need to be included in the workspace and click the Next button. The purpose of the workspace window is displayed.

Generating User OAuth Token in Slack
To generate the User OAuth Token in Slack:
- On the Slack home page, click on the workspace name and select the Tools & Settings option.

- Select the Manage Apps option. The Installed Apps page is displayed.

- In the header menu, click on the Build option. The Your Apps page is displayed.

- Click on the Create an App button. The Create an app pop-up window is displayed.

- Click on the From scratch option, the Name app & choose workspace pop-up is displayed.

- Enter the name of the app in the App Name textbox.
- By default, the workspace created will be displayed in the Pick a workspace to develop your app in the dropdown. Select the workspace and click on the Create App button. The Basic Information page is displayed.

- Click OAuth & Permissions option.

- Scroll down to the User Token Scopes section, select the chat:write permission from the dropdown.

- Once you have selected the permissions, click the "Install to Workspace" (here, "Install to OvalEdge Slack New") button. The confirmation page is displayed.


- Click on the Allow button, and the OAuth Token for Your Workspace is generated and displayed in the User OAuth Token textbox.

- Copy the User OAuth Token and paste it in the OvalEdge Slack Configuration.
Configuring the OAuth Token in OvalEdge
To configure Slack’s User OAuth Token in the OvalEdge application.
- Log in to the OvalEdge application.
- In the left menu, navigate to Administration > System Settings > Notifications > Settings. Search with the Key (slack.app.oauth.token), add the User OAuth Token generated in the previous step in the Value field, and click Save.

- The User OAuth Token configurations will be saved.
Slack Channel ID Creation
- Navigate to the OvalEdge Slack New app. Click + Add Channels > Create a new channel.

- Click Next.

- Add the desired Channel name and click Create.
Note: By default, the visibility is selected as Public - anyone in OvalEdge Slack New.
- An Add People to # oe-channel is displayed. Click Add.
Note: By default, “Add all members of OvalEdge Slack New” is selected.
- The oe-channel Slack channel is created.

- Right-click the oe-channel and select View channel details.

- An #oe-channel pop-up window is displayed. Copy the Channel ID from the bottom.

- Log in to the OvalEdge application.
- Click on the My Profile.

- Click on the Edit Profile icon. The Edit Profile pop-up window is displayed. In the Slack ID textbox, paste the Channel ID, and click Save.

- The message “Profile updated successfully” is displayed.
- Select the messages or alerts that you want to view on Slack. The available alerts are related to Collaboration, Watchlist Alerts, System Alerts, Data Quality Alerts, Service Desk Alerts, Governance Roles Alerts, and Team Communication.

- Navigate to Administration > System Settings and click on the Notifications tab.
- Click on the Test button.
- Click on the Test Slack option.

- A Test Slack Configuration pop-up window is displayed. Click Confirm.

- A message “Successfully sent Test Message to Slack” is displayed. Here, the Test message from the Ovaledge application is sent to Slack.

- Verify the Test message in Slack.

Testing Collaboration Notifications
1. In the OvalEdge application.
2. In the left menu, click on the Data Catalog main module menu, and click on the Databases sub-module name. The Databases home page is displayed.
3. Click on the Schema name, and the Schema Summary page is displayed.
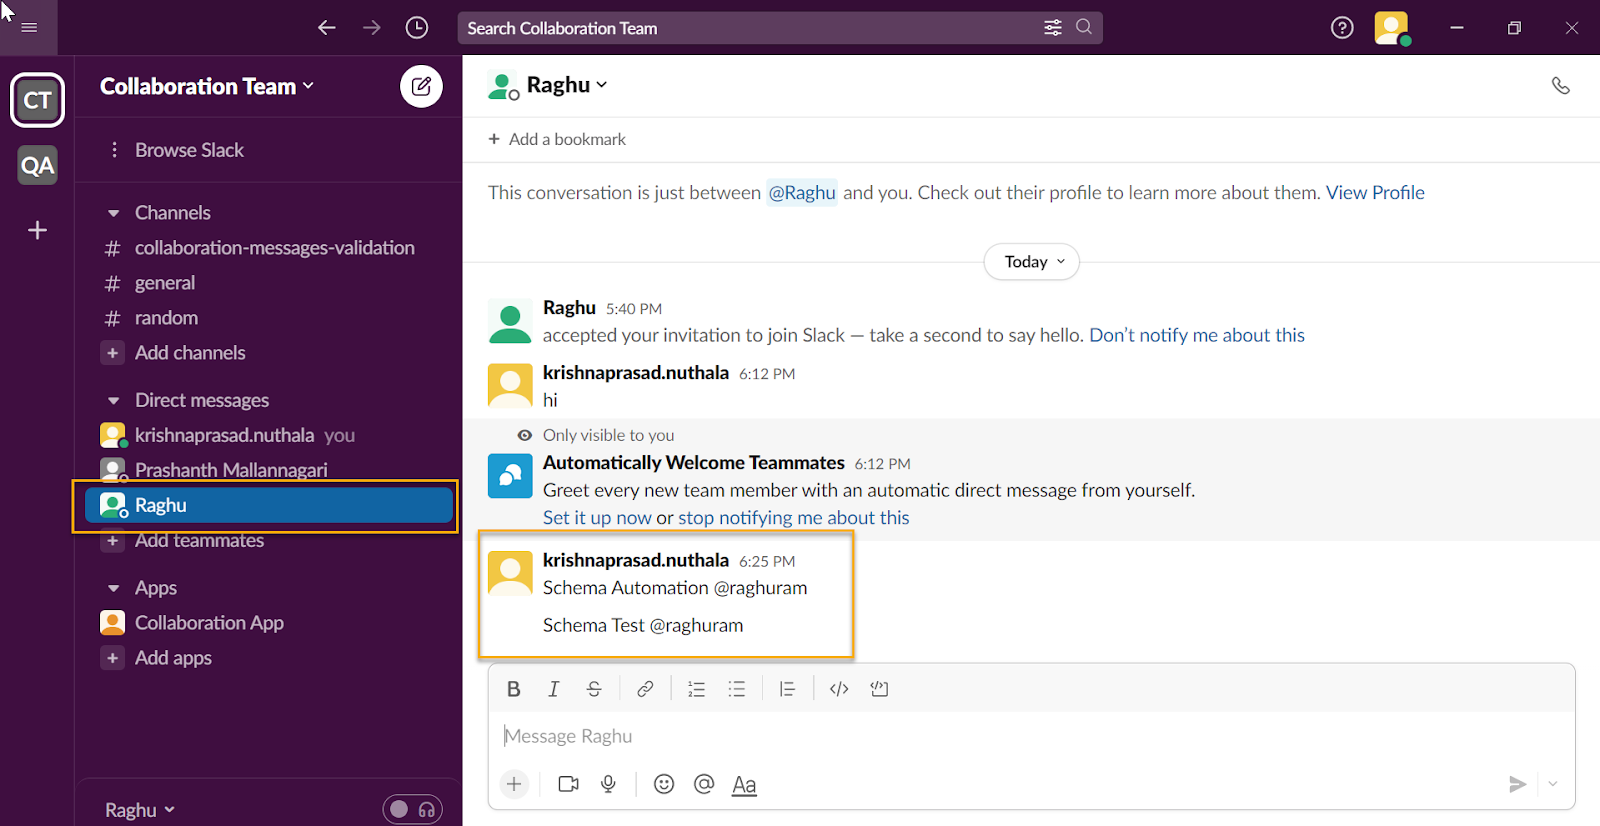
4. In the Schema Summary page, click on the Collaboration icon and enter the test information by tagging the administrator using @ annotation.
5. Click on the Submit button. The notification is sent to the administrator, which is also displayed in the Slack Workspace under the administrator profile. 
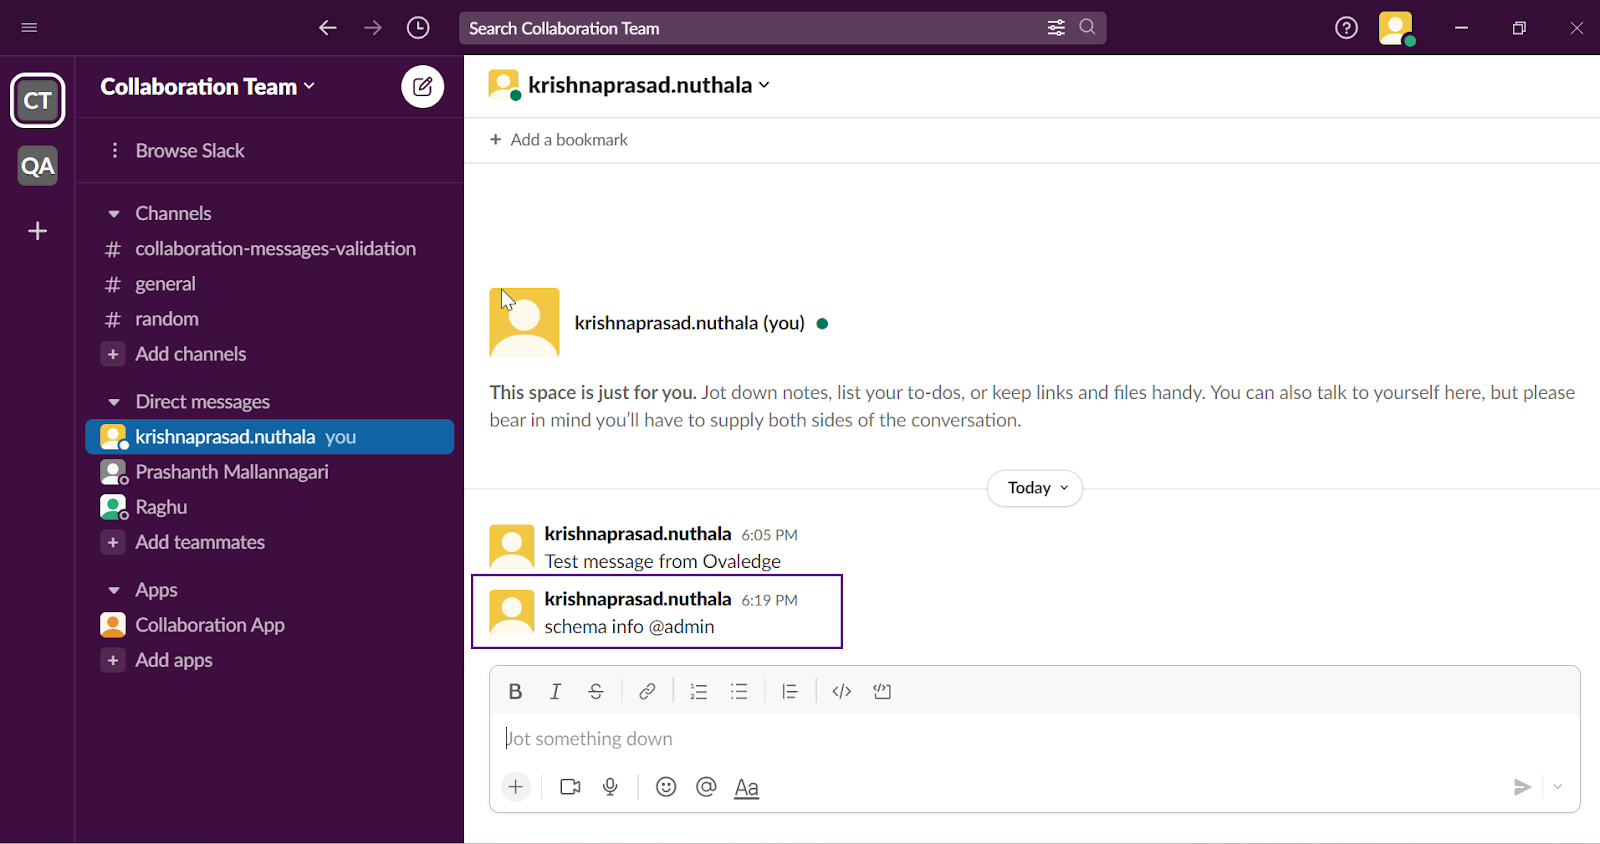
Note: To receive the Slack Notification, the particular user must be created in OvalEdge, and their Slack ID must also be configured in the OvalEdge My Profile > Slack ID.
Testing Job Workflow Notifications
1. In the OvalEdge application.
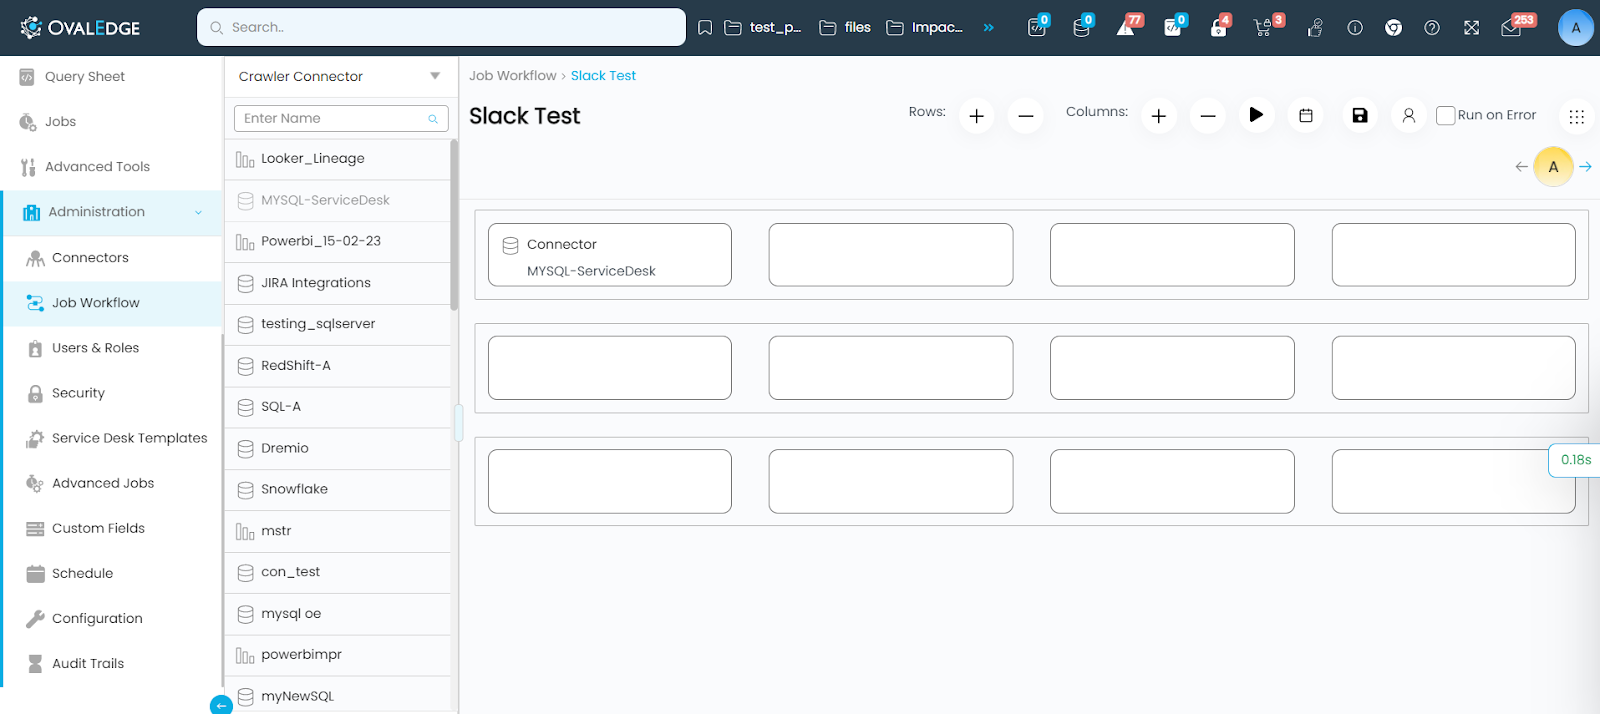
2. In the left menu, click on Administration > Job Workflow.
3. Click the + icon on the Job Workflow Information page. A new job workflow template is displayed.
4. Enter a Job Workflow name.
5. Click the Job Types and choose the related jobs to be added to the workflow.
6. Drag and drop the Jobs in the workflow space.
7. Click on the Save icon to save the Job Workflow.
8. Click on the 9 Dots option and select the Notifications options. The Notification Settings pop-up window is displayed.
9. Select the checkboxes to send a notification on Error or on Success, or on Partial Success.
10. Click on the Notify Experts button. The message “Notification added successfully” is displayed.
11. Click on the Expert icon, and the Add or Remove experts pop-up window is displayed.
12. Select the teammates to whom the notification needs to be sent and click on the Update Experts button.
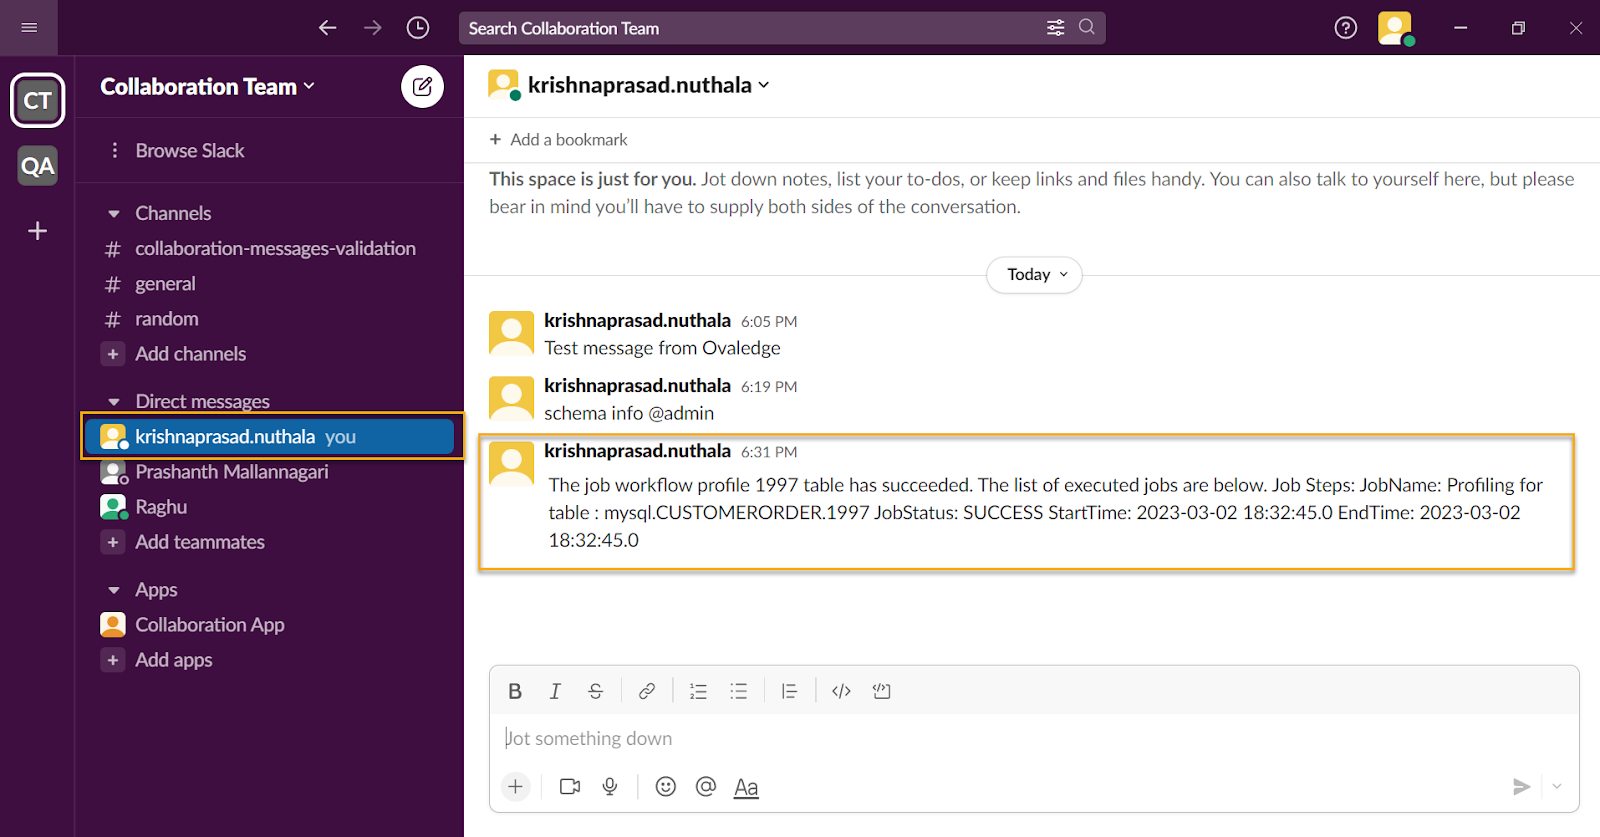
13. Once after selecting the teammates, click on the Run icon, the job is initiated, and the notifications will be sent to the expert's email, and the same notifications will also be sent to the Slack ID.
14. Verify the Job Workflow notification message in the Administrator Slack.

Copyright © 2025, OvalEdge LLC, Peachtree Corners, GA, USA