Introduction
Microsoft Teams is a collaborative platform within the Microsoft 365 suite, designed to streamline workplace communication and collaboration. It provides a chat-based workspace for one-on-one or group conversations, organizes discussions into channels, and facilitates real-time file sharing and editing through integration with OneDrive and SharePoint.
Teams offer a wide range of meeting capabilities, including video and audio conferencing, with features like screen sharing and recording. The platform supports a wide range of third-party apps and bots, enhancing its functionality, and prioritizes security and compliance with features like encryption and multi-factor authentication.
OvalEdge Integration
Integrating OvalEdge with Microsoft Teams enhances the extensibility of client alerts by allowing OvalEdge users to directly transmit messages to their selected Teams Channels from within the OvalEdge platform.
These messages can cover diverse topics, ranging from sharing detailed data catalog information (such as data definitions, data lineage, and data quality) to providing updates on workflows (involving data preparation and analysis).
Additionally, users can share insights into data assets, including details about data sources, data quality, and usage statistics, as well as receive notifications related to Data Governance tasks, such as data privacy and compliance.
Configuring the OvalEdge Integration with Microsoft Teams involves setting up specific parameters, both optional and mandatory, and configuring corresponding settings within the OvalEdge application.
Integrating OvalEdge with Microsoft Teams
Integrating OvalEdge with Microsoft Teams involves the following steps:
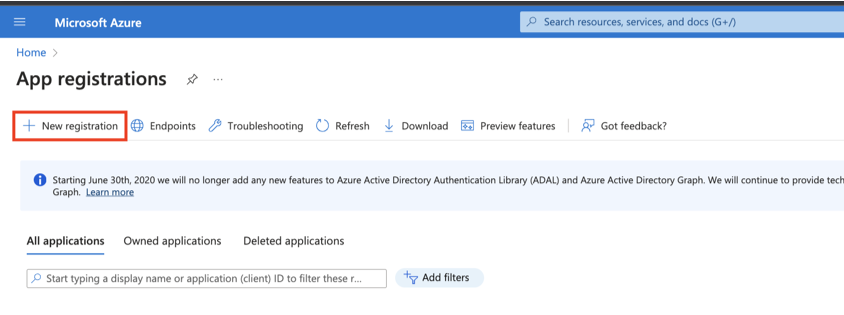
Step#1: Create an App Registration in Azure
- Navigate to the Azure Portal and access the "App Registration" page.
- Click on "+ New Registration" to create a new app registration.
- Provide a name and complete the registration process.
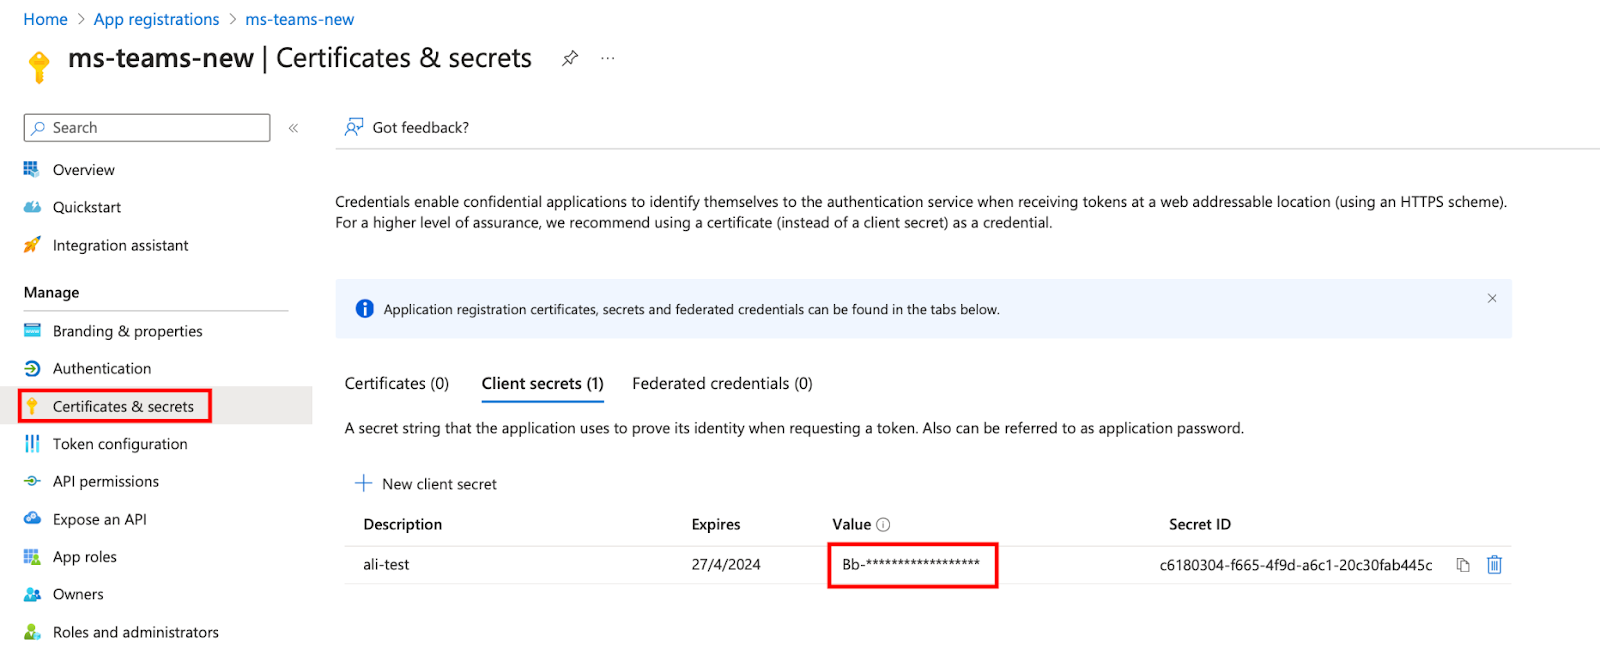
Step#2: Generate a Client Secret
- After creating the app registration, go to the "Certificates & Secrets" section.
- Create a new secret and save its value for later use.
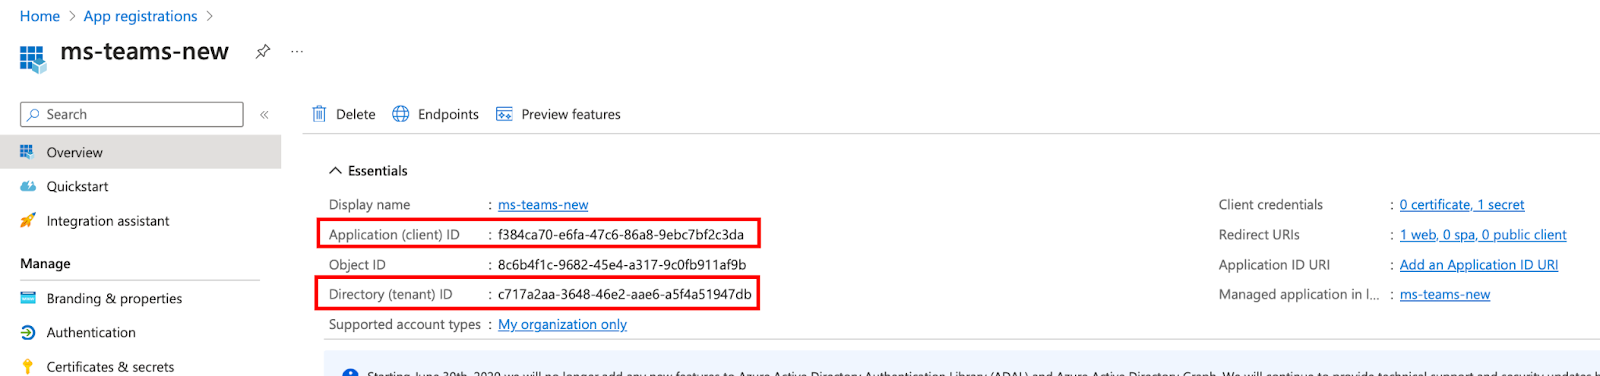
Step#3: Retrieve Client-Id and Tenant-Id
- Navigate to the "Overview" page of your app registration to find the Client-Id and Tenant-Id.
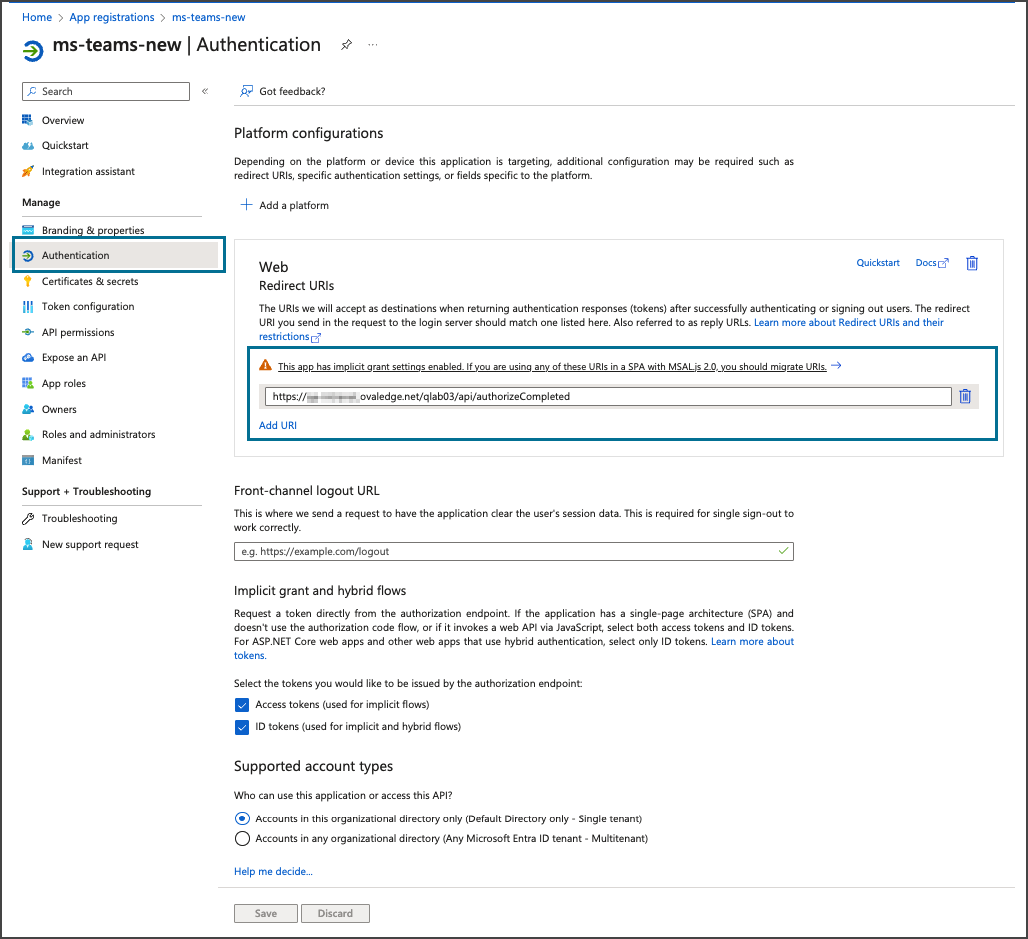
Step#4: Update Web Redirect URL
- Access the "Authentication" section, and update the Web Redirect URL details.
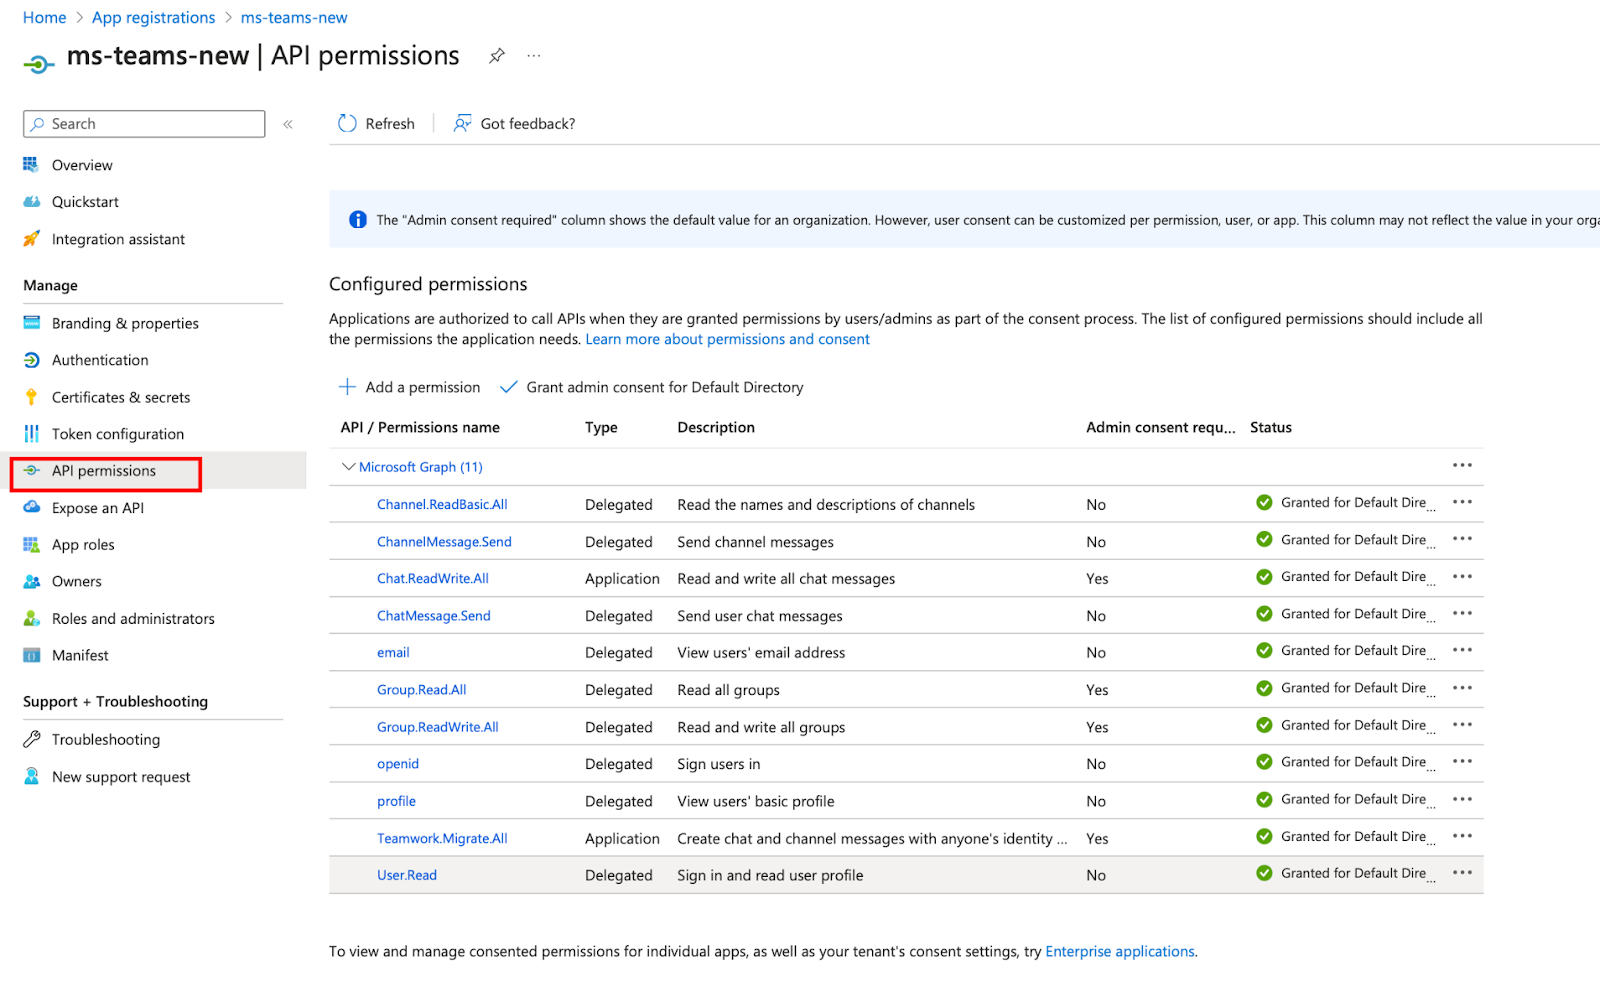
Step#4: Configure API Permissions
- Access the "API Permissions" section, enable the necessary APIs, and click on +Add a permission. The Request API permissions pop-up is displayed.
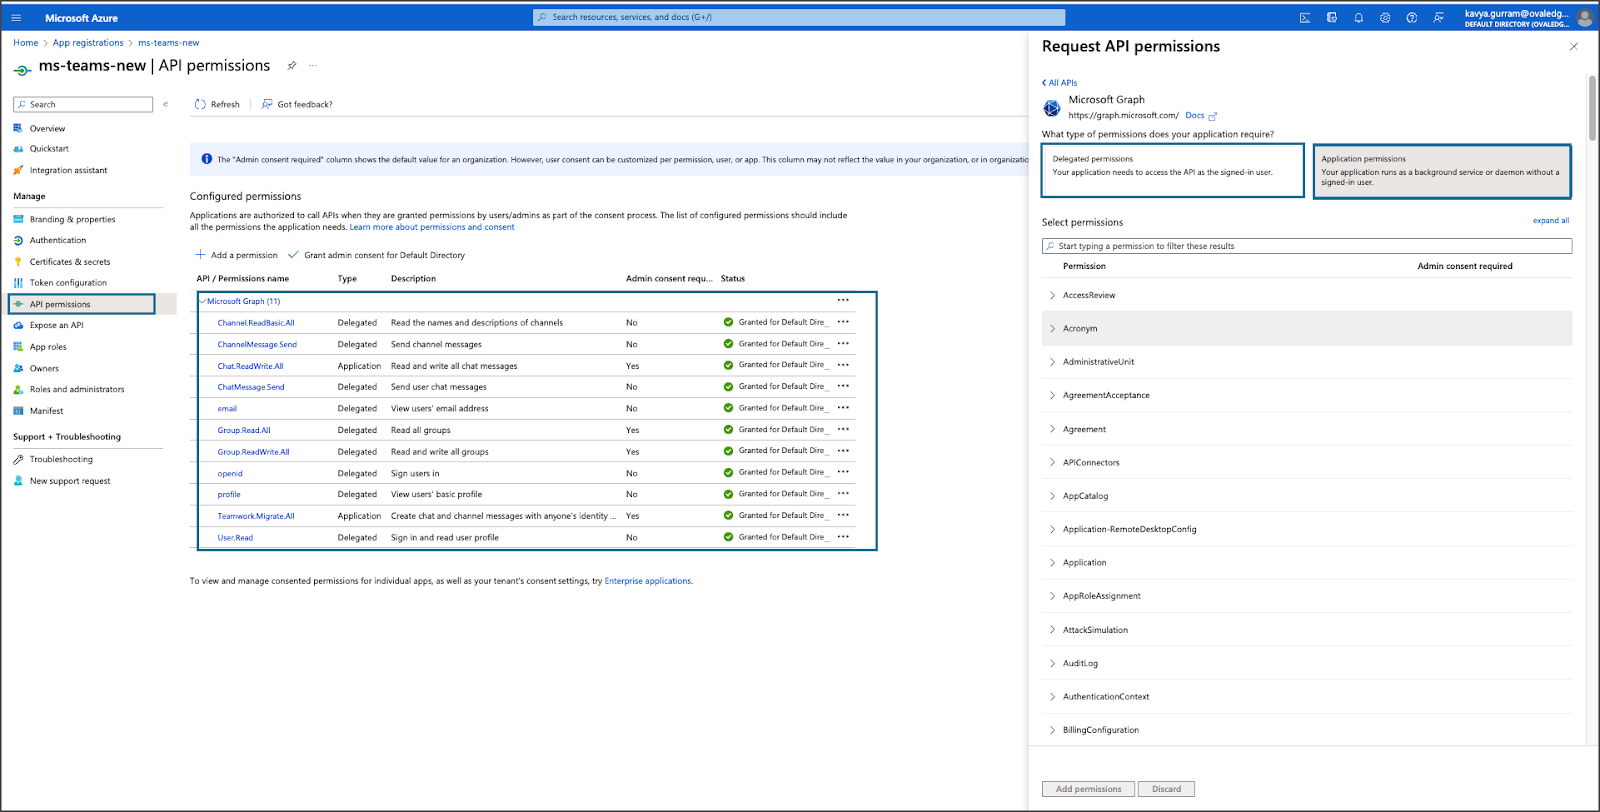
- Specify the necessary API Permissions under Microsoft Graph, and select both Delegated and Application permissions, as illustrated in the screenshot:
Step#5: Add Microsoft Teams Configurations to OvalEdge
- Note Azure app details (Client ID, Client Secret, Tenant ID, Redirect URL).
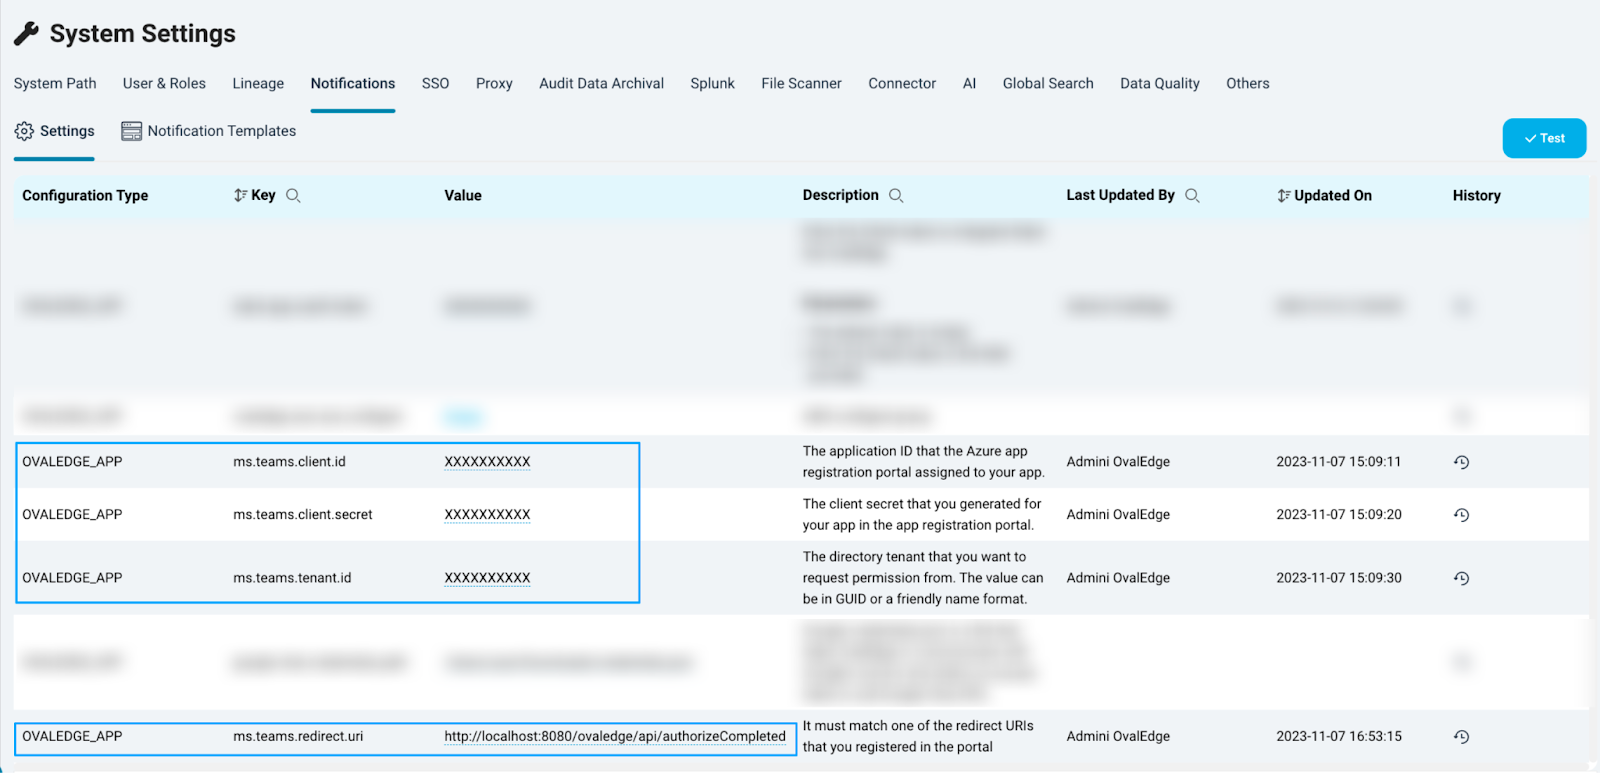
- In OvalEdge, go to Administration > System Settings > Notifications and find the following configuration keys:
- ms.teams.client.id
- ms.teams.client.secret
- ms.teams.tenant.id
- ms.teams.redirect.url
- Enter the information in their respective value fields and save the settings.
Step#6: Obtain Microsoft Teams Chat ID
- Log into Teams in the browser and obtain the Microsoft Teams Chat ID from the Teams website.
- Select the conversation of the admin user for whom this Azure app has been configured to send notifications.
Note: Any User ID can be given in the profile section.
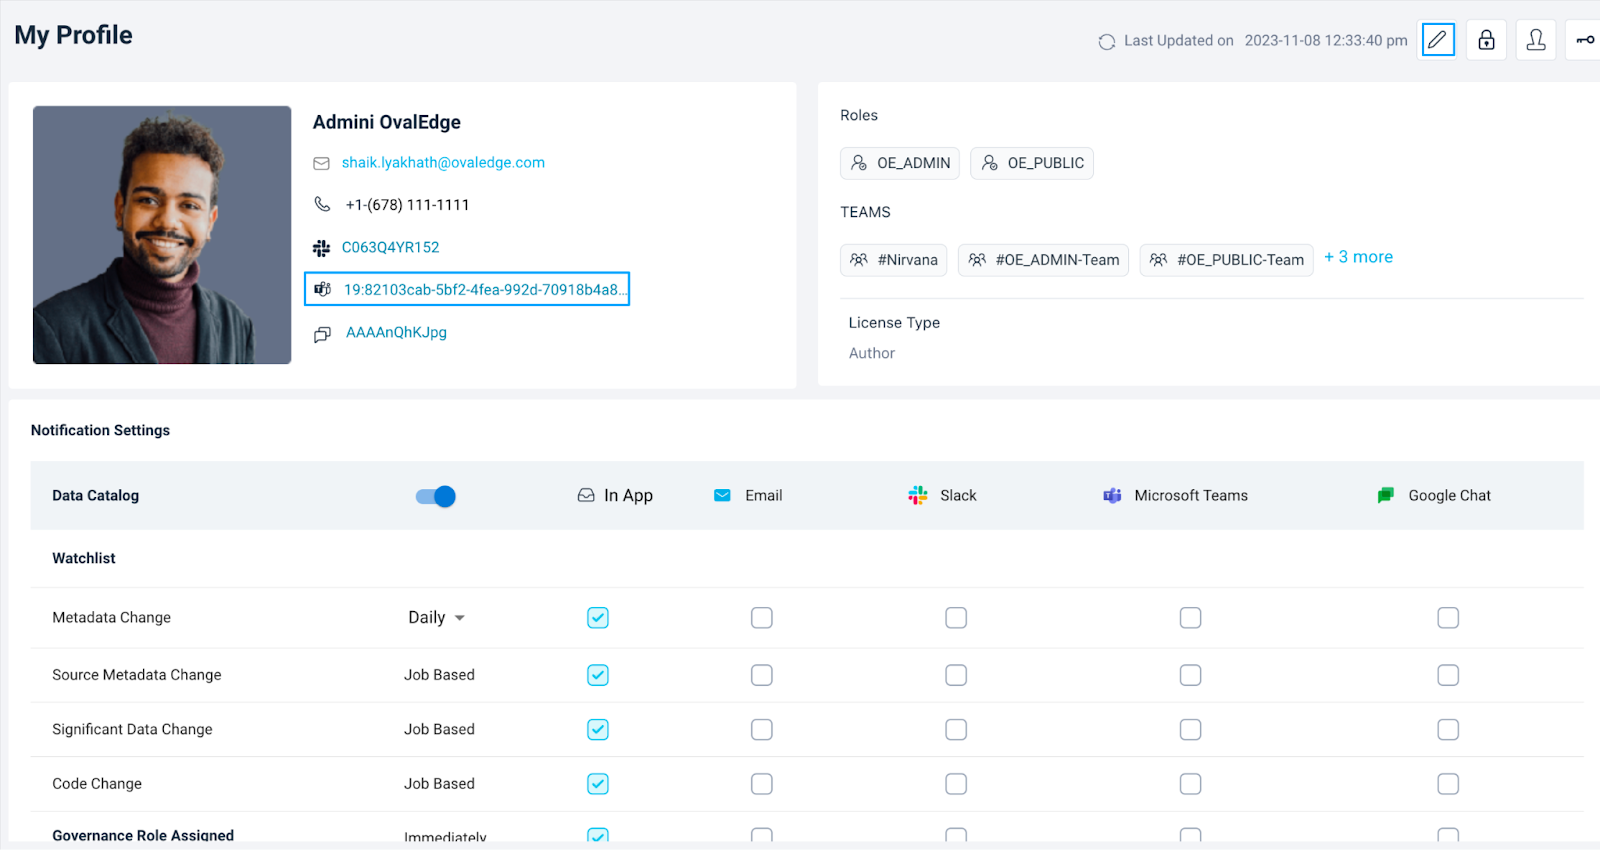
- Copy the conversation ID from the browser URL.
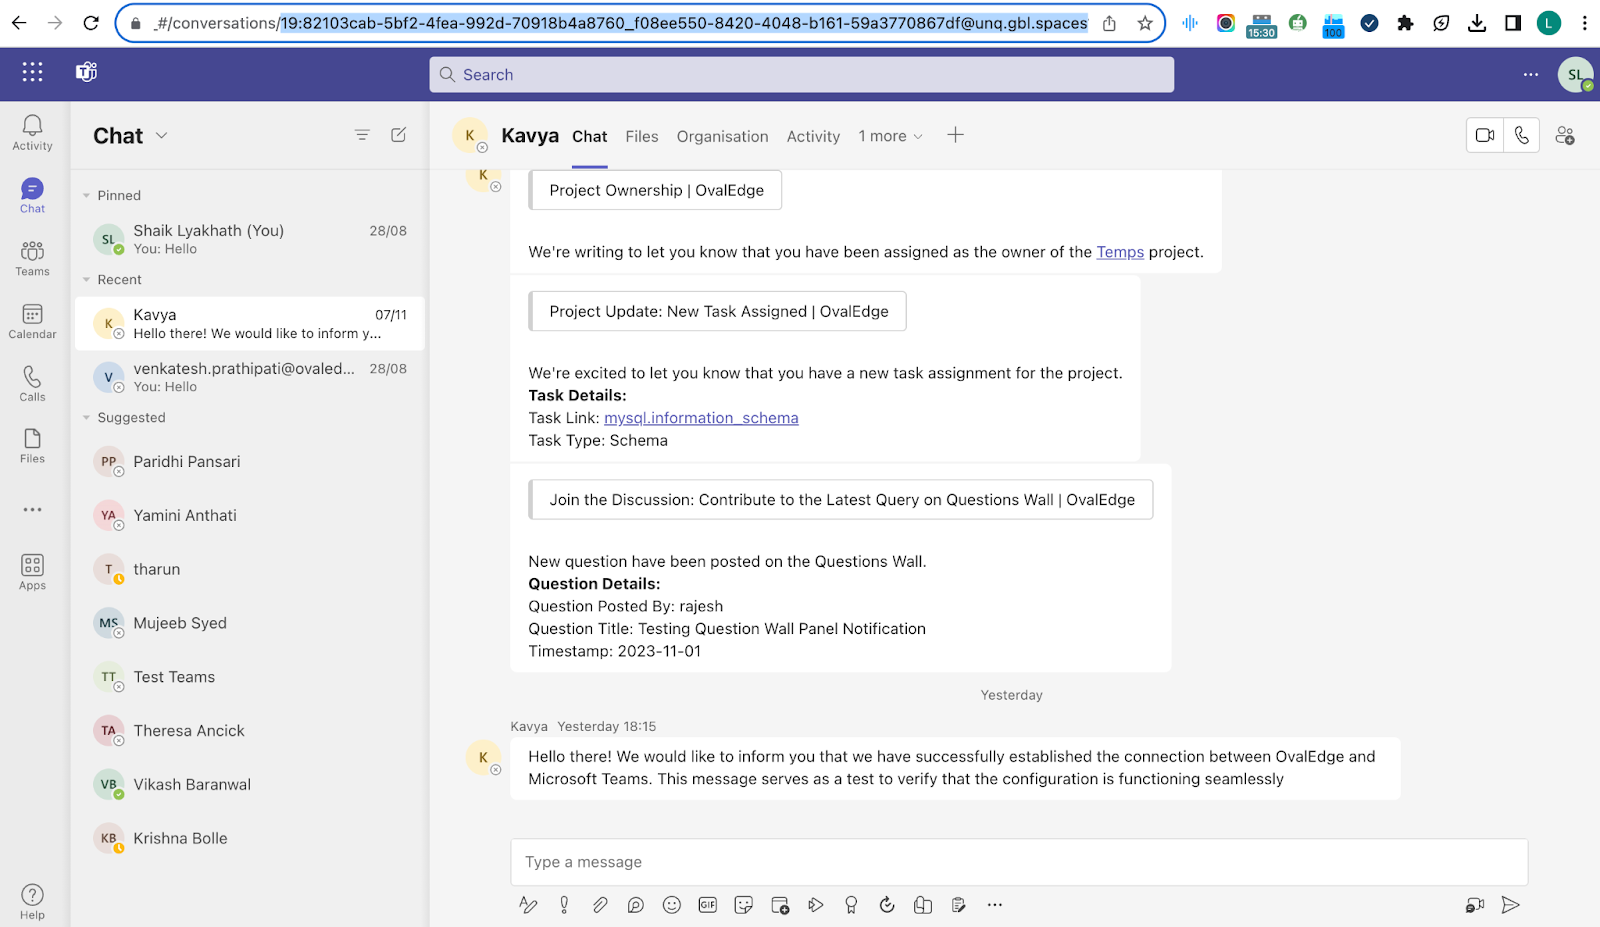
Example: if you click on the Teams space user ID on the website, such as https://teams.microsoft.com/_#/conversations/19:82103cab-5bf2-4fea-992d-70918b4a8760_f08ee550-8420-4048-b161-59a3770867df@unq.gbl.spaces?ctx=chat
Extract the ID 19:82103cab-5bf2-4fea-992d-70918b4a8760_f08ee550-8420-4048-b161-59a3770867df@unq.gbl.spaces
Step#7: Include the Microsoft Teams Chat ID in OvalEdge
- In the OvalEdge Application, click on the user icon at the top right corner, then select "My Profile," and click on "Edit".
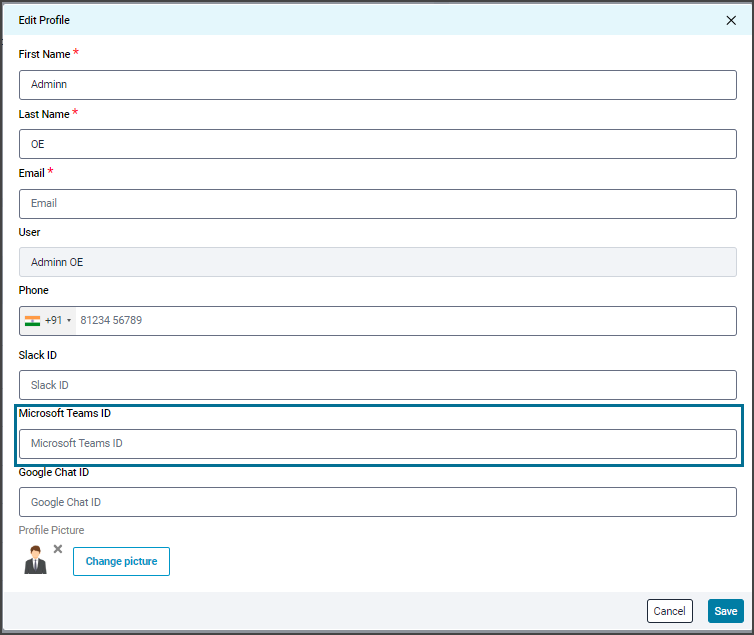
- Enter the required profile details along with the Microsoft Teams ID and click on the Save button.
- Once the Microsoft Teams ID is added, the Microsoft Teams column is displayed under the Notification Settings section.
Step#8: Test Configurations
- Once Microsoft Teams ID is enabled in the user's profile, test the configuration by navigating to Administration > System Settings > Notifications.
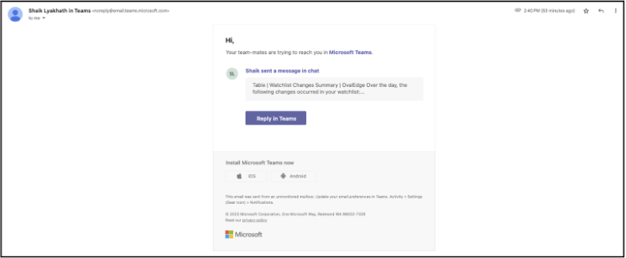
- Upon testing, a success message will appear, and a notification will be sent to the registered email and specified Microsoft Teams channel.
Email Notification
Teams Notifications
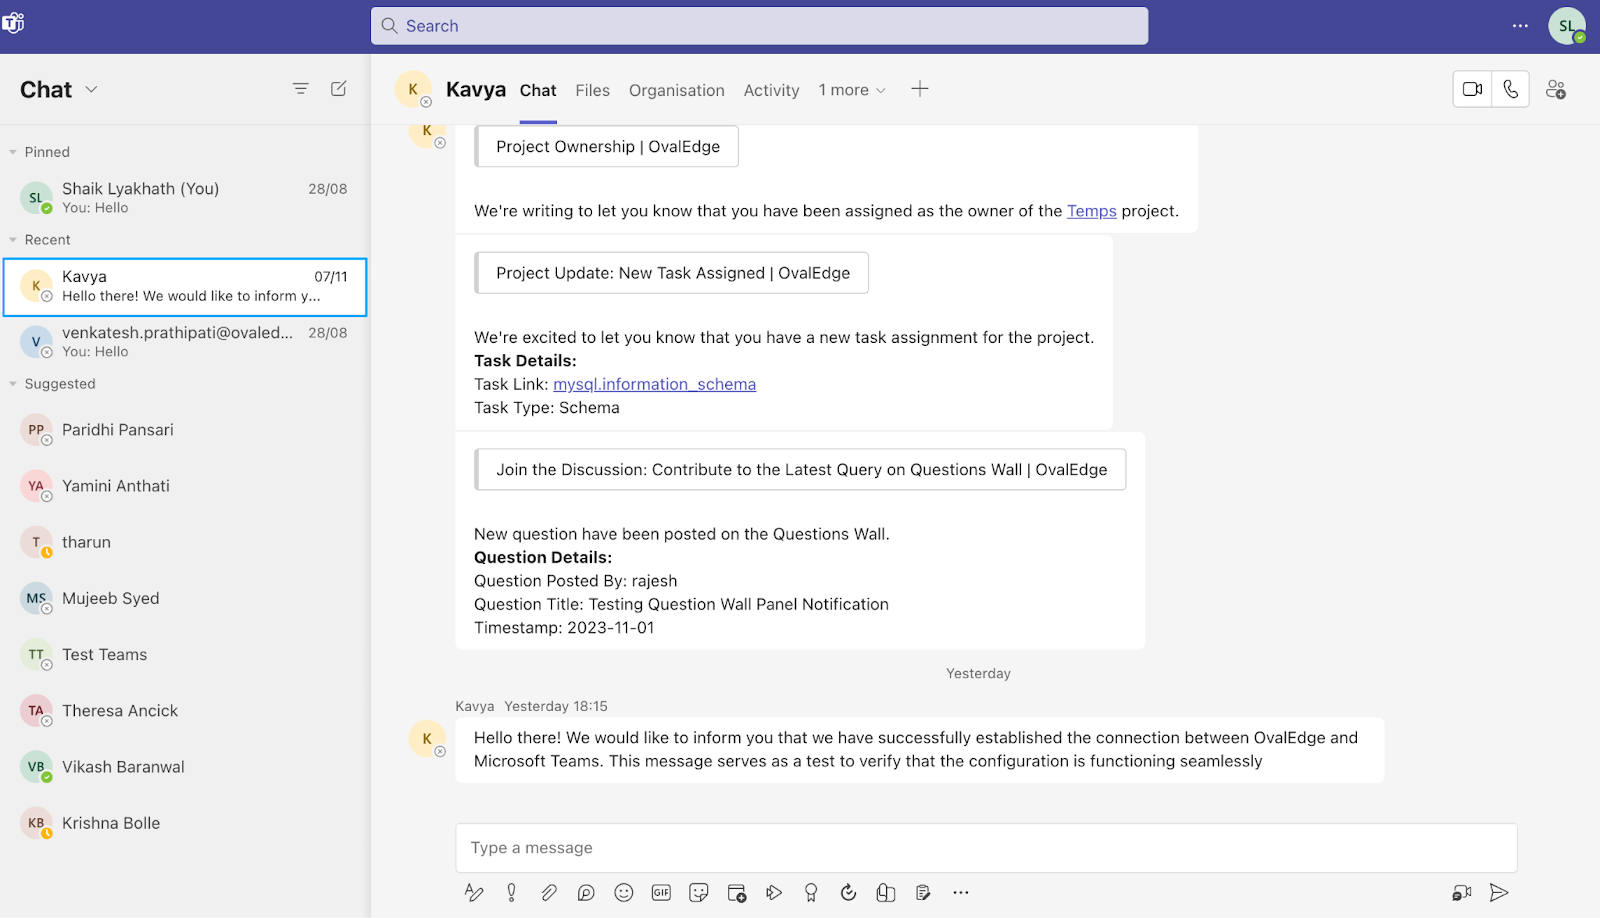
- Users will now receive alerts related to the data catalog details (such as data definitions, data lineage, and data quality information), workflow updates (involving data preparation and analysis), insights into data assets (including data source information, data quality, and usage statistics), and notifications related to Data Governance tasks (such as data privacy and compliance).