Introduction
Google Chat is a cloud-based communication and collaboration platform aimed at improving teamwork and enhancing organizational communication. It offers real-time communication options like instant messaging, voice and video calls, and file sharing.
It provides various features, including channels for organizing discussions around specific topics or projects and seamless integrations with tools and services like Google Drive, Trello, and Salesforce.
The primary objective of Google Chat is to streamline communication and collaboration, minimize email overload, and boost productivity by offering a centralized platform for effective team collaboration.
OvalEdge Integration
Enabling OvalEdge integration with Google Chat leverages the extensibility of email alerts sent to clients. OvalEdge users can directly send messages to their chosen Google Chat channels from within the OvalEdge platform.
These messages can cover a wide range of topics, including sharing data catalog details (such as data definitions, data lineage, and data quality information), workflow updates (involving data preparation and analysis), insights into data assets (including data source information, data quality, and usage statistics), and notifications related to Data Governance tasks (such as data privacy and compliance).
Configuring OvalEdge Integration with Google Chat requires the setup of specific Google Chat parameters, including both optional and mandatory ones, and the corresponding configuration of settings within the OvalEdge application.
To set up the Google Chat API for OvalEdge, follow these steps:
Step 1: Google Cloud Console
- Go to the Google Cloud console at https://console.cloud.google.com/
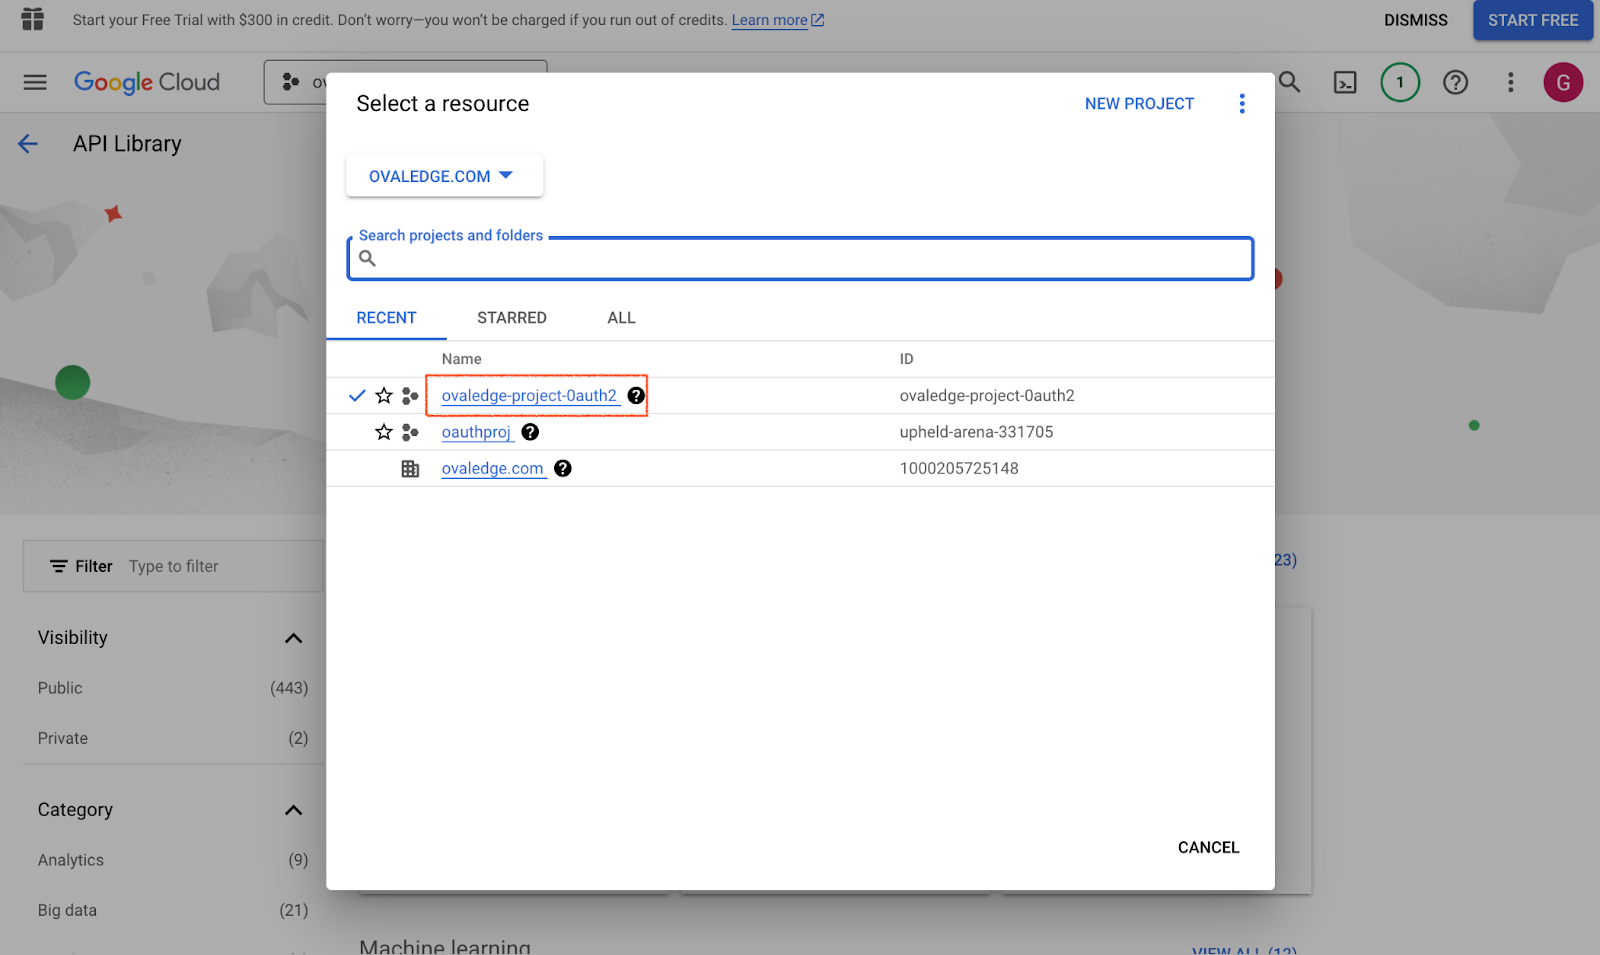
Step 2: Create or Access a Project
- Users can either use an existing project or create a new one for this integration.
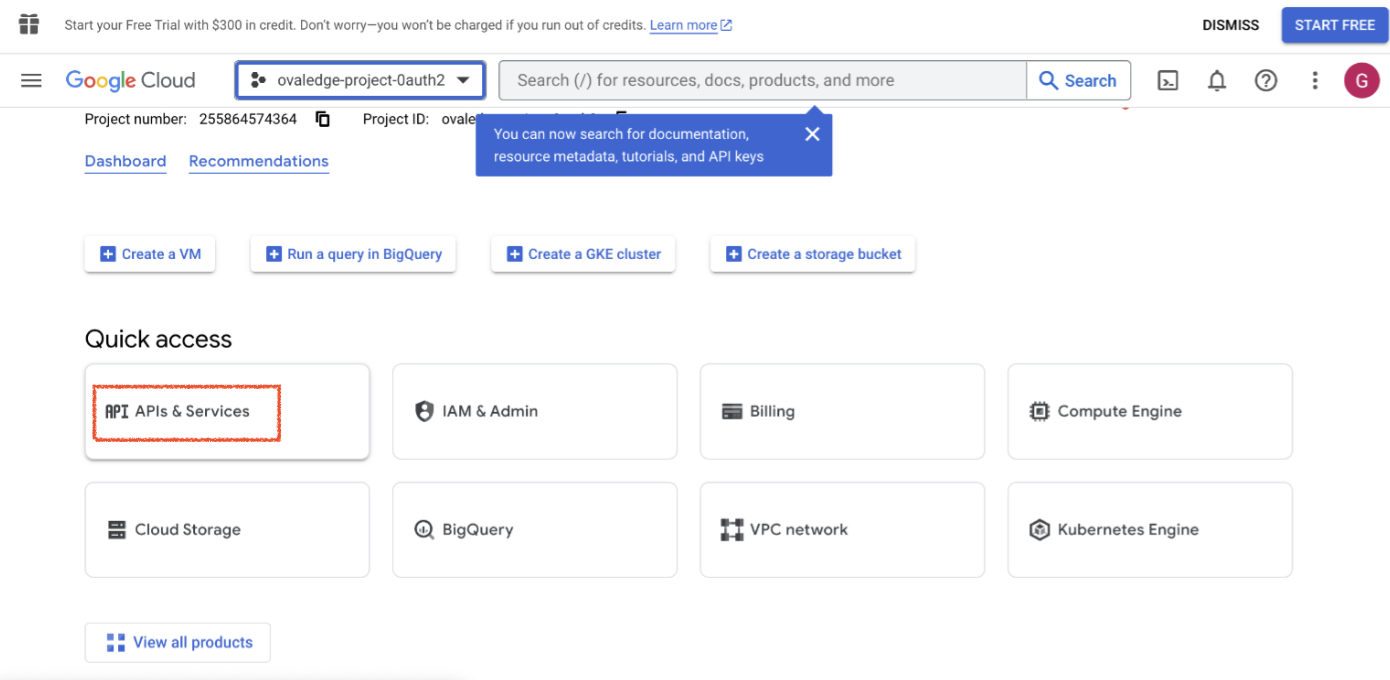
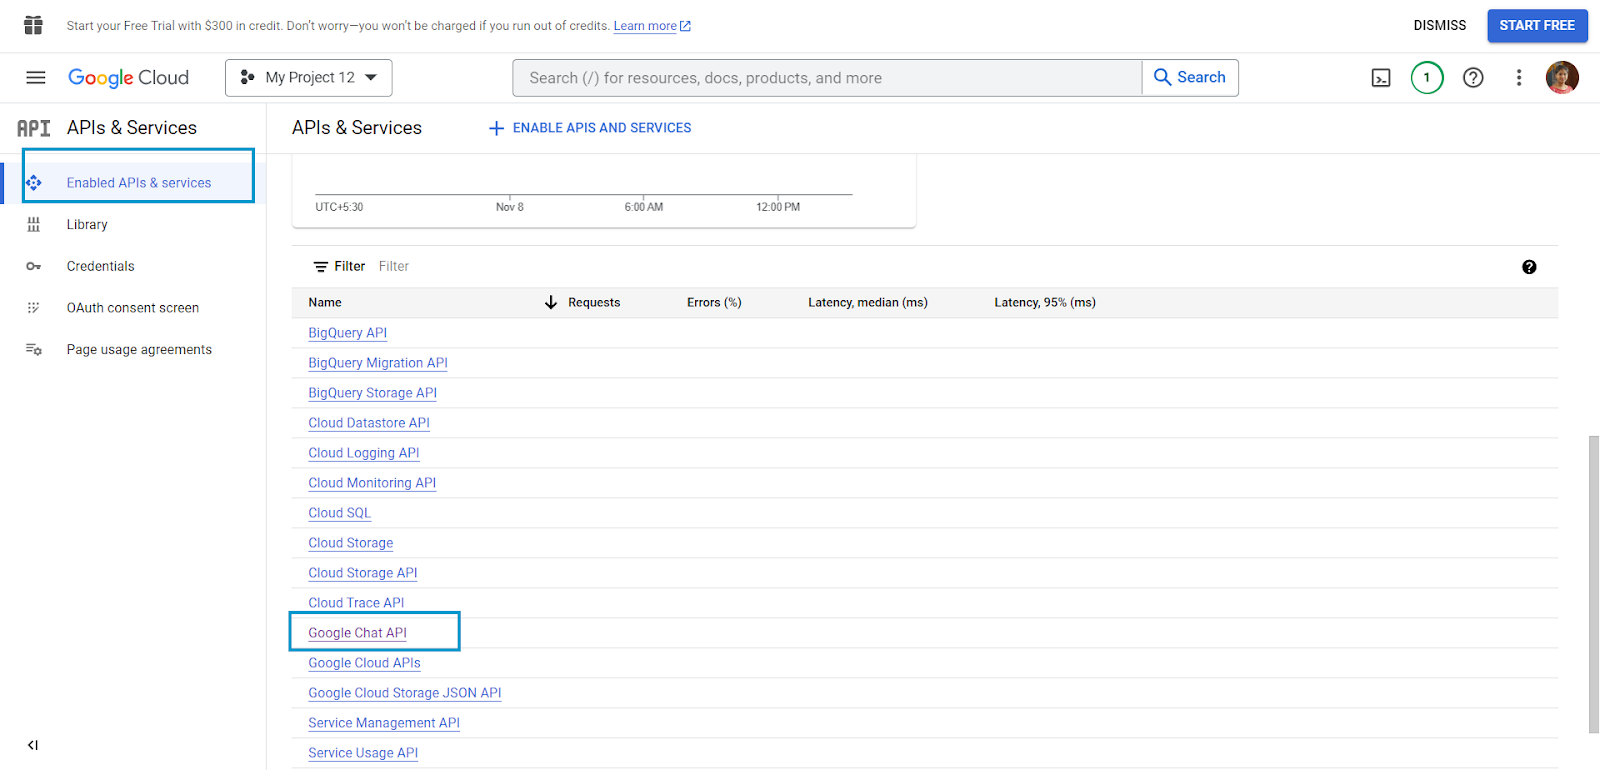
Step 3: Enabling Google Chat API
- After selecting the required project, click on "API & Services."
- Choose "ENABLE APIs & SERVICES."

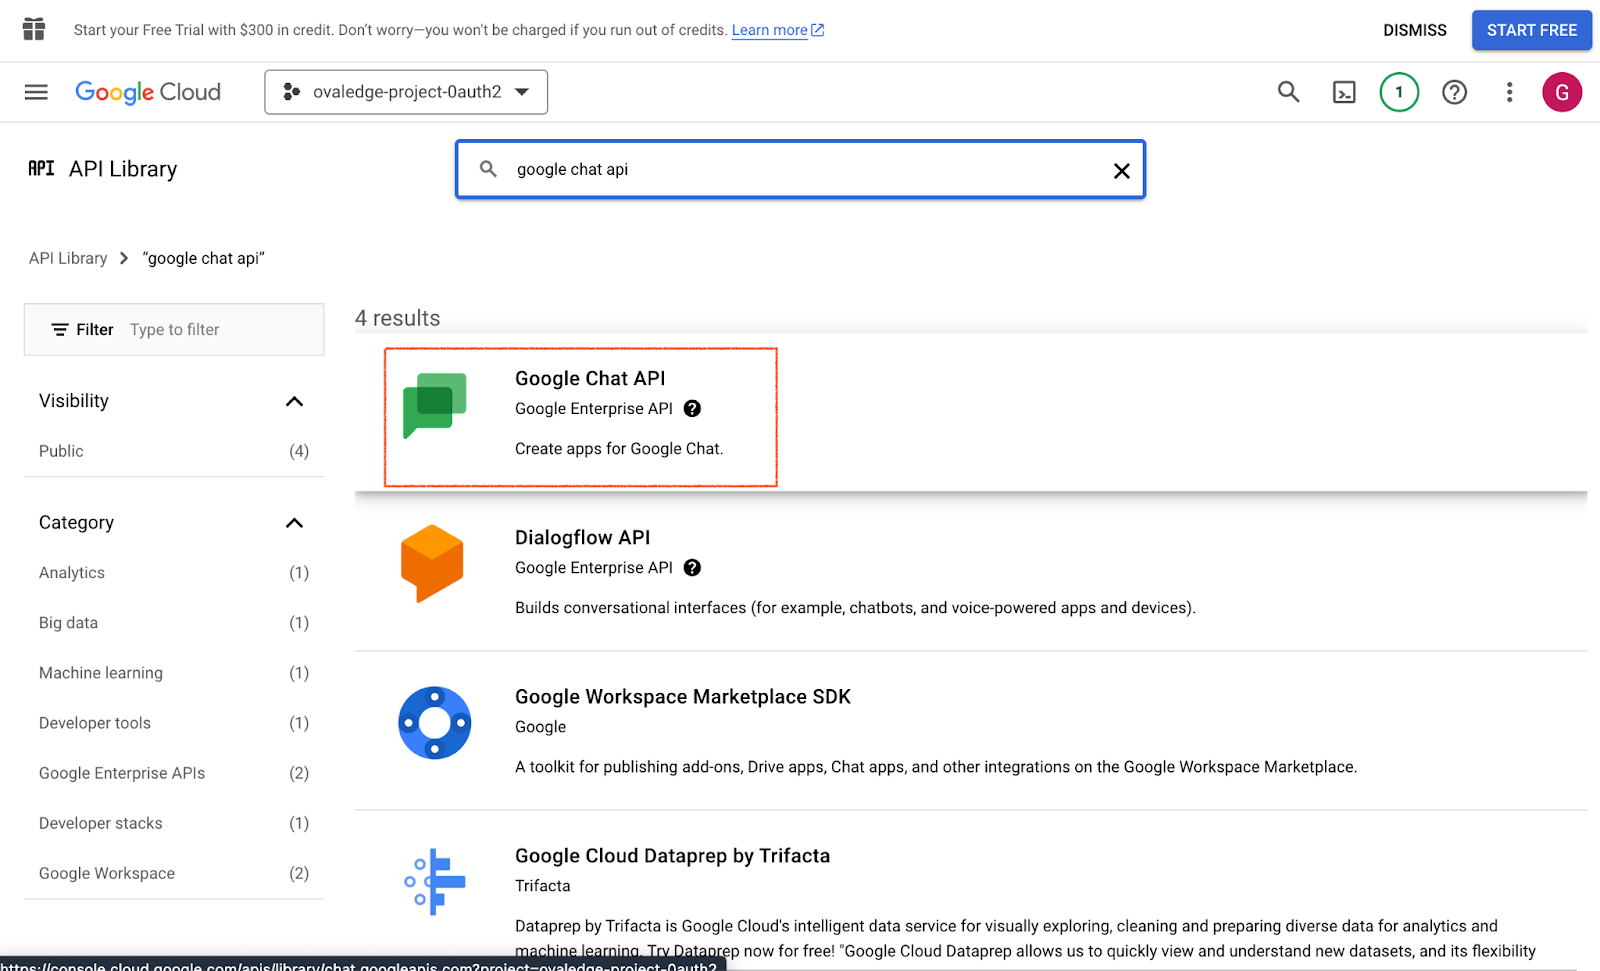
- Users will be redirected to a Welcome to the API Library page.
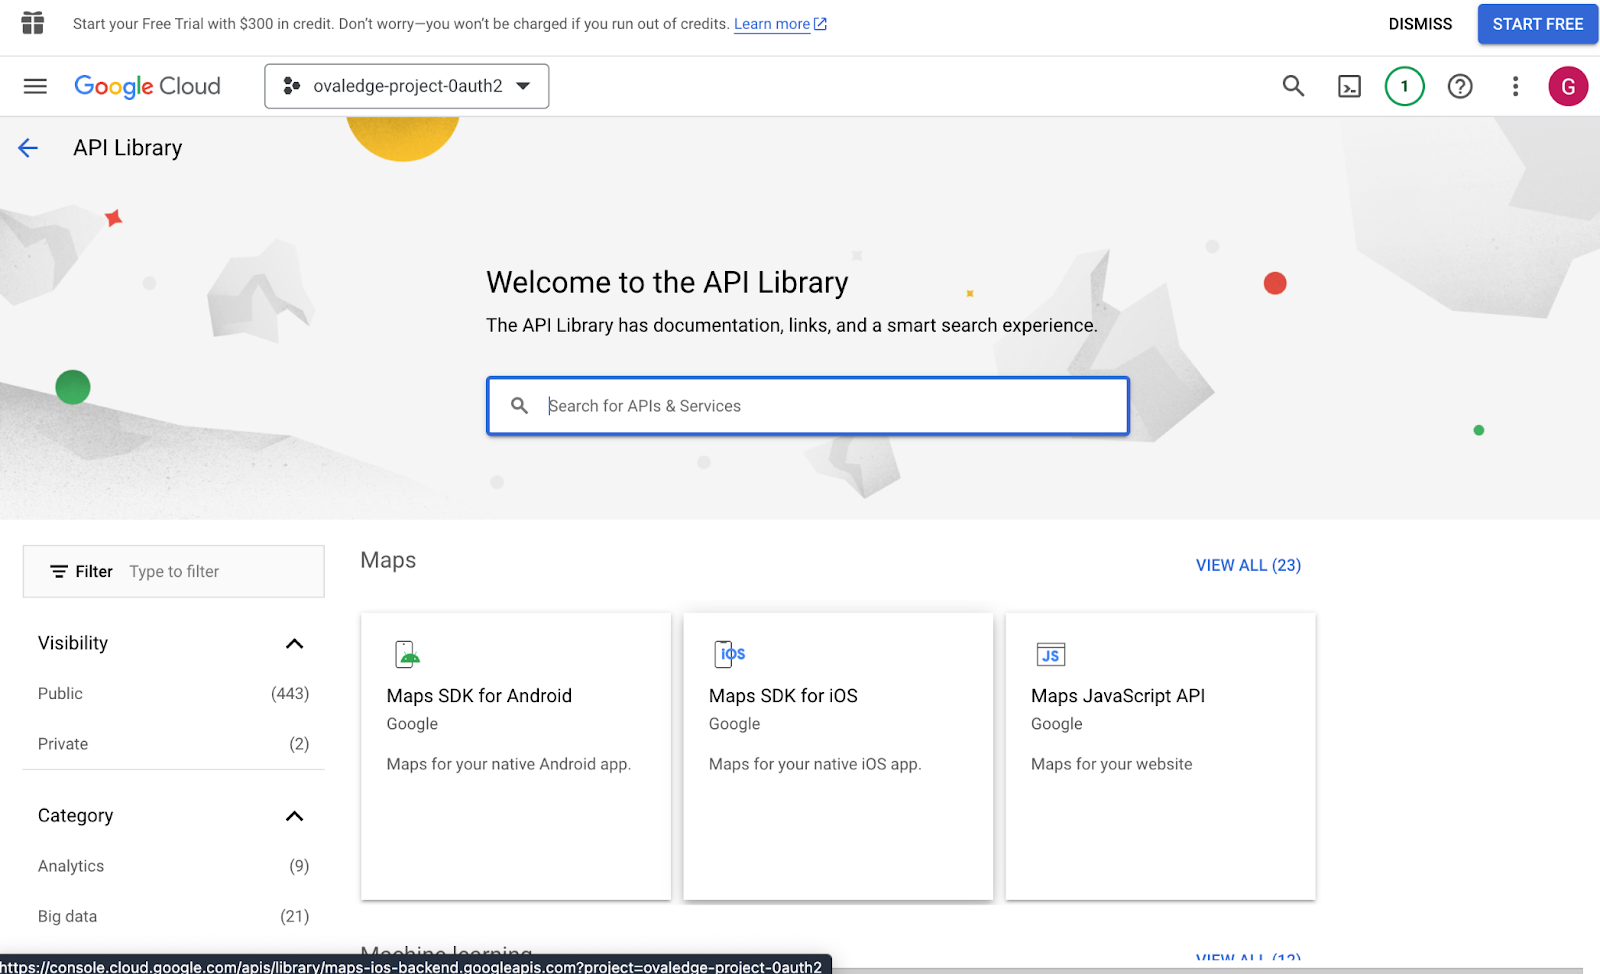
- Search for Google Chat API

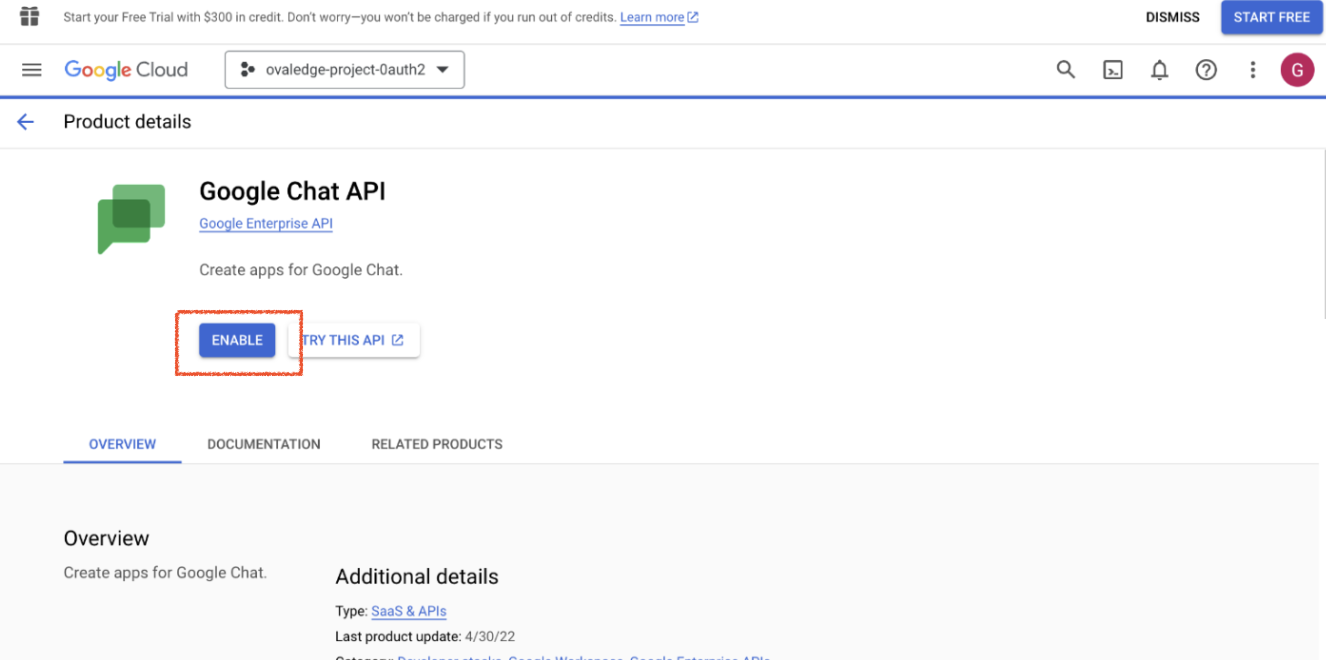
- Select Google Chat API from the options.
- Users can click on the Enable button.
Step 4: Create a Service Account
- Users need to select the APIs & Services > Credentials from the left side pane.
- Click on the "Credentials" tab in the below pane.
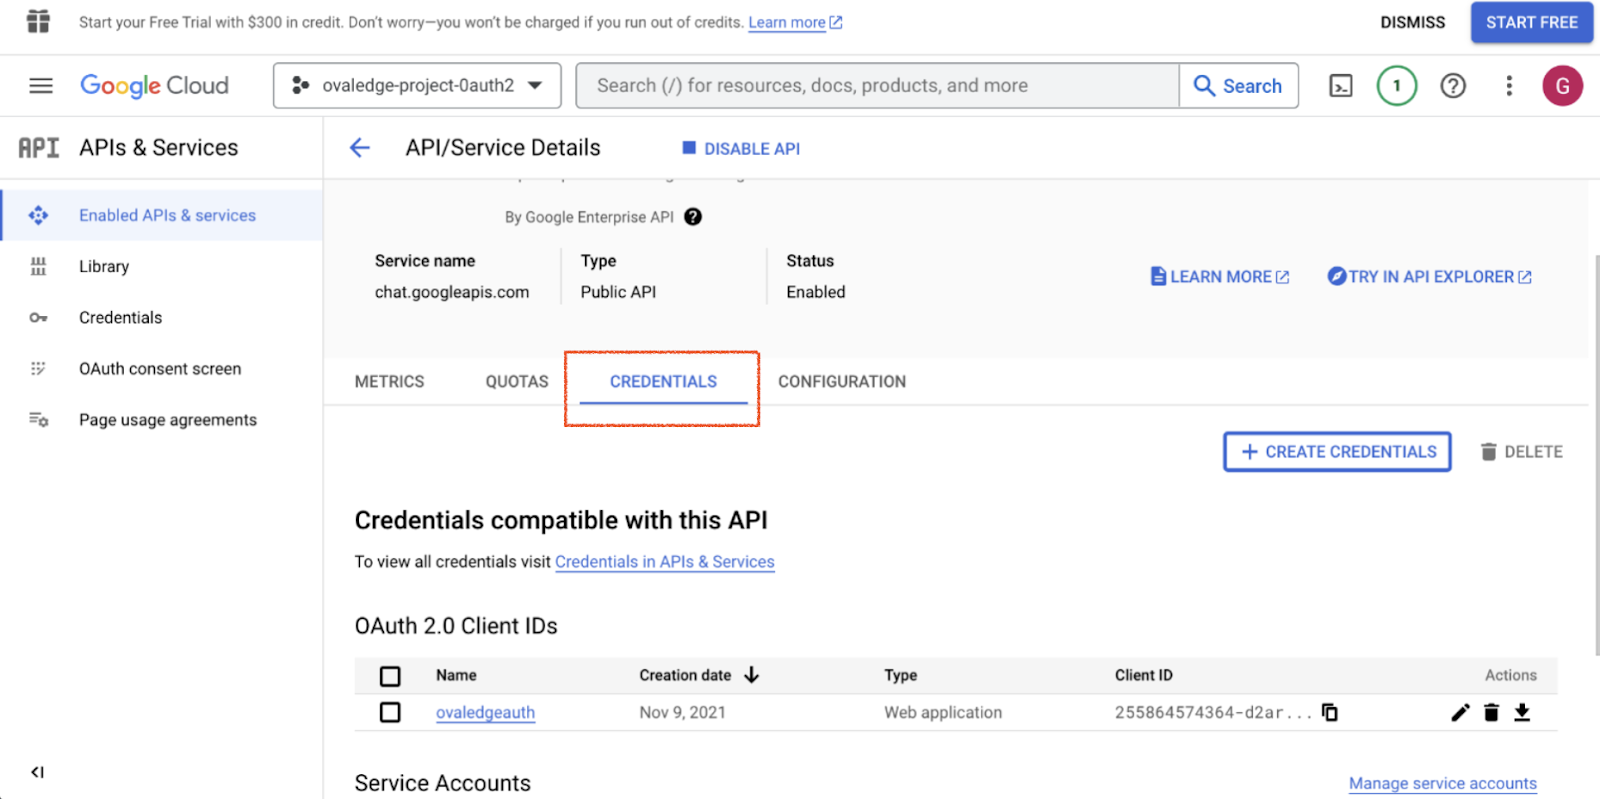
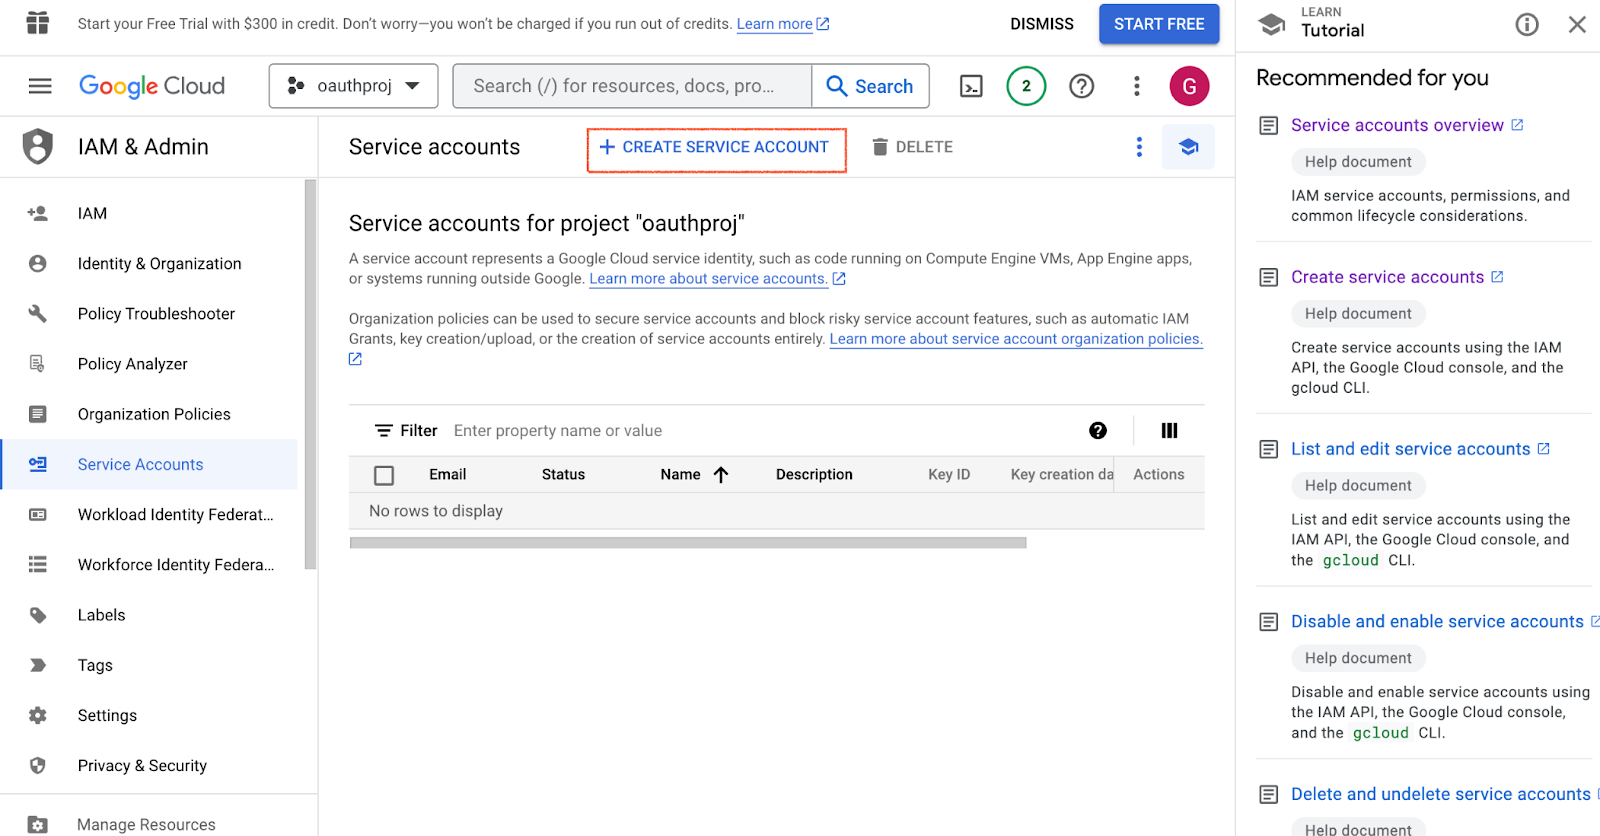
- Users can locate Create Credentials and when users click on it they can choose the option to create a service account.
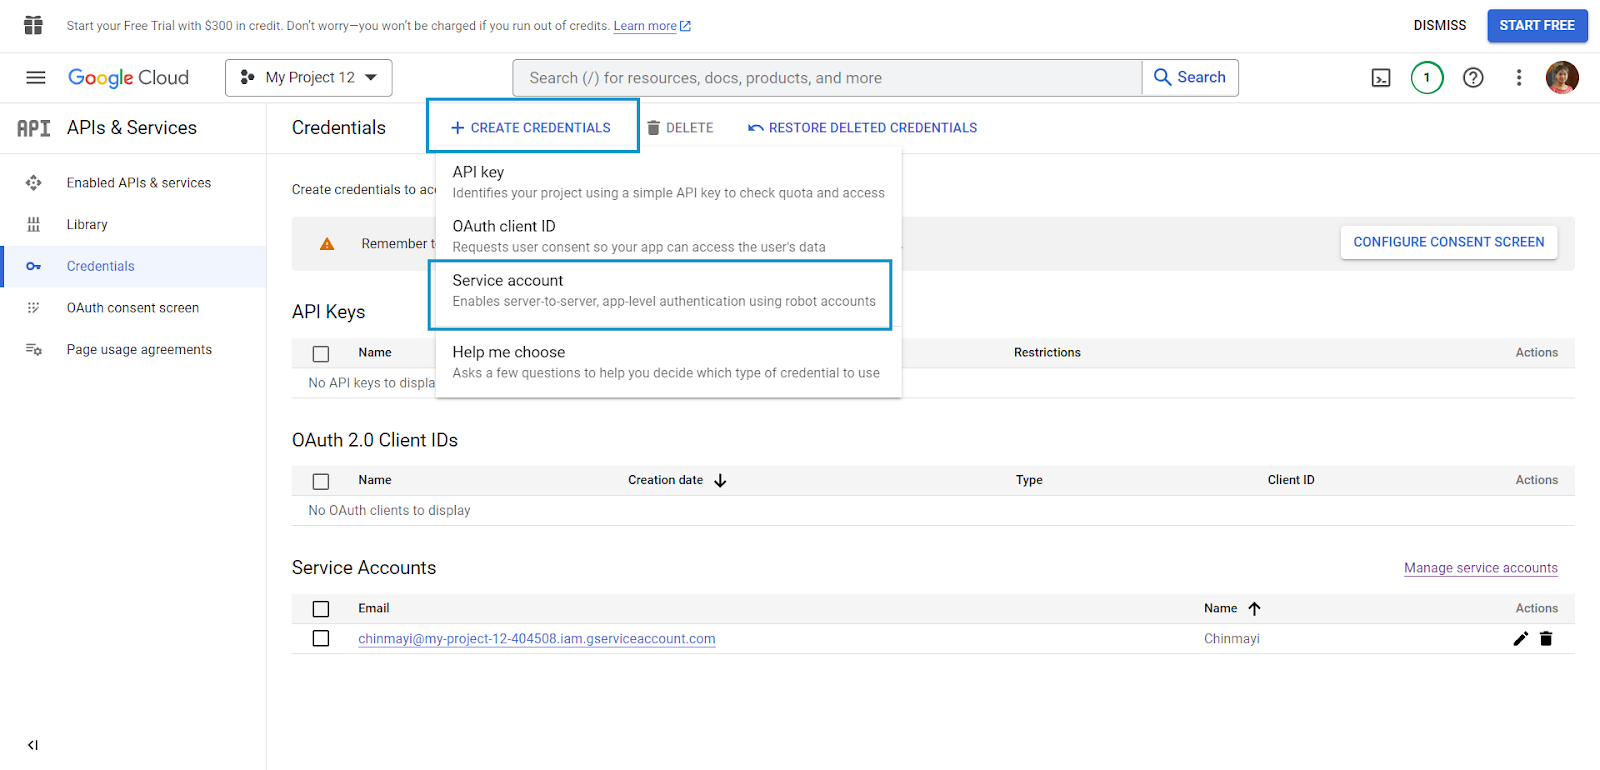
- Users can also create a service account by navigating to Manage Service Accounts and clicking on "CREATE SERVICE ACCOUNT”.
- Fill in the required details to create a service account.
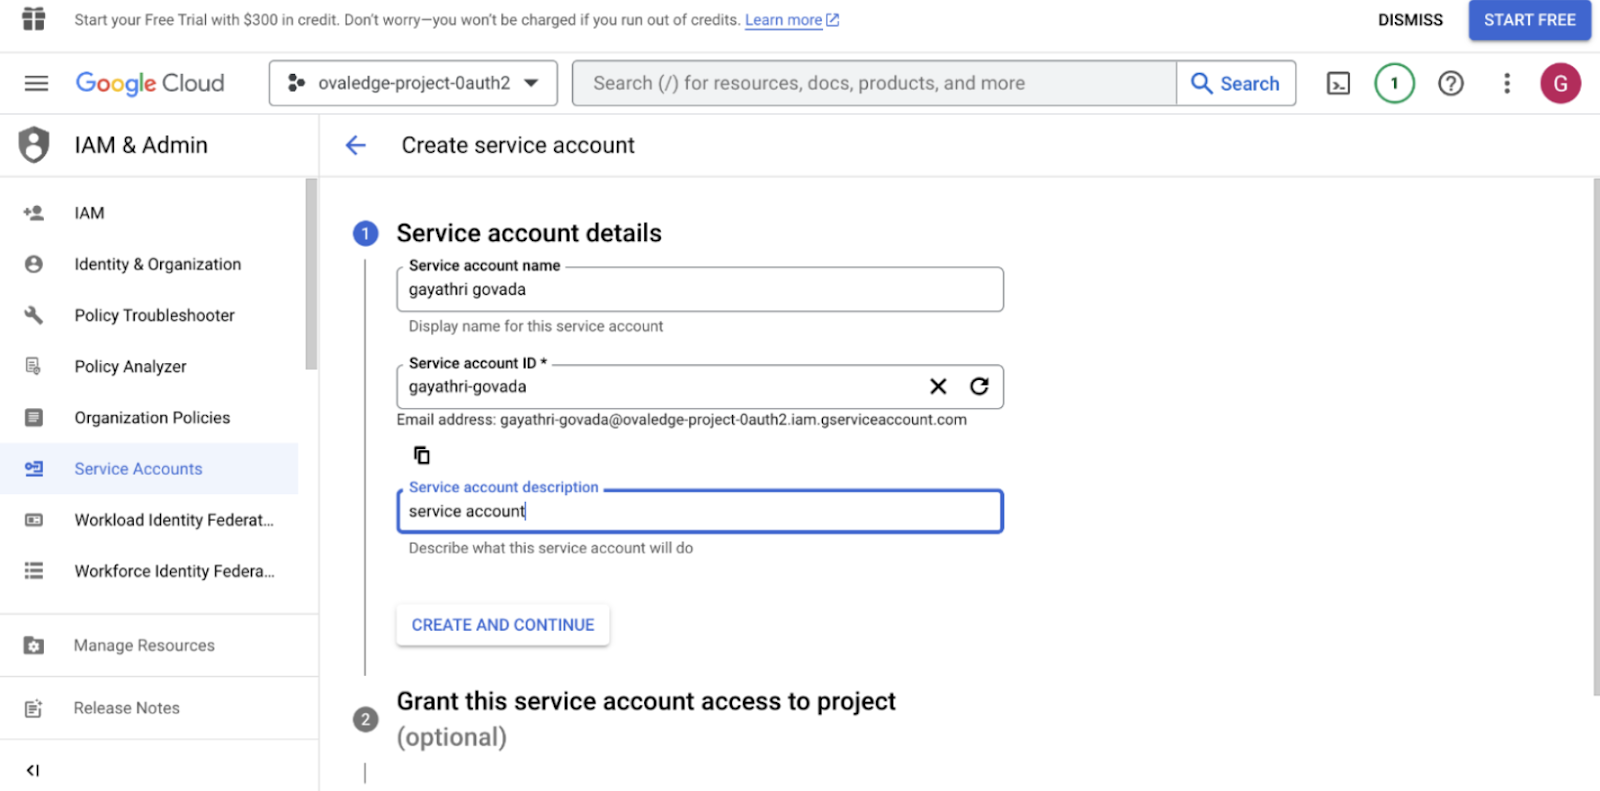
- Service Account Name: The name used to identify this service account.
- Service Account ID: The unique ID associated with this service account's email address: <id>@my-project-12-404508.iam.gserviceaccount.com.
- Service Account Description: A brief description of the intended actions and purpose of this service account.
- After completing the details, click on "CREATE AND CONTINUE."
- Grant this service account access to the project (optional)
- Assign an "owner" role to the service account.
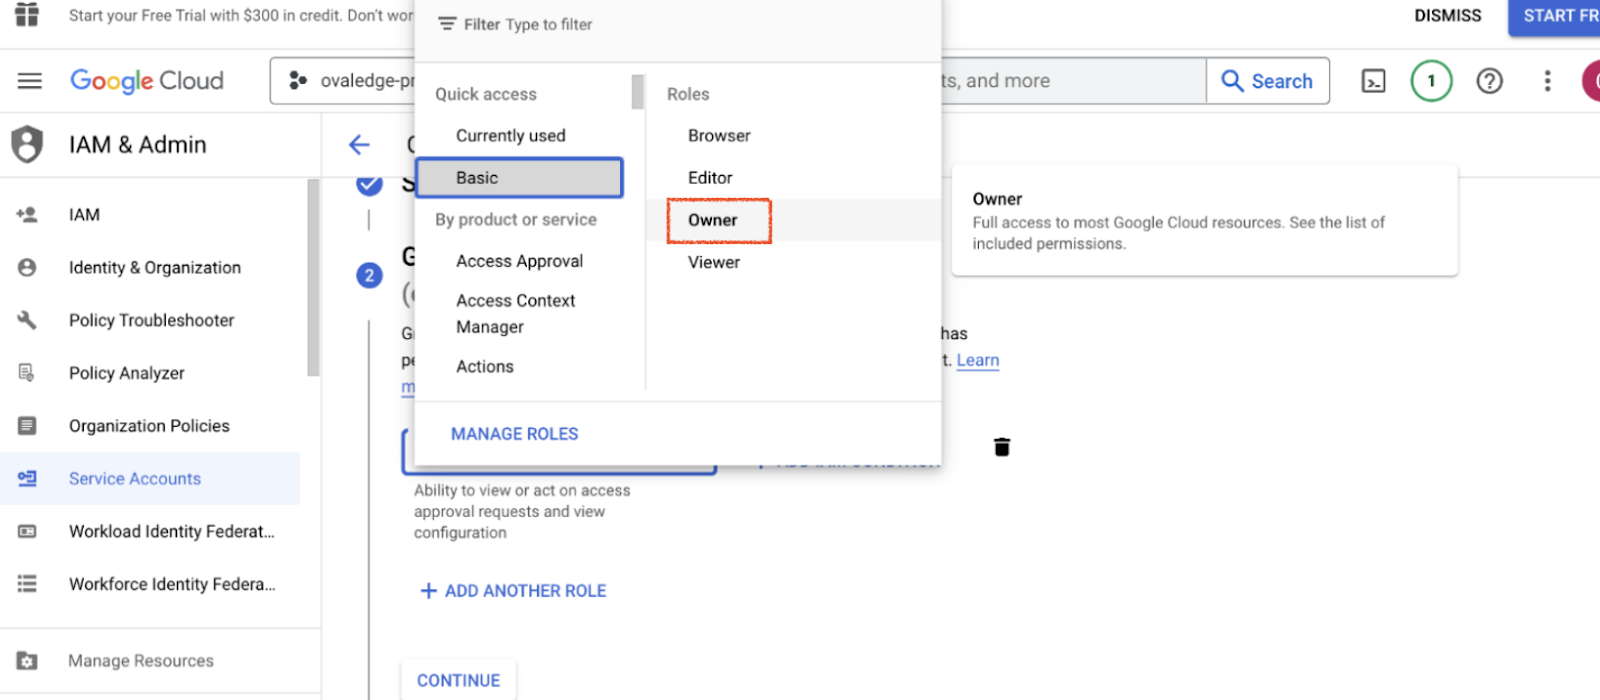
- Click on Continue
- Grant users access to this service account
Users can provide access to the service account to users or groups as needed. Here are the two roles and their respective permissions:
- Service Account Users Role:
This role allows users to deploy jobs and virtual machines using this service account.
- Service Account Admin Role:
This role grants users permission to administer and manage this service account.
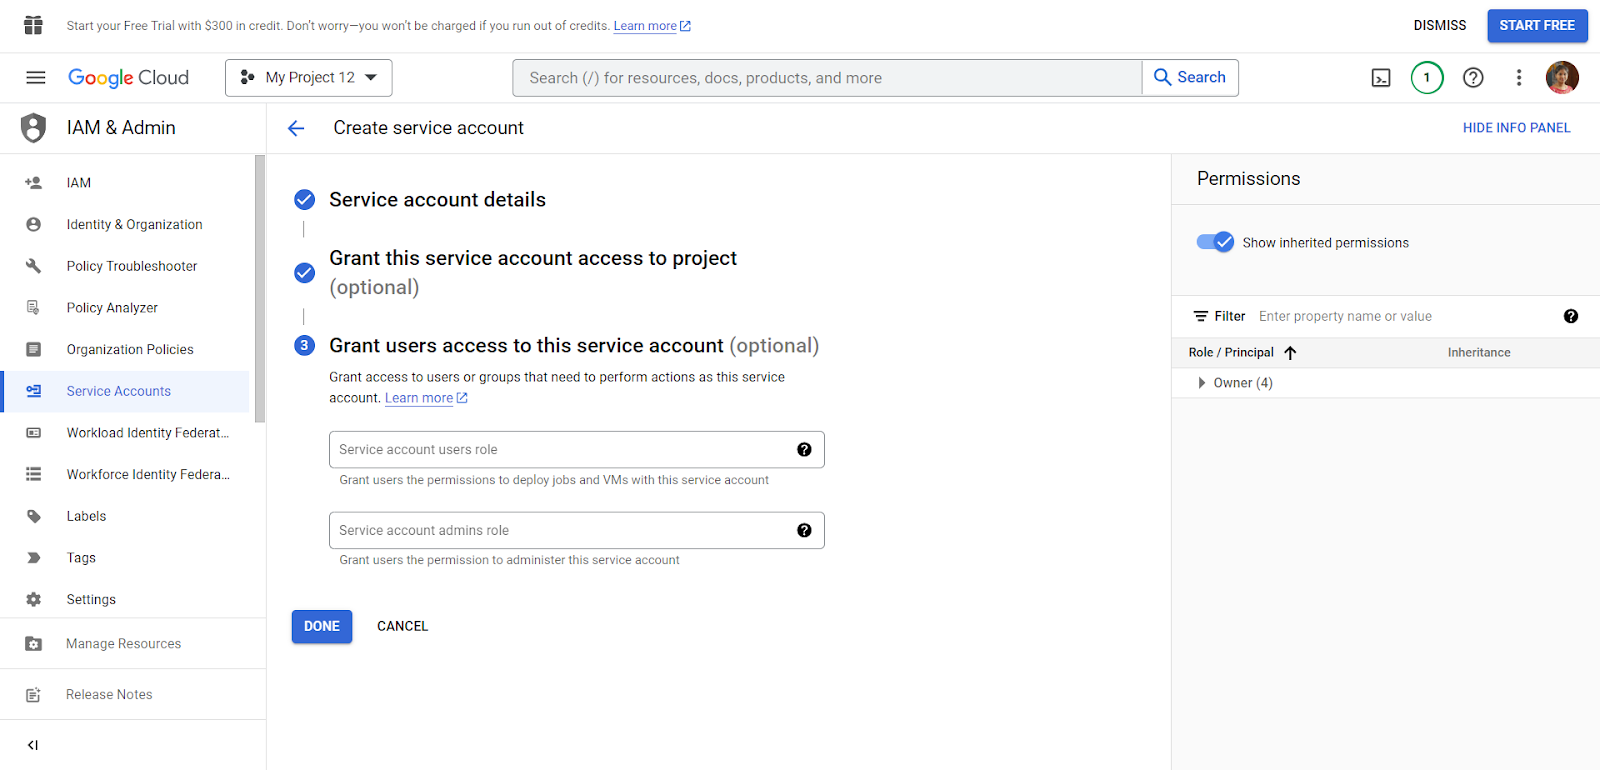
- Click on the DONE button.
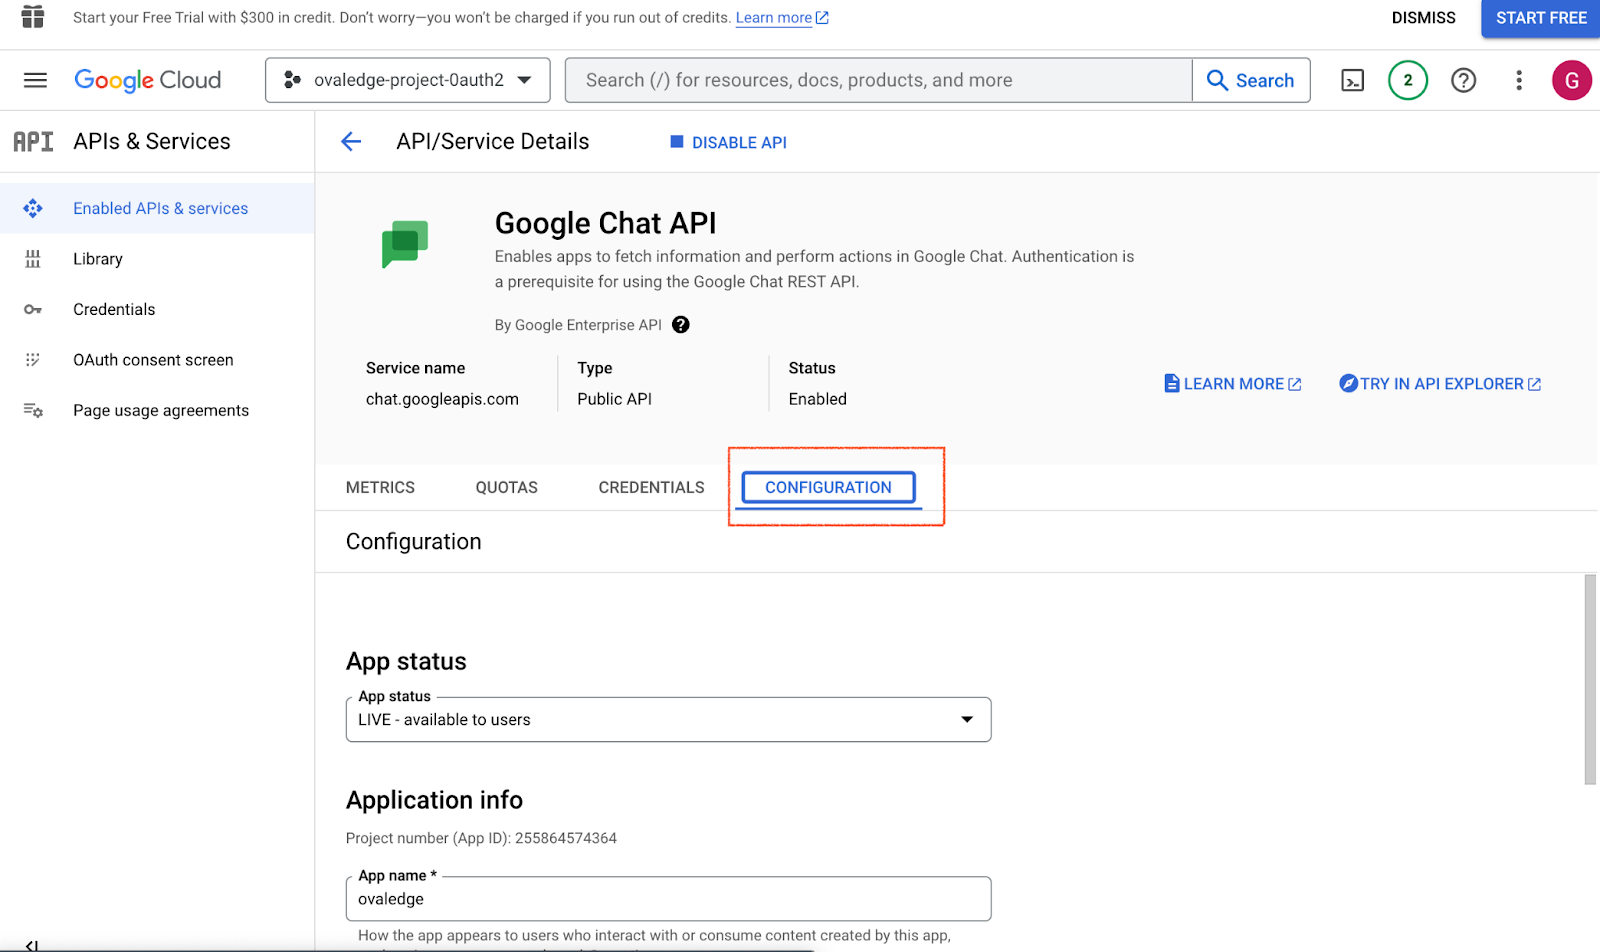
Step 5: Google Chat API Configuration
- Users need to Navigate to Enabled APIs & Services and select the Google Chat link from the below options.
- Click on the Configuration tab from the below pane
- Fill in the required fields, which include:
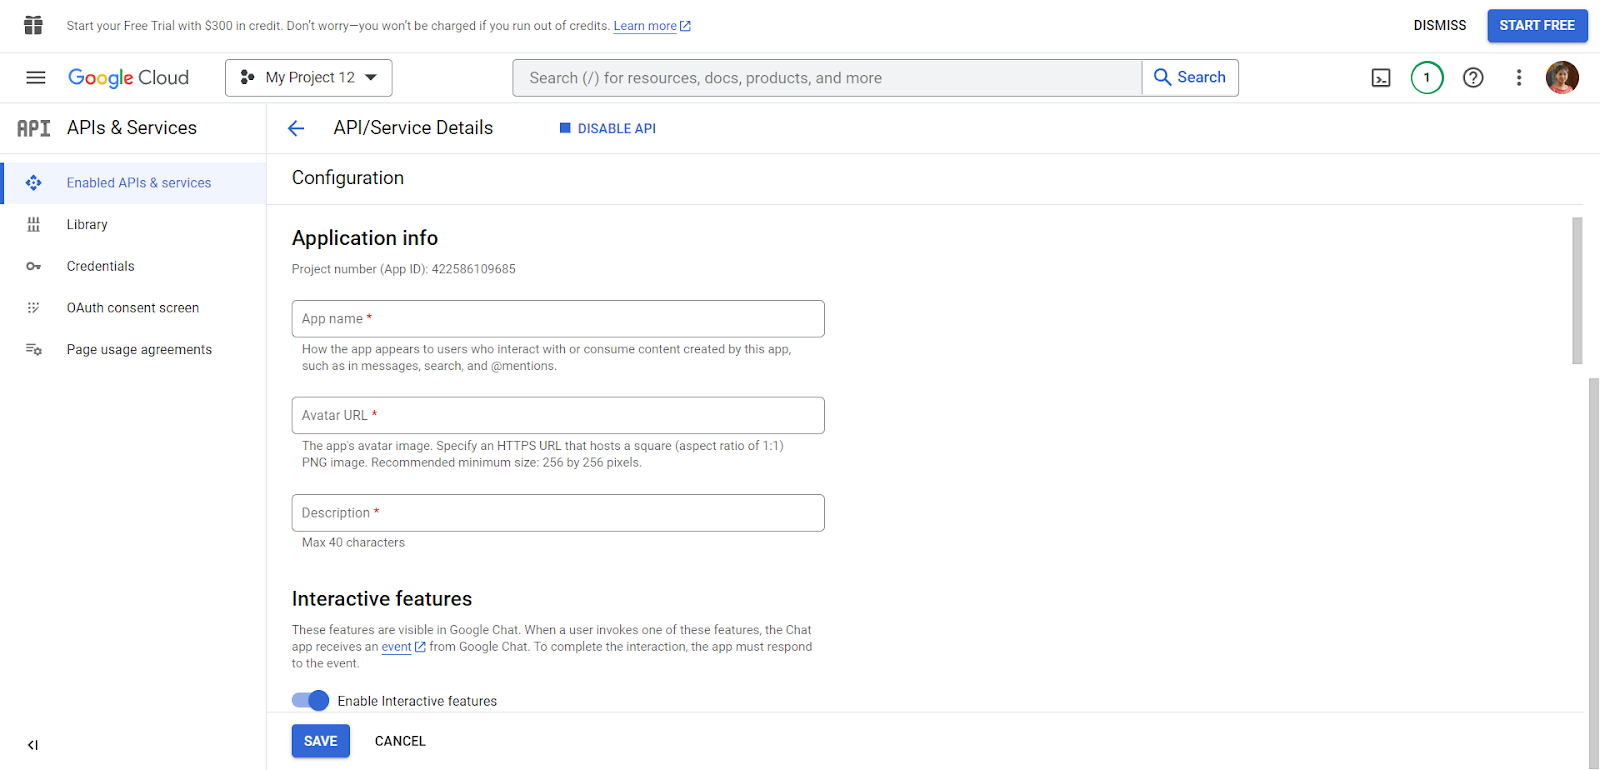
- App Name: How the app appears to users who interact with or consume content created by this app, such as in messages, searches, and @mentions.
- AvatarURL: Use the OvalEdge Logo URL (https://www.ovaledge.com/).
- Description: Provide Description.
- Check the interactive features and functionalities.
- Provide the application URL in the Connection Settings.
- Verify the visibility option while scrolling down the page, and input the email of an individual or group in the application domain.
- Click the save button.
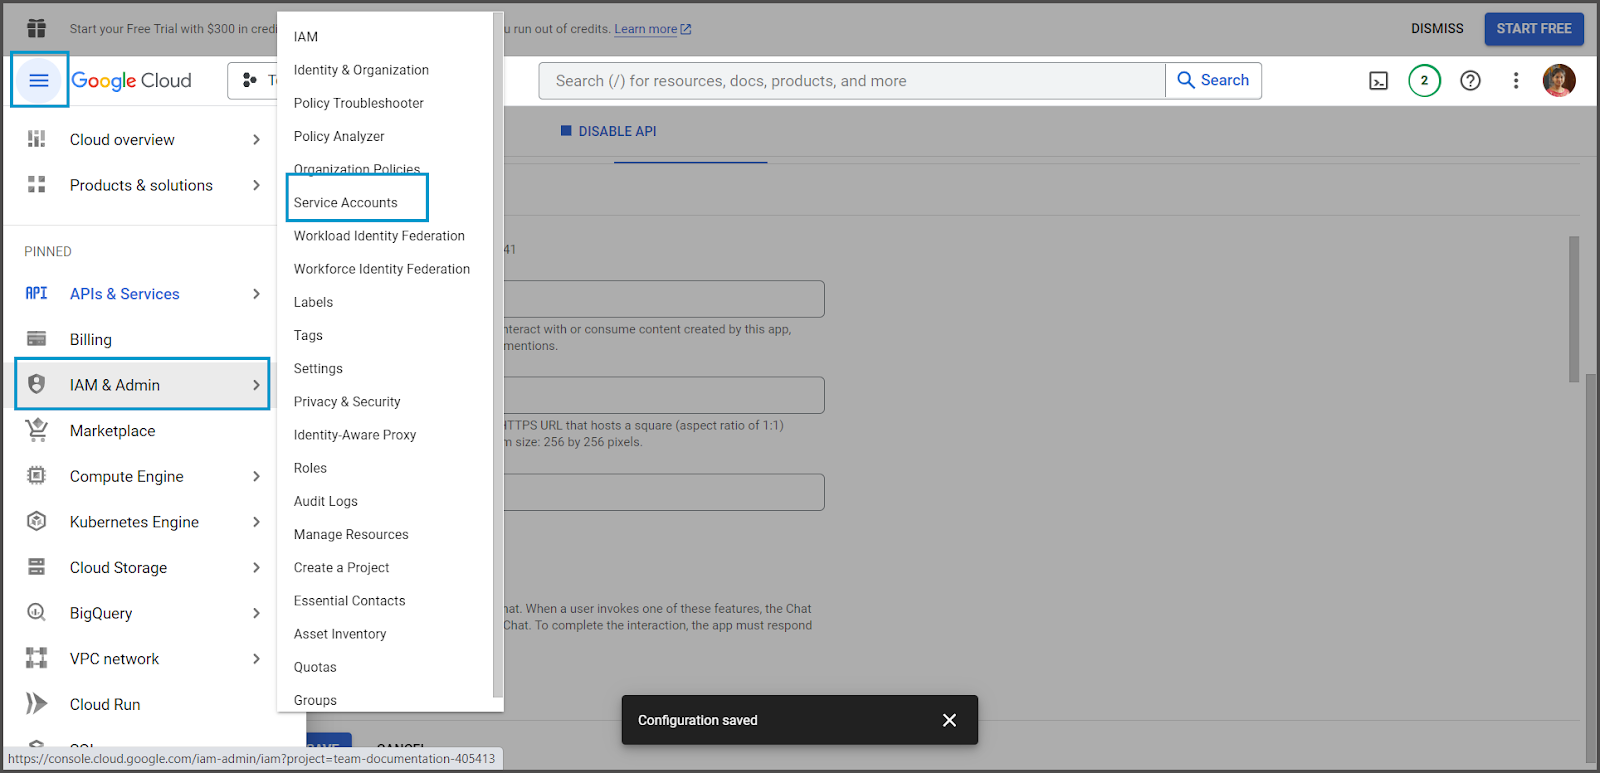
Step 6: Save the JSON file
Save the JSON file, which will be shared with the necessary individuals for application use. To do so:
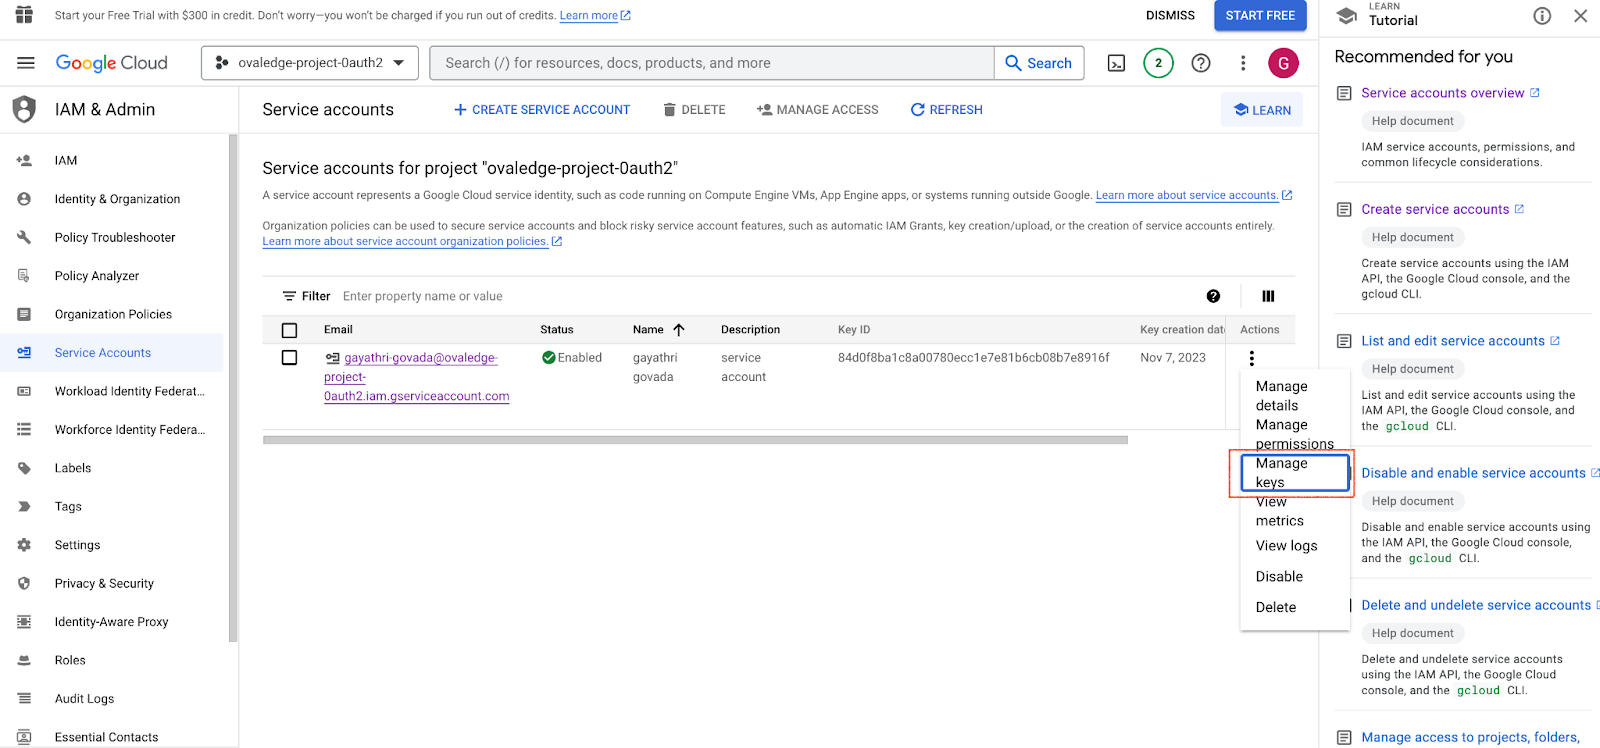
- Navigate to the left side menu, select the IAM & Admin section, and select service accounts.
- Select the required service account from the list, and click on the 3 dots option beside the account.
- Click on "Manage keys" to initiate the saving process.
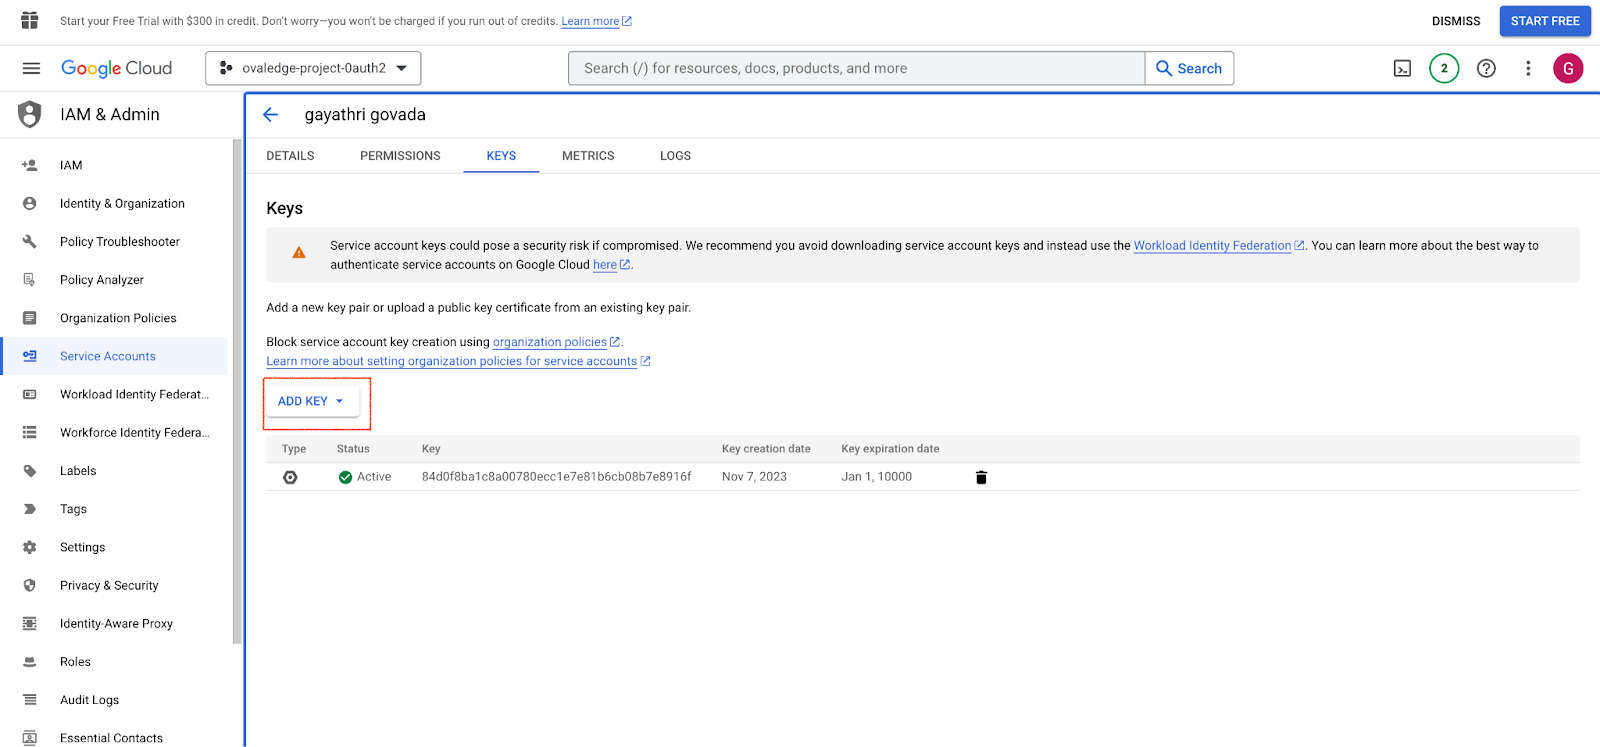
- Click on ADD KEY
- Select the key type and Click on CREATE
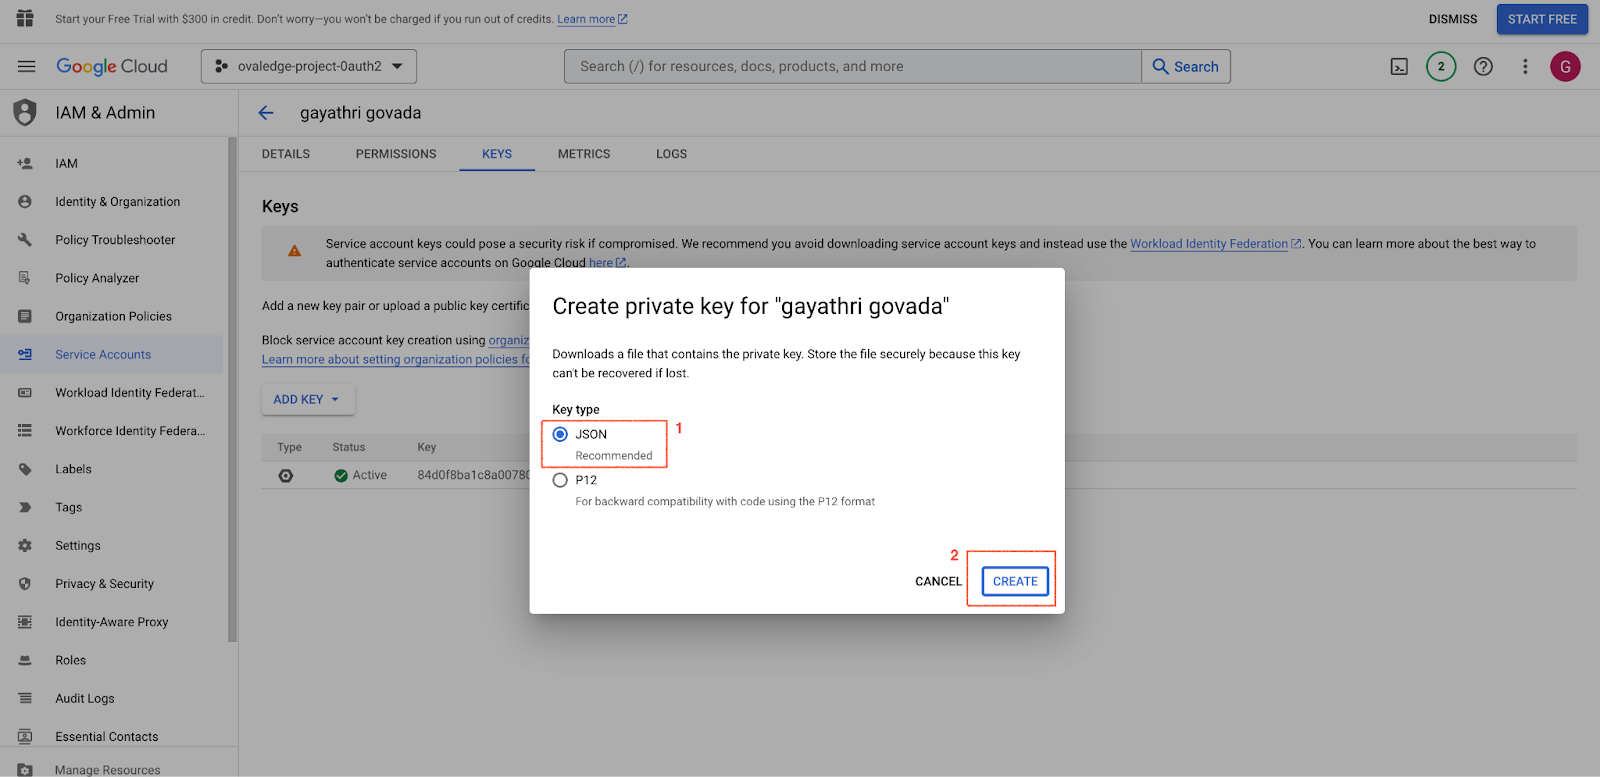
- The file will be downloaded to your local folder.
|
Google Chat Configurations in OvalEdge
- Log in to the OvalEdge application and go to Administration > System Settings > Notifications.
- Search for "configure key google.chat.credentials.path," click on the value, and then upload the JSON file path that has been downloaded by creating a service account.
- Once the configurations are in place, the next step involves obtaining the Google Chat ID from the Google Chat website.
- After logging into Google Chat and selecting a conversation, you should copy the conversation ID from the browser URL.

For example, consider the URL: https://mail.google.com/chat/u/0/#chat/space/AAAAAGm8bvU. In this case, users should extract the ID, which is "AAAAAGm8bvU."
5. After obtaining the Google Chat ID, proceed as follows:- Log in to the application.
- Click on the user icon located at the top-right corner.
- Select "My Profile."
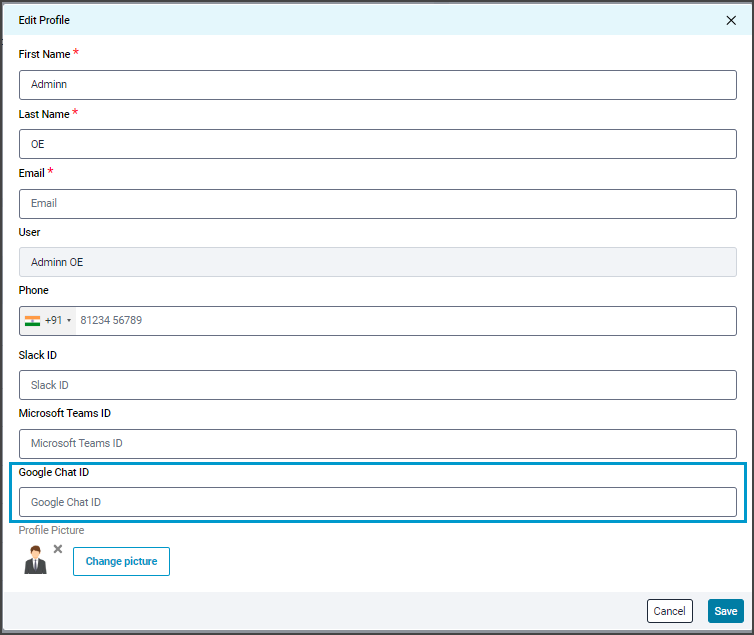
- Click on the "Edit Profile" or the edit icon.
- Enter the required profile details along with the Google Chat ID and click on the Save button.
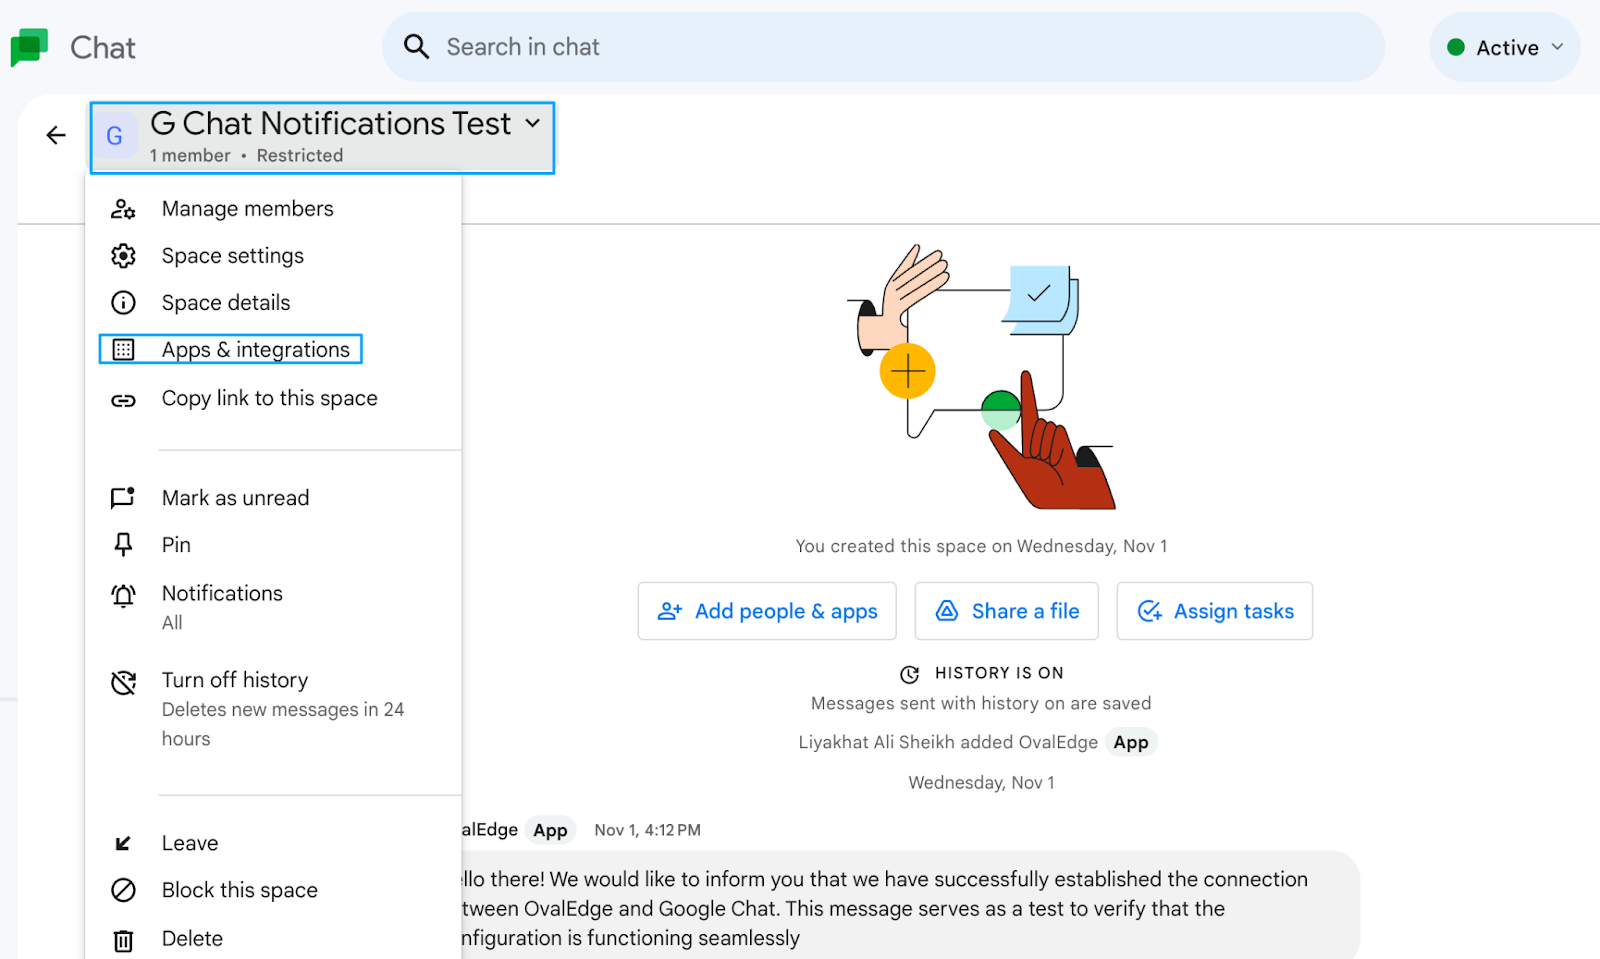
- Click on the Chat where you wish to receive notifications, and a pop-up window will appear. From the list, select the "Apps & Integrations" option.
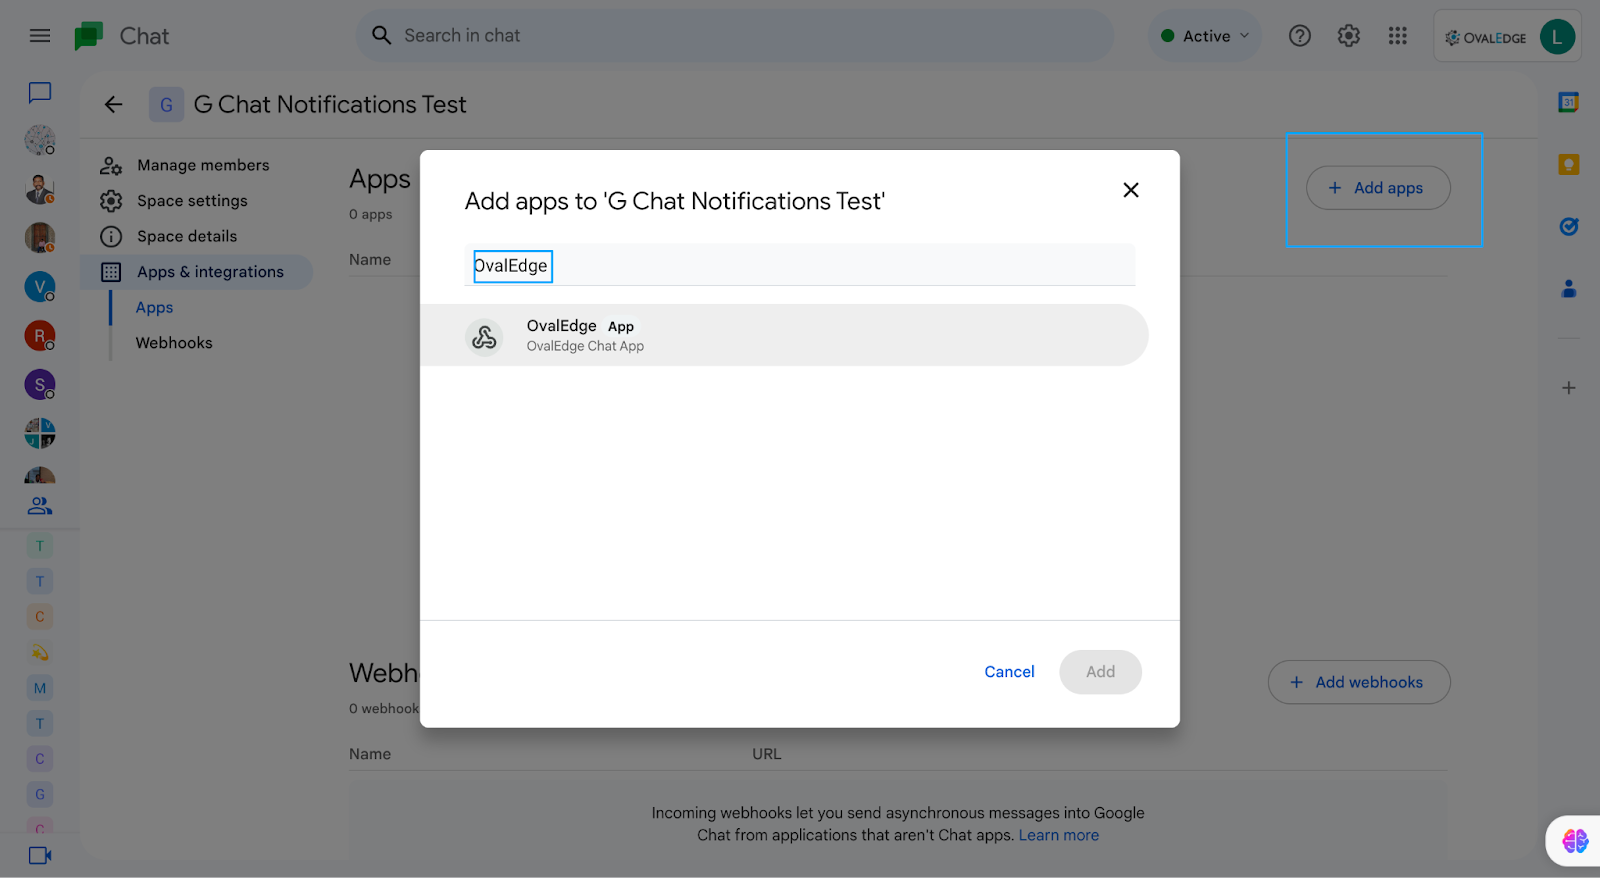
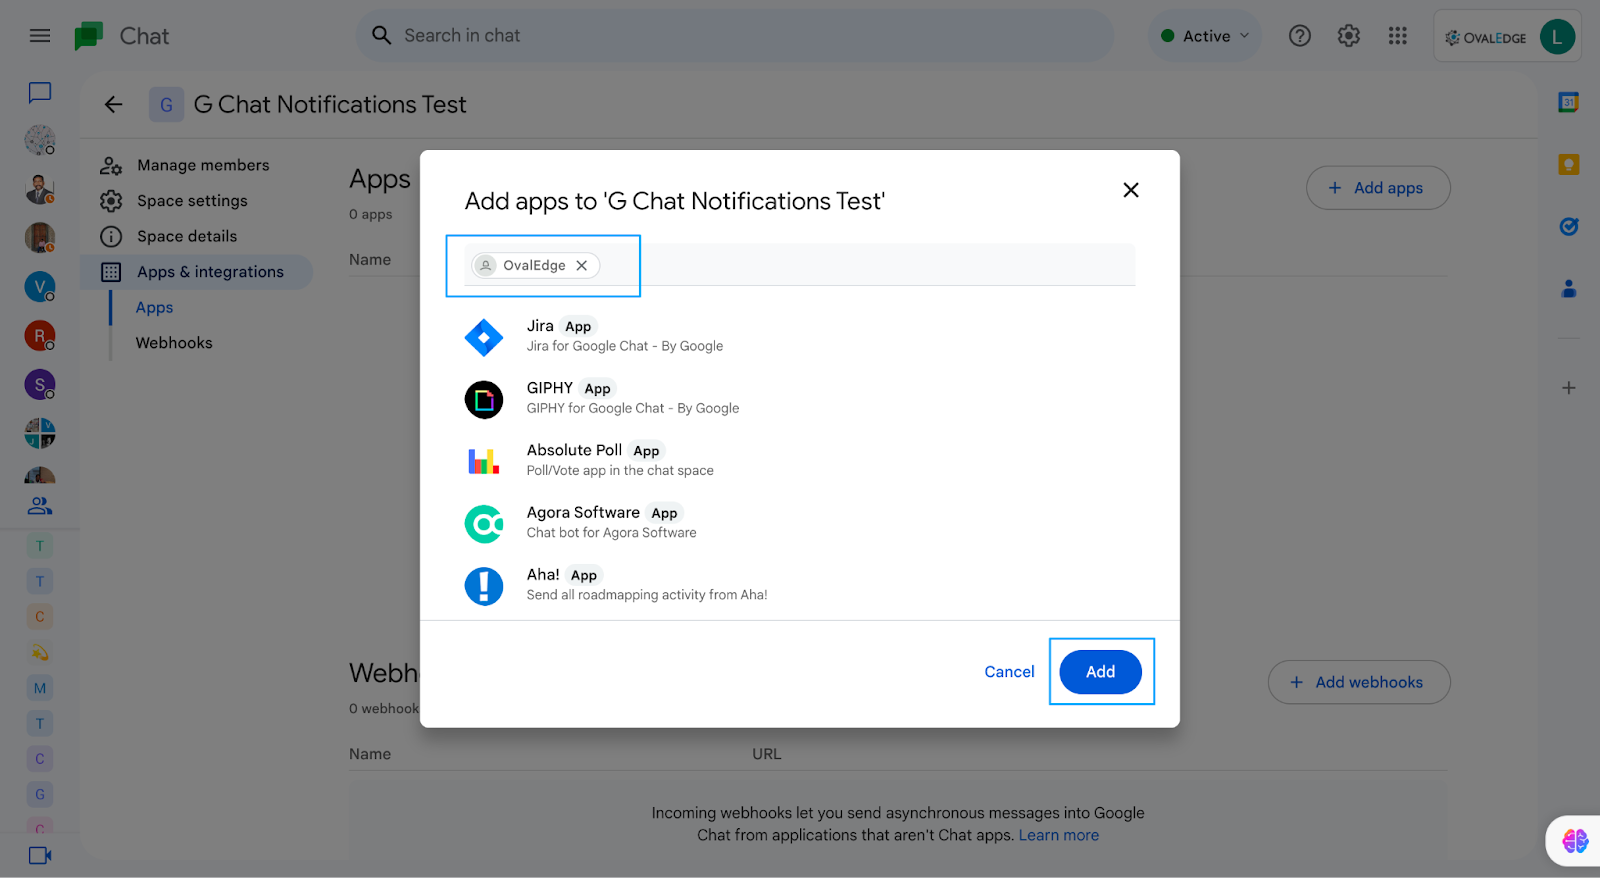
- Click on the “+Add Apps” at the top right corner and search for the OvalEdge app.
- Select the OvalEdge App option from the list and click on the Add button.
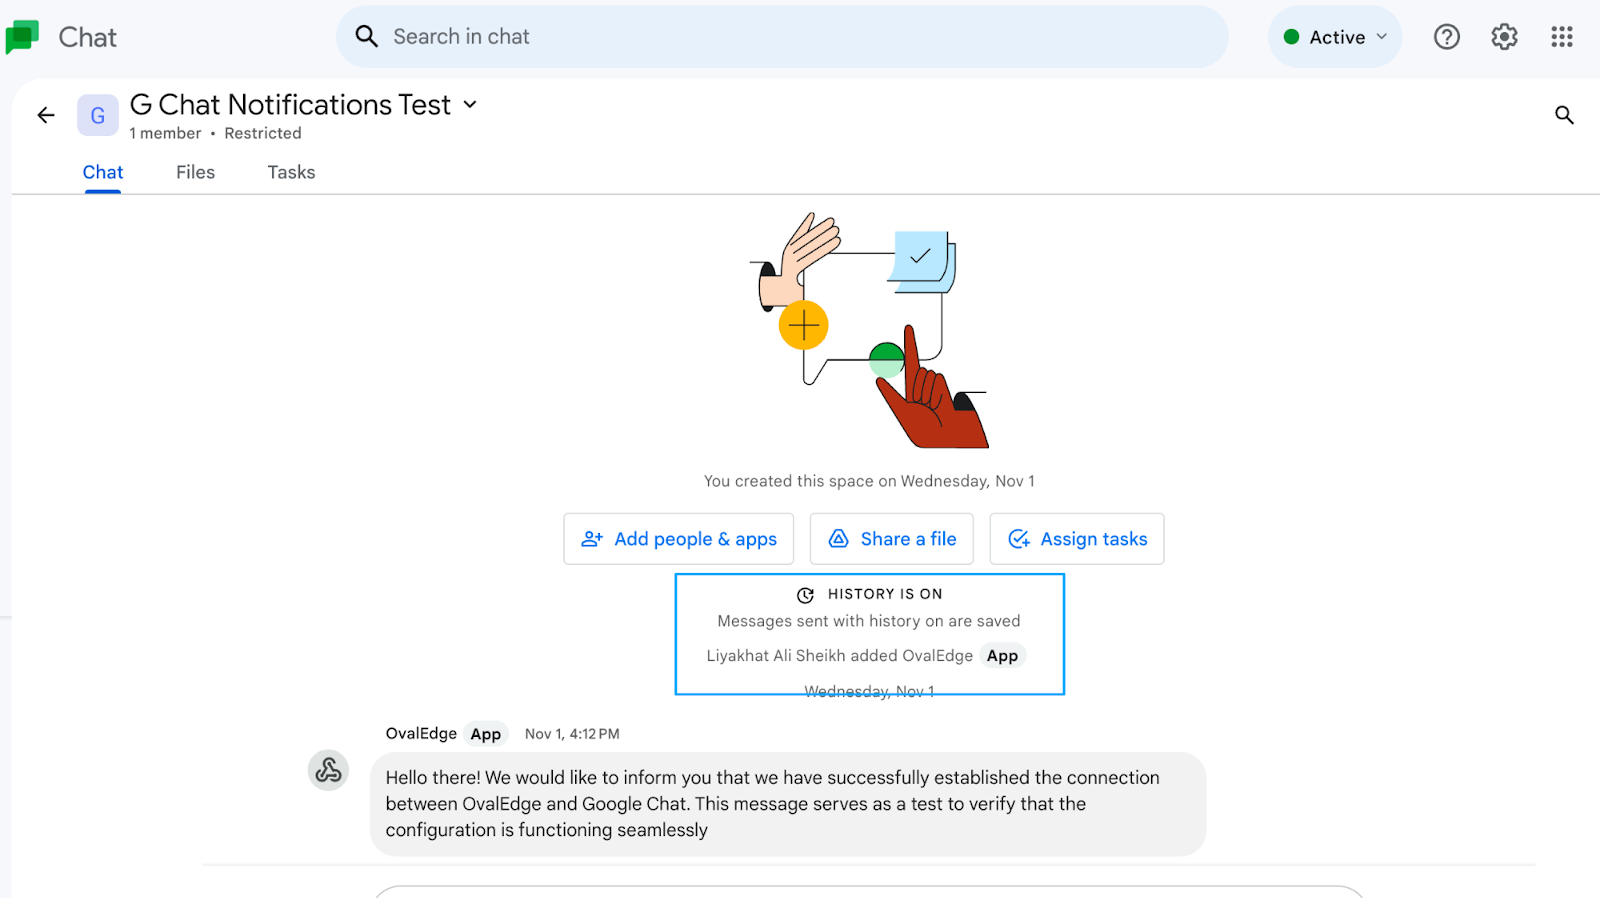
7. After integrating the app, go to the OvalEdge application.
8. Navigate to "Administration" > "System Settings" > "Notifications" and search for the configuration key. Then, click on the "Test" button.
9 If the test is successful, a success message will be sent to the chat.