Introduction
This document helps in configuring the integration of PING SSO with the OvalEdge application.
Steps to integrate PING SSO with the OvalEdge application
Configuration Steps:
- Go to the ping SSO console and log into the application using username and password.
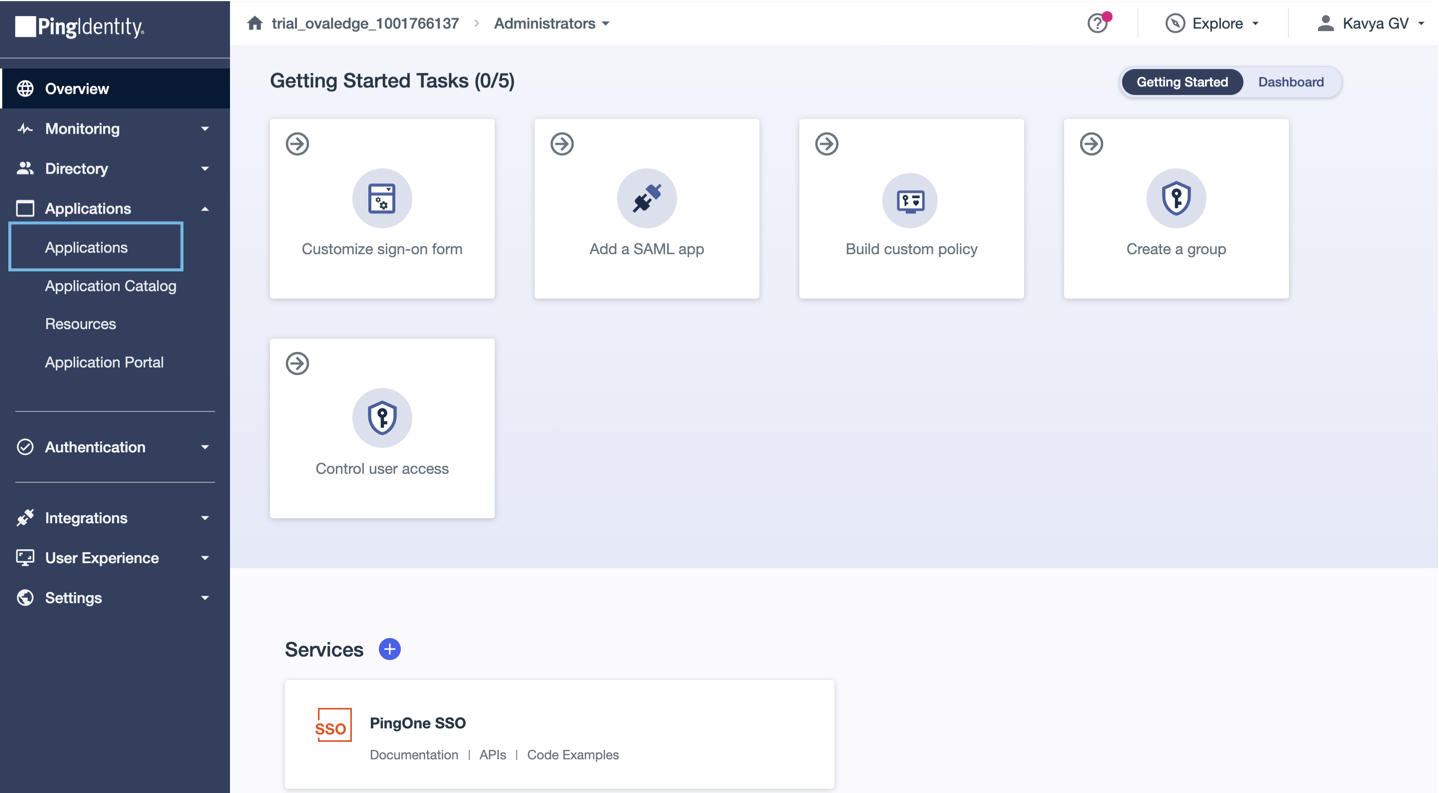
- After logging in, navigate to the Applications tab and click on it.
- From the above-highlighted screenshot, click on the + icon, and the below page will appear.
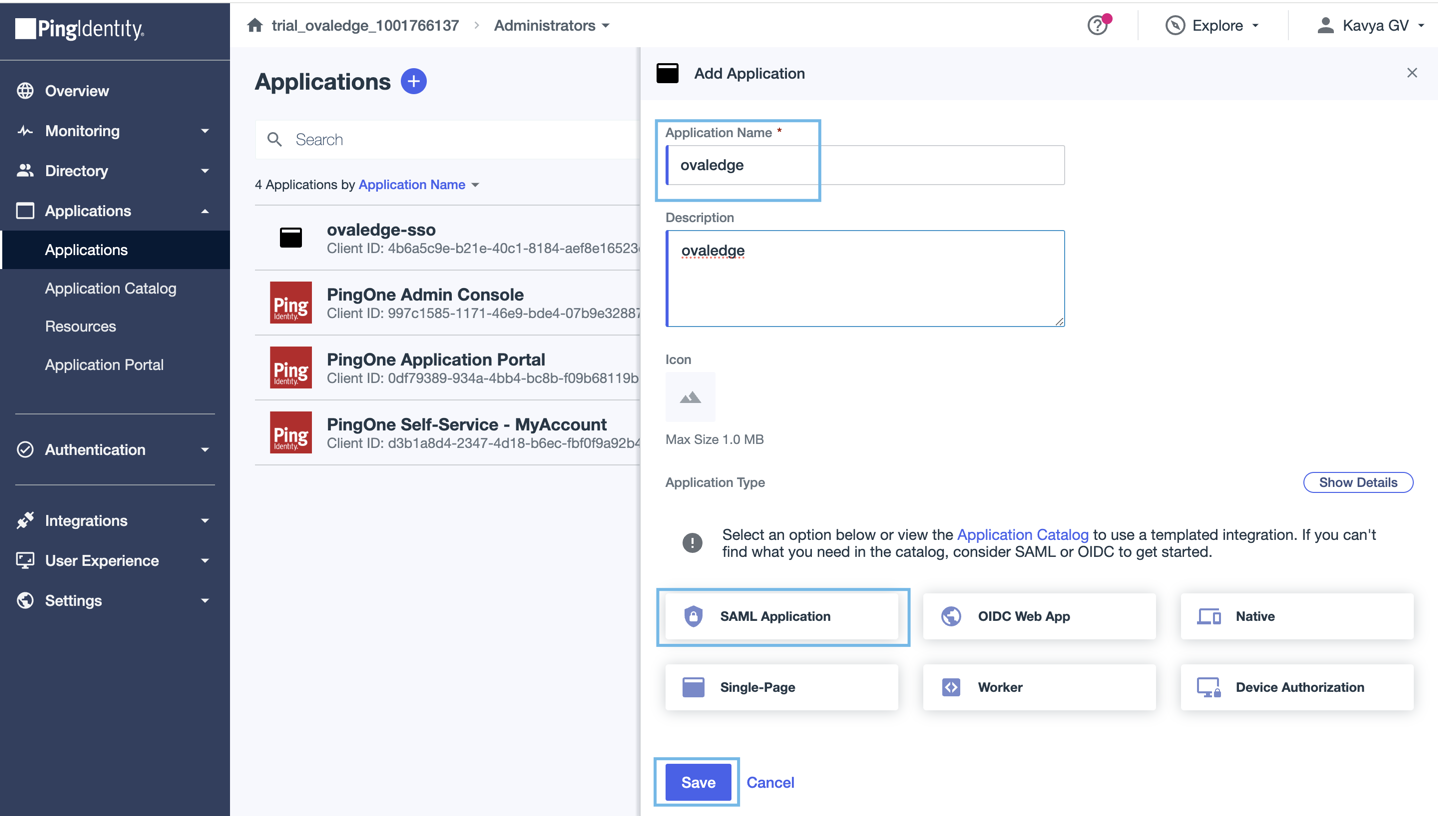
Enter the details, such as the Application Name, select SAML Application, as shown below, and click Save. - Enter details i.e the URL of the Ovaledge application as shown below.
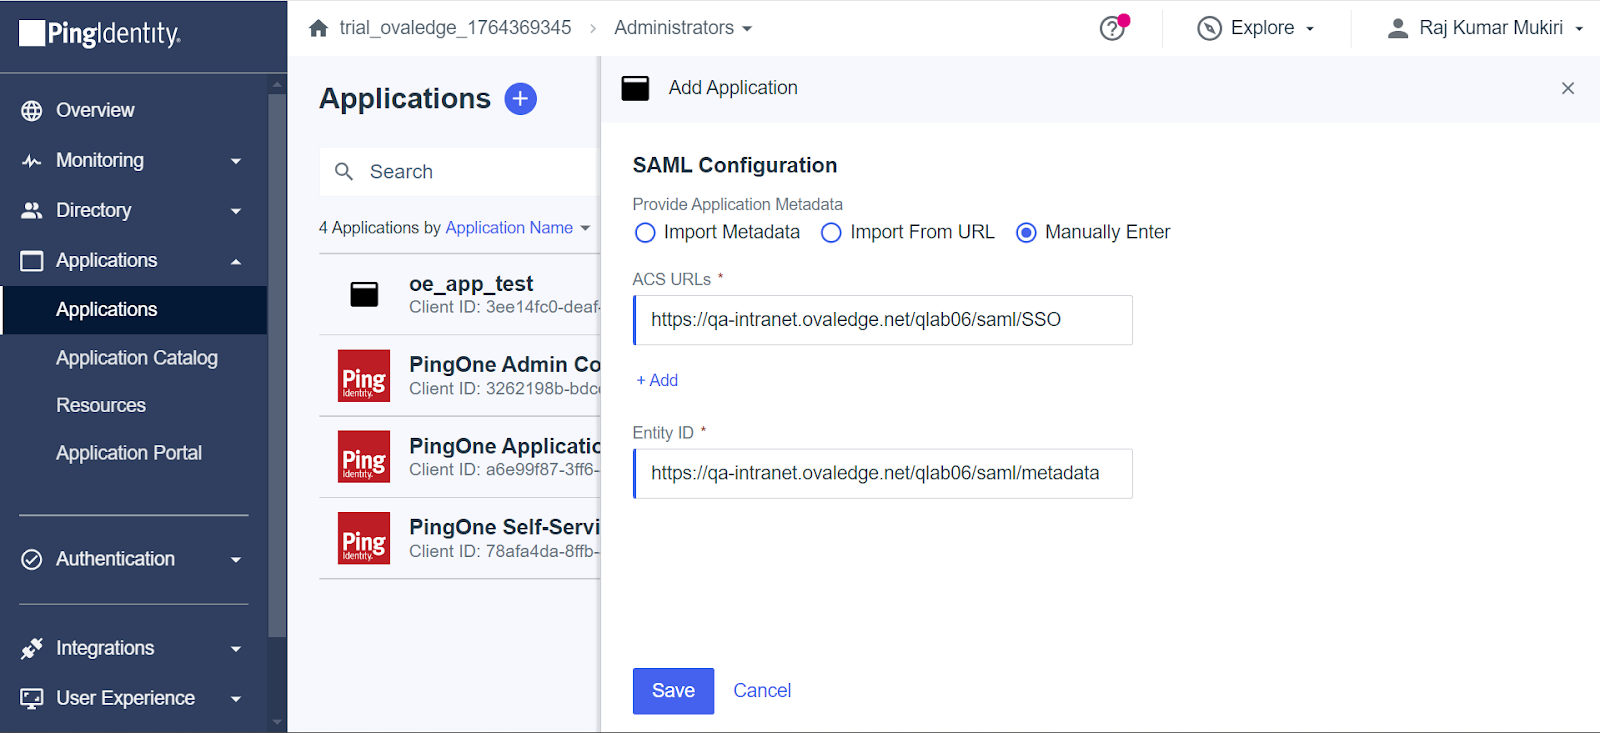
ACS URL: https://<Domainaddress>/saml/SSO
Entity ID: https://<Domain Name>/saml/metadata
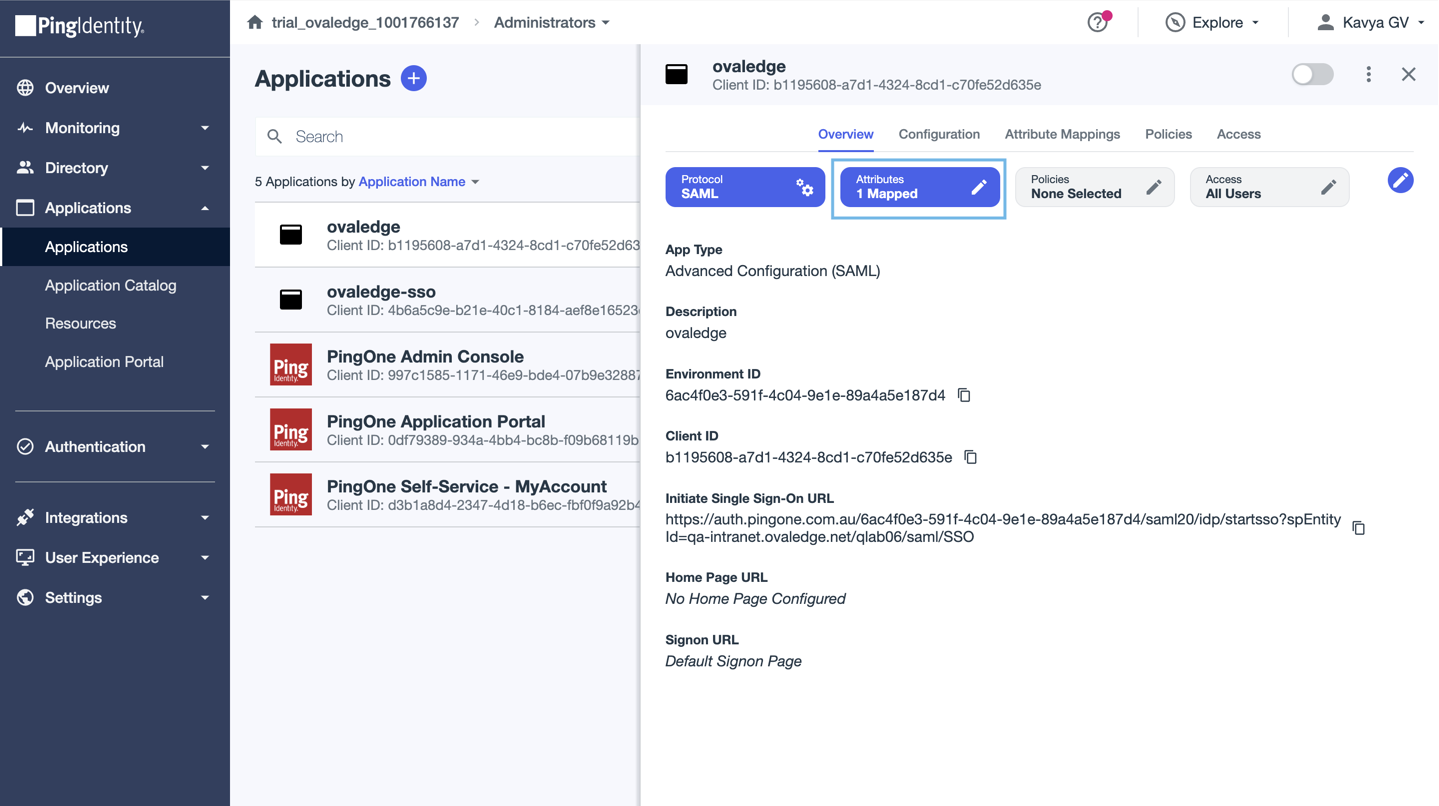
After adding the above details, click on the Save. - Now click on the mapped tab.
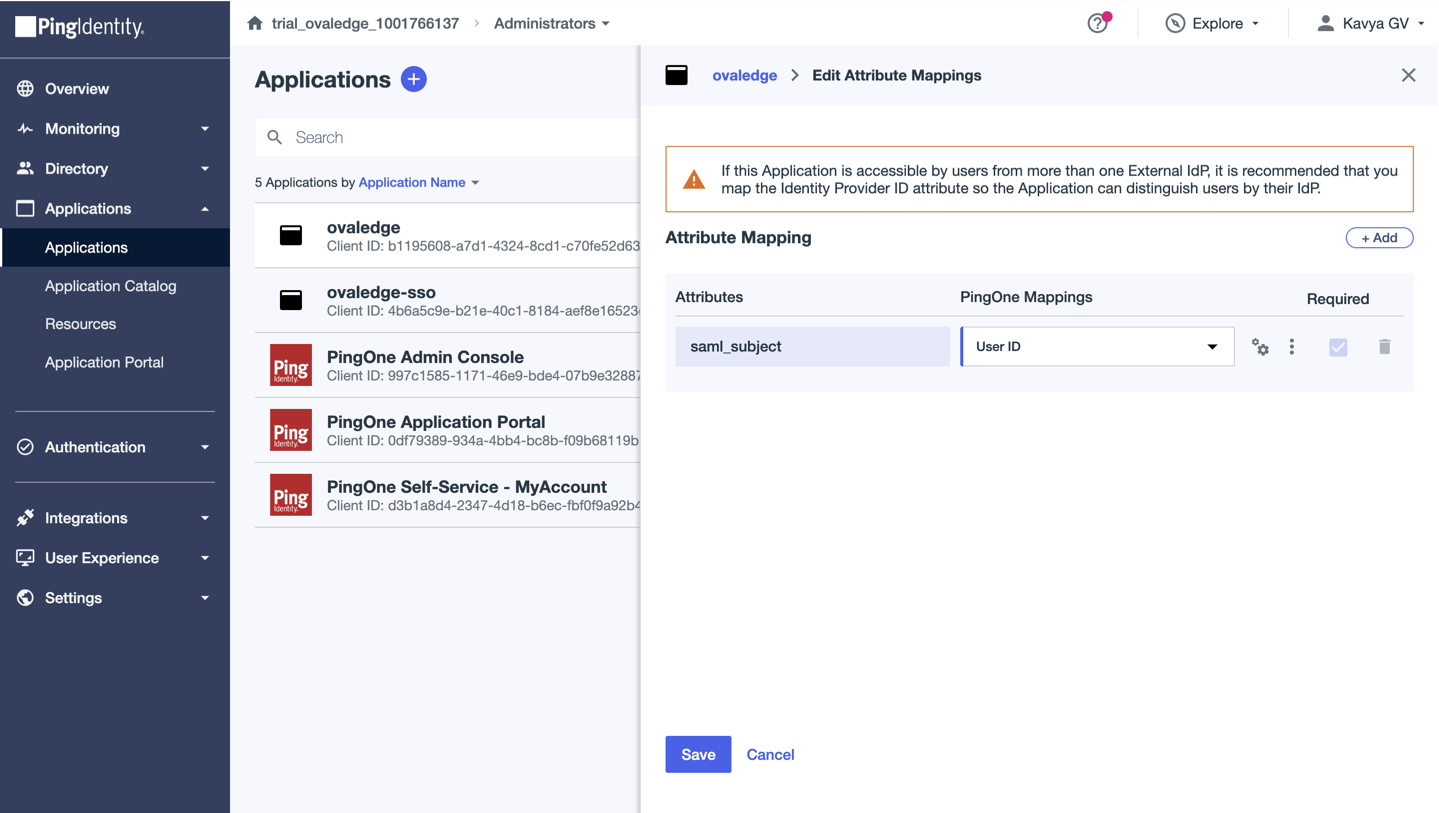
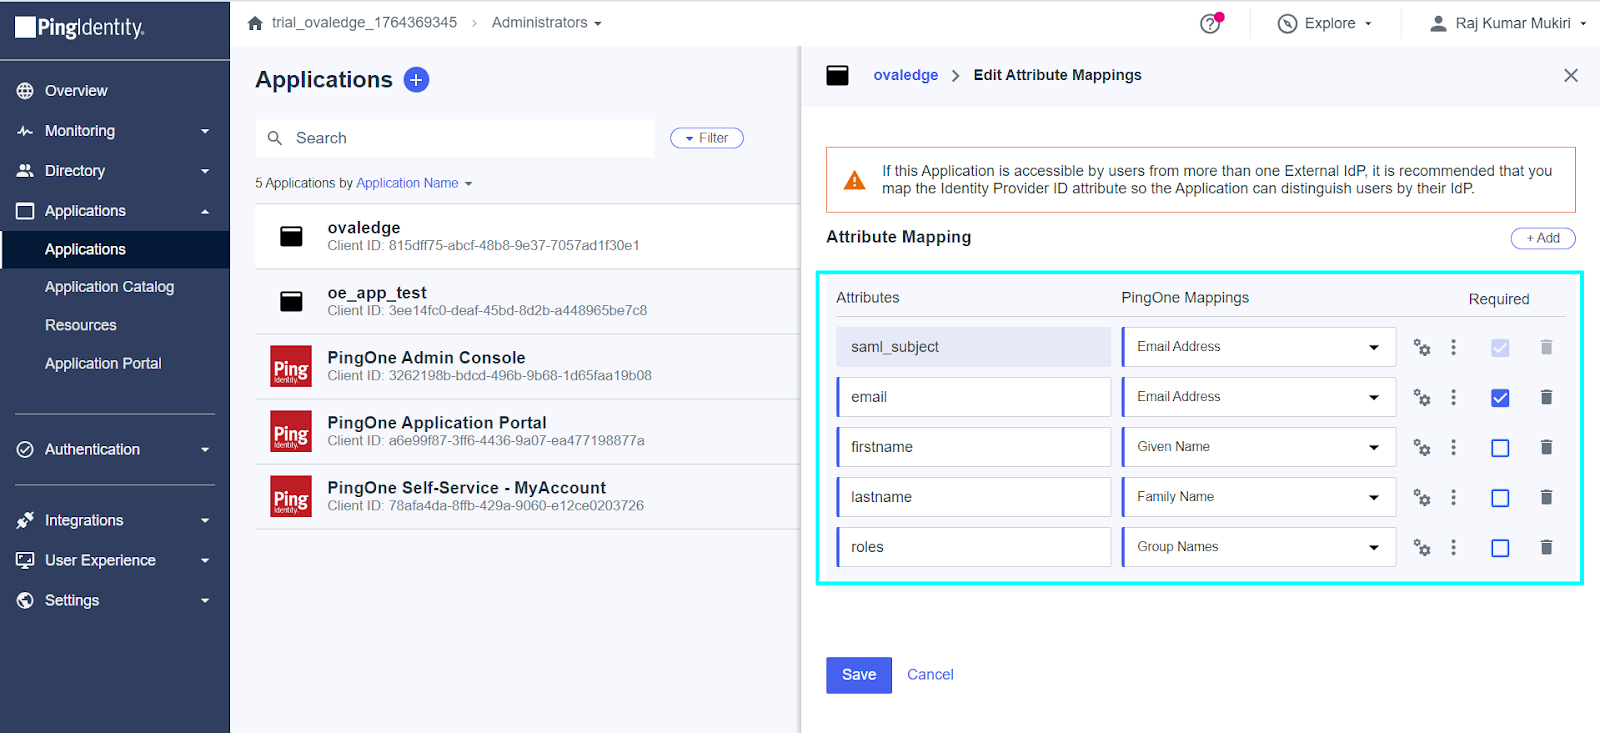
- After clicking on the Mapped tab, the page below will appear; enter the details as shown below.
saml_subject Email Address
email Email Address
firstname Given Name
lastname Family Name
roles Group Names
userid Username
Note: Make sure the Required icon checkbox is selected as shown below.
Click on Save.
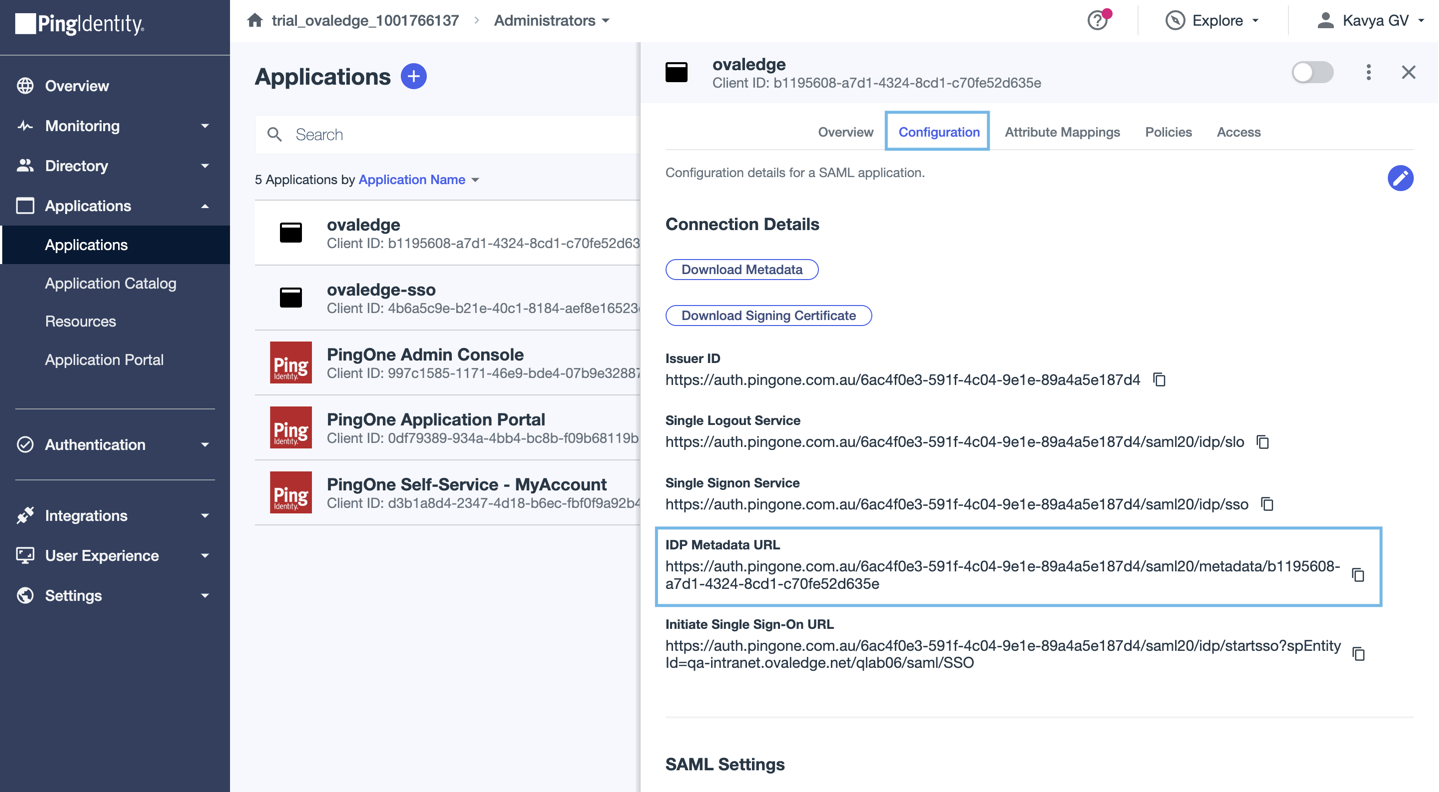
- Finally, go to the Configuration tab; copy the IDP metadata URL, and paste it in oasis.properties as shown below.
Log in to the OvalEdge application VM and add the URL below to the oasis.properties file.
Now navigate to the tomcat bin path and edit setenv.sh (if it is Linux; for Windows, open tomcat9w.exe). In security_type, add saml, as shown below.
-DOVALEDGE_SECURITY_TYPE=saml
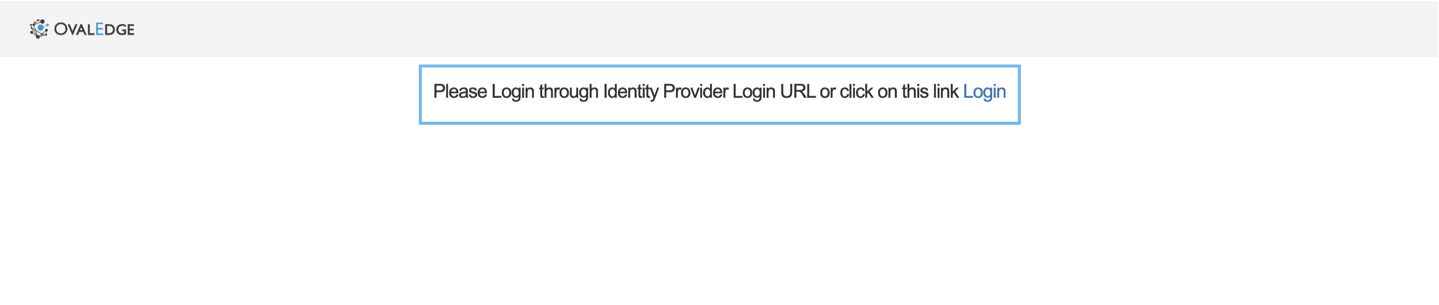
- Now restart Tomcat services. It will take a few minutes to up the application and the page below will appear.
Click on login to enter the OvalEdge application.
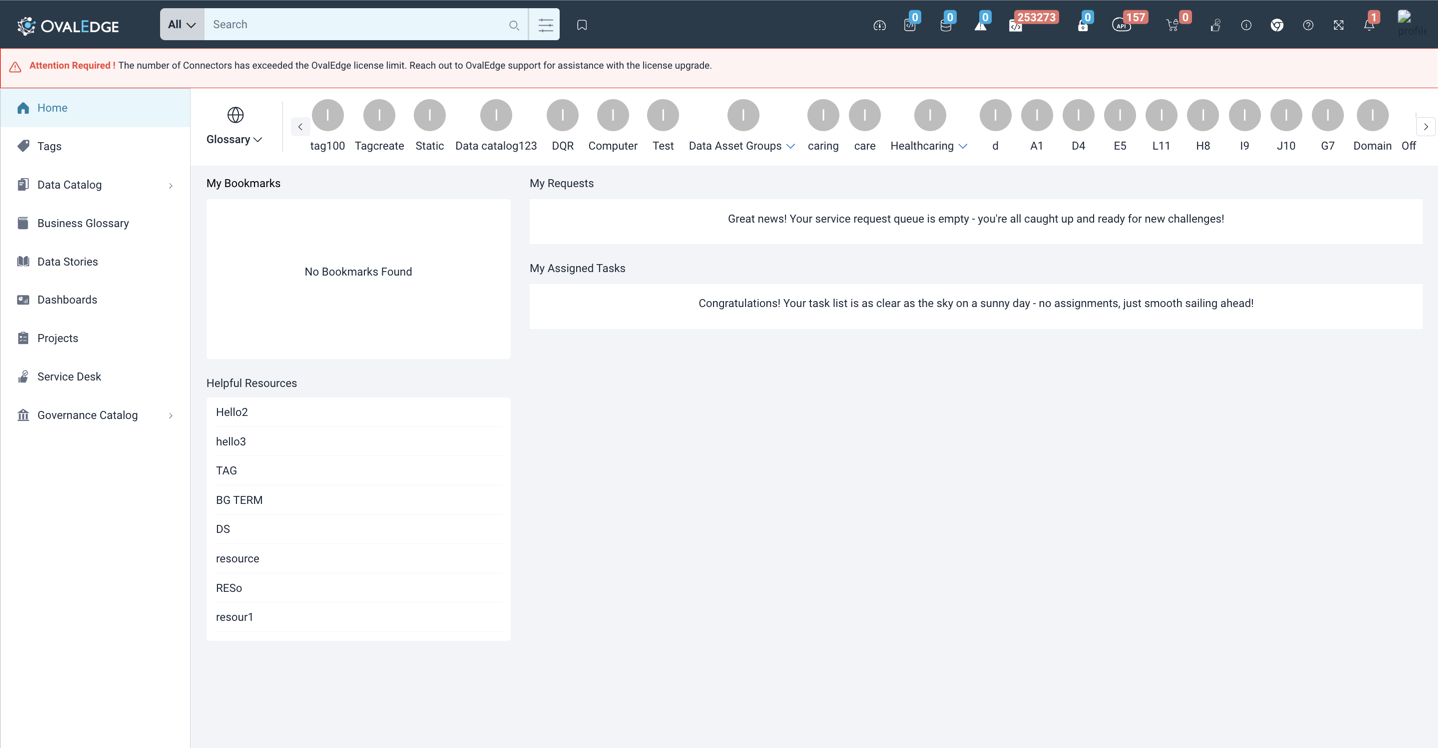
- You can log in to the Ovaledge application with the user you logged in to by pinging the SSO console.
Try to log in with the same user; you will log in successfully.

Note : In the OvalEdge application, under System Setting, click on SSO and ovaledge.extauth.authtype configuration value is HYBRID then no need to create the groups else preferred value is REMOTE then we need to create the groups and below are the steps.
Group Creation:
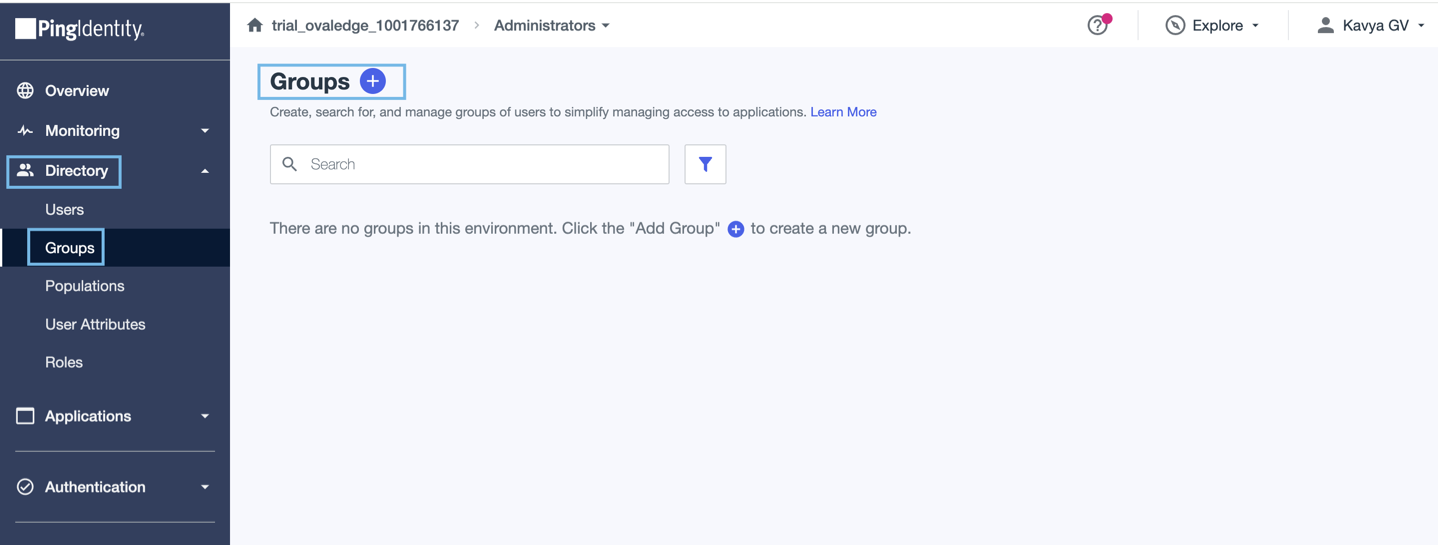
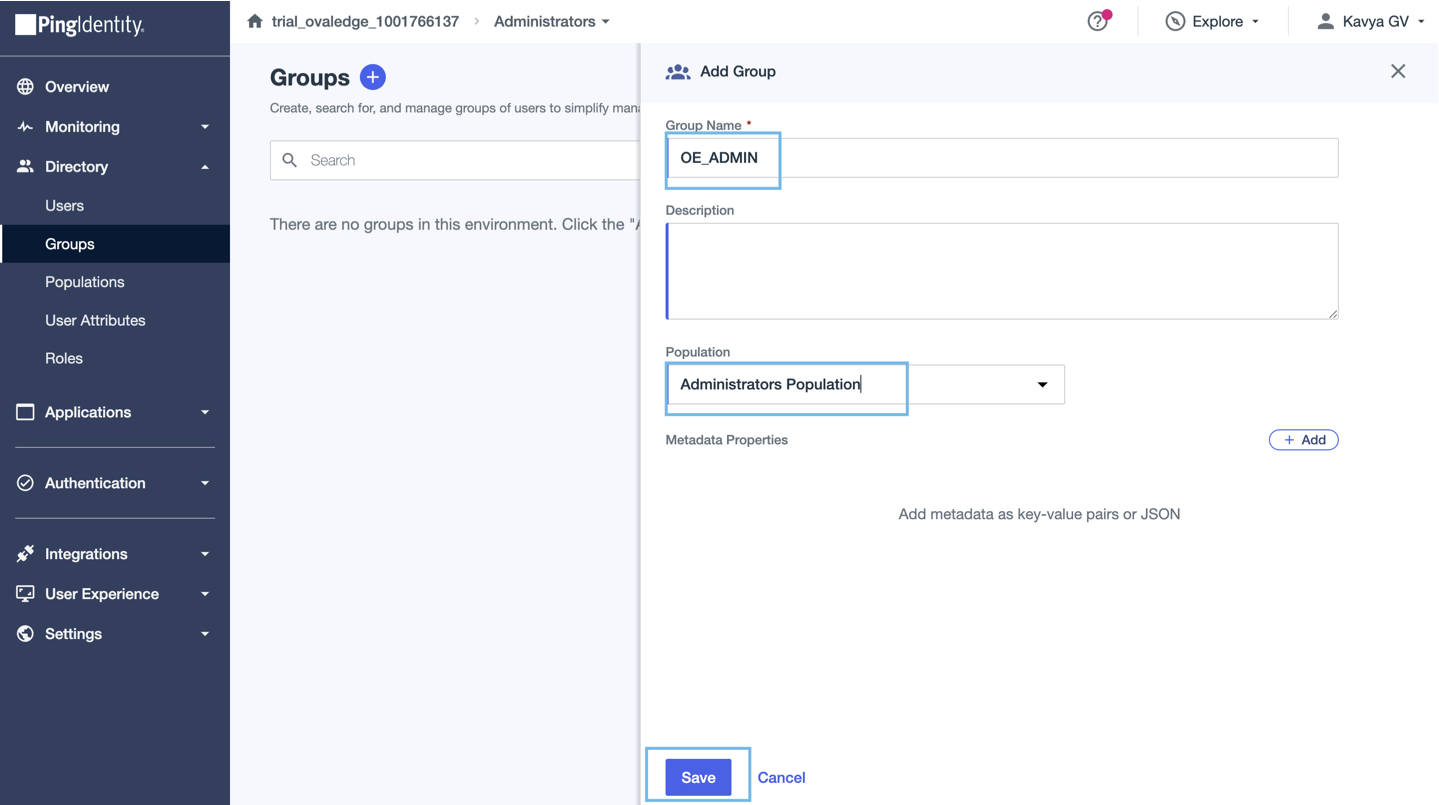
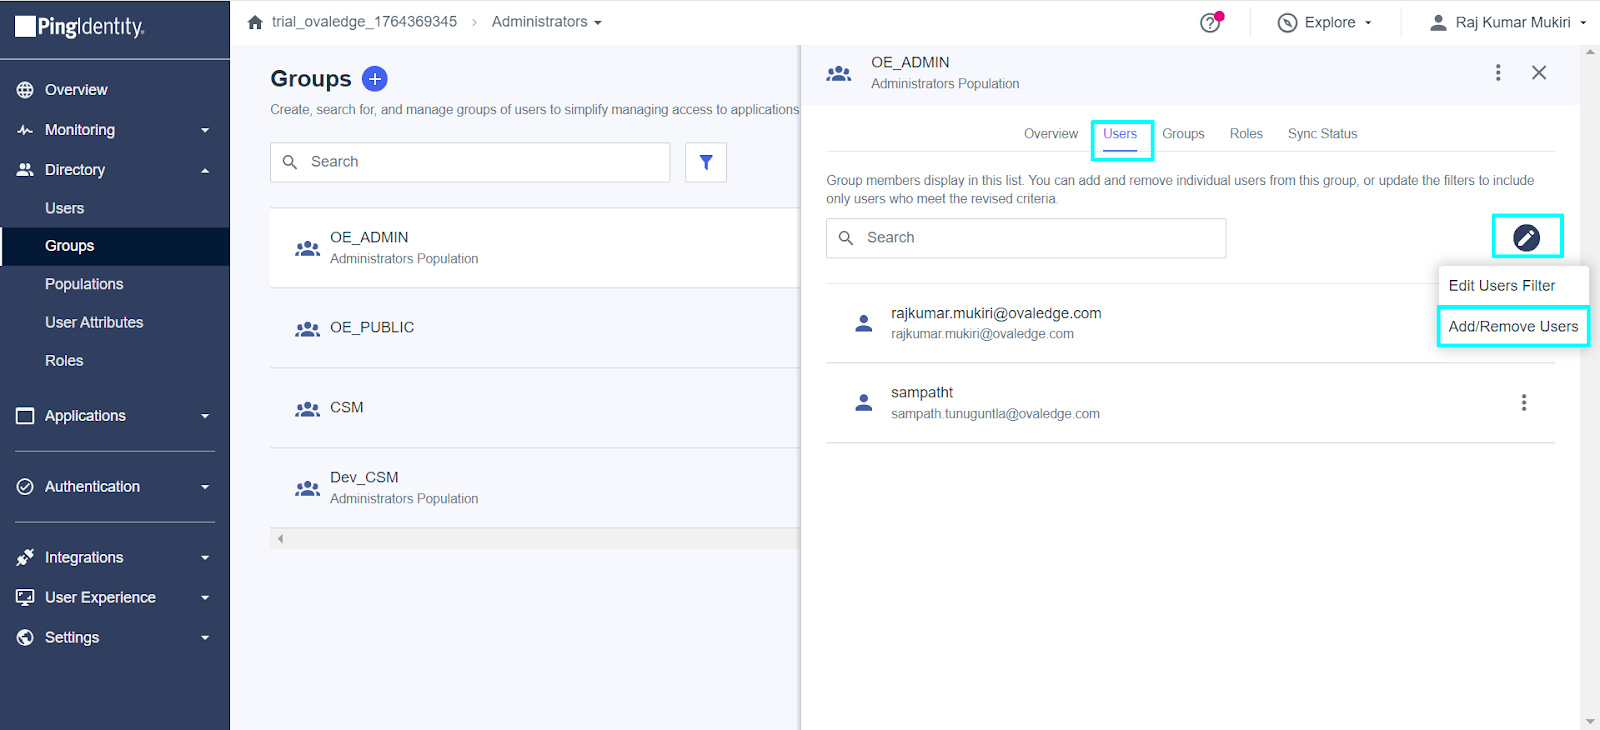
Now, let us create a group with OE_ADMIN and assign a user to that group.
Navigate to Directory⇒Groups⇒click on the + icon as shown below.
Under Users tab, You can add/remove the users to/from the group
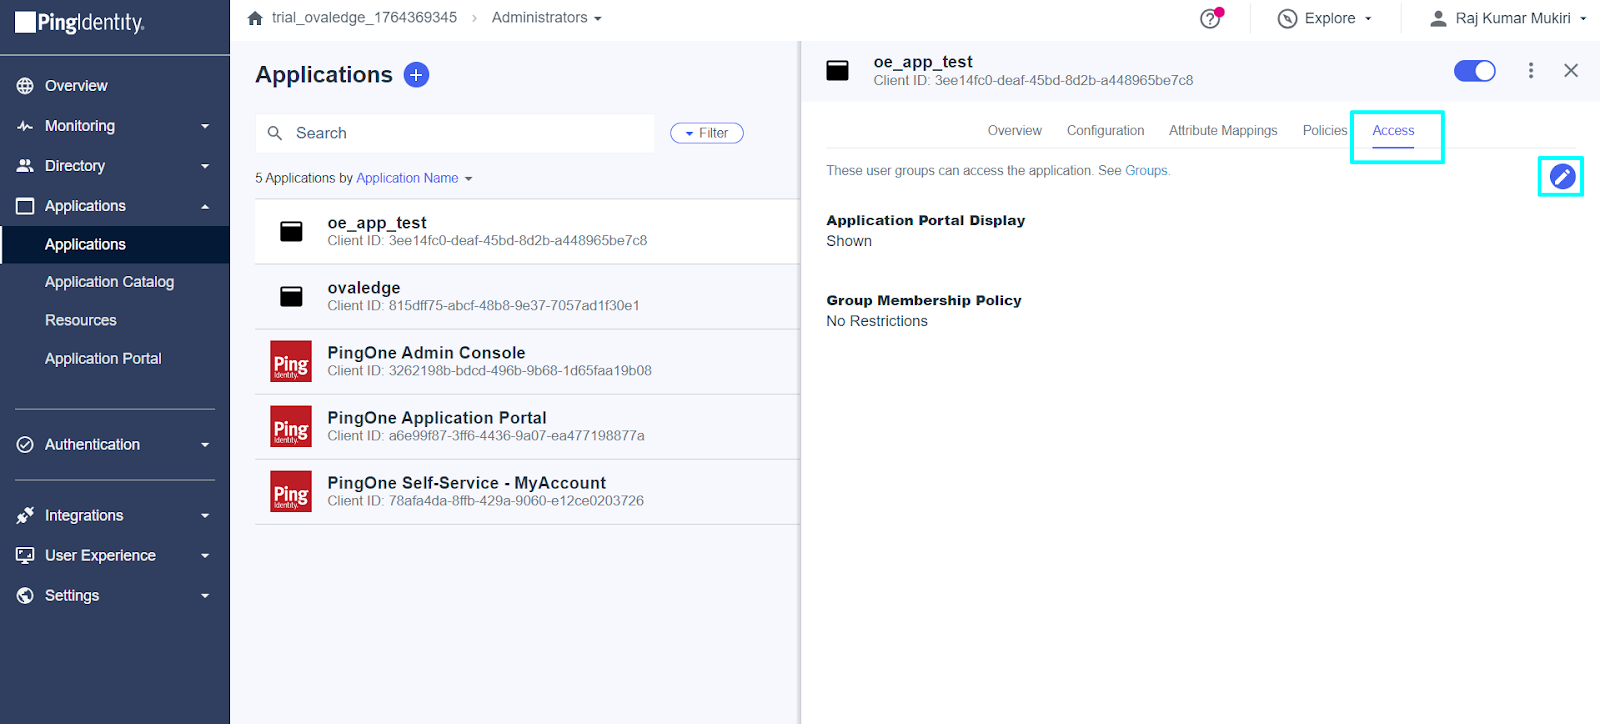
- Navigate to the Applications=> Application
- Select the created ovaledge application. And click on the Access tab as shown below:
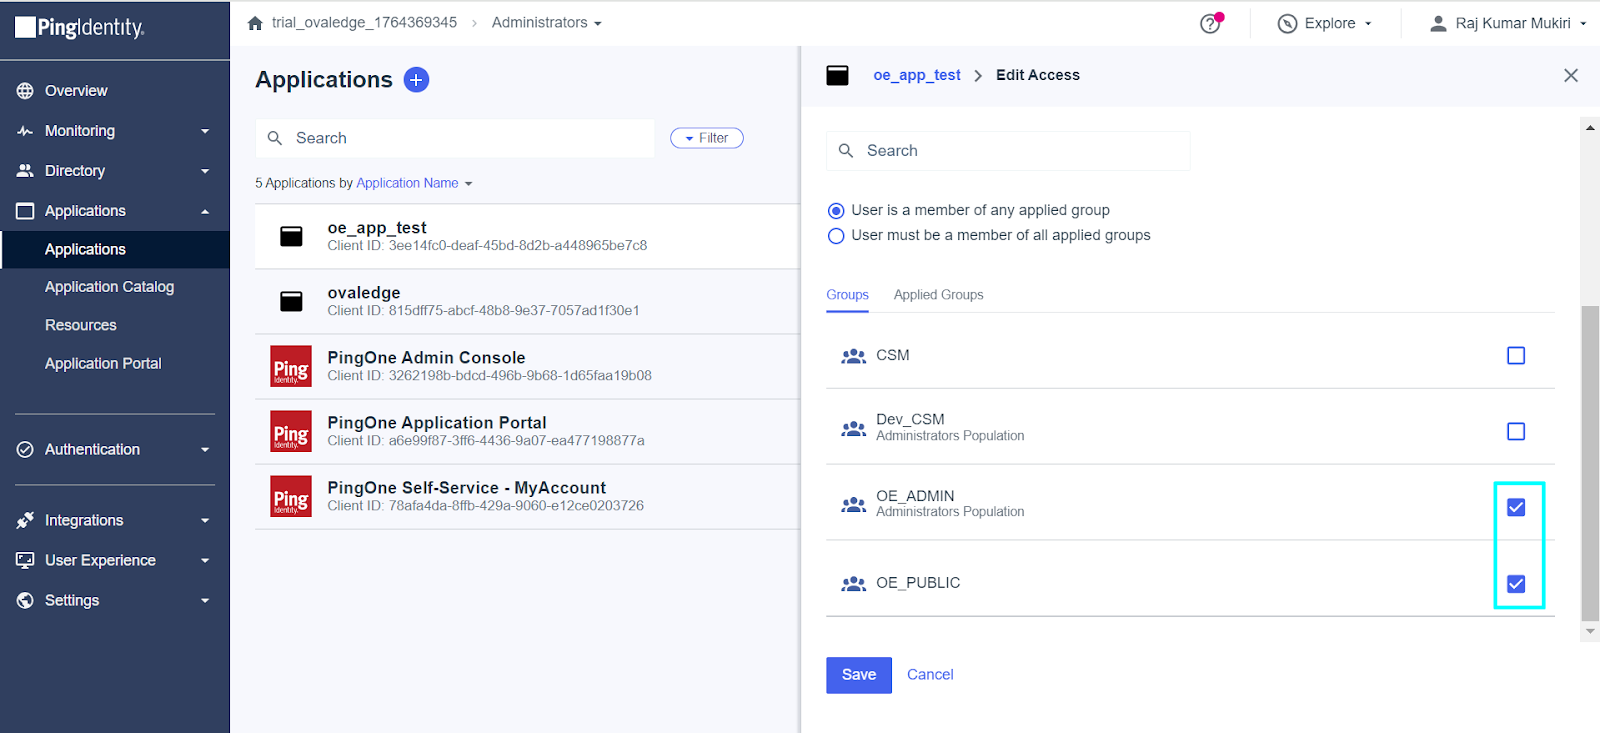
- Enable the checkbox for the groups that need access to the application.
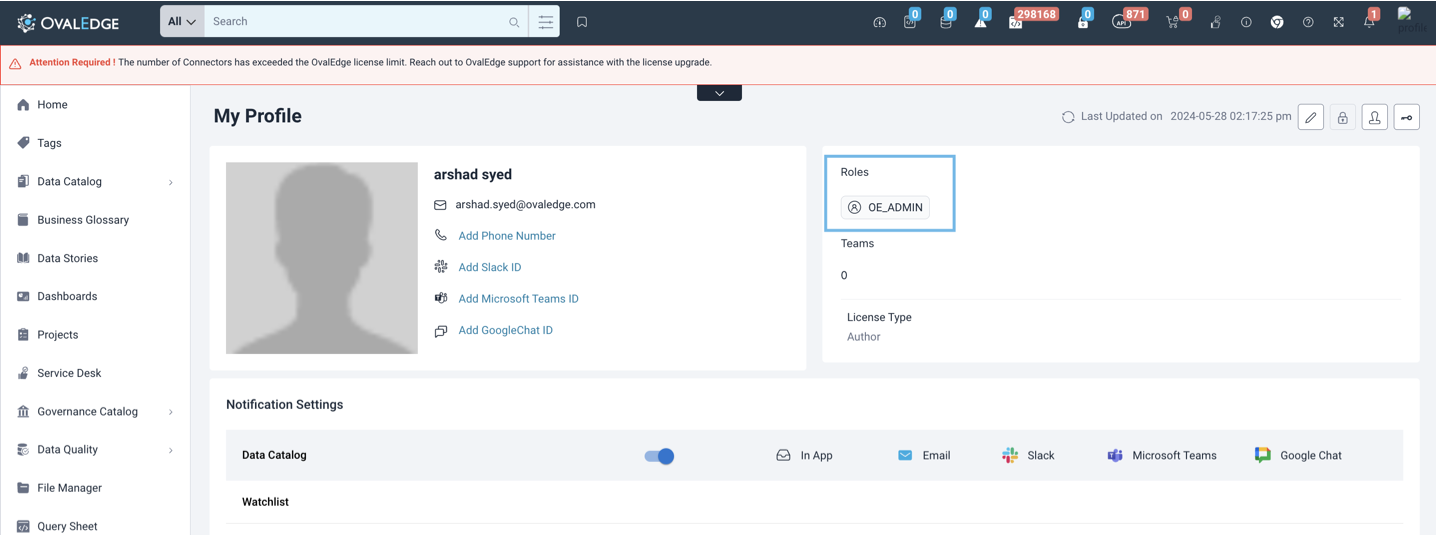
- Now, finally, log out of the OvalEdge application and log in again. You will see the OE_ADMIN role.
Copyright © 2024, OvalEdge LLC, Peachtree Corners, GA, USA.