To create a new domain
1. Expand the Administration tab in the object browser and Select Security and select the Domains tab from the security menu bar.
2. Click the +Add Domain icon to add a new domain, a dialogue box opens for user input. Enter the domain name, domain description, and select the default Steward, and Reviewer from the drop-down list and then click Save to save the domain name and return to the domain security page. Select the Auxiliary Domain checkbox (If required) to create an auxiliary domain. 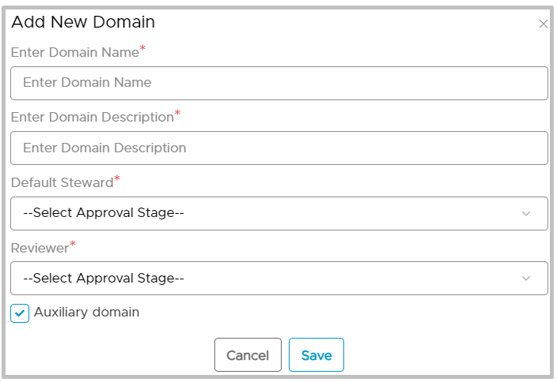
Auxiliary Domain
At the time of creating a new domain, an admin user is provided with the option to create an Auxiliary domain. Here the primary domain will have primary terms and similarly, an auxiliary domain will have one or many auxiliary terms . At the time of associating the terms to any of the objects(Schema, Database, Table, Table Column, File, File Columns), the primary term can be mapped to the objects that belong to the primary domain and whereas one or more auxiliary terms can be assigned to the auxiliary domain. Auxiliary domains can be created before the organization defines any primary term. The auxiliary domain does not share the same associations as the primary domain.

Configure Classification
To configure a data classification for each domain,
- Go to Administration>Security.
- Select the Domains tab.
- Choose a single domain.
- Click the 9-dots and select the Configure Classification option.

A page to configure classification for the selected domain is displayed. - Enter the data classifications.
- Click on the Save button to create the data classifications for all the domains.
Configure Categories and Subcategories
To Create categories,
In Administration >>Security, select the Domains tab, choose a single domain and click the nine dots icon and select Configure categories. A pop-up window opens to enter the domain categories.
Click "Add New Category" to add a new category.
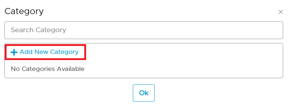

Example: Training
Additionally, click the attachement sign next to each category.
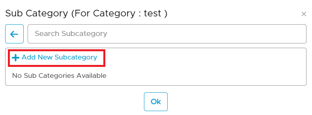
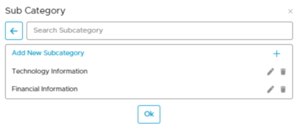
Similarly we follow the same steps for Sub category as well as shown below:
A pop up displays to add a new sub category.

Manage Category level responsibilities
To manage the responsibilities at a domain category level, go to Administration >> Security, select the Domains tab, choose a single domain and click nine dots and select Configure categories. Choose the category to configure user responsibilities. A pop up window appears to enter the optional steward and reviewer for the selected category.
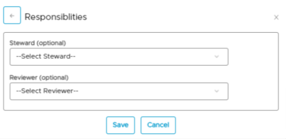 Select the steward and reviewer from the drop-down list.
Configure Data Association Preferences
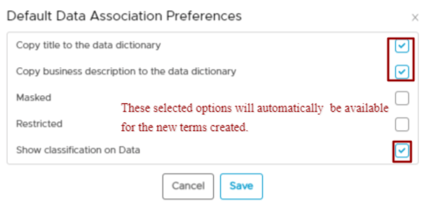
Data association preferences are the details that are added to a business term. Before creating a term, users should select and configure the default data association preferences for each Domain. The selected preferences are automatically chosen while creating domain terms.
Go to Administration >> Security, select the Domains tab, choose a single domain and click nine dots and select Configure default data association preferences. Click the checkbox to make the selections automatically chosen for each term created under that domain. Click Save to add the default selections.
See this article Business Glossary Security to know more about the roles and permissions of a Domain.
Rules while sharing Domain access
- When you give domain access to a user role, the users in that role can see all the business glossary terms in that domain.
- When similar data objects in a domain are grouped through a DAG Tag, then the DAG TAG owner and steward will manage and control the access approval on those data objects.
- To access the data objects that belong to a DAG tag, a user role must have minimum Metadata Read permissions. To access its data the user role must have a minimum Data Preview permission.
To delete the domain
Expand the Administration tab in the object browser and Select Security, select the Domains tab from the security menu bar.
Select a Domain name and click the Delete icon to Delete domain.
A pop-up dialogue box asking for user permission to delete the domain is displayed. Select Delete to remove the domain.