The API services act as a point of contact between the source system (OvalEdge Application) and the user system (Client Application) to perform various actions such as adding users, setting up connections, creating domains/terms/tags, associating those terms with objects, creating lineage, analyzing the impact, etc.

Example: Suppose a user from the Client application wants to create a new user in the OvalEdge application using the “Add User API.” In that case, the user can create a form with user-defined fields like Email, License Type, First Name, Last Name, User ID, etc. After entering the required field details and submitting the form, the Client application will interact with the API and communicate the details with the OvalEdge application to add a new user. Once a new user is added in OvalEdge, a successful message is sent to the Client application via API.
To access the OvalEdge API, it is necessary to generate the authorization token with User Credential.
This document provides a step-by-step guide to accessing OvalEdge API.
It includes two steps.
- Downloading API Credentials
- Generating Authorization Token
Steps to Download API Credentials
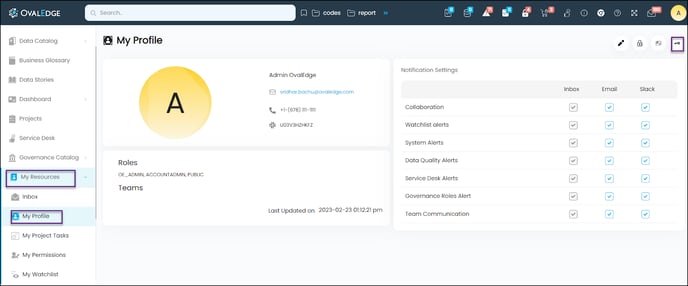
- To Download API Credentials, navigate to My Resources | My Profile in the OvalEdge application and click on the Download API Credentials icon. The Download User Credentials pop-up window will be displayed.
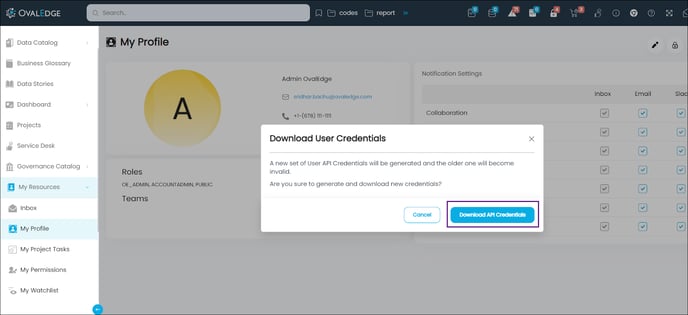
- Click on the Download API Credentials button on the Download User Credentials pop-up window.
- The credentials file will be downloaded in the downloads folder. It will be used in the Postman tool to generate the Authorization Token.
Steps to Generate Authorization Token
Users can generate the authorization token in the Postman tool by following the below steps:
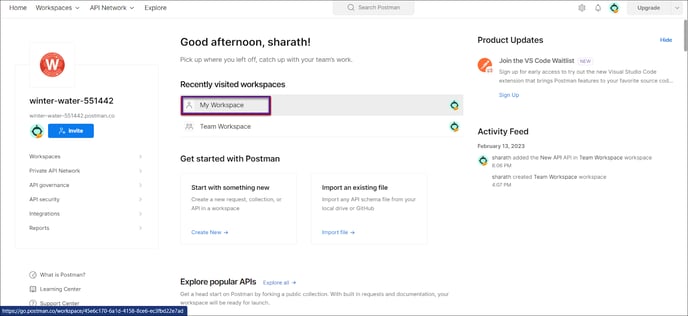
- Open the Postman tool and navigate to My Workspaces.
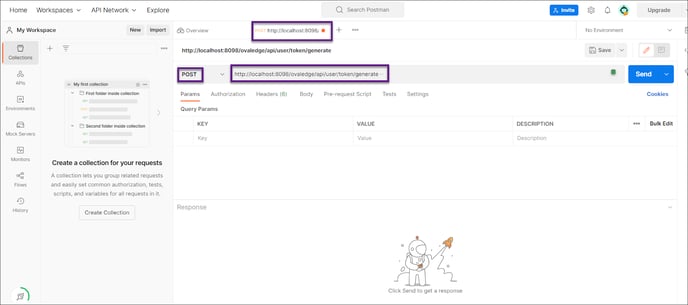
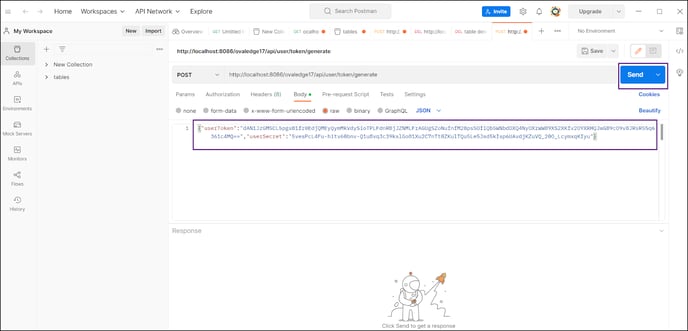
- Click on the + icon available on the top panel. An untitled request page will open, where users can select the request type (POST) and enter the application URL followed by the user token. (Example: Application URL/User Token, i.e: https://qa2.ovaledge.net/api/user/token/generate)
Note: The user token details to be used by the user is: api/user/token/generate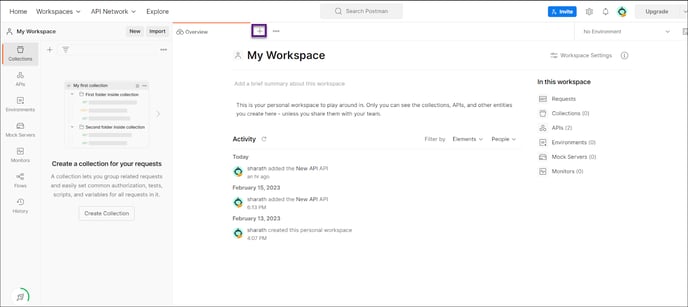
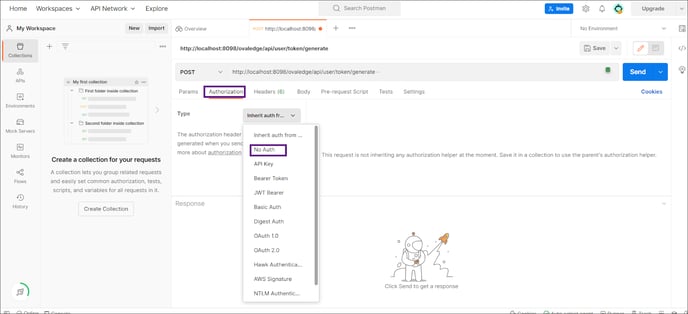
- Navigate to the Authentication tab, and select the type no authentication from the drop-down list.
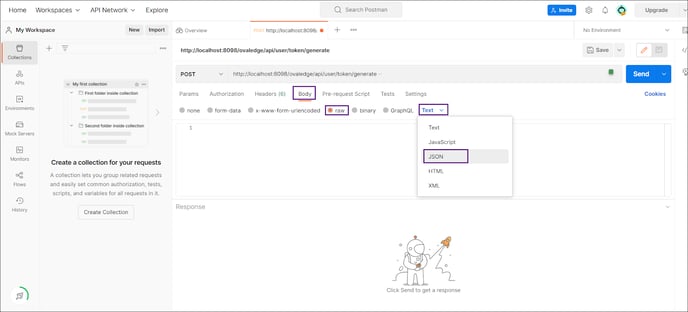
- Navigate to the body tab, select the raw option, and select the test JSON from the drop-down list.
- Now open the downloaded user credentials in a notepad, copy the credentials, and paste it into the text box on the body tab as mentioned in the below screenshot. Then, click on the send button.
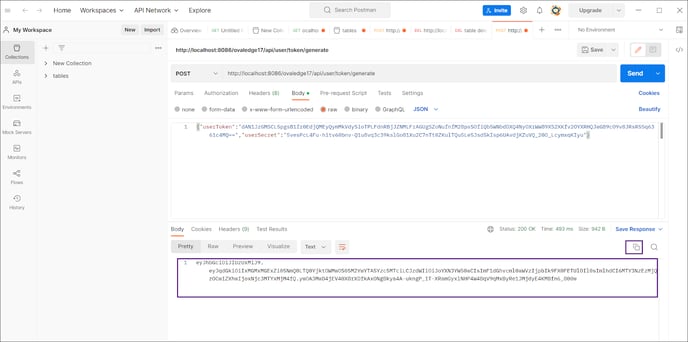
- The authorization token will be generated as mentioned in the below screenshot. Copy the URL and save it in a notepad.
Accessing OvalEdge APIs
Users must follow the below steps to access OvalEdge APIs.
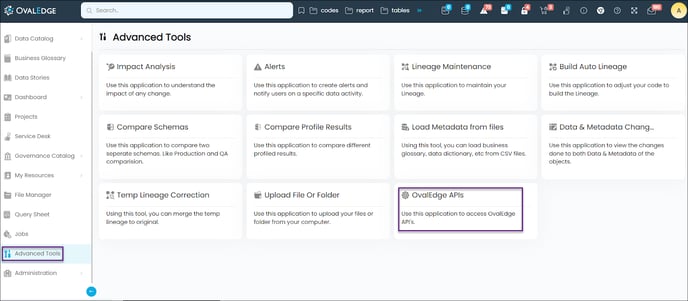
- Navigate to the OvalEdge application | Advanced Tools | OvalEdge APIs. The list of APIs available in the application will be displayed.
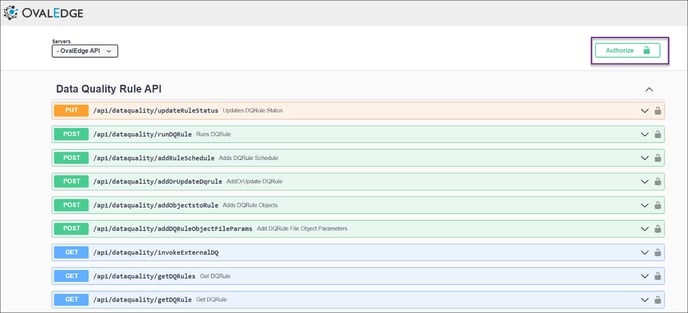
- Click on the Authorize button. The Available authorizations pop-up will be displayed to enter the required details.
- On the Available authorizations pop-up window, enter the copied Authorization token against the value field of the Bearer (apiKey). Then, click on the Authorize button.
Note: In the "Value" field, enter "jwt" followed by a space and then provide the "token". Example: jwt jhgjoveOijvudfsdgjkdasj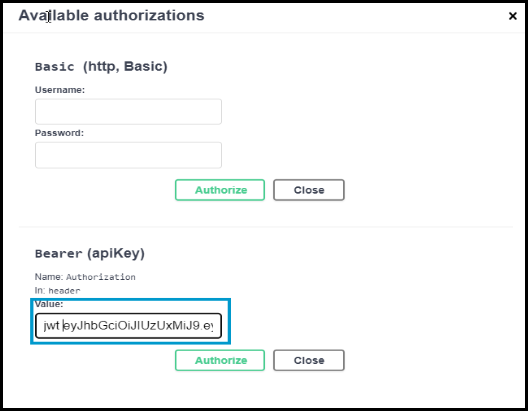
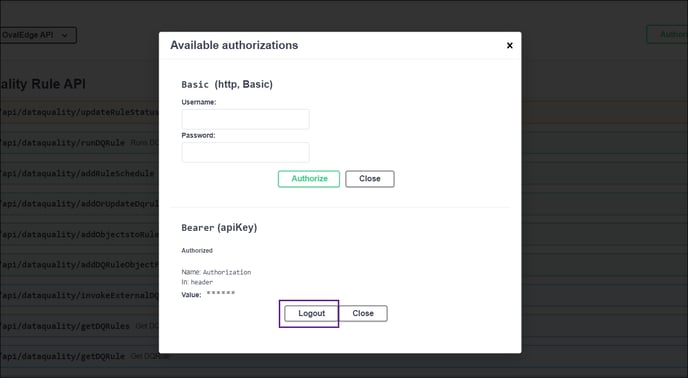
- Once the authorization is successful, the Authorize button will be replaced with the Logout button. And, the user will be able to access the API by providing the necessary details to achieve the result.
Permission required to access the APIs
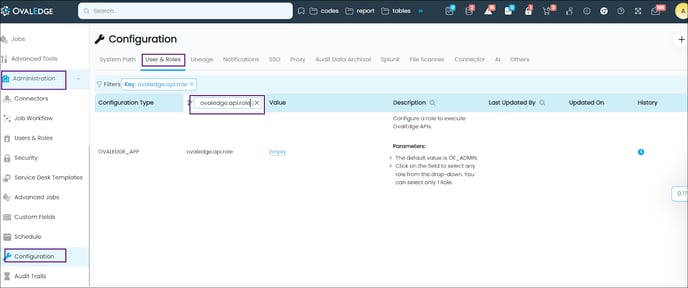
Below is the settings required to be done by the users to access the APIs if the APIs need to be restricted to the Role level. All users can access the APIs if the value is empty for ovaledge.api.role configuration.
- Navigate to the Administration | Configuration | User’s & Roles.
- Search for the configuration ovaledge.api.role.
- Enter the roles name in the value column, if you want the APIs to be accessed by specified users, else make it empty.
