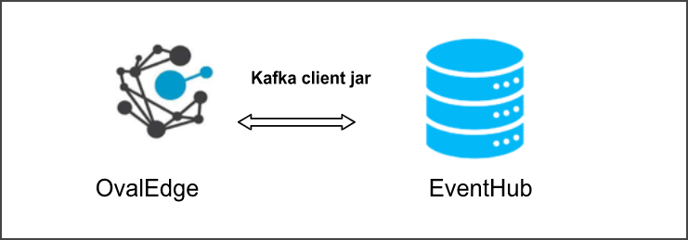
EventHub is one type of message broker available on Azure. It is useful for ingesting high volumes of messages reliably. It provides support for crawling streams and profiling of messages.
Connector Capabilities
Technical Specification
A technical specification for the Amazon Redshift connector contains information about the Crawler, Profiler, and Query Execution and also information about supported objects, supported data types, and user permissions.
Crawler
|
Supported Objects Description |
|
|
Tables |
Topics in EventHub will be represented as tables |
|
Table columns |
Messages in EventHub will be represented as Columns, and they will be crawled while Sample profiling. |
Profiling
| Supported Objects Description | |
|
Table Profiling |
Row count, Columns count, View sample data |
|
Views Profiling |
Not Supported |
|
Column Profiling |
Min, Max, Null count, distinct, top 50 values |
|
Full Profiling |
Not Supported |
|
Sample Profiling |
Supported |
Note: Lineage and Query are not supported.
Connection Details
To use the EventHub connector, the details specified in the following section should be available.
Prerequisites
The APIs/ drivers used by the connector are given below:
|
Item List |
Versions |
Description |
|---|---|---|
|
Driver(s) |
- |
No external driver Required |
|
Internal jars |
5.3.0 |
org.apache.kafka.clients |
|
Internal jars |
5.3.0 |
io.confluent.kafka-schema-registry-client |
|
Service Account User |
- |
Service Account user with Read Privileges |
User Permission
- By default, the service account provided for the connector will be used for any query operations. If the service account with write privileges, then Insert/Update/Delete queries can be executed.
- The minimum privileges required are:
|
Operation |
Minimum Access Permission For Service Account |
|---|---|
|
Connection Validation |
SELECT, and USAGE |
|
Crawling |
Select, Usage, Reference, and Execution |
|
Profiling |
No permission is required to profile |
Note: Navigate to Configuration > Users & Roles for roles and permission.
Add Connection
To connect to the EventHub using the OvalEdge application, complete the following steps.
- Login to the OvalEdge application
- Navigate to Administration > Connectors module.
- To add a new connection, click on the +AddNewConnector icon. A manage connection pop-up is displayed to select a connector.
- Click on the +AddNewConnector icon, and the Manage Connection with Search Connector pop-up window is displayed. Select the connection type as EventHub. The Manage Connection with EventHub specific details pop-up window is displayed.
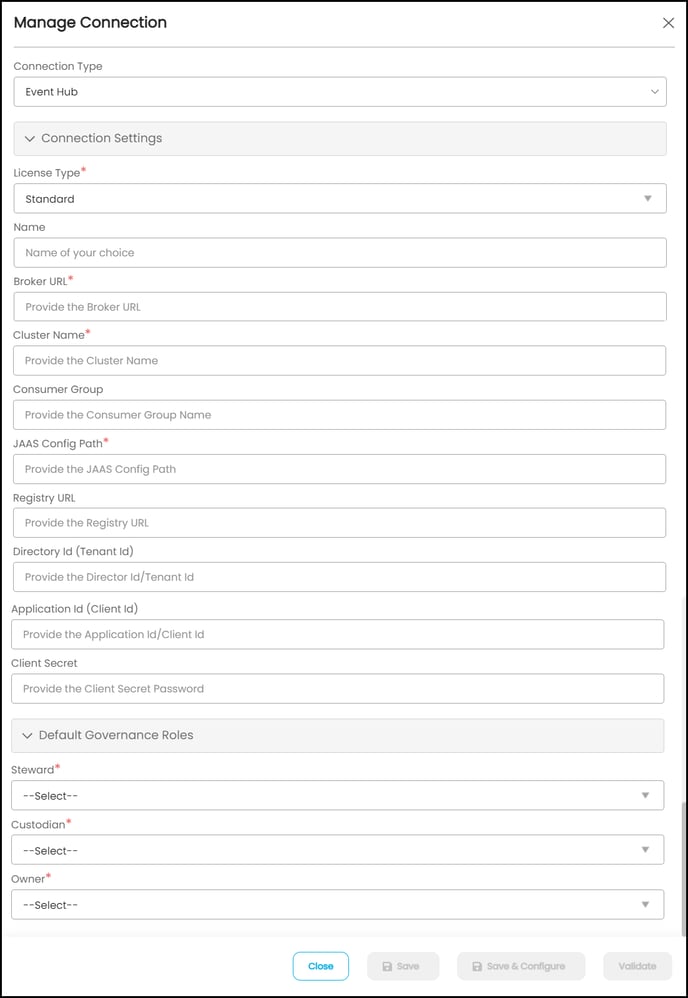
5. The following are the field attributes required for the connection.
|
Field Name |
Mandatory/Optional |
Description |
|---|---|---|
|
Connection Type |
Mandatory |
Select Amazon Redshift connector. By default, the selected connection type is displayed as Amazon Redshift. If required, the connection type can be changed, and depending on the connector selected, fields are displayed accordingly. |
|
License Type |
Mandatory |
By default License type is Auto Lineage. License Type: In a license type, the permissions are specified based on the customer's requirements. The user has the option to select the license type as Standard or Auto Lineage. The connector license is categorized into (i) Standard: The standard connectors may not have Auto Lineage functionality. It will not build the lineage for the selected database. (ii) Auto Lineage: Additionally, auto lineage connectors have Auto Lineage functionality. It will build the lineage for the selected database. See, License Types for more information. |
|
Connection Name |
Mandatory |
Select a Connection name for the EventHub database. The name that you specify is a reference name to identify your EventHub database connection in OvalEdge. Example: EventHub Connection1 |
|
Broken URL* |
Mandatory |
Database instance URL (on-premises/cloud-based) |
|
Cluster Name * |
Mandatory |
(Default) |
|
Consumer Group |
Optional |
Provide the Consumer Group |
|
JAAS Config Path* |
Mandatory |
Provide the path for EventHub secret key for validation |
|
Registry URL |
Optional |
Enter the Registry URL |
|
Directory ID (Tenant ID) |
Optional |
It is optional to provide the Directory Id |
|
Application ID (Client ID) |
Optional |
It is optional to provide the Directory Id |
|
Client Secret |
Optional |
It is optional to enter the Client Secret |
|
Default Governance Roles |
Mandatory |
From the dropdown list, select Stewards, Custodian, and Owner. |
6. Once after entering the connection details in the required fields,
7. Click on the Save button or Save & Configure to establish and configure the connection settings. When you click the Save & Configure button, the Connection Settings pop-up window is displayed, where you can configure the connection settings for the selected Connector.
Note: The Save & Configure button is displayed only for the Connectors for which the settings configuration is required.
8. click on the Validate button the entered connection details are validated.
Note: It is up to the user's choice, you can save the connections details first, or you can validate the connection and then save it.
Error Validation Details
The following are the possible error messages encountered during the validation.
|
Sl.No |
Error Messages |
Description |
|
1 |
/volume/OE_DATA/Connections/EventHub/con-config(No Such File or Directory) |
Incorrect JAAS path |
|
2 |
Invalid credentials passed! |
Incorrect password |
Connection Settings
Once connectivity is established, additional configurations for crawling and profiling can be specified:
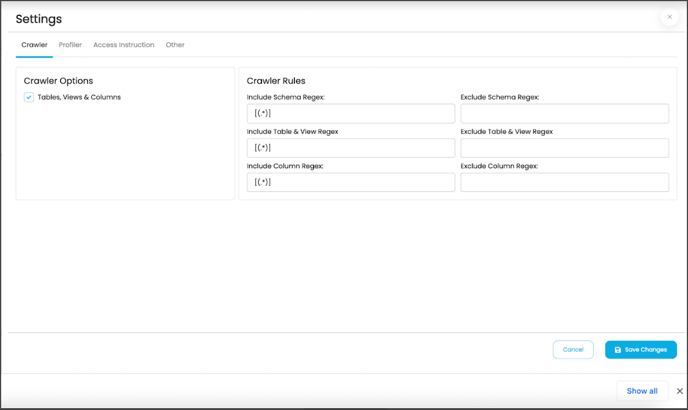
Crawler
Crawler has various settings tabs for crawling and profiling options. The crawler options are available for all the connections. Based on the connection selected, the options will differ. You need to provide the mandatory options for the crawler setting one of them is mandatory.
|
Crawler options |
Tables and Columns: This crawling will discover the tables and Columns and bring them into OvalEdge. This is the Default option for crawling. |
|
Crawler Rule |
In the Crawler Rules, when setting up the regex rules, the user will be able to write rules that will either include and/or exclude schema, tables, views, columns, procedures, and functions that start with, end with, or have middle characters as defined in the rule. |
Profiler
Profiling a data source also helps identify relationships between the tables at the entity level and patterns between them. Many attributes can be specified in the profile settings. Once the setting for profiling has been configured, go back to the Crawler screen and click “Crawl/Profile” to begin the profiling.
Note: Profiling will be successful if “All” and “Current Day” are matched.
The attributes are as follows,
|
Parameters |
Description |
|---|---|
|
Order |
Order number is a sequence in which the profiling is done. |
|
Day |
The day of a week in which profiling is set to run. |
|
Start/End Time |
The start and end time which profiling is set to perform. |
|
Number of Threads |
A thread is a process where a query is executed on a database to do single or multiple tasks. The number of threads determines the number of parallel queries that are executed on the data source. |
|
Profile Type |
There are four main types of data profiling.
|
|
Row Count Constraint |
The Row Count Constraint option is applicable only when the Profile Type is selected as Auto.
|
|
Row Count Limit |
Enter the maximum number of rows that should be considered for profiling. |
|
Sample Data Count |
Enter the total number of rows to see within the table data page in the Catalog. |
|
Sample Profile Size |
Select this option for considering the total number of rows in profiling. |
|
Query Timeout |
Enter the number of seconds for the query to run on the remote database before it times out. |
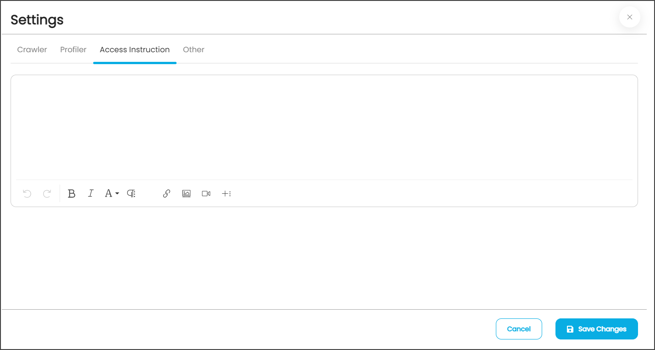
Access Instruction
It allows the admin user to write the instructions and guide the business user to crawl the data source. Instructions are nothing, but some related information about the data source connection can be provided here. It could have the information resources like links, Images, or Videos that help business users of that particular data source connection.
For example: When an admin user saves the access instructions and crawls the schema, the saved instruction will appear in the data catalog after clicking on the schema. It's just providing info or guidelines on a specific schema.
- You can provide the instruction in Connectors > Setting page
- Click on the Access Instruction tab
- Enter the instructions
- Click the Save Changes button. Once you add the access instruction for a specific connection in the crawler settings, it will appear in the connection hierarchy like a database.
Other
When you navigate to the Others tab, the Send Metadata Changes Notifications to and Context URL sections are displayed.
Send Metadata Notification to:
- Select whether the notifications for the Data Owner and Data Steward under the specific Roles need to be sent or not.
- Select the desired role from the Roles dropdown menu and click on the Save Changes button. The notifications will be successfully sent to select Data Owner and Data Steward.
Context URL:
Enter the browser URL for the selected data source.
Example: https://azure.microsoft.com/en-in/services/event-hubs/#overview is entered in for the tableau connection.
Note: To add multiple URLs, click on the + Add New URL option. The new textbox to provide the URL details is displayed in the Context URL section.