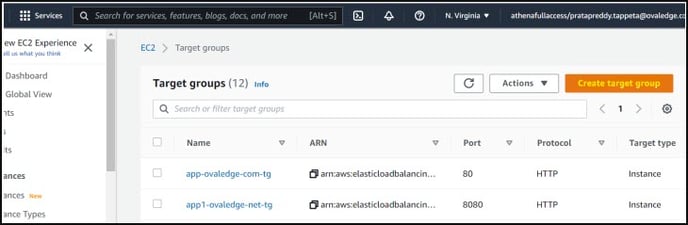
Creating Target Group
To create a Target Group and Register them with target instances, complete the following steps:
- Go to Target Groups → Create Target Group.
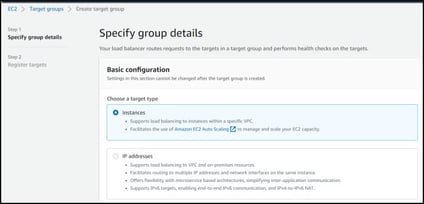
- Select the below-required details Choose a target type - Instance.
- Target Group Name - Give a Name to the target group Protocol and Port - Select the Protocol and Port VPC - Select the VPC.
- Click Next to register the targets to the created Target Group.
- Select the Target Group where you want to register the targets and click on Targets.
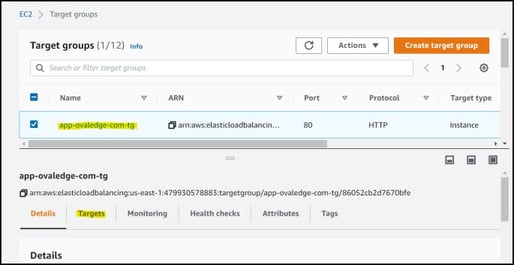
- Click on Register Targets.
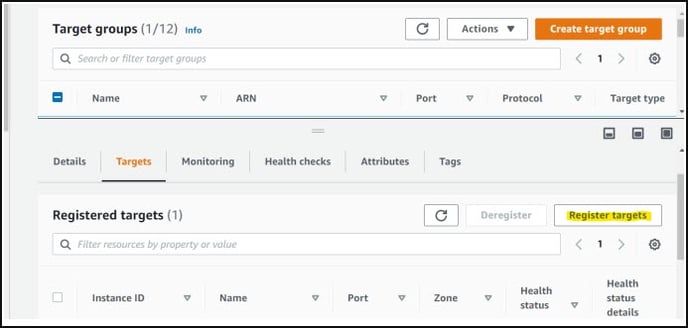
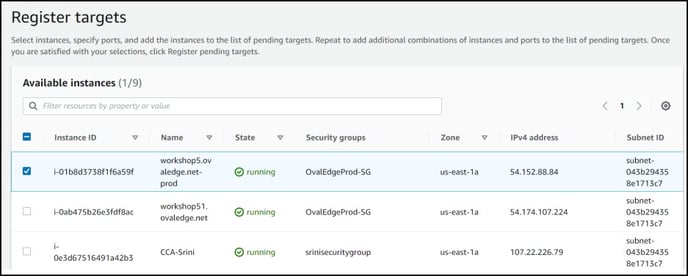
- Select the instance from the list of instances and Click on Register.
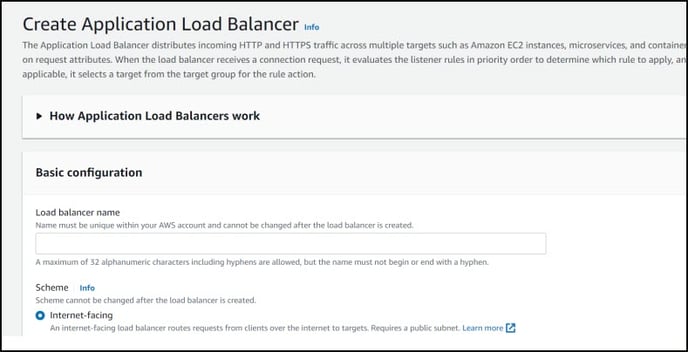
Creating Load Balancer
To create a Load Balancer and add the target groups for the load balancer, complete the following steps:
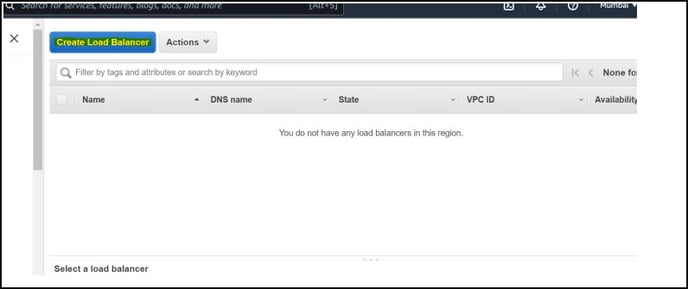
- Go to Load Balancer→ Click on Create Load Balancer.
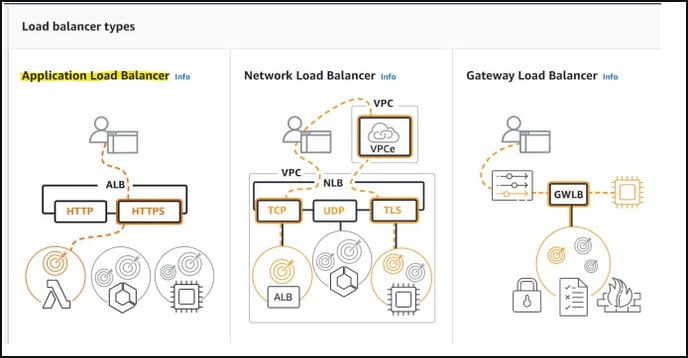
- Select Application Load Balancer And click on create.
- Give the below-required details and click on Create.
- Load BalancerName - Name of Load BalancerScheme - Internet-facing or Internal.
- IP address type - IPv4
- VPC - Select the VPC where you want to use the Load BalancerAZ’s - Select the AZ where you want to use this Load Balancer For Security Group - Select the Security Group.
- Listen - Add a listener(443 is recommended as we use https traffic mostly)
- Target Groups - Select the target group where the target instances are registered and click on create the Load Balancer to create the Load balancer.
4. Once the Load Balancer Is created, add the certificates and edit the rules as per requirement.
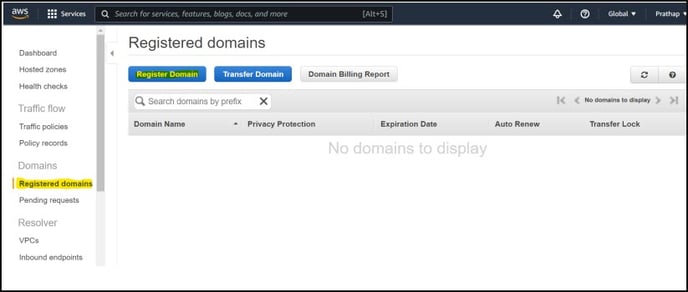
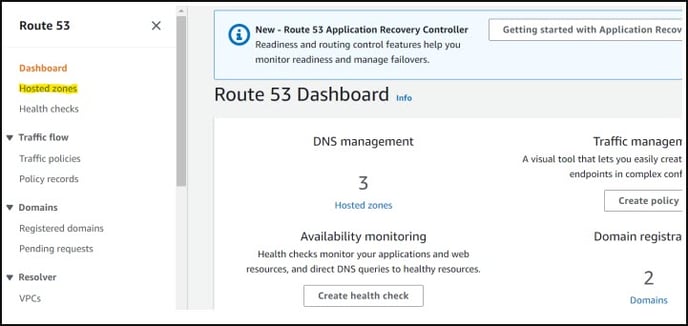
Registering a Domain with Route53
In AWS we use Route53 service to buy domains, as shown in the below screenshots.
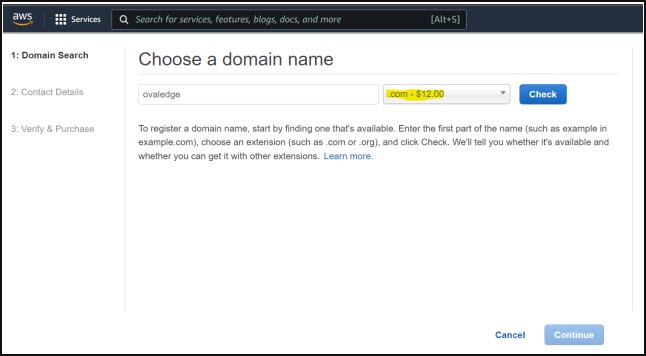
- Go to Route53 → Click on Register.
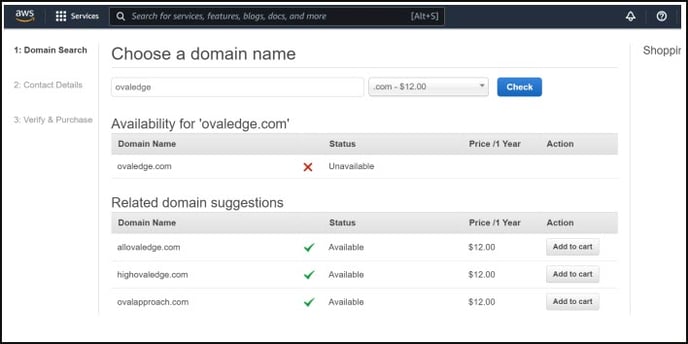
- Enter the domain of your choice and click on check to check the availability of the domain.
- Choose the available domain and click on continue to proceed with the payment options.
- Use the domain ovaledge.com to map it to the resource where the application is being hosted.
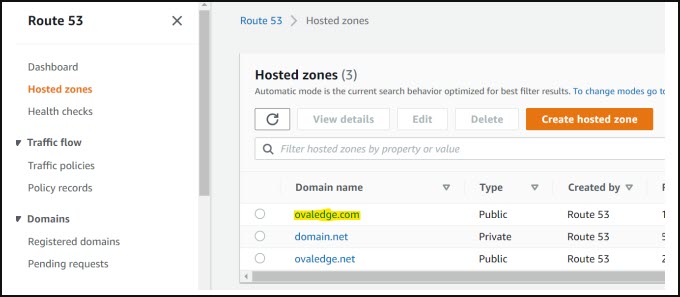
Mapping a Domain Record to Resource in AWS
- To map a resource to a domain, create the record in the hosted zone.
- Go to Route53 → Hosted Zones.
- Select the domain where you want to create a record.
- Click on create record or select the existing record if you want to add a resource to the existing record and click edit record.

- After clicking on the Edit record, add the Record type and Value fields. Record Type - Select A record as we are routing traffic to ipv4 address or ELB Value - Give the ipv4 address or ELB.
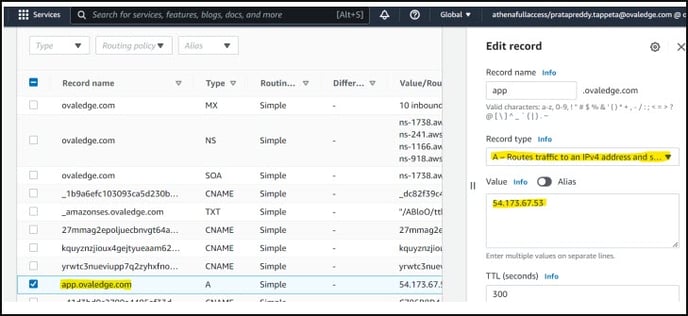
- When the DNS name is entered in the browser, it gets routed to the endpoint or ipv4 that we give in the value field.
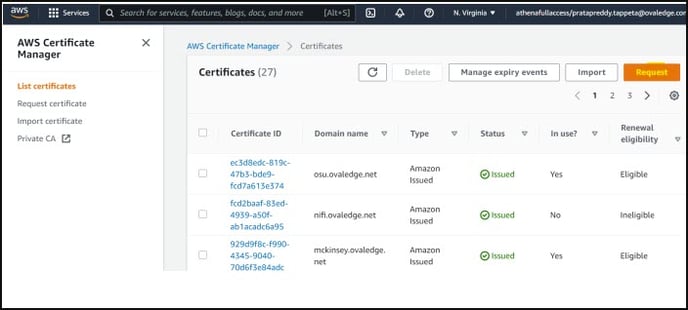
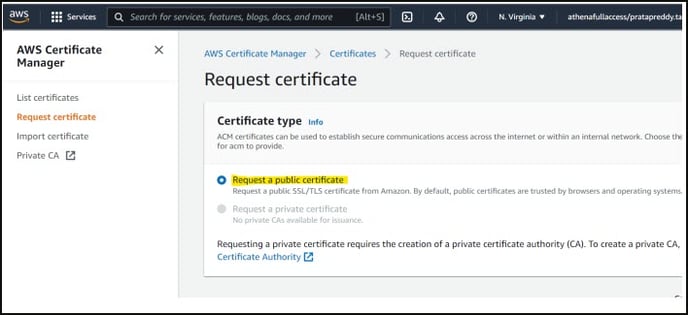
Creating a Certificate from AWS ACM
- Go to ACM → Click on Request.
- Select Request a Public Certificate and click on Next.
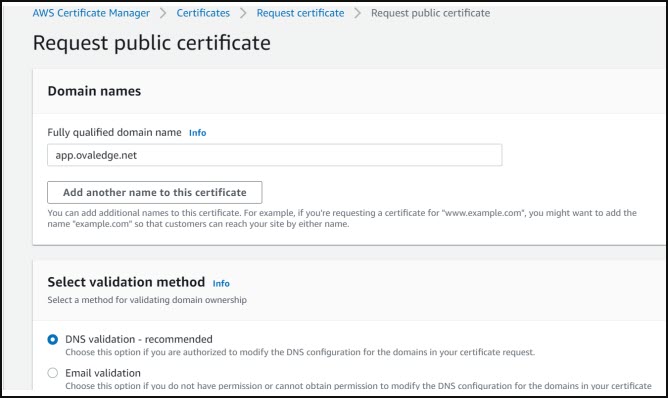
- Give the below-required details and click on Request.
- FQDN - Give the FQDN for which you want to generate the certificate.
- DNS Validation - Check the DNS validation.
- Add a tag name and click on Request to create a certificate.
- Once the Domain and Certificate are created, map it to the ELB to make use of DNS and certificate.
Adding the certificate to the ELB
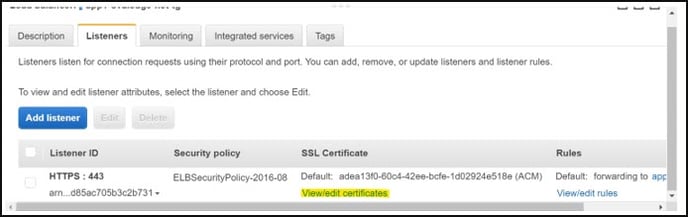
- Go to Load balancers, select the Load Balancer that you want to add certificates for, and click on Listeners.

- Click on view/edit certificates → Select the correct certificate that you want to map to this Load Balancer and click on Ok.
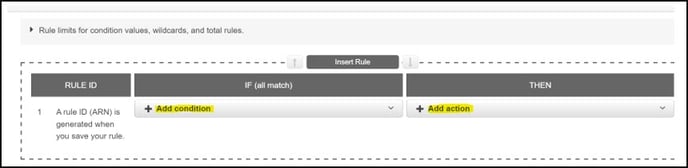
Routing the traffic to correct resources (Adding rules to ELB)
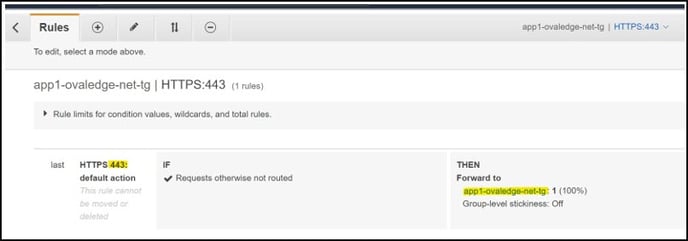
- Now select View/edit rules to edit the routing rules.
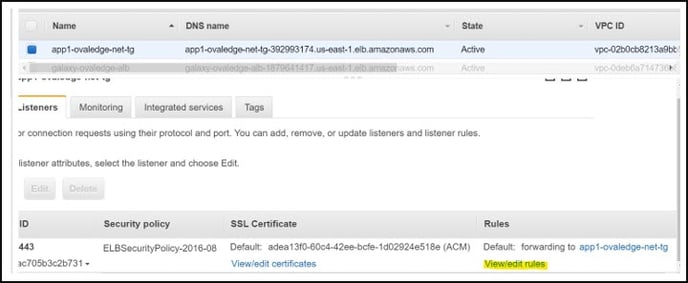
- As shown in the below screenshot, this elb accepts the traffic on 443 and forwards it to “app1-ovaledge-net-tg” target group. This target group may contain one or more instances running the same kind of application and listening on the same port registered to it.
- For Load Balancer to route traffic to other target groups, click on + icon → Insert rule.
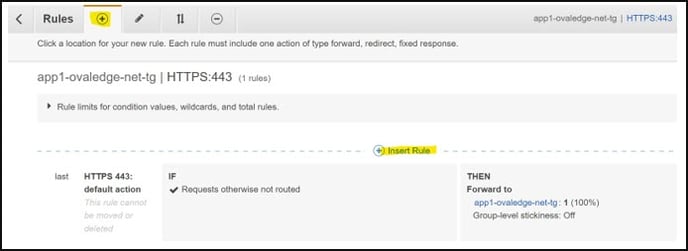
- Define the rule condition, i.e., add a Condition and an Action to carry out if the condition is matched and click on Save to save the condition.