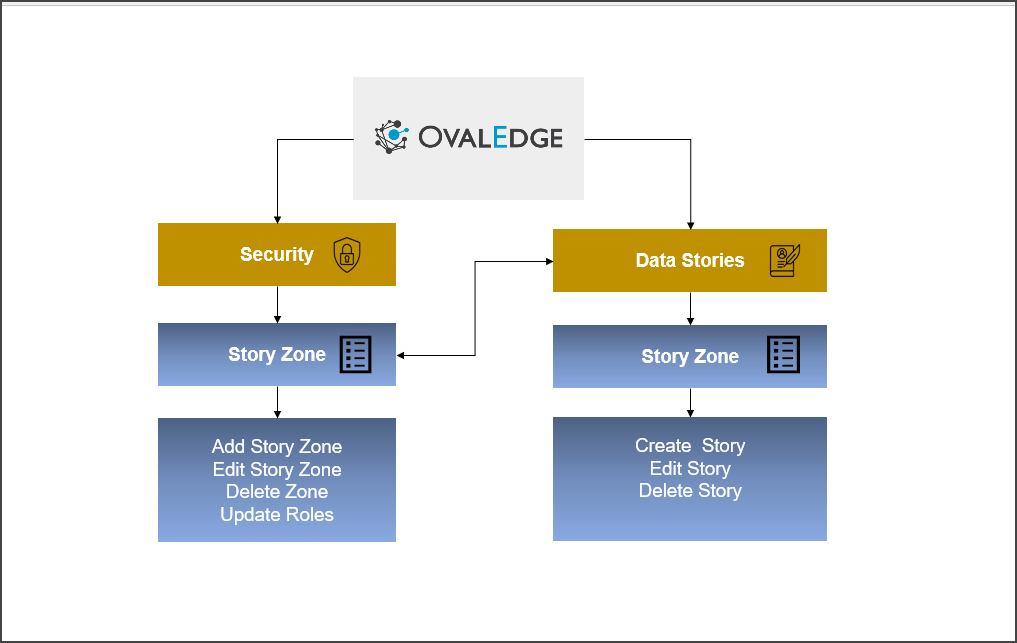
The data story feature in OvalEdge is like Wikipedia. It serves the purpose for you to create, modify, and organize business knowledge within OvalEdge. This makes all individually obtained knowledge neatly documented and available for data discovery and reuses within an organization.
In OvalEdge,
- When you create new content on this page, it is called a Data story.
- Each data story can be grouped under a Story Zone.
- Each Story zone can have one or more Parent data stories. Each parent story has single or multiple child stories. Data stories can be tagged to be organized further based on business needs.
Create a Story Zone
The story zone is first created in the Administration > Security module; once the story zone is successfully created, it is available in the Data Story module. You can select your story zone and create a data story.
To create a Story Zone,
- Navigate to the Administration >Security module.
- Select the Story Zone tab, as shown below.
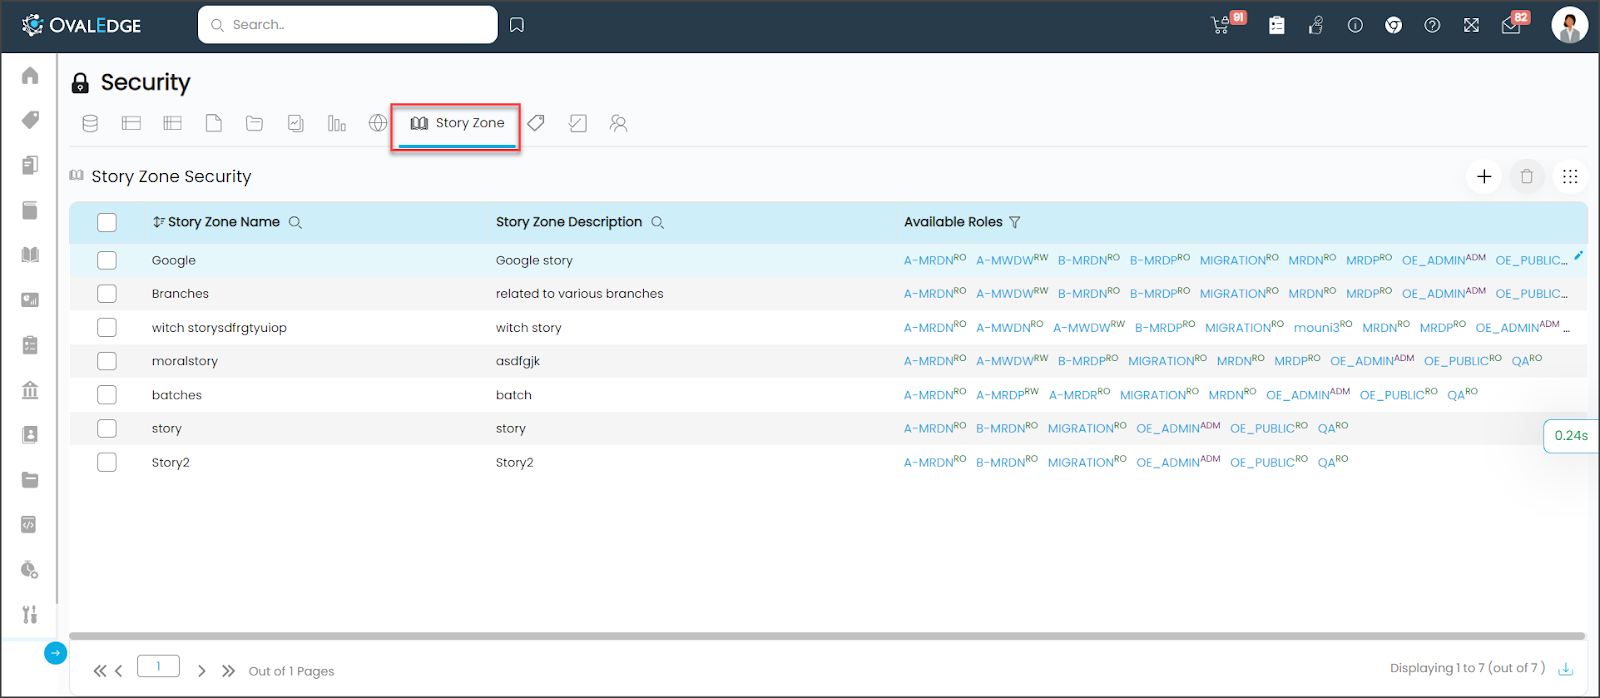
|
Fields |
Descriptions |
|---|---|
|
Story Zone Name |
Name of a Story Zone |
|
Description |
It describes a story zone |
|
Available Roles |
It displays the roles with metadata permission applied to the story zone |
- Click the plus + icon sign to add New Story.
- Enter the name of your choice with additional information in the description below and save.
- Click the Save button; the story zone created will reflect the data stories module.
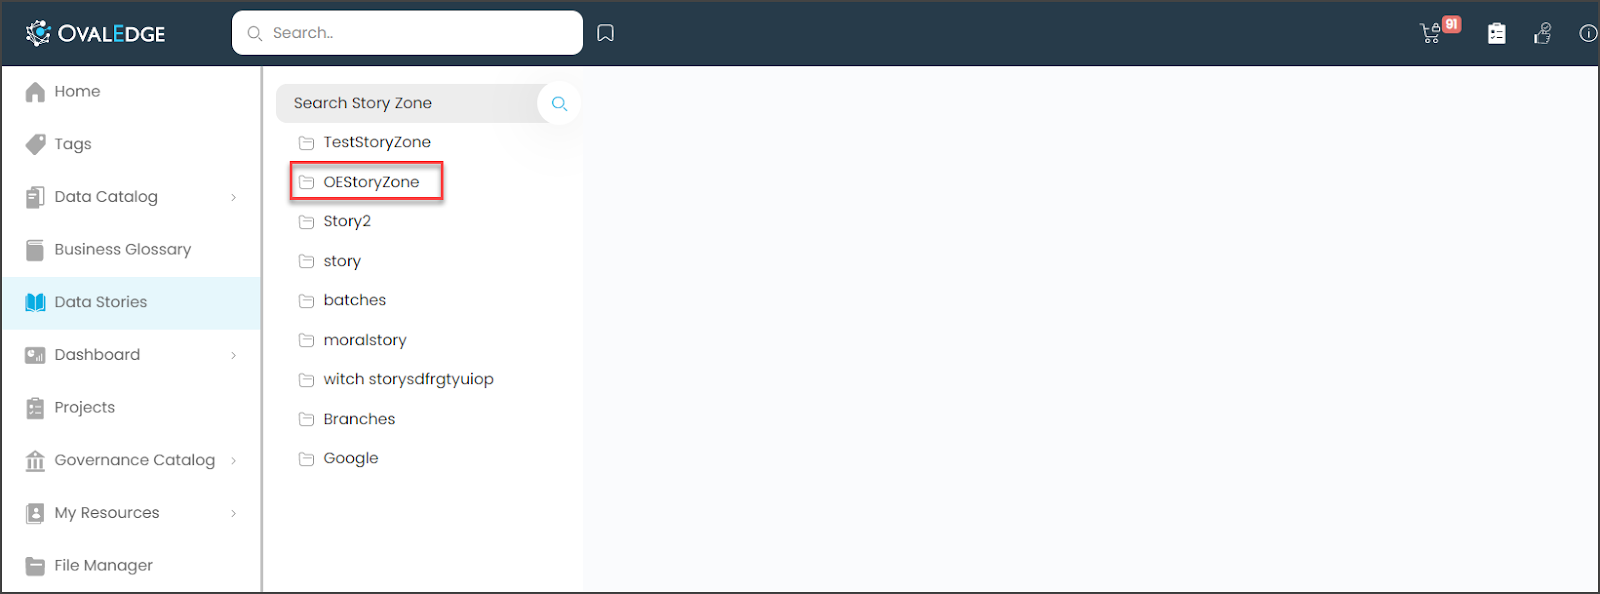
- Navigate to Data Stories, and select a story zone to see the list of all the parent and child data stories listed hierarchically
To delete a Story Zone
To Delete an existing story, select the Story Zone and click on the delete button. After confirmation, the selected story zone will be deleted.
Manage Permission and Roles
User roles can be set on each Data story in the security page to limit the editing permissions on its content, as shown below.
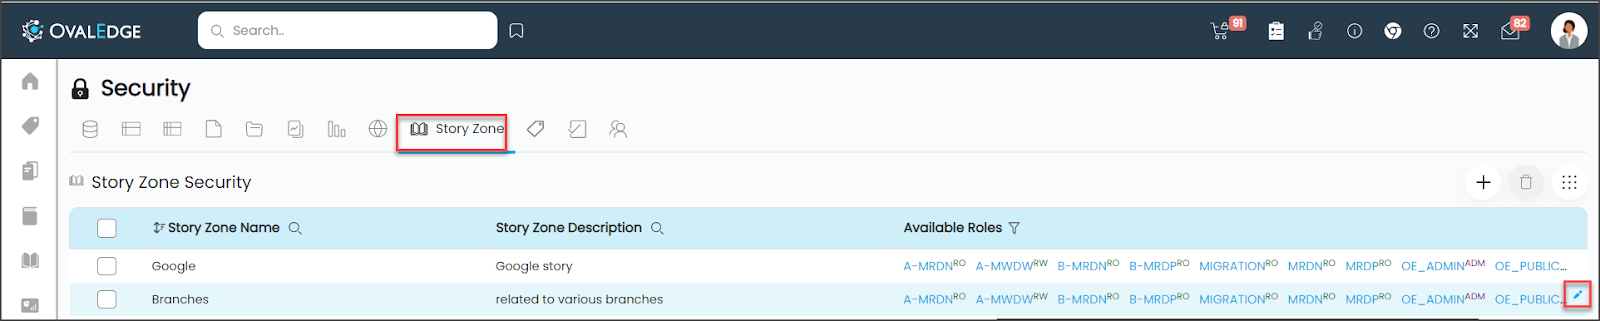
Click on the Edit icon and select the meta permissions that can be set or updated to the user.

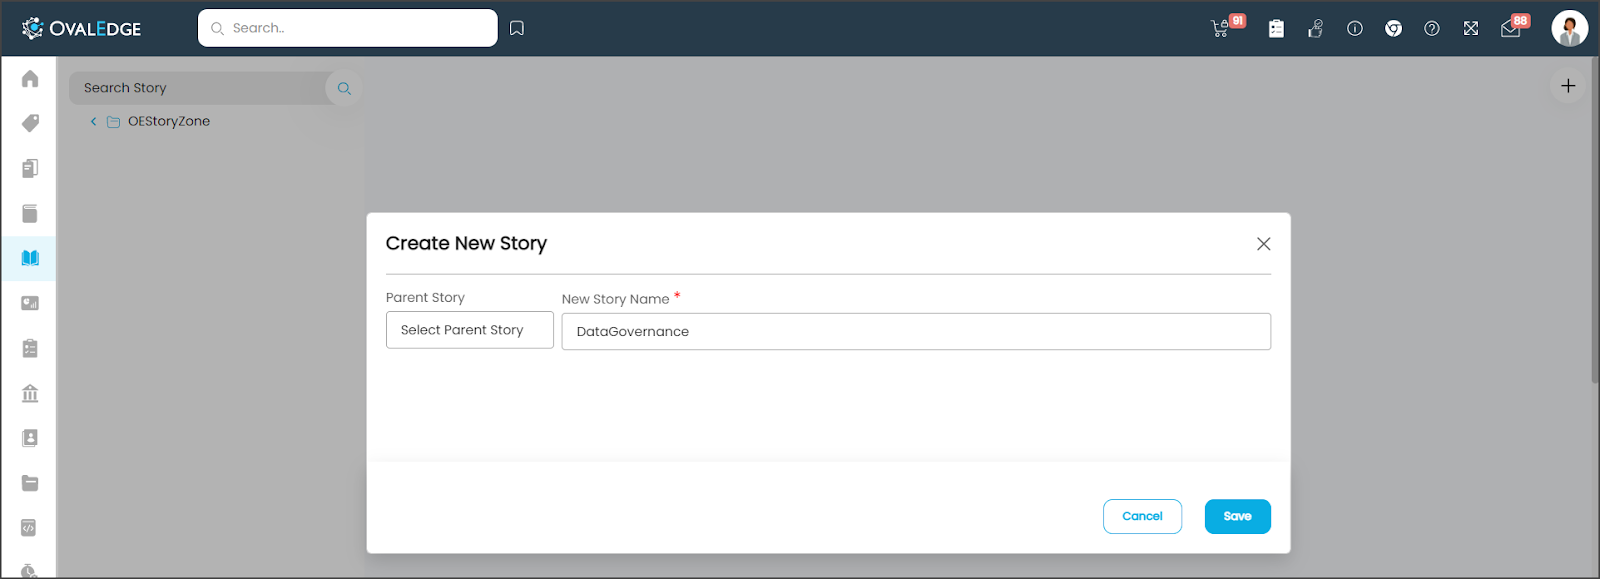
Create a parent data story
After creating a Story Zone,
- Select a story zone and click the + icon on the right of the screen as shown below
- Enter a new story name. Click OK.
- A new parent story gets created under the selected Story zone.

- Parent story content page: You can create, save, edit, add to project, tag, endorse, add to cart, and collaborate messages on the content page of a Parent story.
Note: You can use @ symbol notation to select the users in the collaboration tool and select the objects on the content page.
Associate data story to a project
To add datastory to a project:
- select the Parent Data Story name to add to the project
- Click on the project icon in the header bar. If the Parent Data Story is already added to the project, it displays the current default project; from the dropdown list, you can set the data story to another project.
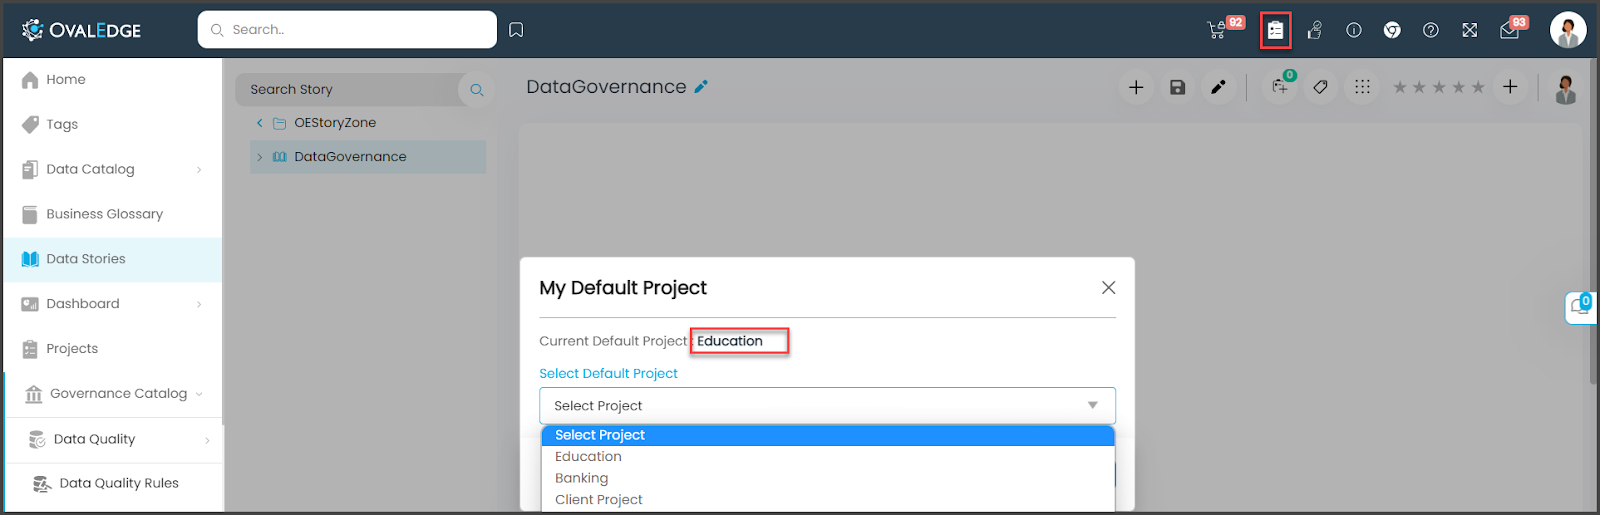
Add to Project icon:
When you click on the icon beside the Data Story name, the “Add to project” pop-up window is displayed, as shown below

- In Add to the project, the project selected as default is displayed in the Default Project field; if you want to edit the Default Project, click on the icon and change the default project name.
- Click the Edit icon in the Task Note textbox and enter notes specific to the project.
- Click the Add to Project button to save, and the selected Parent Story will be added to Default Project
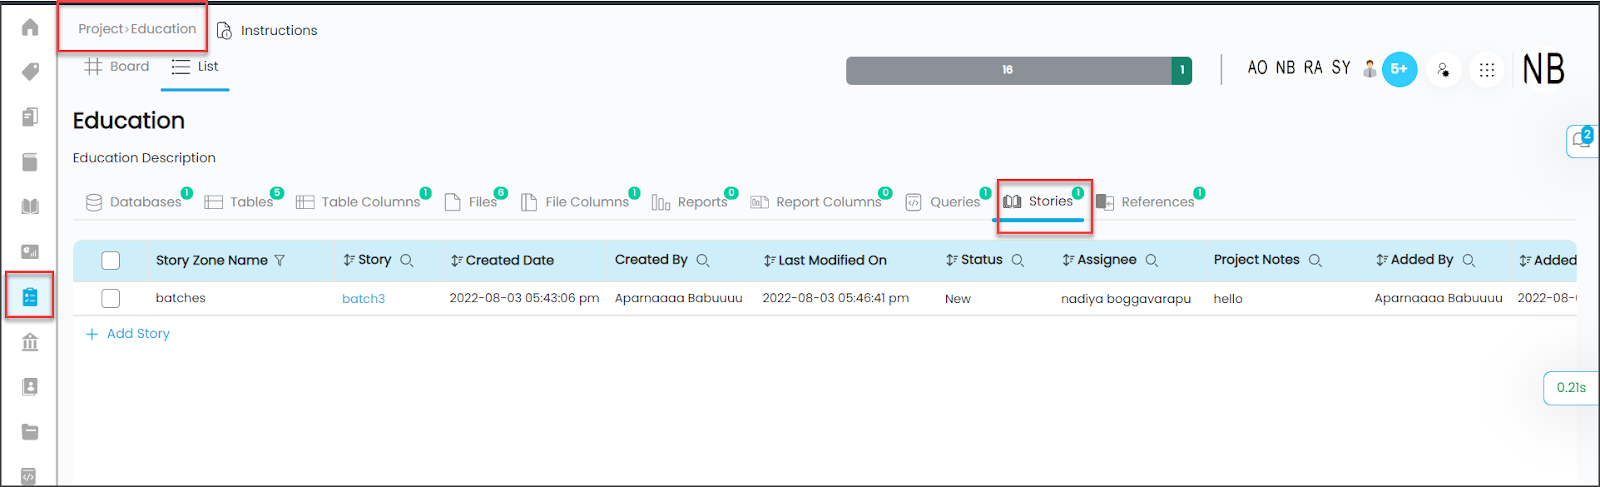
- To verify whether the selected Parent Data Story is added to the Default Project or not.
- Navigate to the Projects; the list of all existing projects is displayed in the data grid.
- In the projects data grid, click on the Project Name under which the parent data story is added. The selected project details page displays the Databases, Tables, Table Columns, Files, File Columns, Reports, Report Column, Queries, Stories, and References information.
- On the project details page, click on the Stories icon. The Parent Data Story added to the project is displayed as shown below.
Note: My Access Cart feature does not apply to Data stories. When a default project is set as “My Access cart,” it is disabled in the Data stories.
How to remove a parent data story added to the project?
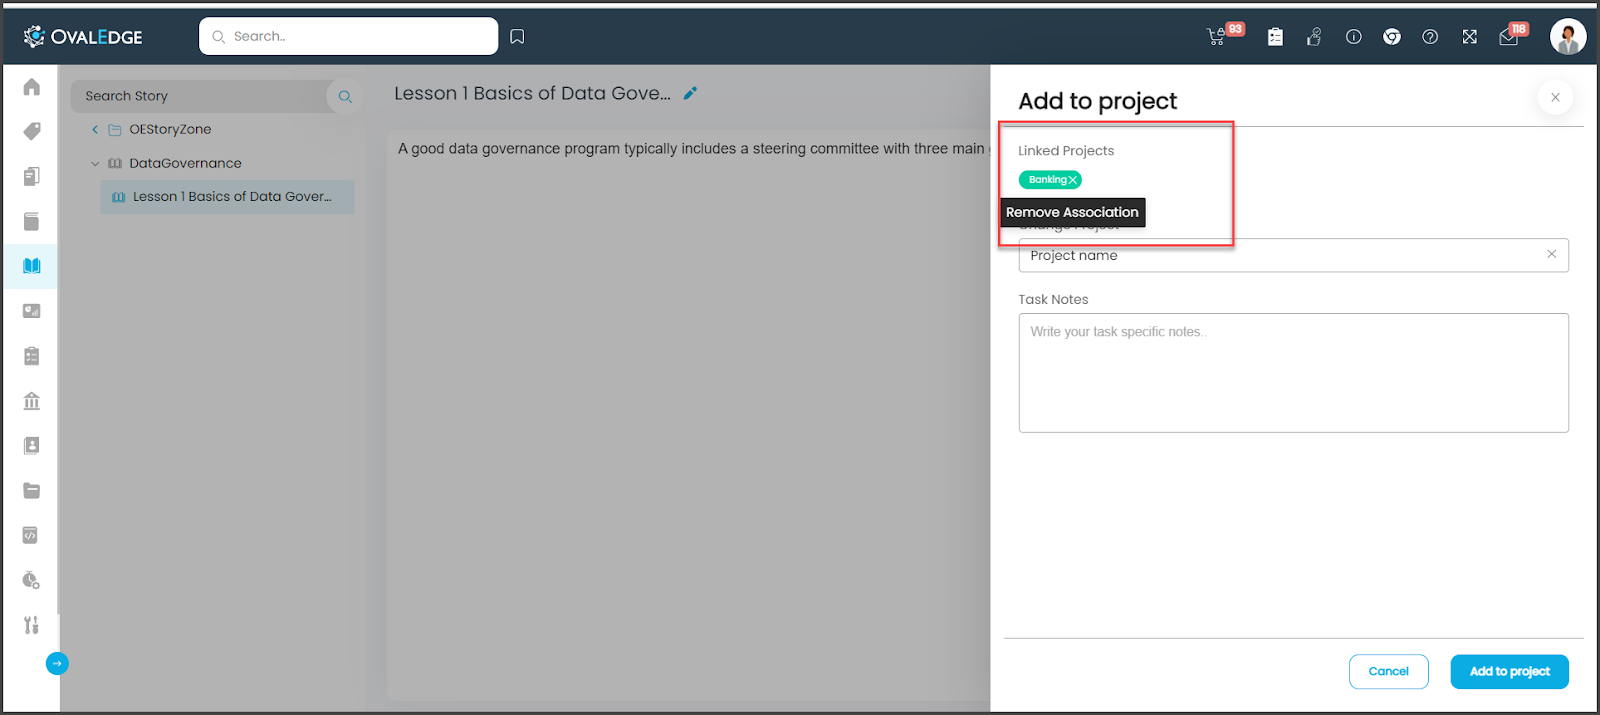
- Select the Parent Data Story name which needs to be removed from the project and click on the Add to Project
icon. the “Add to project” pop-up window is shown below
- The project names associated with the selected parent data story are displayed under the Linked Projects field.
- To remove the parent data story associated with the project, click on the X icon beside the project name under the Linked Projects field.
- To verify whether the selected Parent Data Story is removed from Project or not.
- Navigate to the Projects; the main project page with the list of all existing projects is displayed.
- In the project’s data grid, click on the Project Name. The selected project details page displays the Databases, Tables, Table Columns, Files, File Columns, Reports, Report Column, Queries, Stories, and References information.
- On the project details page, click on the Stories icon. The selected Parent Data Story will not exist in the Stories data grid.
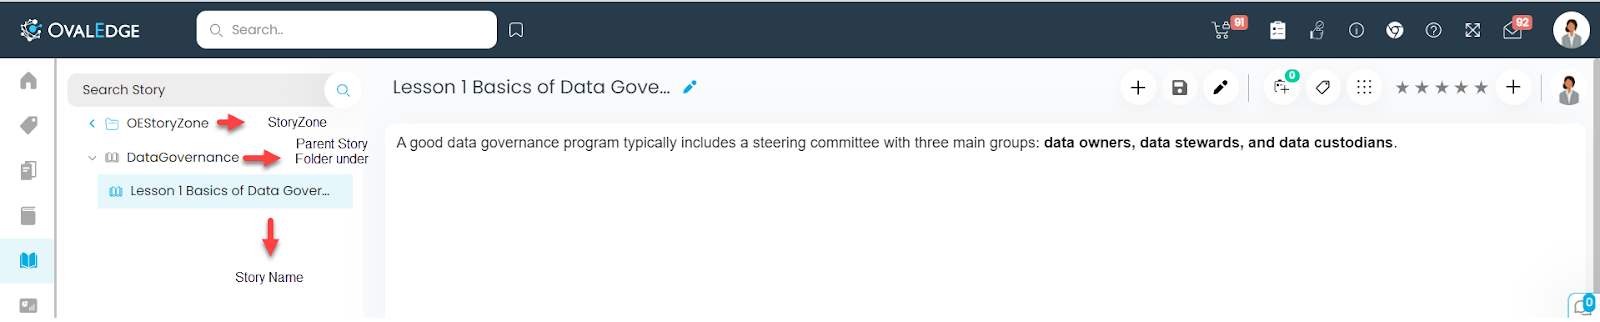
Create a child data story
To create a child data story,
- Select a parent data story and click the plus + icon on the right of the screen.
- Select a parent story and enter a new child's story name.
- Click the OK button. A child story under a parent story in a story zone is displayed.
Note: A Child data story can also be associated or removed from the project the way a parent data story is added.

Data Stories Features

|
Features |
Description |
|---|---|
|
Plus (+) Icon |
To add a new data story |
|
Save Icon |
Click on the Save button to save the save data story. |
|
Editing |
To make the content of the data story in presentable way, OvalEdge provides numerous editing features.
|
|
Tag |
To add tags to data stories
Note: Clicking on the tag assigned to the data story will navigate to the Tag page. |
|
Endorsement |
It provides the rating with commenting features
|
|
Collaboration tool |
The collaboration tool allows you to communicate and interact with your peers for clarification, queries, etc. It is available in all modules with a collaboration icon on the right side. Refer to the Collaboration tab for detailed information. |
|
Modify a Story |
Navigate to Data Stories, click on the Nine dots, and you perform the following actions for a data story. Click on the Nine dots; you will get different actions for modifications as shown below:
|
Copyright © 2019, OvalEdge LLC, Peachtree Corners GA USA