Overview
This article provides an overview of how to use the Configure Views feature in OvalEdge’s Data Catalog. It highlights the benefits of creating user-specific views and emphasizes how these views can improve the efficiency of data analysis. This article simplifies the process of configuring views allowing users to streamline their data analysis experience.
User Permissions
All users, regardless of their access level, have the ability to configure and create new views. This feature grants users the flexibility to personalize their view settings according to their specific requirements.
Configure View
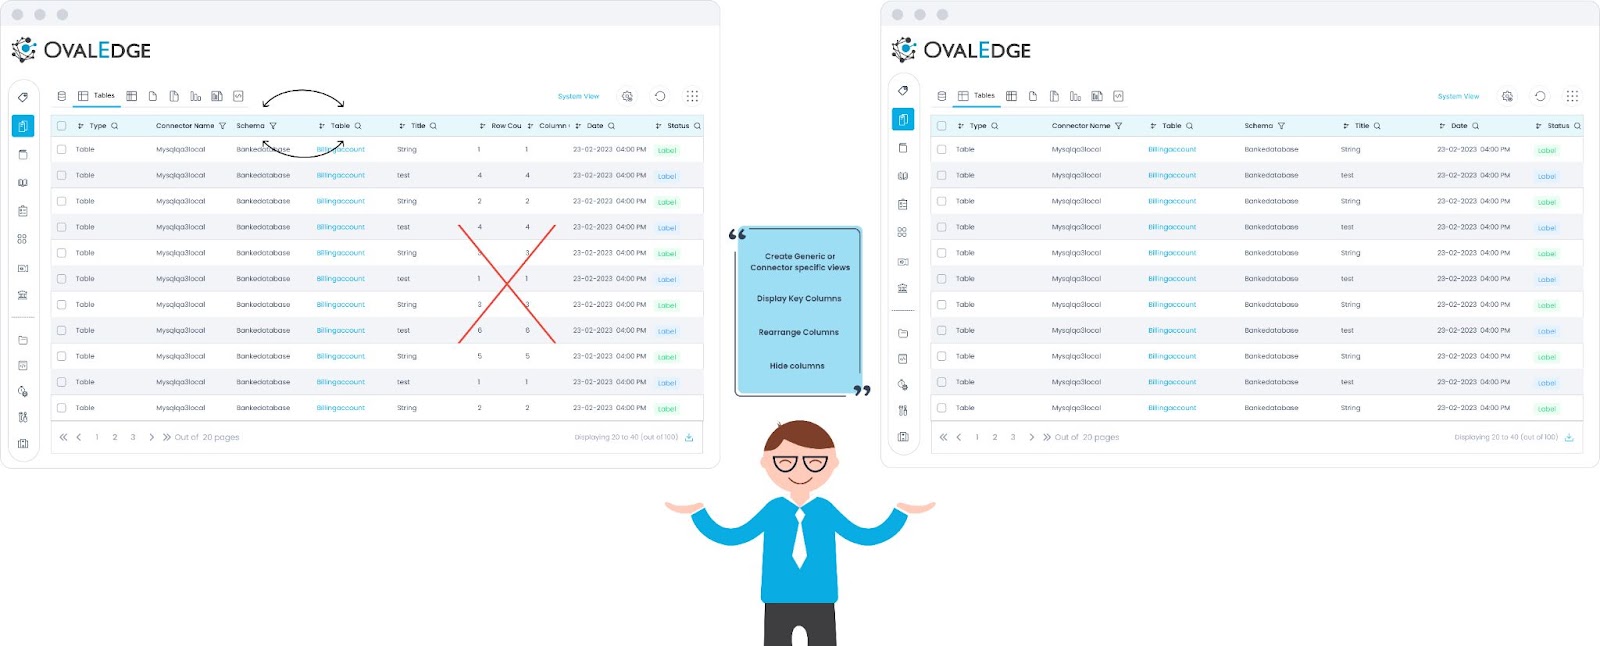
The Configure View feature allows users to personalize the way the data catalog is displayed in the List View. By customizing views, users can prioritize the columns and tailor the display according to their preferences. This flexibility allows for a more efficient and user-friendly experience. Whether working with a specific data source or multiple connections, users can create custom views that provide a consolidated and clutter-free representation of their catalog.
Advantages of Configuring Views
- Personalized User Experience: Users can prioritize the order of the fields that are most important to them.
- Reduced Clutter: Users can select only the required fields, which helps to reduce clutter and improve the overall efficiency of data analysis.
- Consolidated View: This provides a unified view of the data that can be helpful when working with multiple data sources.
- Connector-Specific View: Users can customize the way data is displayed for a specific connection and view only the relevant data objects and configured custom fields associated with that connection. This helps improve the accuracy and relevance of the data displayed.
- List of Views: With different types of views available, users can easily switch between views or create their own customized views to suit their specific needs.
- Improved Productivity: By providing a customized view of the data that is tailored to the user's needs, the Configure Views feature helps to improve productivity and save time.
List of Views to Personalize the Data Catalog
Once you have created personalized views in OvalEdge, accessing and managing them becomes effortless. You can easily navigate to the data catalog and find the button located at the top-right corner of the screen.
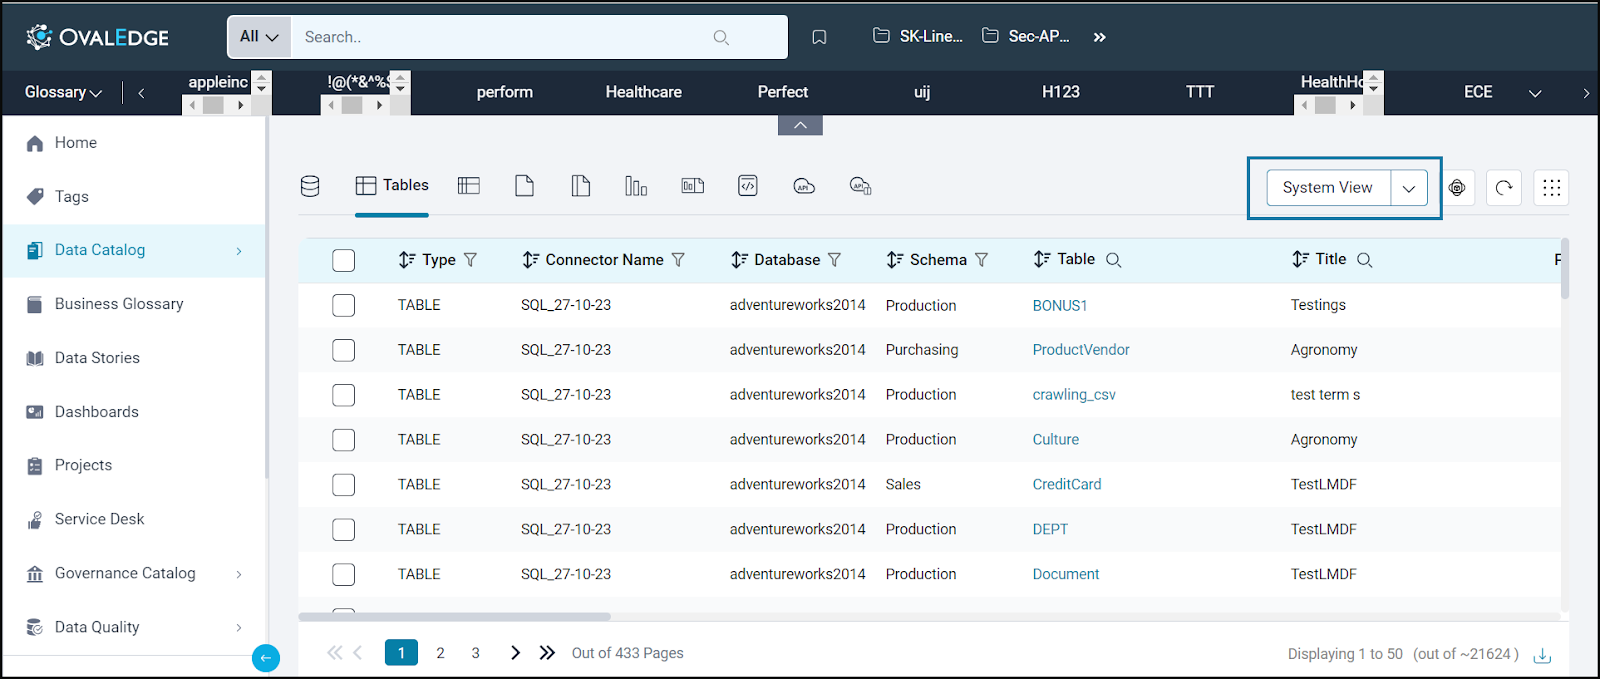
Clicking on this icon will display a drop-down list containing all the views in the system. This centralized location streamlines the process of accessing and organizing your views.
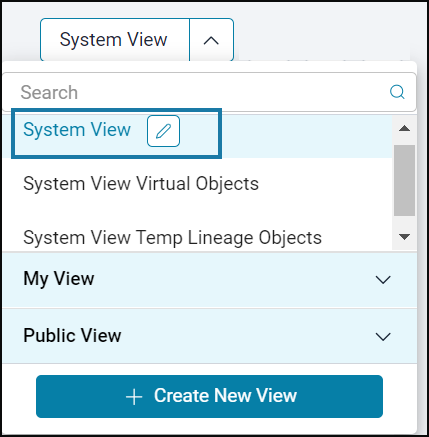
There are three types of views available:
- System View: The System View serves as the default view within OvalEdge and cannot be edited or deleted. It comes pre-configured with a set of predefined columns, offering a standardized perspective. Additionally, separate System Views have been established for standard, virtual objects, and temporary lineage objects, each featuring uniquely configured attributes.
- My Views: This category showcases the views that you, as the logged-in user, have personally created. These views reflect your individual preferences and selections.
- Public View: The Public View presents a list of views that have been created by other users within the application. It allows users to explore and use the views created by other users.
How to Configure Views in a Data Catalog
To create a View,
- Locate the System View button in the top right corner of the Data Catalog interface, featuring a dropdown arrow facing downwards.
- Open the dropdown menu to access various views, including system-defined options, personal views labeled as "My Views," and publicly shared views titled "Public Views".
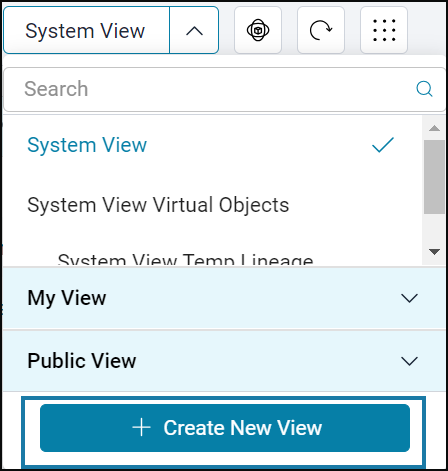
- To initiate the creation of a new view, choose the "Create New View" button.
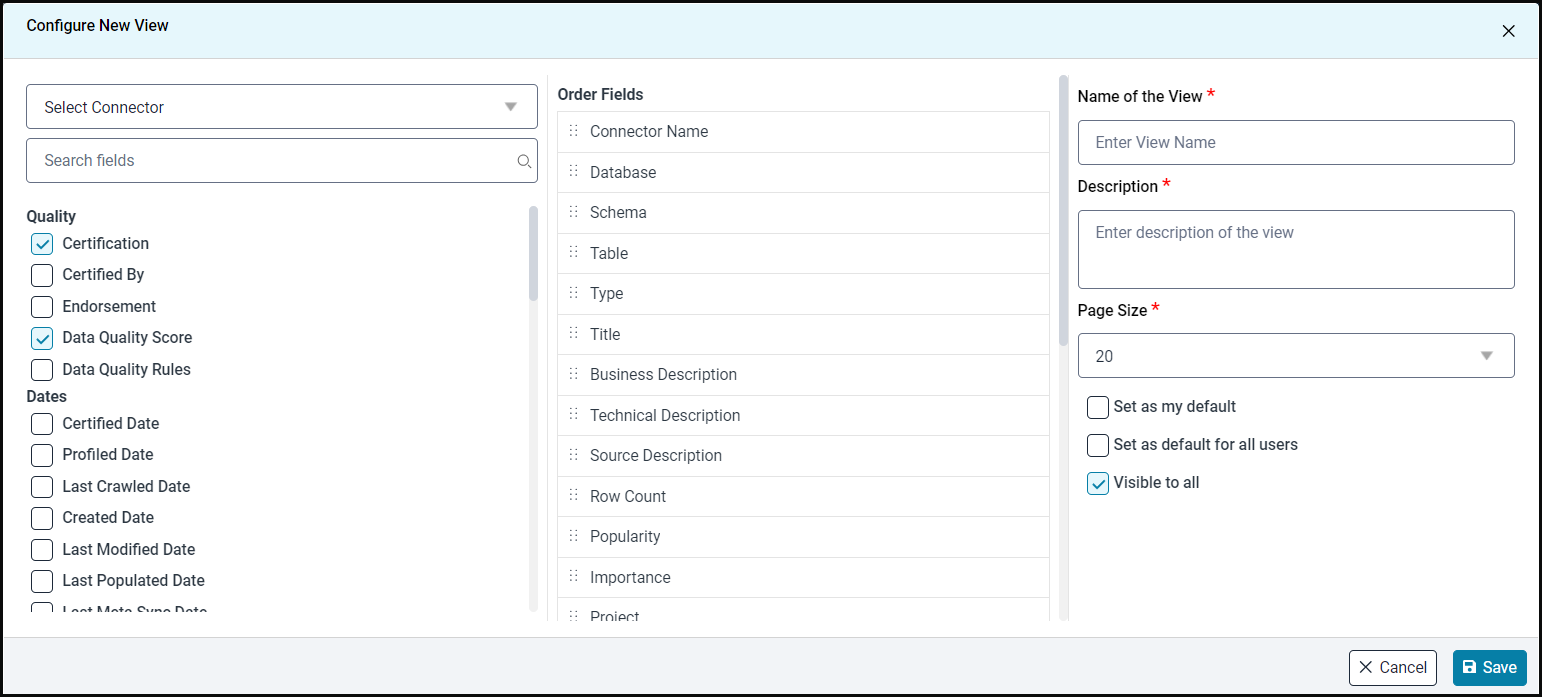
- A pop-up window is displayed with all the configurable options as shown in the image below.
- From the left section of the pop-up, select the catalog Fields to add to the view, such as Governance Roles, Custom Fields, etc. Use the Search Field icon to find specific fields.
|
Note: The global custom fields or Connector specific custom fields are displayed only when configured in Administration > Custom Fields. Custom fields associated with a selected connector will be displayed when the connector is chosen. |
- The selected fields will be displayed in the Order Fields panel. Prioritize the fields by clicking and dragging them up or down to determine their display order in the List View.
- From the right section of the pop-up, choose to Create a New View or Update View.
- To update an existing view, select Update View. Views created by the logged-in user can be edited and saved.
- To create a new view, select Create New View. Enter a unique name, and description for the view in the field provided.
- Enter a unique name for the view in the field provided.
- Add a description for the view in the field provided.
- Set the Page Size to determine the number of data object line items displayed per page.
- Select Set as my Default View to apply the created view as the default view.
- Select Visible to All (Public View) to make the view visible to all users. This setting will make it a Public View.
Note: Pay attention to the Wait icon next to specific fields, as they indicate the impact on the performance of loading the fields.
- Click Save and the view will be created and displayed in the List of Views > My Views.