OvalEdge connects to the data source using APIs to crawl and build lineage.

Overview
Connector Details
|
Connector Category |
Reporting System |
|
Connector Version |
6.3.4 |
|
OvalEdge Releases Supported (Available from) |
Release6.3 onwards |
|
Connectivity [How OvalEdge connects to CartoVista] |
API |
Connector Features
| Crawling | ✅ |
| Profiling | ❌ |
| Query Sheet | N/A |
| Report Preview | ✅ |
| Auto Lineage | ✅ |
| Manual Lineage | ✅ |
| Authentication via Credential Manager | ✅ |
| Data Quality | ❌ |
| DAM (Data Access Management) | ❌ |
| Bridge | ❌ |
Getting Ready to Establish a Connection
Prerequisites
The following are the prerequisites for establishing a connection between CartoVista and OvalEdge.
Service Account User Permissions
|
Important: We recommend having a separate service account to establish a connection from OvalEdge to the data source with minimal permissions. |
|
Operations |
Minimum Permissions |
|
Connection Validation |
Map Gallery User |
|
Crawling |
Map Gallery User |
|
Lineage |
Map Gallery User |
Please refer to Appendix A for guidelines on creating a service account with the required permissions.
Setup a Connection
|
Important: You must have the Connector Creator role to set up a connection in OvalEdge. |
- Log into OvalEdge, go to Administration > Connectors, click + (New Connector), search for CartoVista, and complete the specific parameters.
Note: Fields marked with an asterisk (*) are mandatory for establishing a connection.
Field Name
Description
Connector Type
By default, "CartoVista" is displayed as the selected connector type.
Connector Settings
Credential Manager*
Select the desired credentials manager from the dropdown list. Relevant parameters will be displayed based on your selection.
Supported Credential Managers:
- OE Credential Manager
- AWS Secrets Manager
- HashiCorp Vault
- Azure Key Vault
License Add Ons
Auto Lineage
Supported
Data Quality
Not Supported
Data Access
Not Supported
- Select the checkbox for Auto Lineage Add-On to build data lineage automatically.
Connector Name*
Enter a unique name for the CartoVista connection (Example: "CartoVista”
Connector Environment
Select the environment (Example: PROD, STG) configured for the connector.
Tenant*
Enter the unique identifier assigned to your workspace.
Refer here to generate a Tenant ID.
Username*
Enter the "username" used to access the CartoVista Server.
Refer here to create a username.
Password*
Enter the "password" used to access the CartoVista Server.
Default Governance Roles
Default Governance Roles*
Select the appropriate users or teams for each governance role from the drop-down list. All users and teams configured in OvalEdge Security are displayed for selection.
Admin Roles
Admin Roles*
Select one or more users from the dropdown list for Integration Admin and Security and Governance Admin. All users configured in OvalEdge Security are available for selection.
No of Archive Objects
No Of Archive Objects*
It indicates the number of recent metadata changes to a dataset at the source. By default, it is off. You can enable it by toggling the Archive button and specifying the number of objects to archive.
Example: Setting it to 4 retrieves the last 4 changes, shown in the 'version' column of the 'Metadata Changes' module.
Bridge
Select Bridge*
If applicable, select the bridge from the drop-down list.
The drop-down list displays all active bridges configured in OvalEdge. These bridges enable communication between data sources and OvalEdge without altering firewall rules.
- After entering all connection details, you can perform the following actions:
- Click Validate to verify the connection.
- Click Save to store the connection for future use.
- Click Save & Configure to apply additional settings before saving.
- The saved connection will appear on the Connectors home page.
Connectivity Troubleshooting
If incorrect parameters are provided, you may encounter error messages. To resolve these issues, ensure all input is correct. If problems persist, contact your assigned OvalEdge support team.
|
S.No. |
Error Message(s) |
Error Description/Resolution |
|
1 |
"code: LoginFailed; codeDetails: InvalidEmailOrPassword" |
Error Description: |
|
2 |
HTTP Error 503. The service is unavailable. |
Error Description: |
Manage Connector Operations
Crawl/Profile
|
Important: You must have the Integration Admin role in OvalEdge for crawl/profile operations. |
A Crawl/Profile button allows you to select one or more reports for crawling.
- Navigate to the Connectors page and click Crawl/Profile. This allows you to select the report groups to be crawled.
- The crawl option is selected by default.
- Click Run gathers all metadata from the connected source and puts it into the OvalEdge Data Catalog. After a successful crawl, all the information is displayed in the Data Catalog > Reports tab.
Other Operations
The Connectors page in OvalEdge provides a centralized view of all configured connectors, including their health status.
Managing connectors includes:
- Connectors Health: Displays performance with a green (active) or red (inactive) icon, helping monitor data flow and address issues early.
- Viewing: Shows connector details (e.g., Domains, Reports, Report Columns, and Codes) via the View icon.
Nine Dots Menu Options:
You can view, edit, validate, and delete connectors using the Nine Dots menu.
- Edit Connector: Update and revalidate the data source.
- Validate Connector: Check the connection's integrity.
- Settings: Modify connector settings.
- Crawler: Configure metadata that needs to be extracted.
-
- Access Instructions: Specify how data can be accessed as a note.
- Business Glossary Settings: Manage term associations at the connector level.
- Lineage: Choose multiple sources simultaneously to create lineage from the needed tables.
- Others: Configure the "Send Metadata Changes Notifications" settings to receive object metadata changes.
- Build Lineage: Automatically build data lineage using source code parsing.
- Delete Connector: Remove connectors with confirmation.
Metadata Mapping
|
Source Object Name |
OvaEdge Data Object |
OvalEdge Data Object Type |
|
Maps |
Reports |
Map |
|
Slides |
Reports |
Slide |
|
layers |
Reports |
Based on the source type |
|
WMTS layers |
Reports |
WMTS layers |
|
WMS layers |
Reports |
WMS layers |
|
Grid layers |
Reports |
Grid layers |
Limitations
|
Category |
Description |
|
Report Preview |
To embed the map in the application (Data Catalog > Report Preview), you must enable public access to the map. |
Appendix A
Please refer to the below sample steps to create a service account user and grant the required permissions. For more information, consult your CartoVista DBA to check and execute these queries.
- Go to https://cartovista.com/
- Click Login.
- Enter the relevant details, then click Sign up.
- A verification email is sent to the entered email address. Then click Confirm email address.
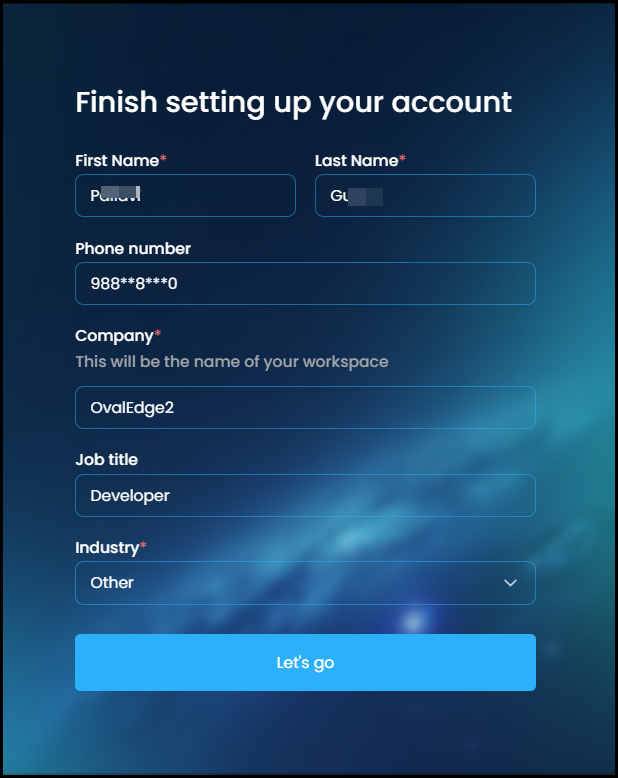
- Enter all the details to set up the account. Then click Let’s go.
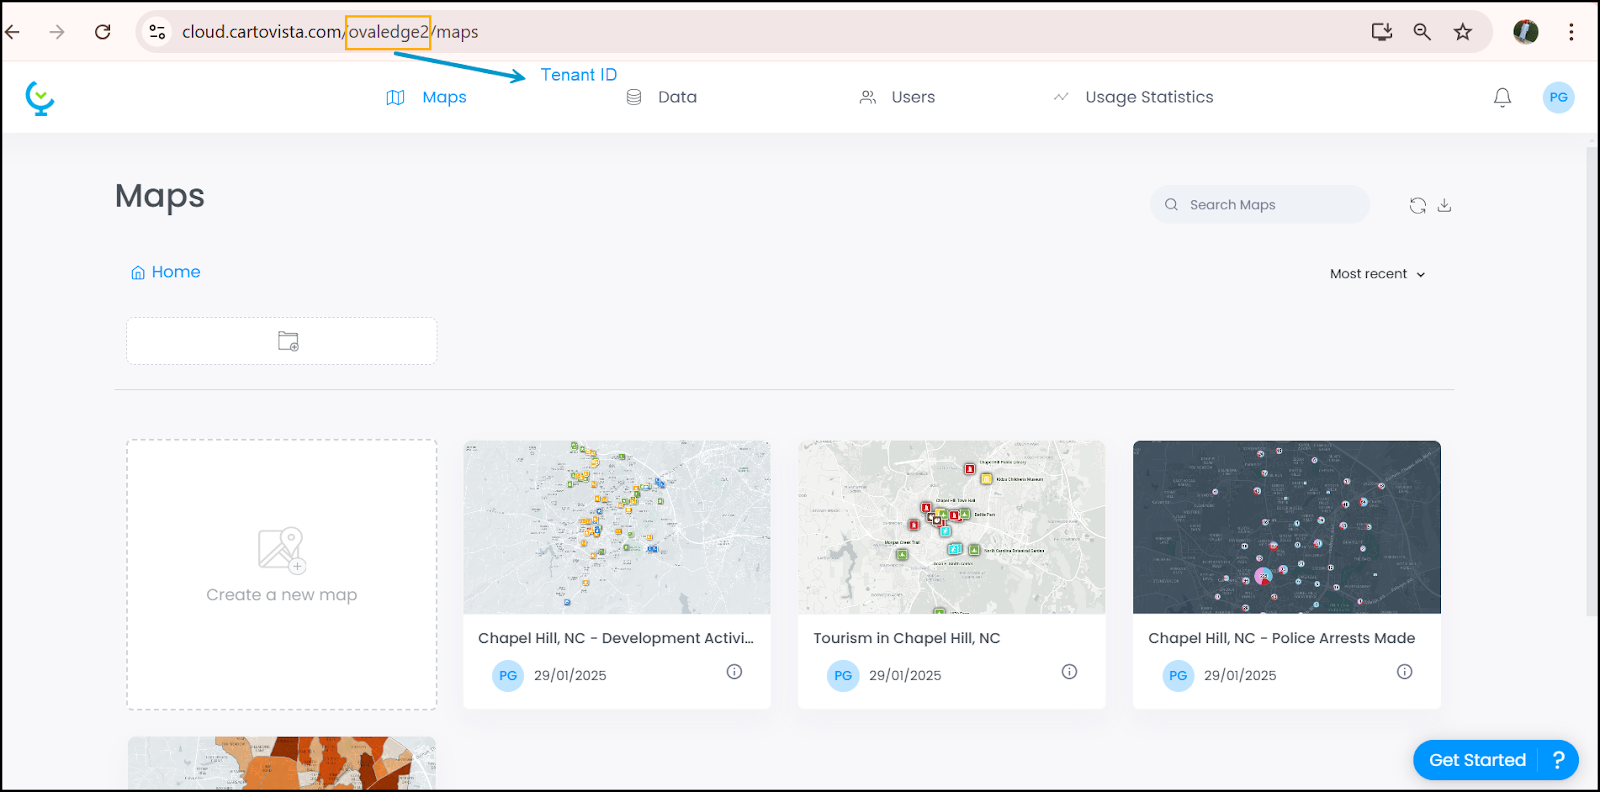
Note: The Company name acts as a Tenant ID. - Maps page opens.
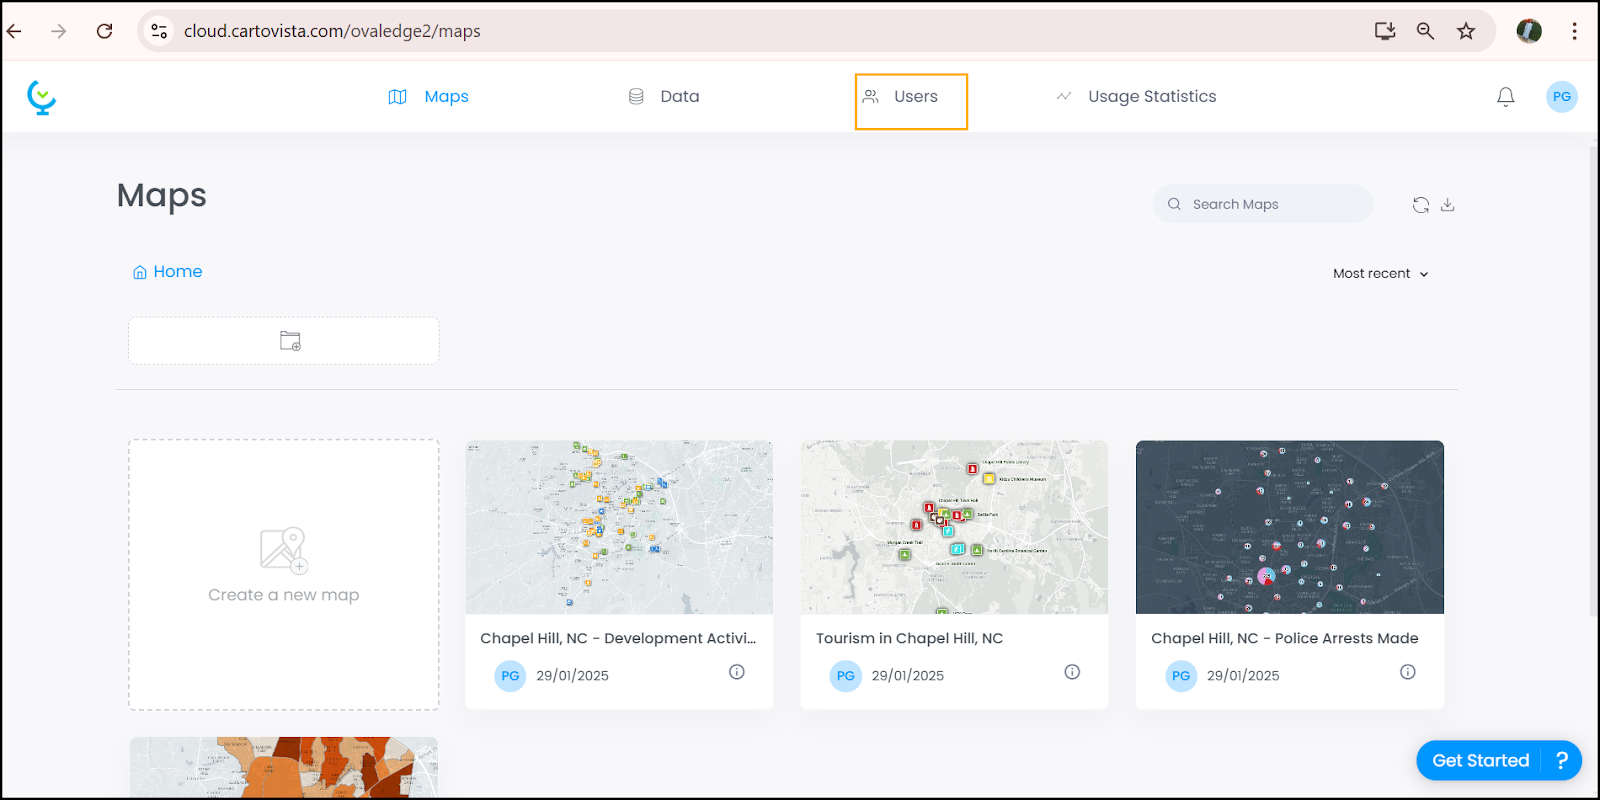
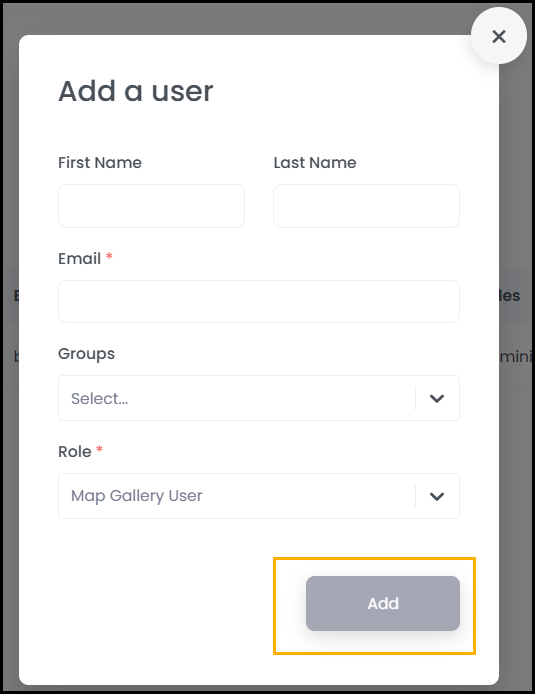
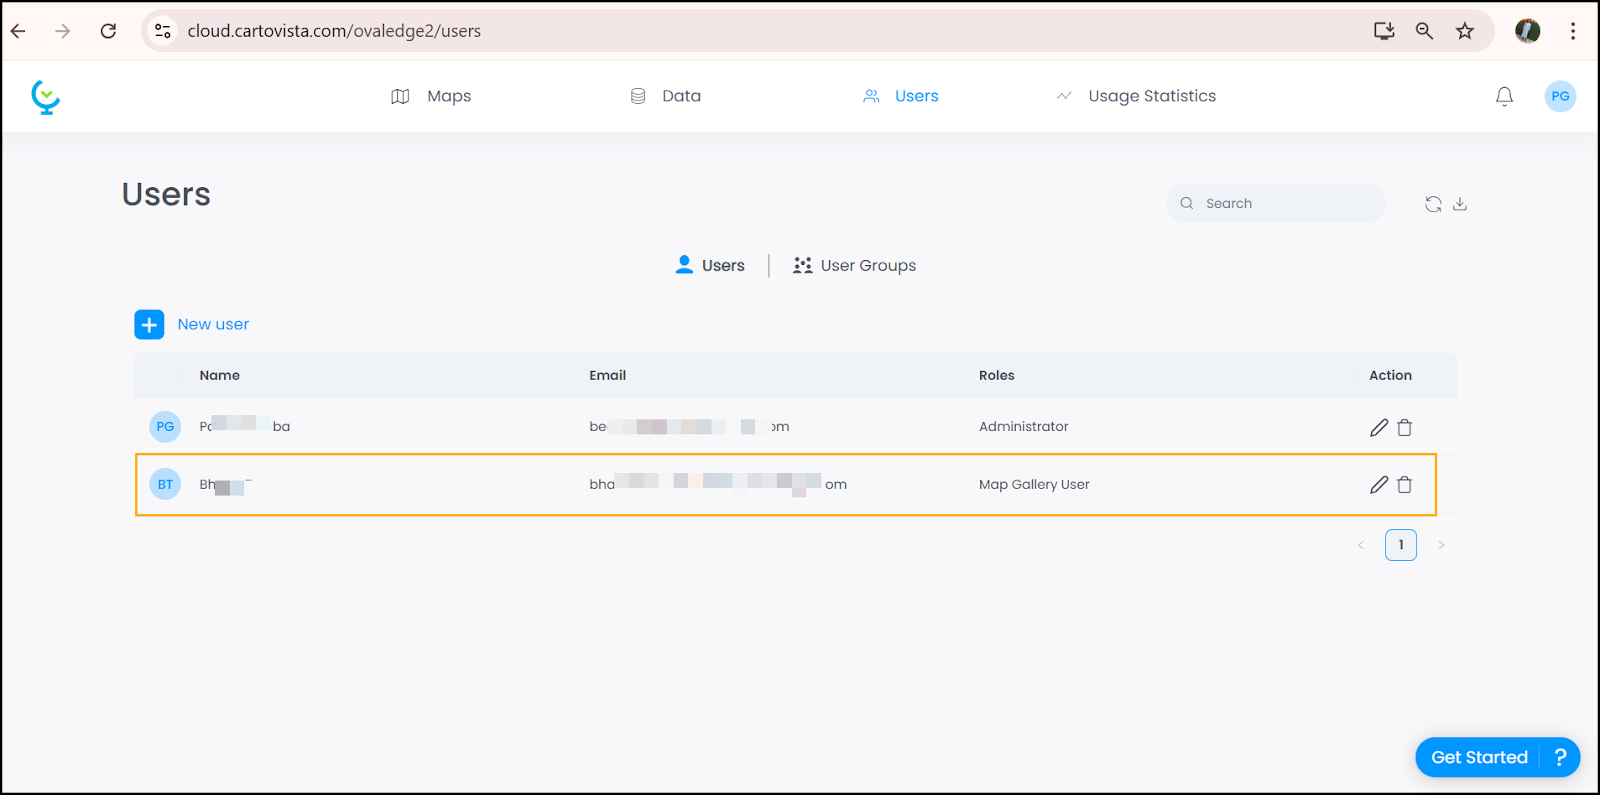
- To create a new user, select the Users tab.
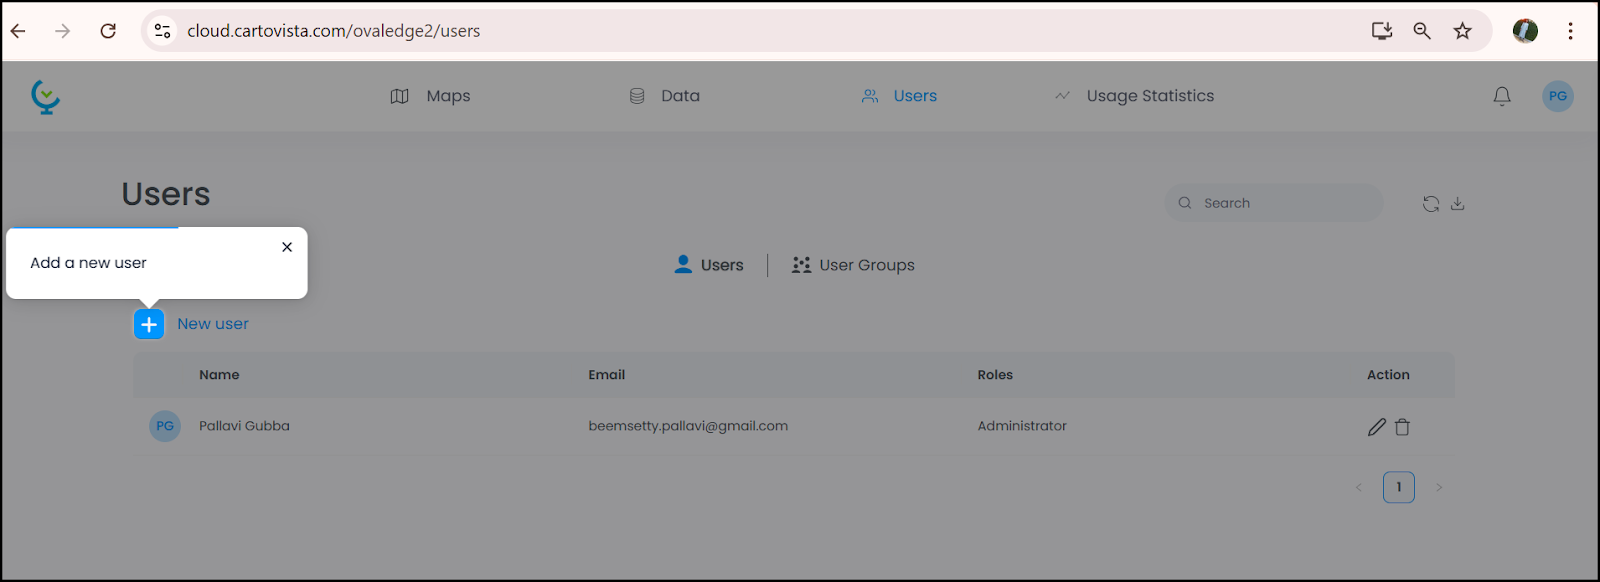
- Click Add a new user.
- Add a user pop-up display. Enter the relevant details. Then click Add.
Note: Select Map Gallery User from the Role drop-down list. - A service account user is created.