Note: Microsoft has recently renamed its "Azure Active Directory" (also called "Azure AD" or "AAD") to "Microsoft Entra ID". This is not to be confused with "Windows Server Active Directory" which will remain the same.
Azure Data Factory (ADF) is an ETL tool which is provided by Microsoft Azure. It allows you to create, schedule, and manage data pipelines that can move data between supported on-premises and cloud-based data stores. Azure Data Factory enables you to compose data storage, movement, and processing services into automated data workflows.
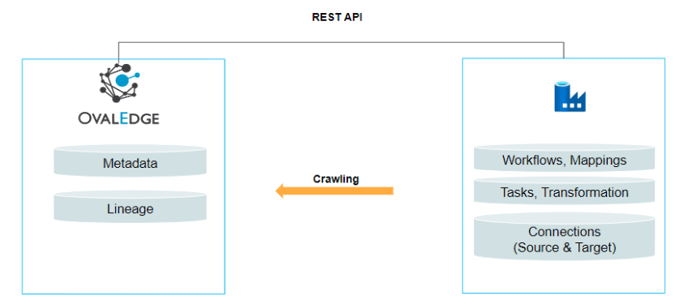
OvalEdge uses the API to connect to the Azure Data Factory schema source, which allows the user to crawl (Workflows, Tasks, Mapping, Transformations, etc) and build Lineage.
Connector Capabilities
The following is the list of objects and data types supported by the Azure Data Factory connector.
|
Functionality |
Supported Objects |
|
Crawling |
|
Prerequisites
Here are the prerequisites for connecting the connector and OvalEdge.
Connectivity via API
The connectivity to Azure Data Factory is via APIs included in the platform.
Version
Azure Data Factory connector currently supports the following versions:
|
API Version |
Support |
|
|
2018-06-01 |
Supported |
|
Configuring Environment Variables
Configuring environment names enable you to select the appropriate environment from the drop-down list when adding a connector. This allows for consistent crawling of schemas across different environments, such as production (PROD), staging (STG), or temporary environments. It also facilitates schema comparisons and assists in application upgrades by providing a temporary environment that can be later deleted if needed.
Before establishing a connection, it is important to configure the environment names for the specific connector. If your environments have been configured, skip this step.
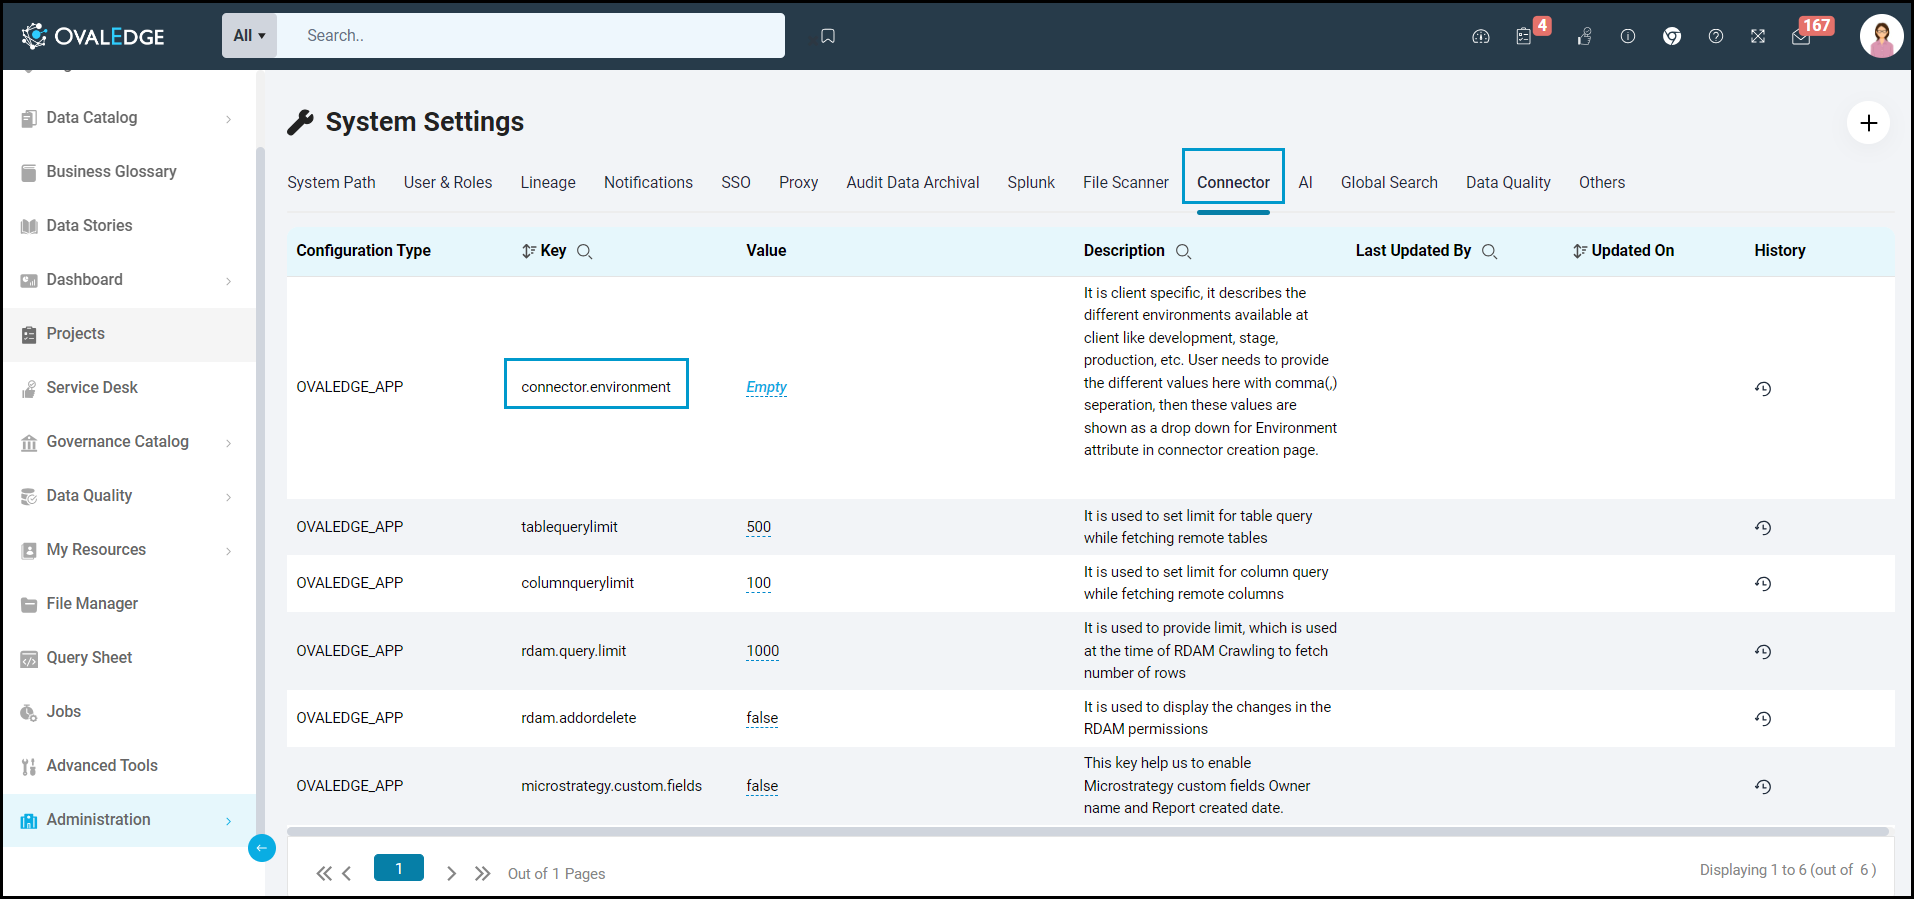
Steps to Configure the Environment
- Log into the OvalEdge application.
- Navigate to Administration > System Settings.
- Select the Connector tab.
- Find the key name “connector.environment”.

- Enter the desired environment values (PROD, STG) in the Value column.
- Click ✔ to Save.
Create a service in the Azure Portal
Creating an App
- Sign in to the Azure portal, and search for Azure AD in the Azure services text box. Under Manage, click on App registrations.

- Click on New Registration.

- Register an application - give a user-facing display name for the app, and select the supported account types.

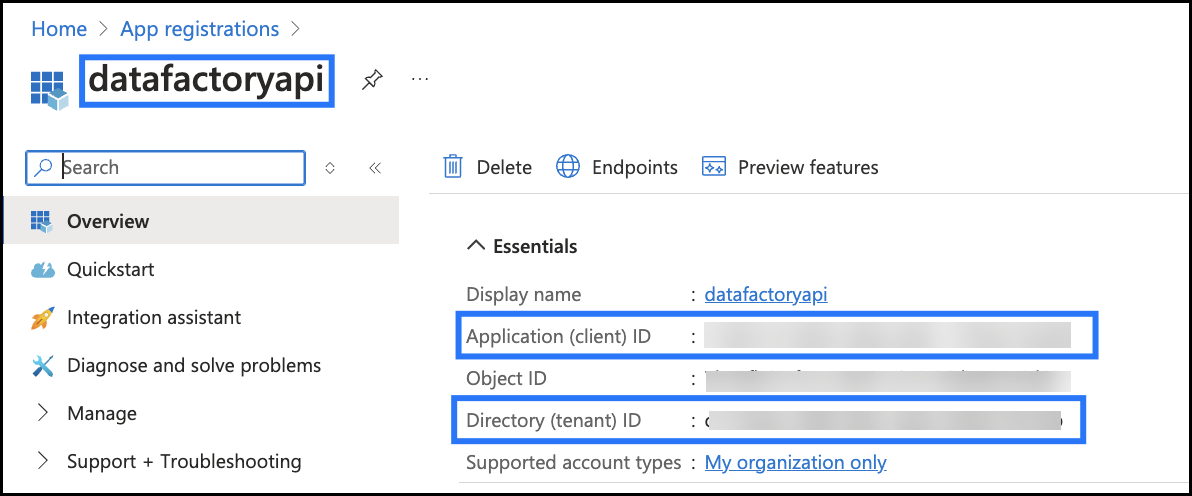
- Click Register. The below screen will be displayed.

- Note the client ID and tenant ID from the above screenshot.
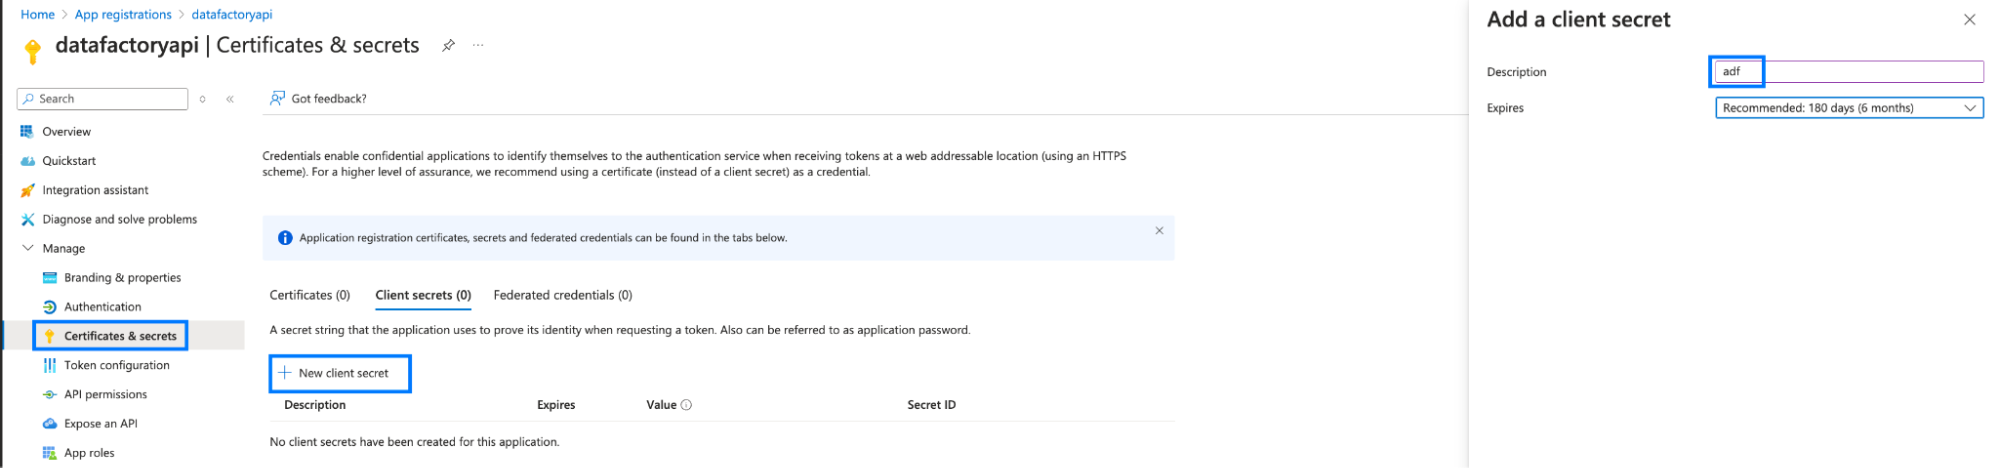
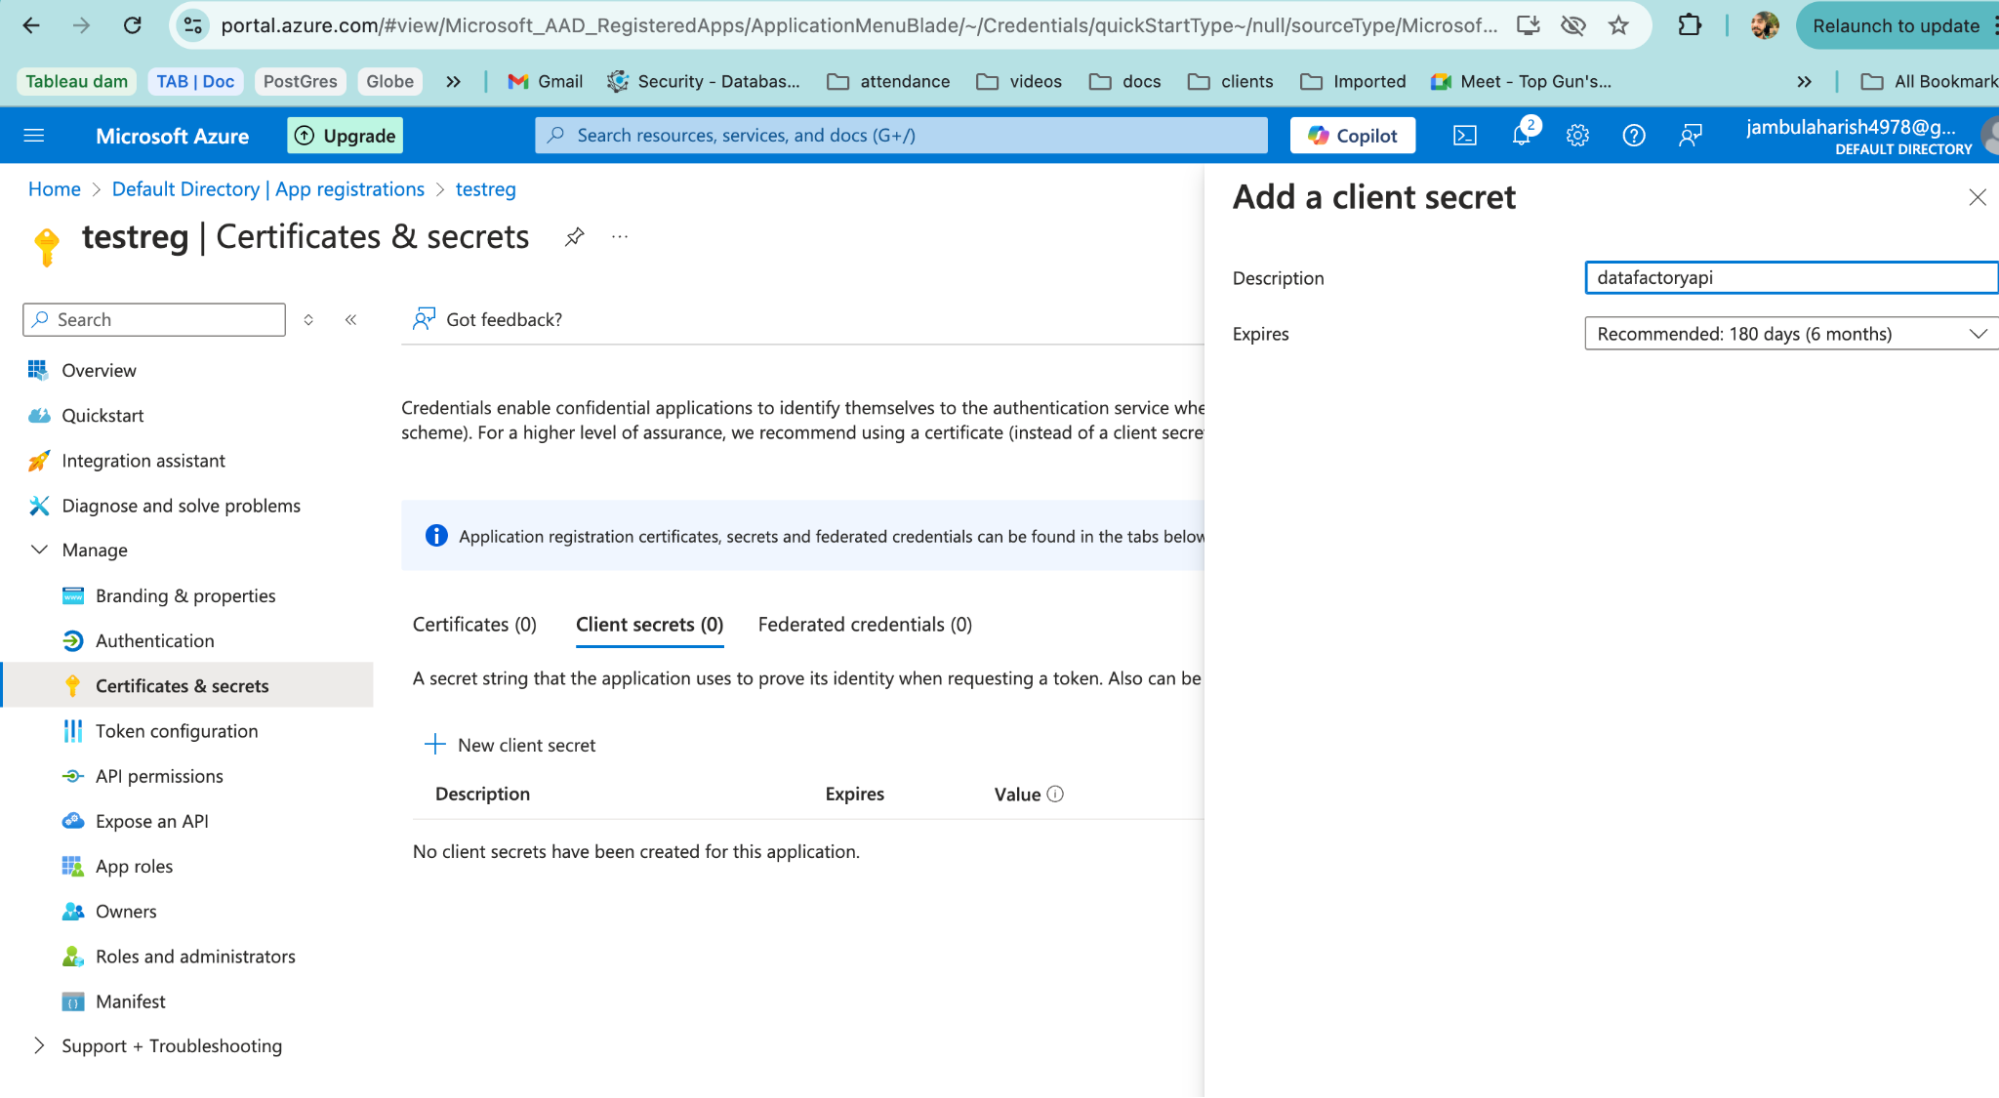
- Then, create a Client ID and Client Secret by navigating to Manage > Certificates and Secrets from the left menu.

- Click on + New client secret.

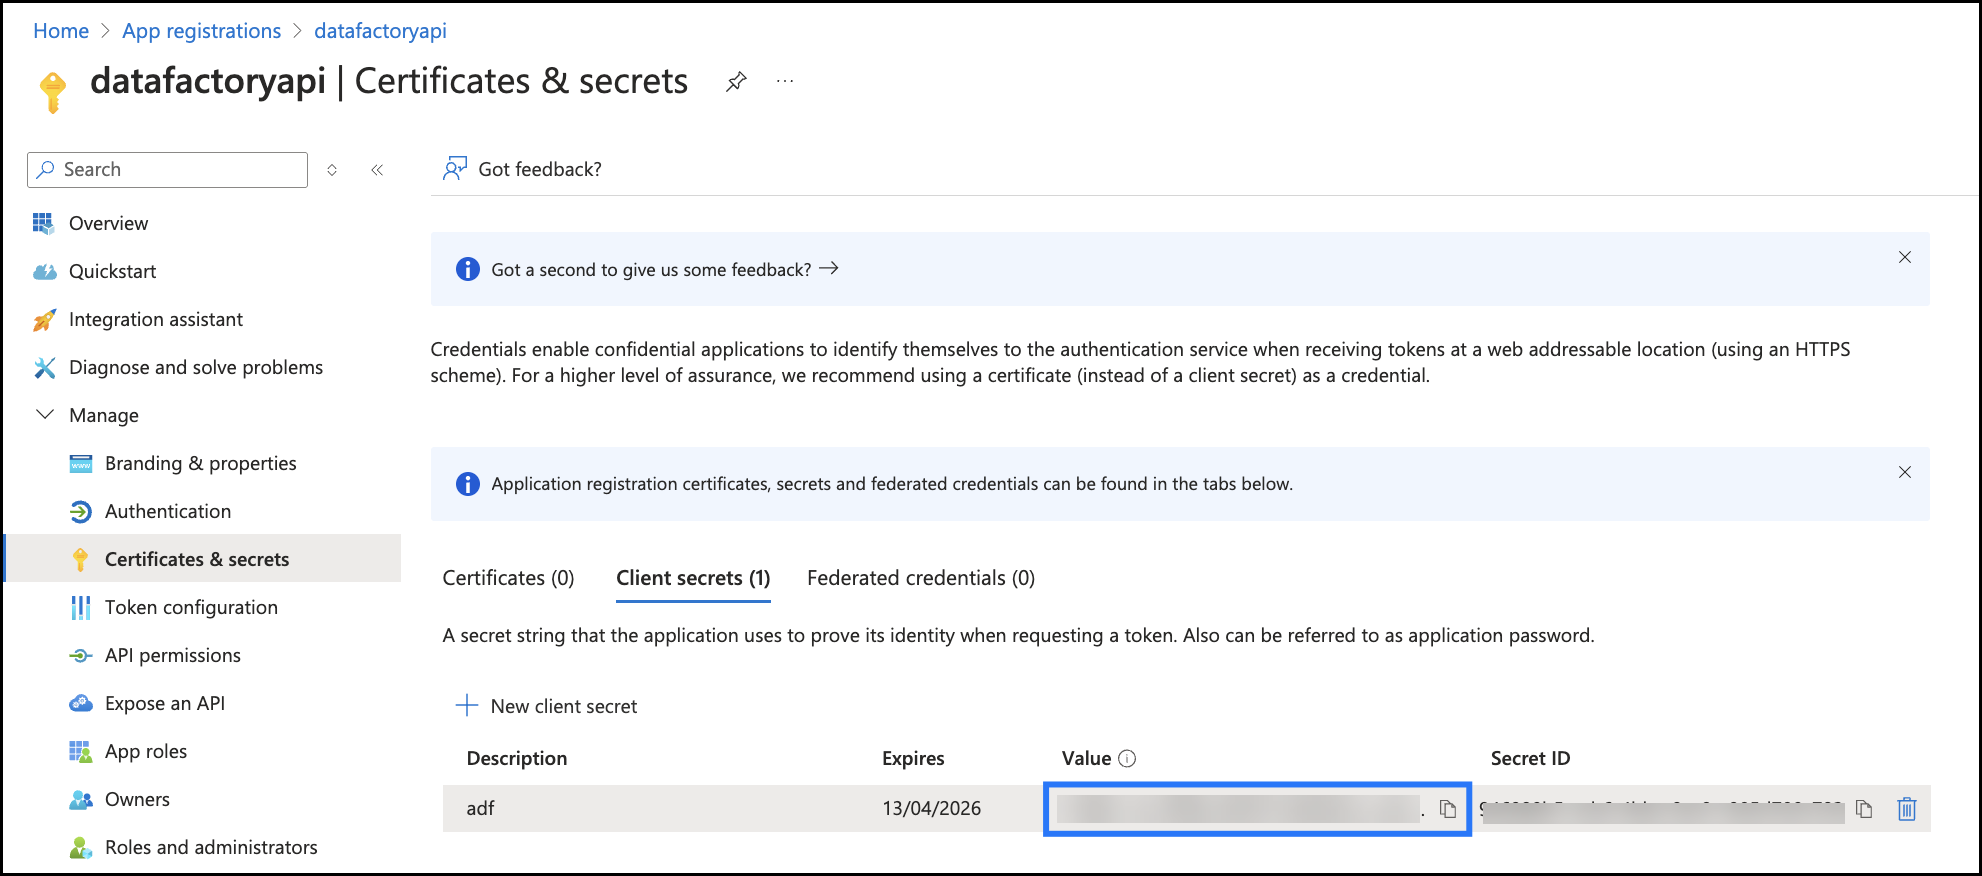
- Click Add.

- From the above screenshot, copy the client secret key. This key is used while creating a connection.

Service Account with Minimum Permissions
Service accounts must have the following privileges to crawl and build the lineage:
|
Operation |
Access Permission |
|---|---|
|
Connection validate |
Read |
|
Crawl datasets |
Read |
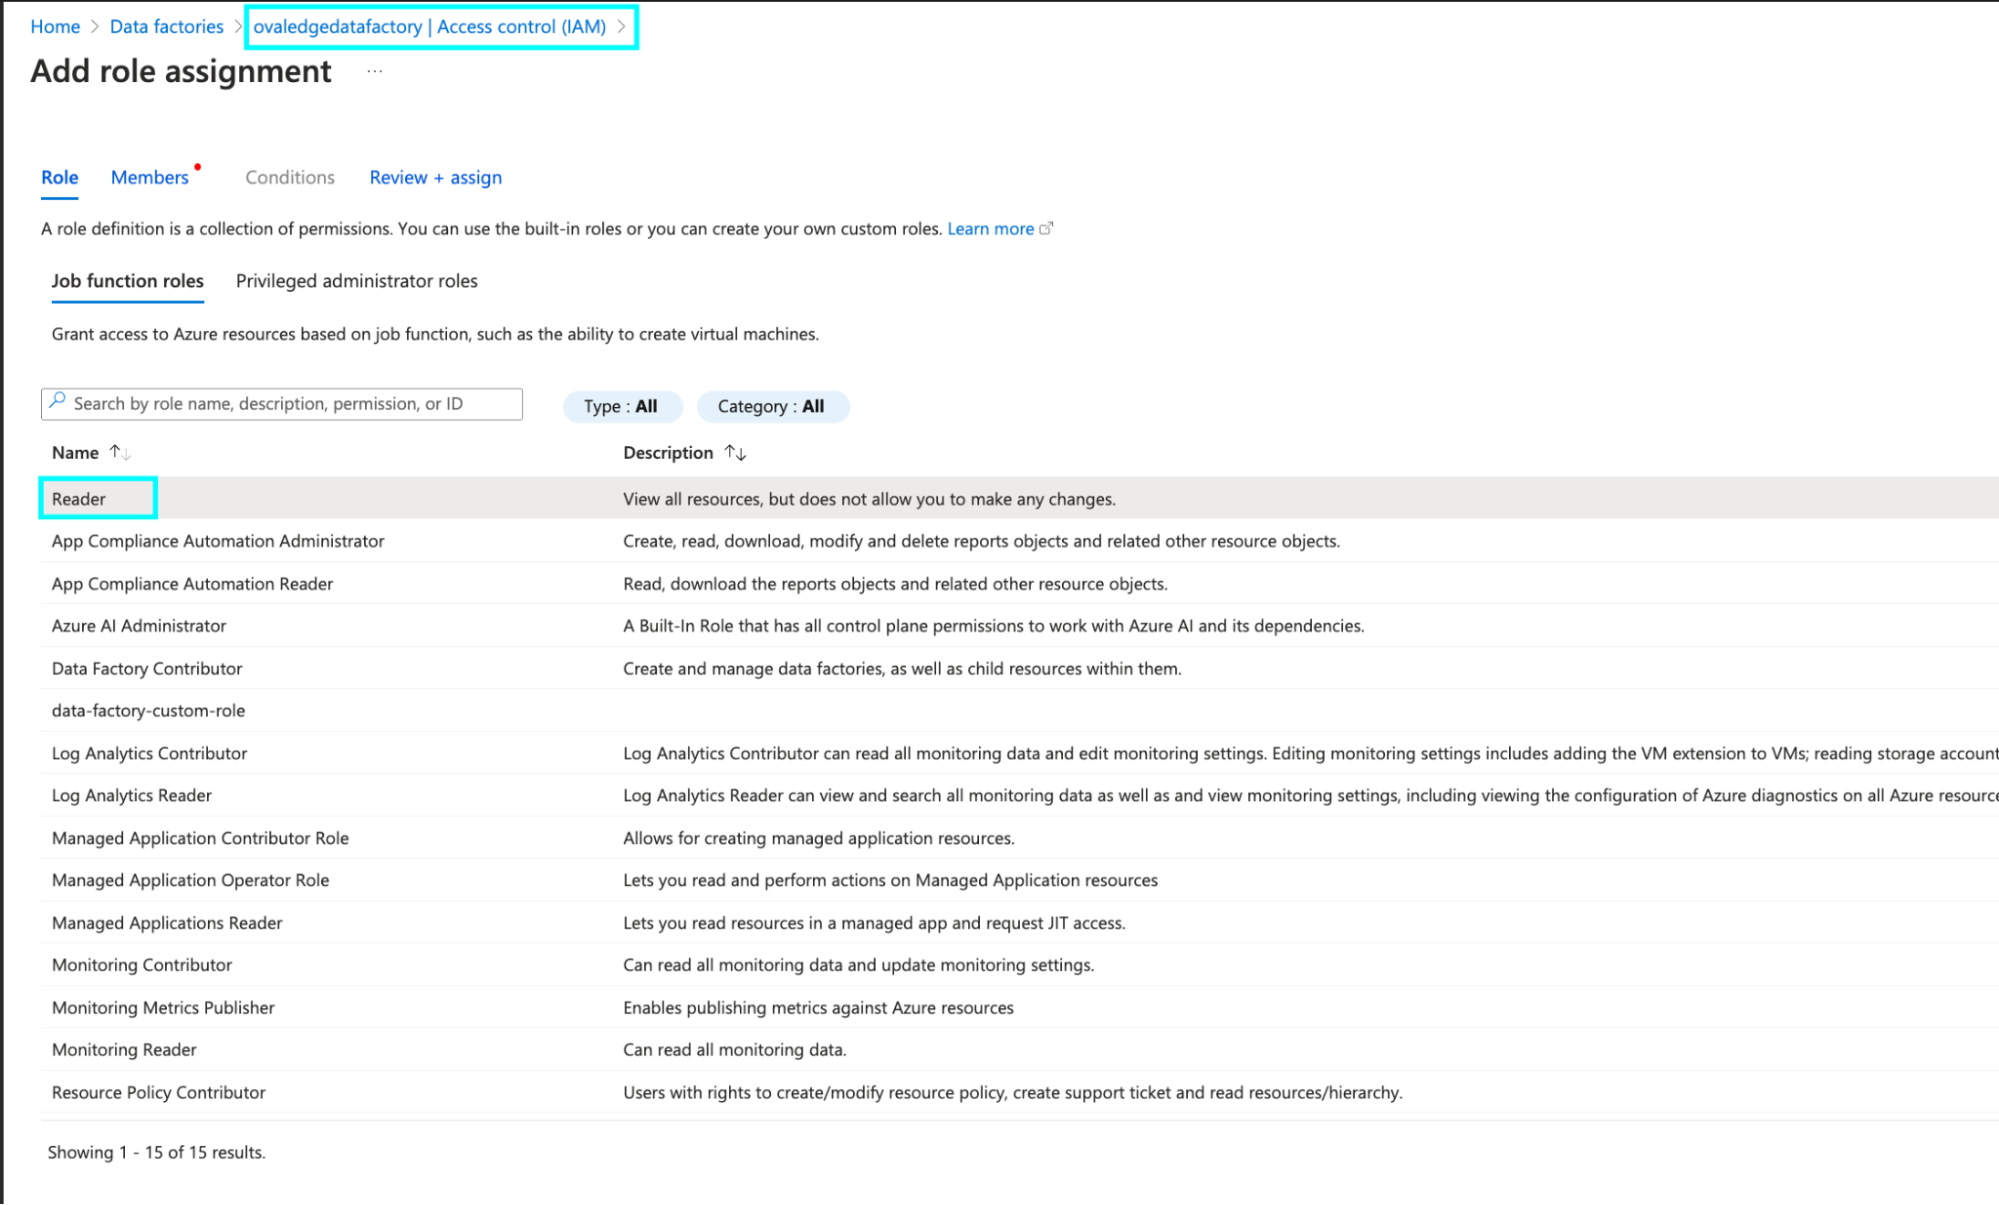
Goto AzureDataFacrory> Select the needed DataFactory> Goto Access control (IAM) > click on +Add(Add Role assignment) > Select the permission as Reader > Select the App registration name > then click on Create to grant the permission.

Establish a Connection
To establish a connection, complete the following steps:
- Log into the OvalEdge application, navigate to the Administration module, and click on Connectors.
- Click on the + icon (New Connector ) and the Add Connector pop-up is displayed.
- Search/click on the desired connector and the Add Connector pop-up with the selected connector details is displayed.
Note: * (asterisk) indicates the mandatory field to establish a connection.
|
Field Name |
Description |
|
|
Connector Type |
By default, the selected connection type is displayed as the Azure Data Factory. |
|
|
Connector Settings |
||
|
License Add-Ons |
By default, all the connectors will have a Base Connector License, which allows you to crawl and profile to obtain metadata and statistical information from a data source. OvalEdge supports various License Add-Ons based on the connector’s functionality requirements. Select the Auto Lineage Add-On license that enables the automatic construction of the Lineage of data objects for a connector with the Lineage feature. |
|
|
Credential Manager* |
The purpose of a credential manager is to enhance the security that stores the API keys, passwords, certificates, and other sensitive data securely and helps to manage access, rotates, and audit secrets. OE Credential Manager: Azure Data Factory connection is configured with the basic Username and Password of the service account in real-time when OvalEdge establishes a connection to the Azure Data Factory database. Users need to add the credentials manually if the OE Credential Manager option is selected. HashiCorp: The credentials are stored in the HashiCorp database server and fetched from HashiCorp to OvalEdge. AWS Secrets Manager: The credentials are stored in the AWS Secrets Manager database server and fetched from the AWS Secrets Manager to OvalEdge. Azure Key Vault: Azure Key Vault allows for secure storage and strict access mechanisms of sensitive information such as tokens, passwords, certificates, API keys, and other confidential data. |
|
|
Connector Environment |
The Environment drop-down list allows you to select the environment configured for the connector from the drop-down list. For example, PROD, or STG (based on the configured items in the OvalEdge configuration for the connector.environment). The purpose of the environment field is to help you identify which connector is connecting what type of system environment (Production, STG, or QA). Note: The steps to set up environment variables are explained in the prerequisite section. |
|
|
Connector Name* |
Select a name for the connection to Azure Data Factory. You can specify a name to identify the Azure Data Factory connection in OvalEdge. Example: Azure Data Factory_test |
|
| Client Id* | After registering your application, you'll see the application ID (or client ID) | |
|
Client Secret* |
When requesting a token, the application needs a client secret to prove its identity. For security reasons, Microsoft limits the creation of client secrets longer than 24 months and strongly recommends that you set this to a value of less than 12 months. |
|
|
Tenant Id* |
The tenant ID identifies the Azure AD tenant to use for authentication. It is also referred to as the directory ID. |
|
|
Subscriber Id* |
The subscription ID is a GUID that uniquely identifies your subscription to use Azure services.
|
|
|
Resource Group Name* |
Select the resource group based on the need |
|
|
Api Version* |
Currently supporting 2018-06-01 |
|
|
Pipeline Types to crawl |
Select the pipeline type from the drop-down list. |
|
|
Default Governance Roles |
||
|
Default Governance Roles* |
Users can select a specific user or a team from the governance roles (Steward, Custodian, Owner) that get assigned for managing the data asset. Note: The drop-down list displays all the configurable roles (single user or a team) as per the configurations made in the OvalEdge Security | Governance Roles section. |
|
|
Admin Roles |
||
|
Admin Roles* |
Select the required admin roles for this connector.
|
|
|
Bridge |
||
|
Select Bridge |
A solution is required to circumnavigate the customer firewall when OvalEdge is deployed as a SaaS application. That solution is OvalEdge Bridge. A bridge is a type of firewall that operates at the network layer.
|
|
Note: It is up to the user's wish, you can save the connection details first, or you can validate the connection first and then save it.
- Click on the Validate button to validate the connection details.
- Click on the Save button to save the connection. Alternatively, the user can also directly click on the Save & Configure button that displays the Connection Settings pop-up window to configure the settings for the selected Connector. The Save & Configure button is displayed only for the Connectors for which the settings configuration is required.
Connection Validation Errors
|
Error Messages |
Description |
|
If you fail to establish a connection, Please check the credentials(Client id, Client secret, etc.,) |
In case of an invalid Client id, Client secret. |
Note: If you have any issues creating a connection, please contact your assigned OvalEdge Customer Success Management (CSM) team.
Connection Settings
Lineage
For the Azure Data Factory Connector, only the Lineage setting option is available, and it is enabled when the Auto Lineage License option is selected.
The purpose of the lineage setting is to serve the option of changing the server/source connection to build the lineage. You can configure multiple servers simultaneously in the Selecting Source Server Type for lineage and also set the connection priority lists to pick the tables in the Connections Priority to pick the source table for lineage building.
The Crawling of Schema(s)
You can use the Crawl/Profile option, which allows you to select the specific schemas for the Crawl and Schedule operations: For any scheduled crawlers, the defined run date and time are displayed to set.
- Navigate to the Connectors page, and click on the Crawl/Profile option.
- By default we are showing all the related objects by pipelines, dataflows etc under one schema that is ADF Schema.
- Click on the Run button that gathers all metadata from the connected source into OvalEdge Data Catalog.