Article Summary
This article provides insights into the Approval Workflow in OvalEdge, which is a systematic process designed to route service requests to Approvers for approval or rejection. The article covers various aspects of the workflow, including its configuration by the system administrator, the option to create new workflows or choose from preconfigured ones, and its focus on improving user experience and efficiency. By the end, readers will understand how OvalEdge's Approval Workflow streamlines service request management, leading to enhanced productivity.
What is the Approval Workflow?
The Approval Workflow in OvalEdge is a well-structured process that facilitates the routing of service requests to one or more Approvers for approval or rejection. It handles different types of service requests, such as access requests, content changes, report data quality issues, building lineage, business term approvals, and new asset requests. OvalEdge offers customization options to tailor the Approval Workflow according to each organization's specific needs.
Types Of Approval Workflows
- System: Workflows for system-defined templates are predefined and are set with predetermined approvers.
- Custom: Workflows for Custom Templates can be created and customized as per the Administrators.
Who can create an Approval Workflow?
The authority to configure the Approval Workflow lies with the system administrator, also known as the Admin user. As the Admin user, they can grant access to different types of service requests and define multiple levels of approval. This ensures that the right users have the appropriate permissions and are notified when their approval is required for specific service requests.
Configuring an Approval Workflow from Security
To configure an Approval Workflow for a Service Request, follow these steps:
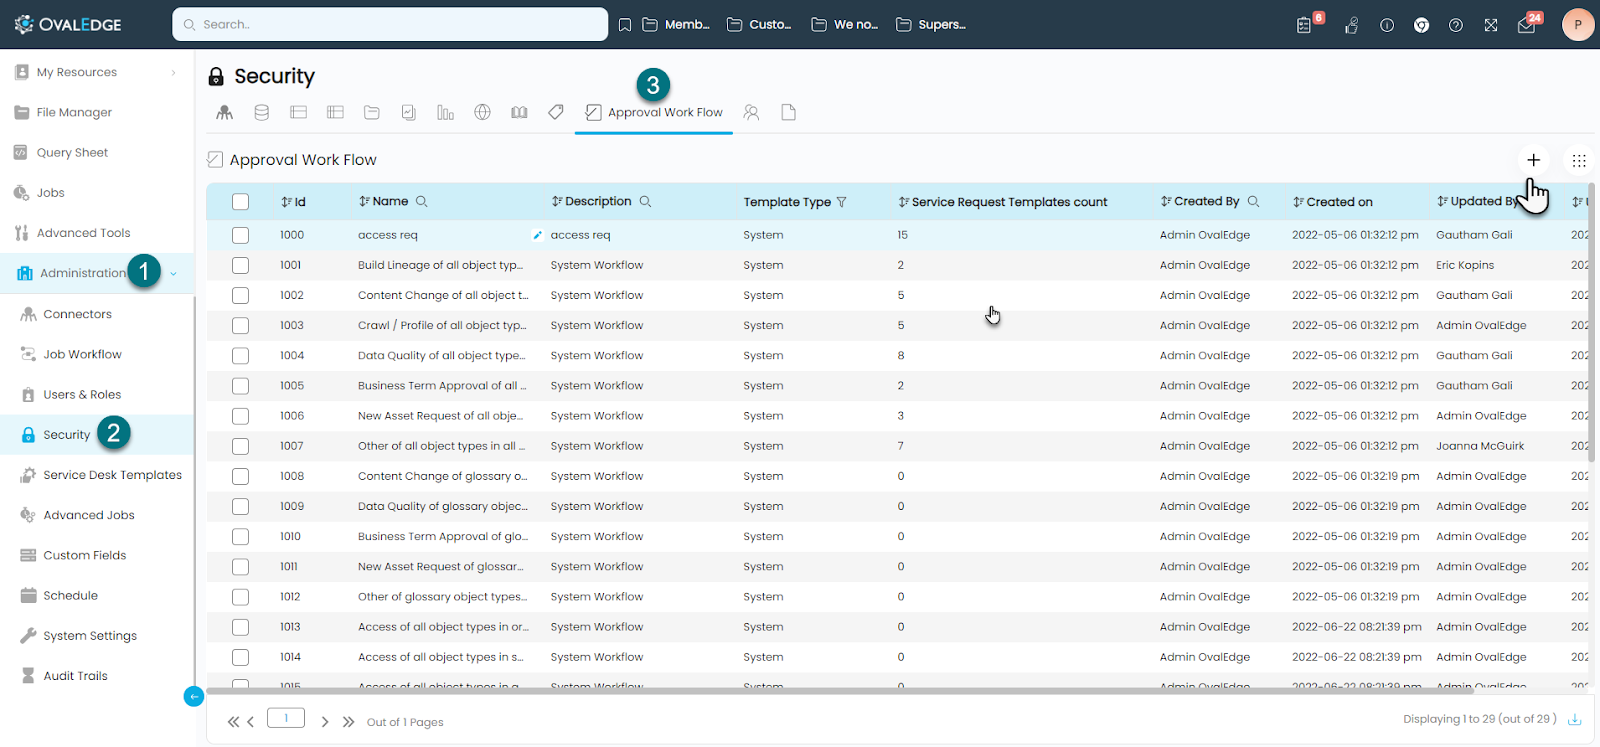
- Navigate to Administration in the OvalEdge application using the left panel menu.
- Under Administration, click on Security, and then select the Approval Workflow tab.
- Click on the + Add Workflow icon located at the top right corner to begin configuring a new workflow.
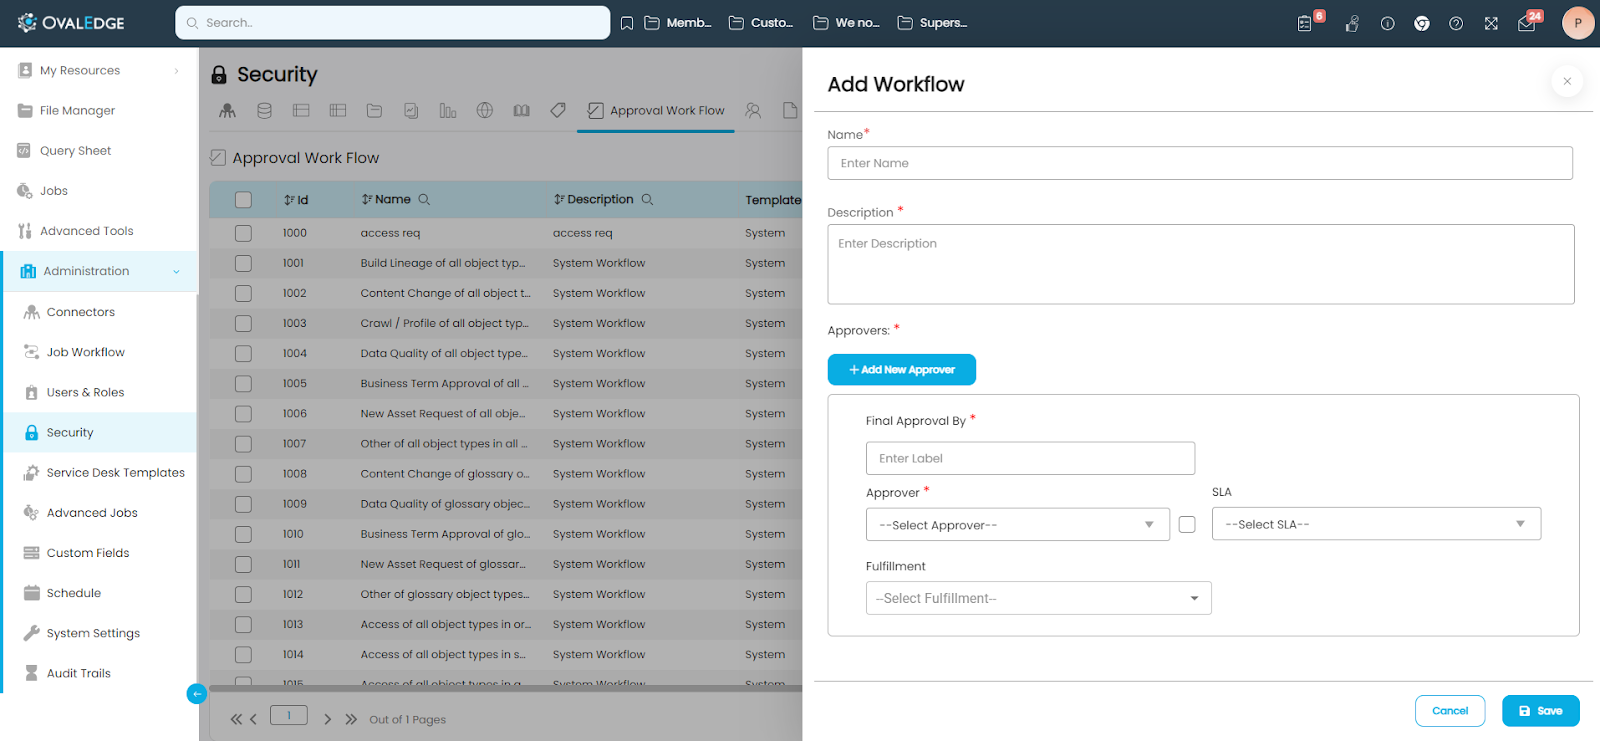
- In the small window that appears, provide the following details to define the Approval Workflow:
- Name: Enter a descriptive name for the service request to be associated with this workflow.
- Description: Provide a brief description that further explains the purpose and scope of the approval workflow.
- Add Approvers by clicking on the + Add New Approvers Icon and fill in the following details for each Approver:
- First Approval By: Specify the name of the Approver responsible for the initial approval stage.
- Approver: Select an appropriate role from pre-configured options, such as Anyone from the Role, Owner, Steward, Team, Technical Support, User, User Data Control Manager, User Data Governance Manager & User Manager.
A point to be noted here.- Check the box beside the Approver if approval is required from all users within the specified role or specified team.
- Service Level Agreement (SLA): Define an SLA with a duration in time or days for each approval stage. The approvers will be notified accordingly based on the SLA duration.
- Choose fulfillment: Determine if fulfillment should occur at a particular approver level or after the final approver approves the request.
- Once you have configured the required details, click on ‘Save’ to save and finalize the Approval Workflow for the Service Request.

Create a new or select an existing workflow for a Service Request Template
To set up an Approval Workflow, the user has two options: creating a new workflow or selecting from an existing one.
To create a new workflow, follow these steps:
- Navigate to Administration and click on Service Desk Templates.
- Select an existing service request from the available options.
- Once inside the service request, click on Approval Workflow located in the right corner.
- A small window will appear, where you can enter the following details to configure the workflow:
- Name: Provide a descriptive name for the service request associated with this workflow.
- Description: Add a brief explanation of the approval workflow's purpose and scope.
- Approvers: Click on the + Add New Approvers Icon and fill in the details for each Approver:
- First Approval By: Specify the name of the Approver responsible for the initial approval stage.
- Approver: Select a role from pre-configured options like Anyone from the Role, Owner, Steward, Team, Technical Support, User, User Data Control Manager, User Data Governance Manager & User Manager.
- Check the box beside the Approver if approval is required from all users within the specified role.
- Integration: Optionally, choose an integration with an external ticketing platform such as Jira, Azure DevOps, or Service Now.
- Service Level Agreement (SLA): Define an SLA with a duration in time or days for each approval stage. Approvers will be notified accordingly based on the SLA duration.
- Choose the fulfillment type: Select the request type of fulfillment, such as Access Request or Business Term Approval, based on your organization's preferences.
- Once all the required details are entered, click on ‘Save’ to save and finalize the Approval Workflow for the Service Request.
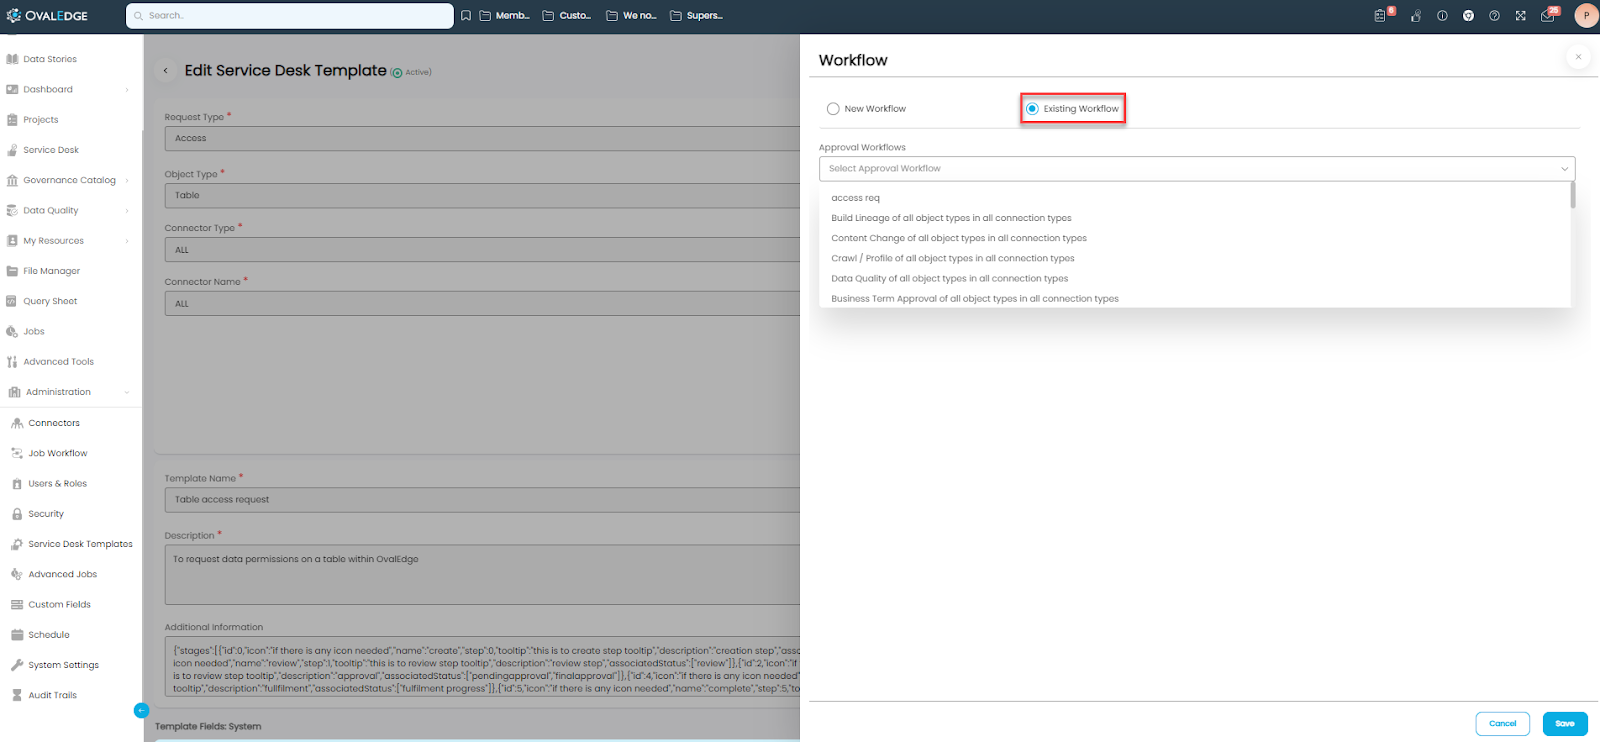
Alternatively, the user has the option to choose from an existing preconfigured workflow, which has been set up by the Administrator through security settings.
To select an Existing Workflow, follow these steps:
-
Navigate to Administration and click on Service Desk Templates.
-
Select an existing service request from the available options.
-
Once inside the service request, click on the Approval Workflow located in the right corner.
-
In the Approval Workflow section, click on the existing workflow to access the drop-down menu.
-
From the drop-down, select the desired existing workflow.
By following these steps, the user can easily choose and utilize a preconfigured workflow that meets their specific requirements.
Conclusion
In conclusion, OvalEdge's Approval Workflow enables systematic routing of service requests to Approvers for approval or rejection, with the system administrator configuring access and defining multiple approval levels. Users can choose from existing preconfigured options or create new workflows, enhancing user experience and streamlining the approval process for efficient service request management.
Copyright © 2023, OvalEdge LLC, Peachtree Corners GA USA