In general, alerts are nothing but a query written on data objects to notify assigned users of essential business events that organizations cannot afford to miss. These queries should be set up so that the result returns either “0” or “1”, and an alert is sent only if the boolean value is specified as “1”. An alert can also generate a task and be scheduled to run periodically using job workflow. Data alerts allows you to create automated messages sent in response to an event. In data organizations, accountable users and stakeholders must be informed immediately if there is a data quality issue.
Some examples of alerts are,
- An alert can be created if the data movement in a table is suspended.
- When there are new tables while crawling a schema, an alert can be created to inform the you regarding new tables.
Data alerts help you with the following,
- To generate an alert, multiple conditions can be set to be met.
- Admin is responsible for generating alerts and sending notifications through email.
- Create a query on a specific data table and catalog the query before creating an alert.
Create a query on a specific data table and catalog the query before creating an alert. To see how to create a query, refer QuerySheet module.
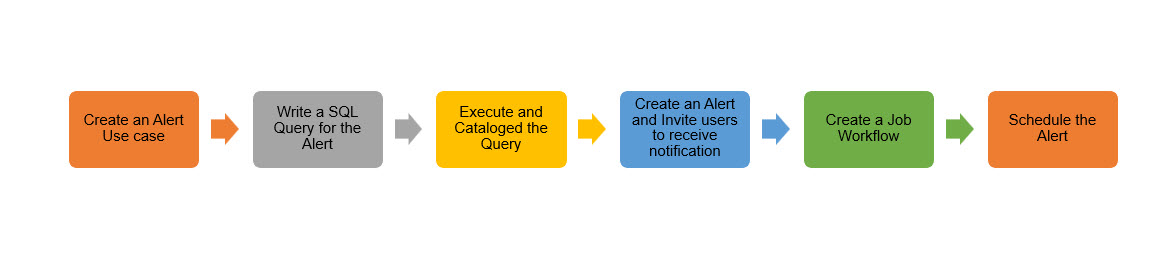 Alert Use case
Compare two Schemas. Create an alert if the total count of tables is not matching
Alert SQL Query
Example:
select (case when ColA=ColB then 0 else 1 end) "AlertValue" from (select (SELECT count(oetableid) Lev1 FROM oetable where oeschemaid in ( select oeschemaid from oeschema where schemaname='dbo' AND connectioninfoid =1013)) ColA, (SELECT count(oetableid) Lev2 FROM oetable where oeschemaid in ( select oeschemaid from oeschema where schemaname='dbo' and connectioninfoid =1014)) ColB) A
Execute and Catalog Query
- When you click on created alert, it will navigate to the Data catalog > Queries.
- It will show the query editor , you can save and to execute the query.
- Once the query is executed it is saved in history. This historic queries are now available to select while creating an alert.
- Go to the Alert application to create an alert on the saved query.
To Create a data alert
- Go to Advanced Tools > Alerts.
- Click on the Add Alert + icon at the top of the screen.
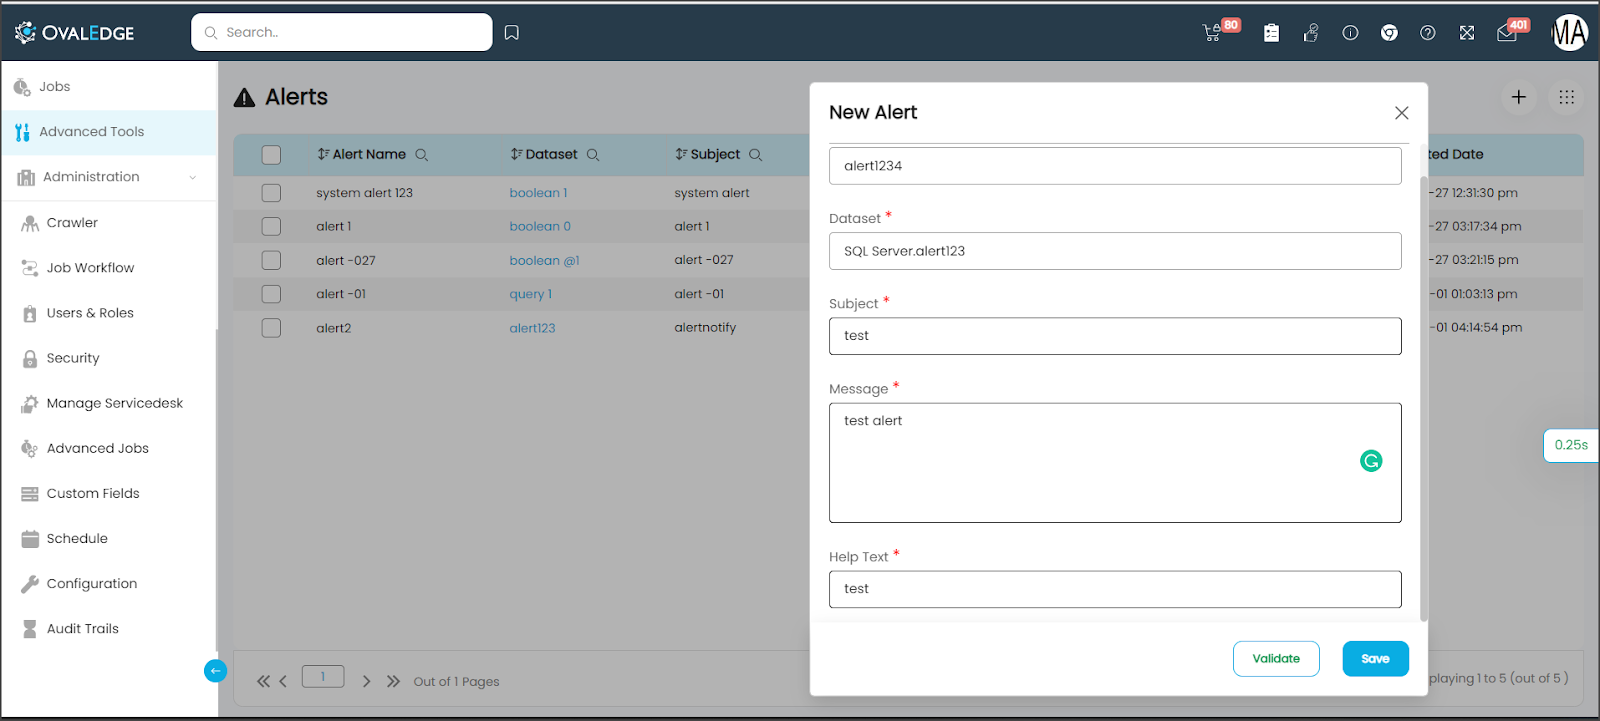
- Enter an Alert name to identify the alert.
- Enter the Dataset name (Query name) that has an alert SQL.
- Enter a help text, subject, and alert definition to know the details of this alert.
Note: You can use the @ symbol to add references to a data object in the help text, subject, and messages. - Enter the Message of what action is to be taken when the alert is generated.
- Click on the Validate button and Save the alert.
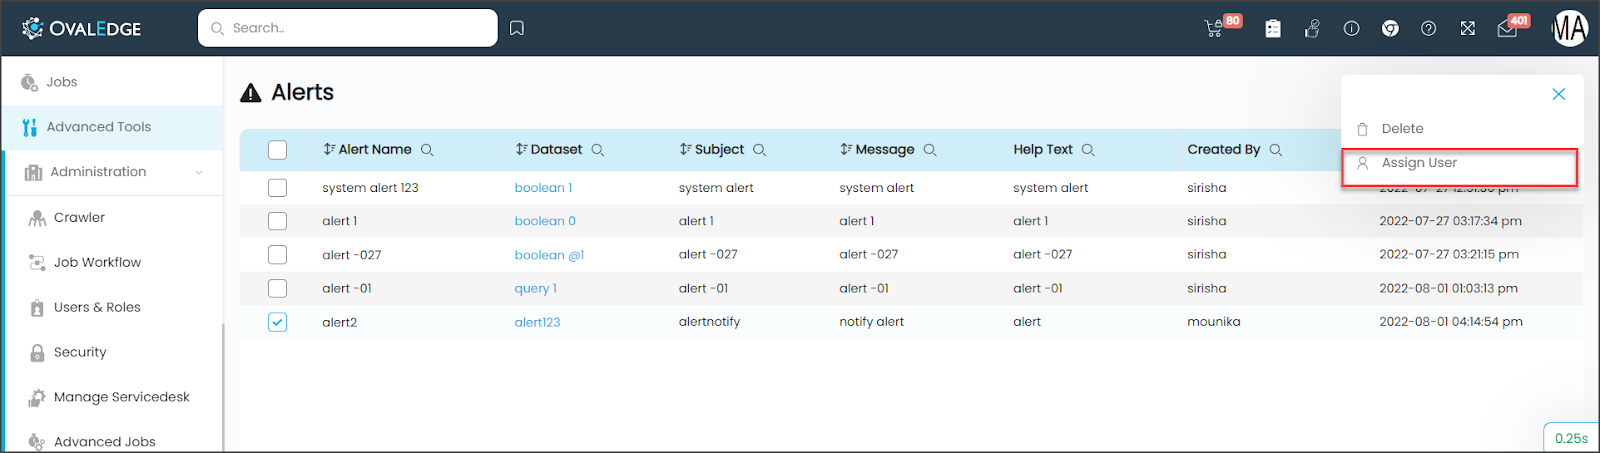
- Select the alert saved to assign the users to receive a notification to act.
- Go to Nine dots option and select option ‘Assign User.’, Assign User popup is displayed. You can select any user and click on the Update button to assign a user.
Note: If the boolean value is 1, then the assigned user will get the notification.

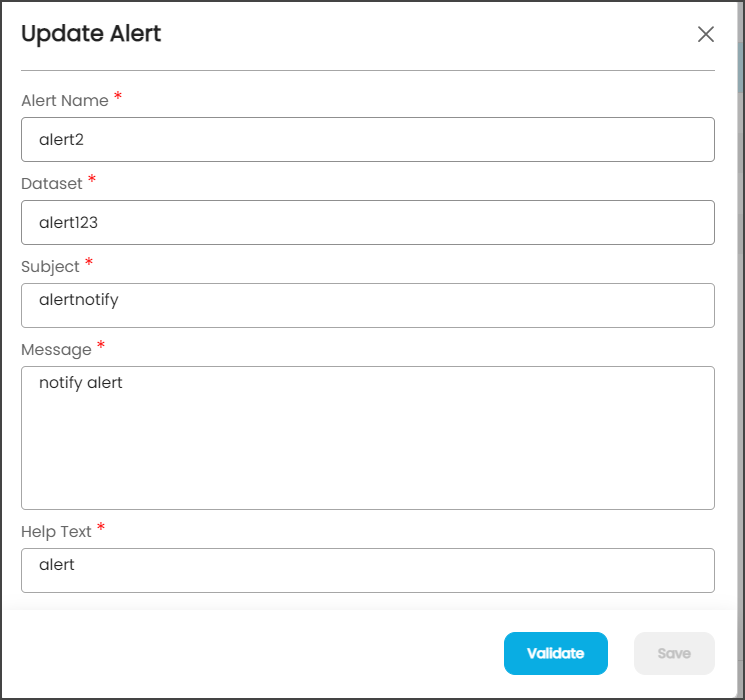
Editing a data alert
- On the Alert Home page.
- Select an Alert and click the Edit button.
- Update the attributes and click validate the changes.
- Select Save to store the changes.

Deleting a data alert
To create a data alert,
- Go to Advanced Tools > Alerts.
- Select an Alert and click the Delete button from the Nine Dots options.
Create a job workflow for the new alert
To create a new job workflow on alerts:
- Navigate to Administration > Job workflow from the object browser.
- Click on the Add New Job Work + icon to create a new workflow job template.
- Select Type and choose the Jobs (Alerts) to be added to the workflow.
- Drag and drop the Alert Jobs in the workflow space.
- Enter a Job flow name when you have configured the workflow template.
- Select the Save button to Save the workflow.
- Close the Workflow space to return to the Job information page of the newly saved template.
- After creating the job workflow, click on the Run button A notification is sent to the assigned user on successful completion of the job.
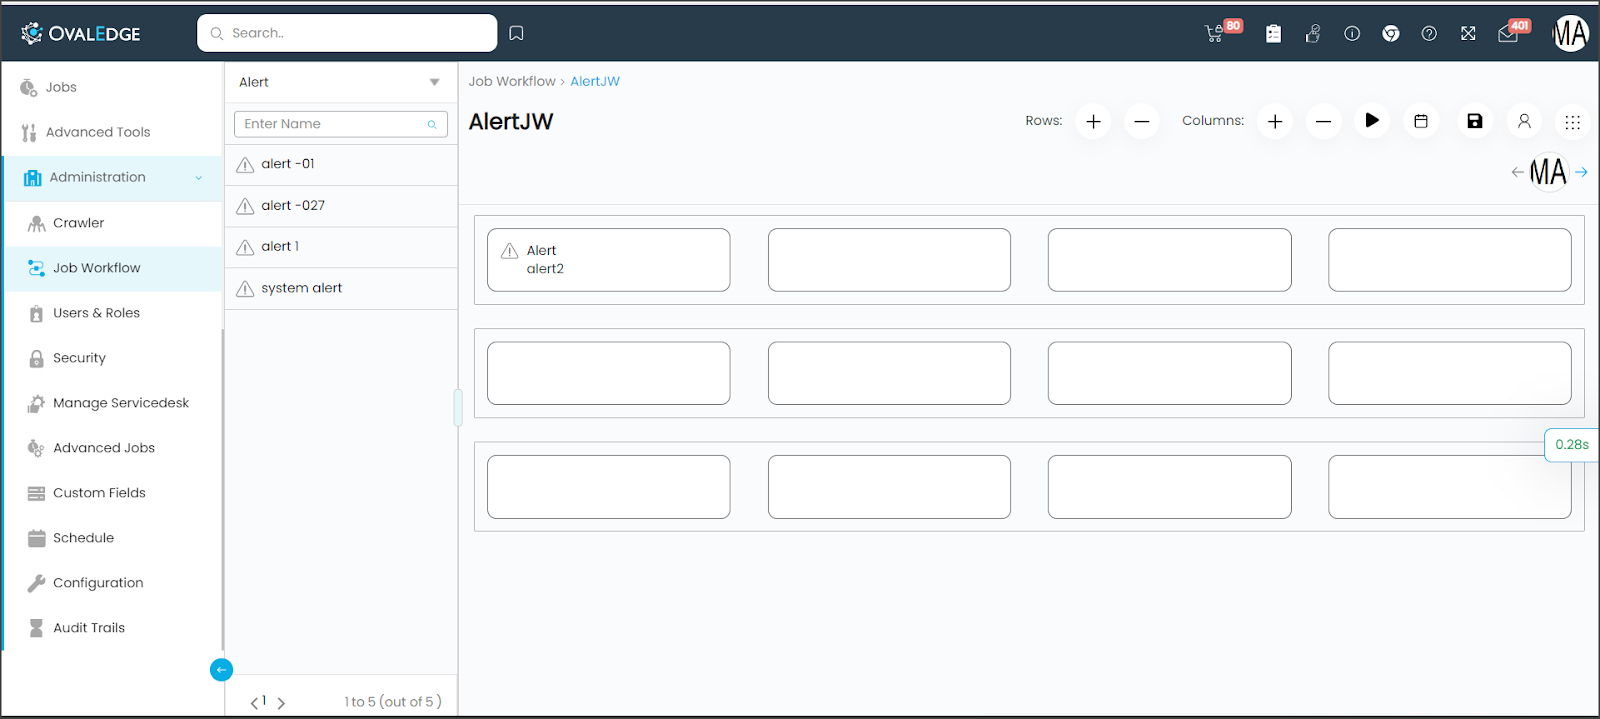
You can review the saved workflow to execute, edit, add permissions, notifications, schedule, delete, or view completed jobs and build a workflow template later.
How to Schedule the Alert in the Job Workflow
Only administrators can schedule an alert to be run periodically,
- Navigate the Administration > Job workflow module.
- Select + icon and choose the type as Alert; all the alert names will be displayed.
- Drag and drop the specific alert onto the workflow designer.
- Give a name for the workflow and save.
- You can either click the Run button to execute the alert right away. A notification is sent to the assigned user on the successful job completion.
- You can also click on the schedule button to run the alert as per the schedule. The assigned user will get a notification as per the defined schedule.
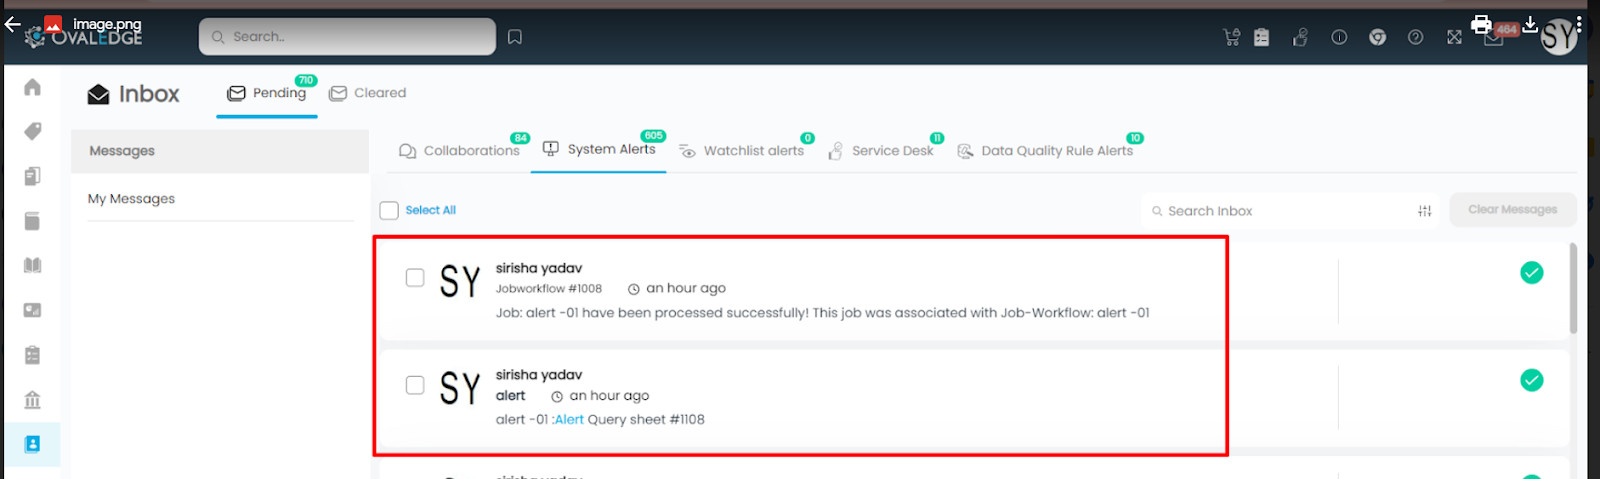
- The assigned user will get a notification as per the defined schedule.
- The above screenshot shows the inbox notification of assigned user when a query returns 1.

Copyright © 2019, OvalEdge LLC, Peachtree Corners GA USA