The purpose of this advanced job is to build project-level relationships. The relationship is built between the tables of a default project. On the table catalog, you can view the relationship between the tables.
Job Overview
To establish project-level relationships, we conduct a thorough check to ensure that all tables added to the project undergo complete profiling. In cases where tables are not fully profiled, we initiate profiling jobs for the specific tables. After the profiling process is completed, we utilize the top 50 values of the columns in these tables to create relationships between them. The determination of relationship scores is carried out through a direct query when both tables originate from the same connection, ensuring precise calculations. In instances where tables are not from the same connection, we perform an approximate calculation based on the top 50 values.
Need to give project name and schema IDs before running advanced job need that schema should be profiled.
How to Run the Job:
- In the OvalEdge application, navigate to the Administration > Advanced Jobs module, and the list of Advanced Jobs in the OvalEdge application is displayed.
- In the Name column field, enter the “Project Level Relationships Building” Advanced Job name and click enter, and related advanced jobs are displayed.
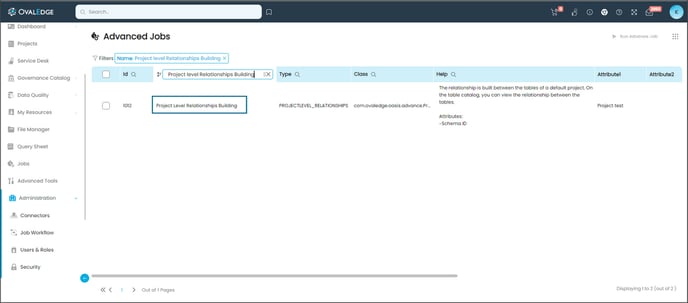
- Click on the edit icon available in the Attribute column field. The Edit Advance Job pop-up window is displayed.
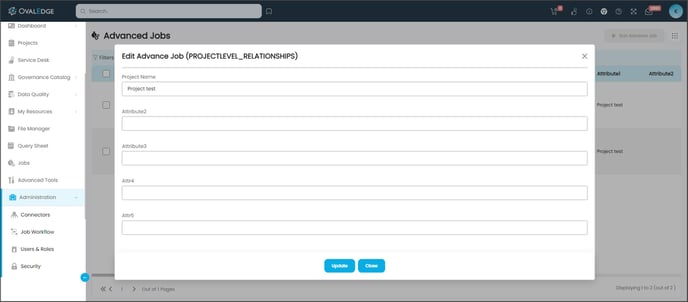
- Enter the details of the parameters mentioned in the Input section and click on the Update button.
Input
Provide the Project Name and Schema ID, ensuring that the specified schema undergoes the profiling process. - Select the check box for the advanced job, click on the Run Advanced Job button, and a confirmation message to run the advanced job is displayed.
Note: The Run Advance Job button is only enabled if the Advanced Job checkbox is selected. - Click on the Submit button, and a prompt message is displayed accordingly, whether the Job is Successful, Error, or Partial Success.
- Navigate to the Jobs module to view the logs. Once the job is successful, the Job Step Status is displayed as Success and the system starts calculating scores after building all relationships.
Copyright © 2023, OvalEdge LLC, Peachtree Corners GA USA